Start an encounter
Before you start
- A patient can have only one open encounter at a time. If they already have one, open it instead of starting a new one.
Ways to start an encounter
Pick whichever is closest to where you are:
| Where you are | What to tap |
|---|---|
| Home › Up next | Start encounter next to a booked patient |
| Appointments | Check in on the appointment (see Appointments) |
| The patient's page, Encounters tab | Start encounter (first visit), or the New encounter folder |
| The patient menu (tap the patient's name) | Start encounter |
| Encounters in the sidebar | The yellow + button, then choose the patient |
Steps
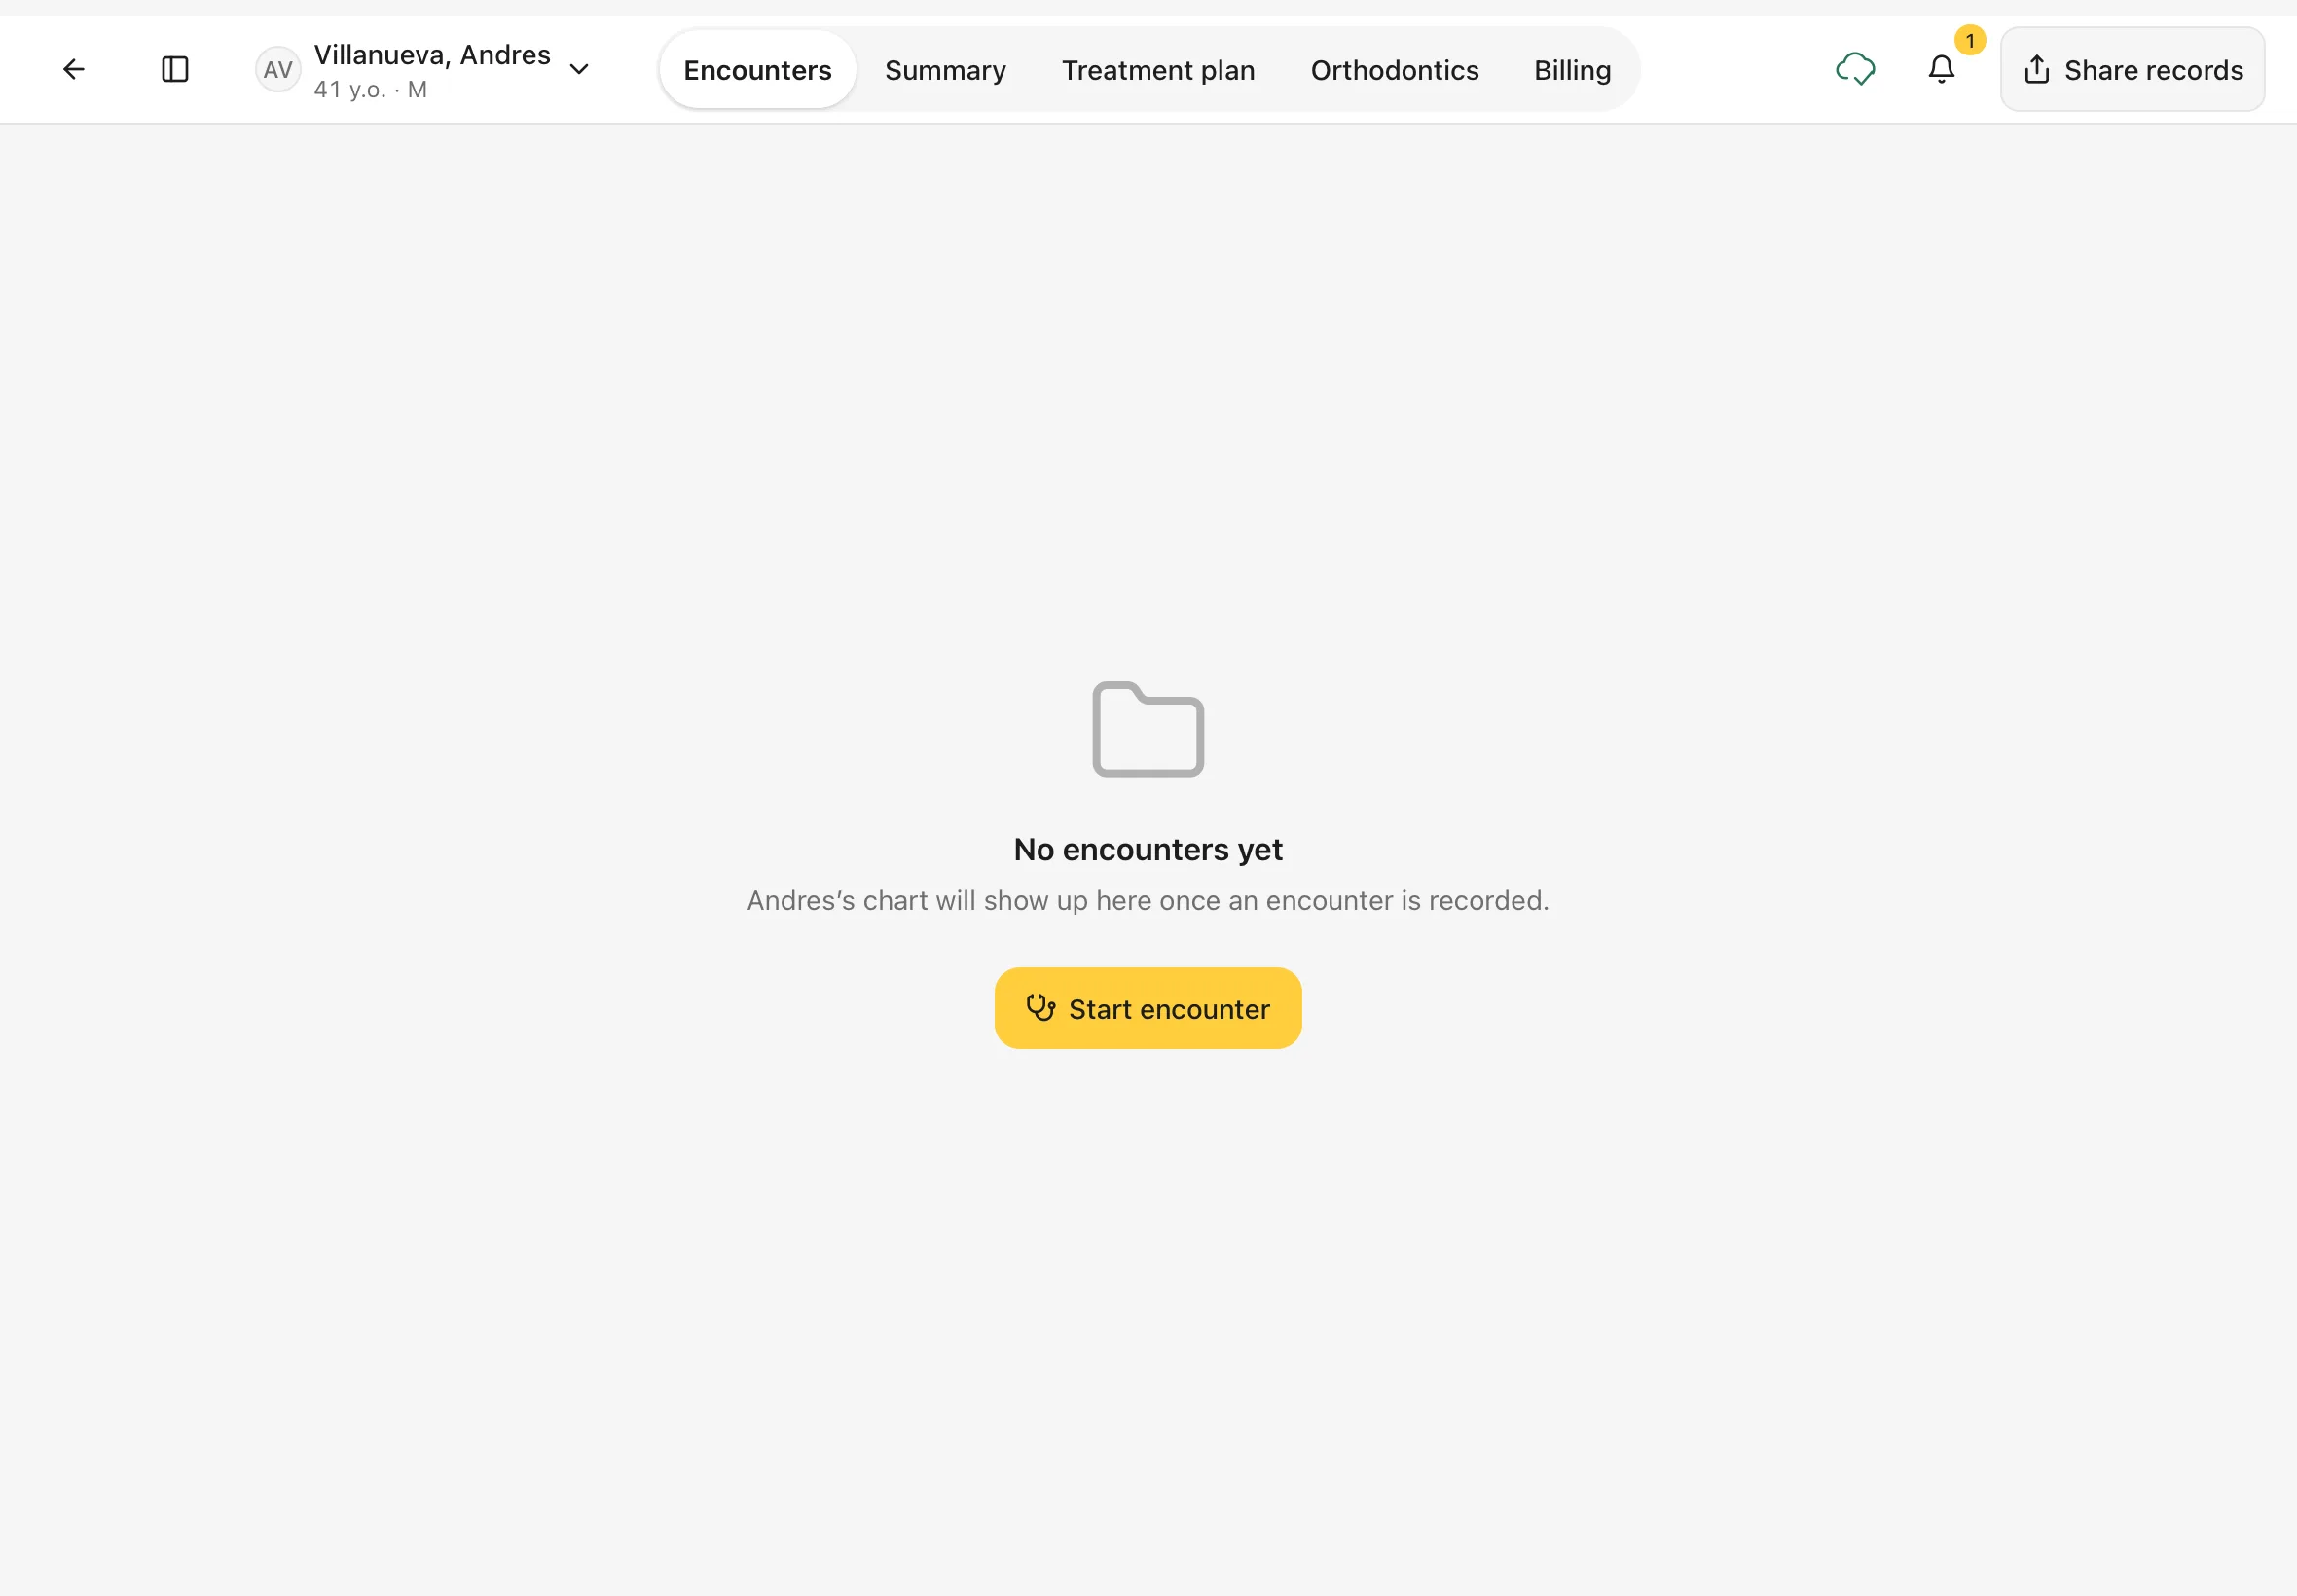
1. Start from the patient's page
Open the patient and tap Encounters.
You should see: for a patient's first visit, No encounters yet and a Start encounter button.
Tap Start encounter.
Tip
For a patient who has been here before, tap the New encounter folder at the right end of their shelf instead.
2. Find your way around the encounter
The encounter opens straight away, with an Encounter started for name message.
- Top bar: ← goes back. The date button (for example Fri, Oct 30 · Active) lists the patient's other encounters, and ‹ › step through them. At the right are notifications, share, Charges (what the visit has charged so far, for example Charges · ₱0) and End encounter.
- The chart: the patient's teeth. A new patient's chart has no marks yet. See Chart teeth.
- Legend ›: under the chart, next to the count of teeth seen. It explains each chart colour and mark.
- Views under the chart: Chart list, Records, Prescription, Orders, Attachments and Orthodontics. Tap one to switch. Whole-mouth work sits at the end of the same row.
You should see: Encounter started for name, the patient's chart, and End encounter at the top right.
3. Or start from the Encounters page
Tap Encounters in the sidebar.
You should see: every encounter as a folder, newest first, each with a status: Pending or Active while it's still open, Closed once it has ended. Use Status and Date to filter, or Search encounters….
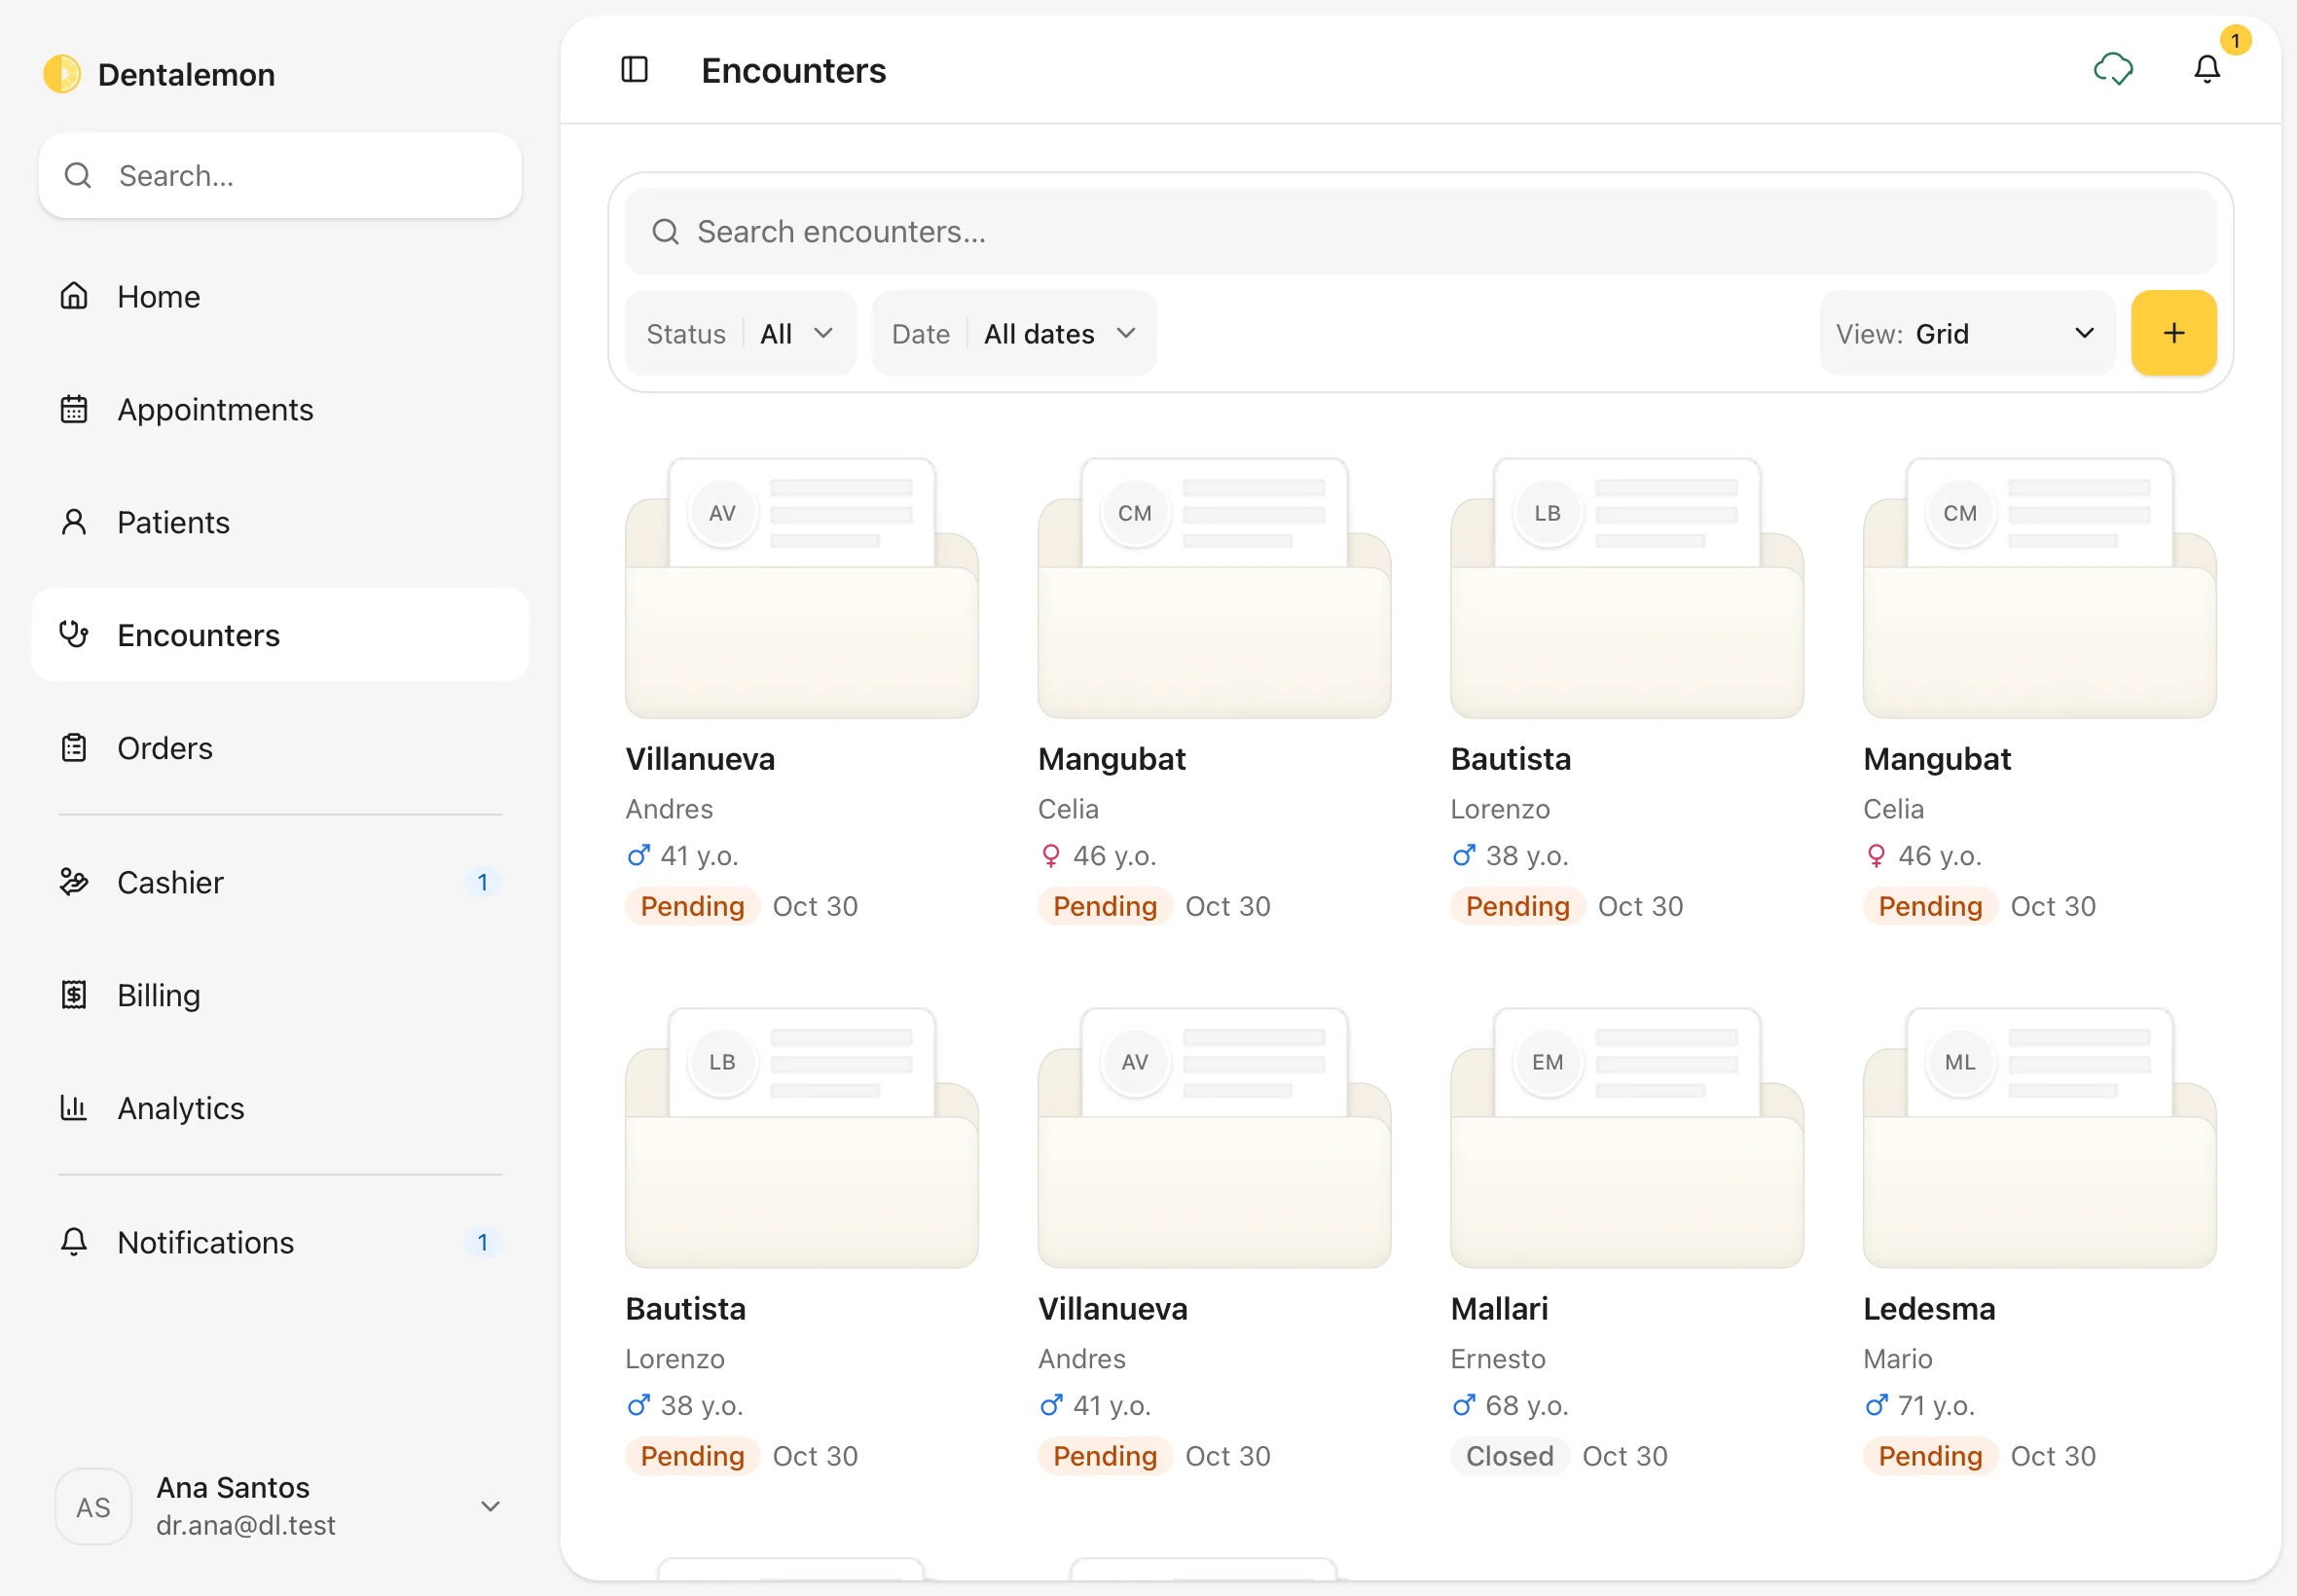
4. Choose the patient
Tap the yellow + button. In Add Encounter, search for the patient, tap their name, then tap Start encounter.
You should see: Add Encounter with the patient you picked highlighted.
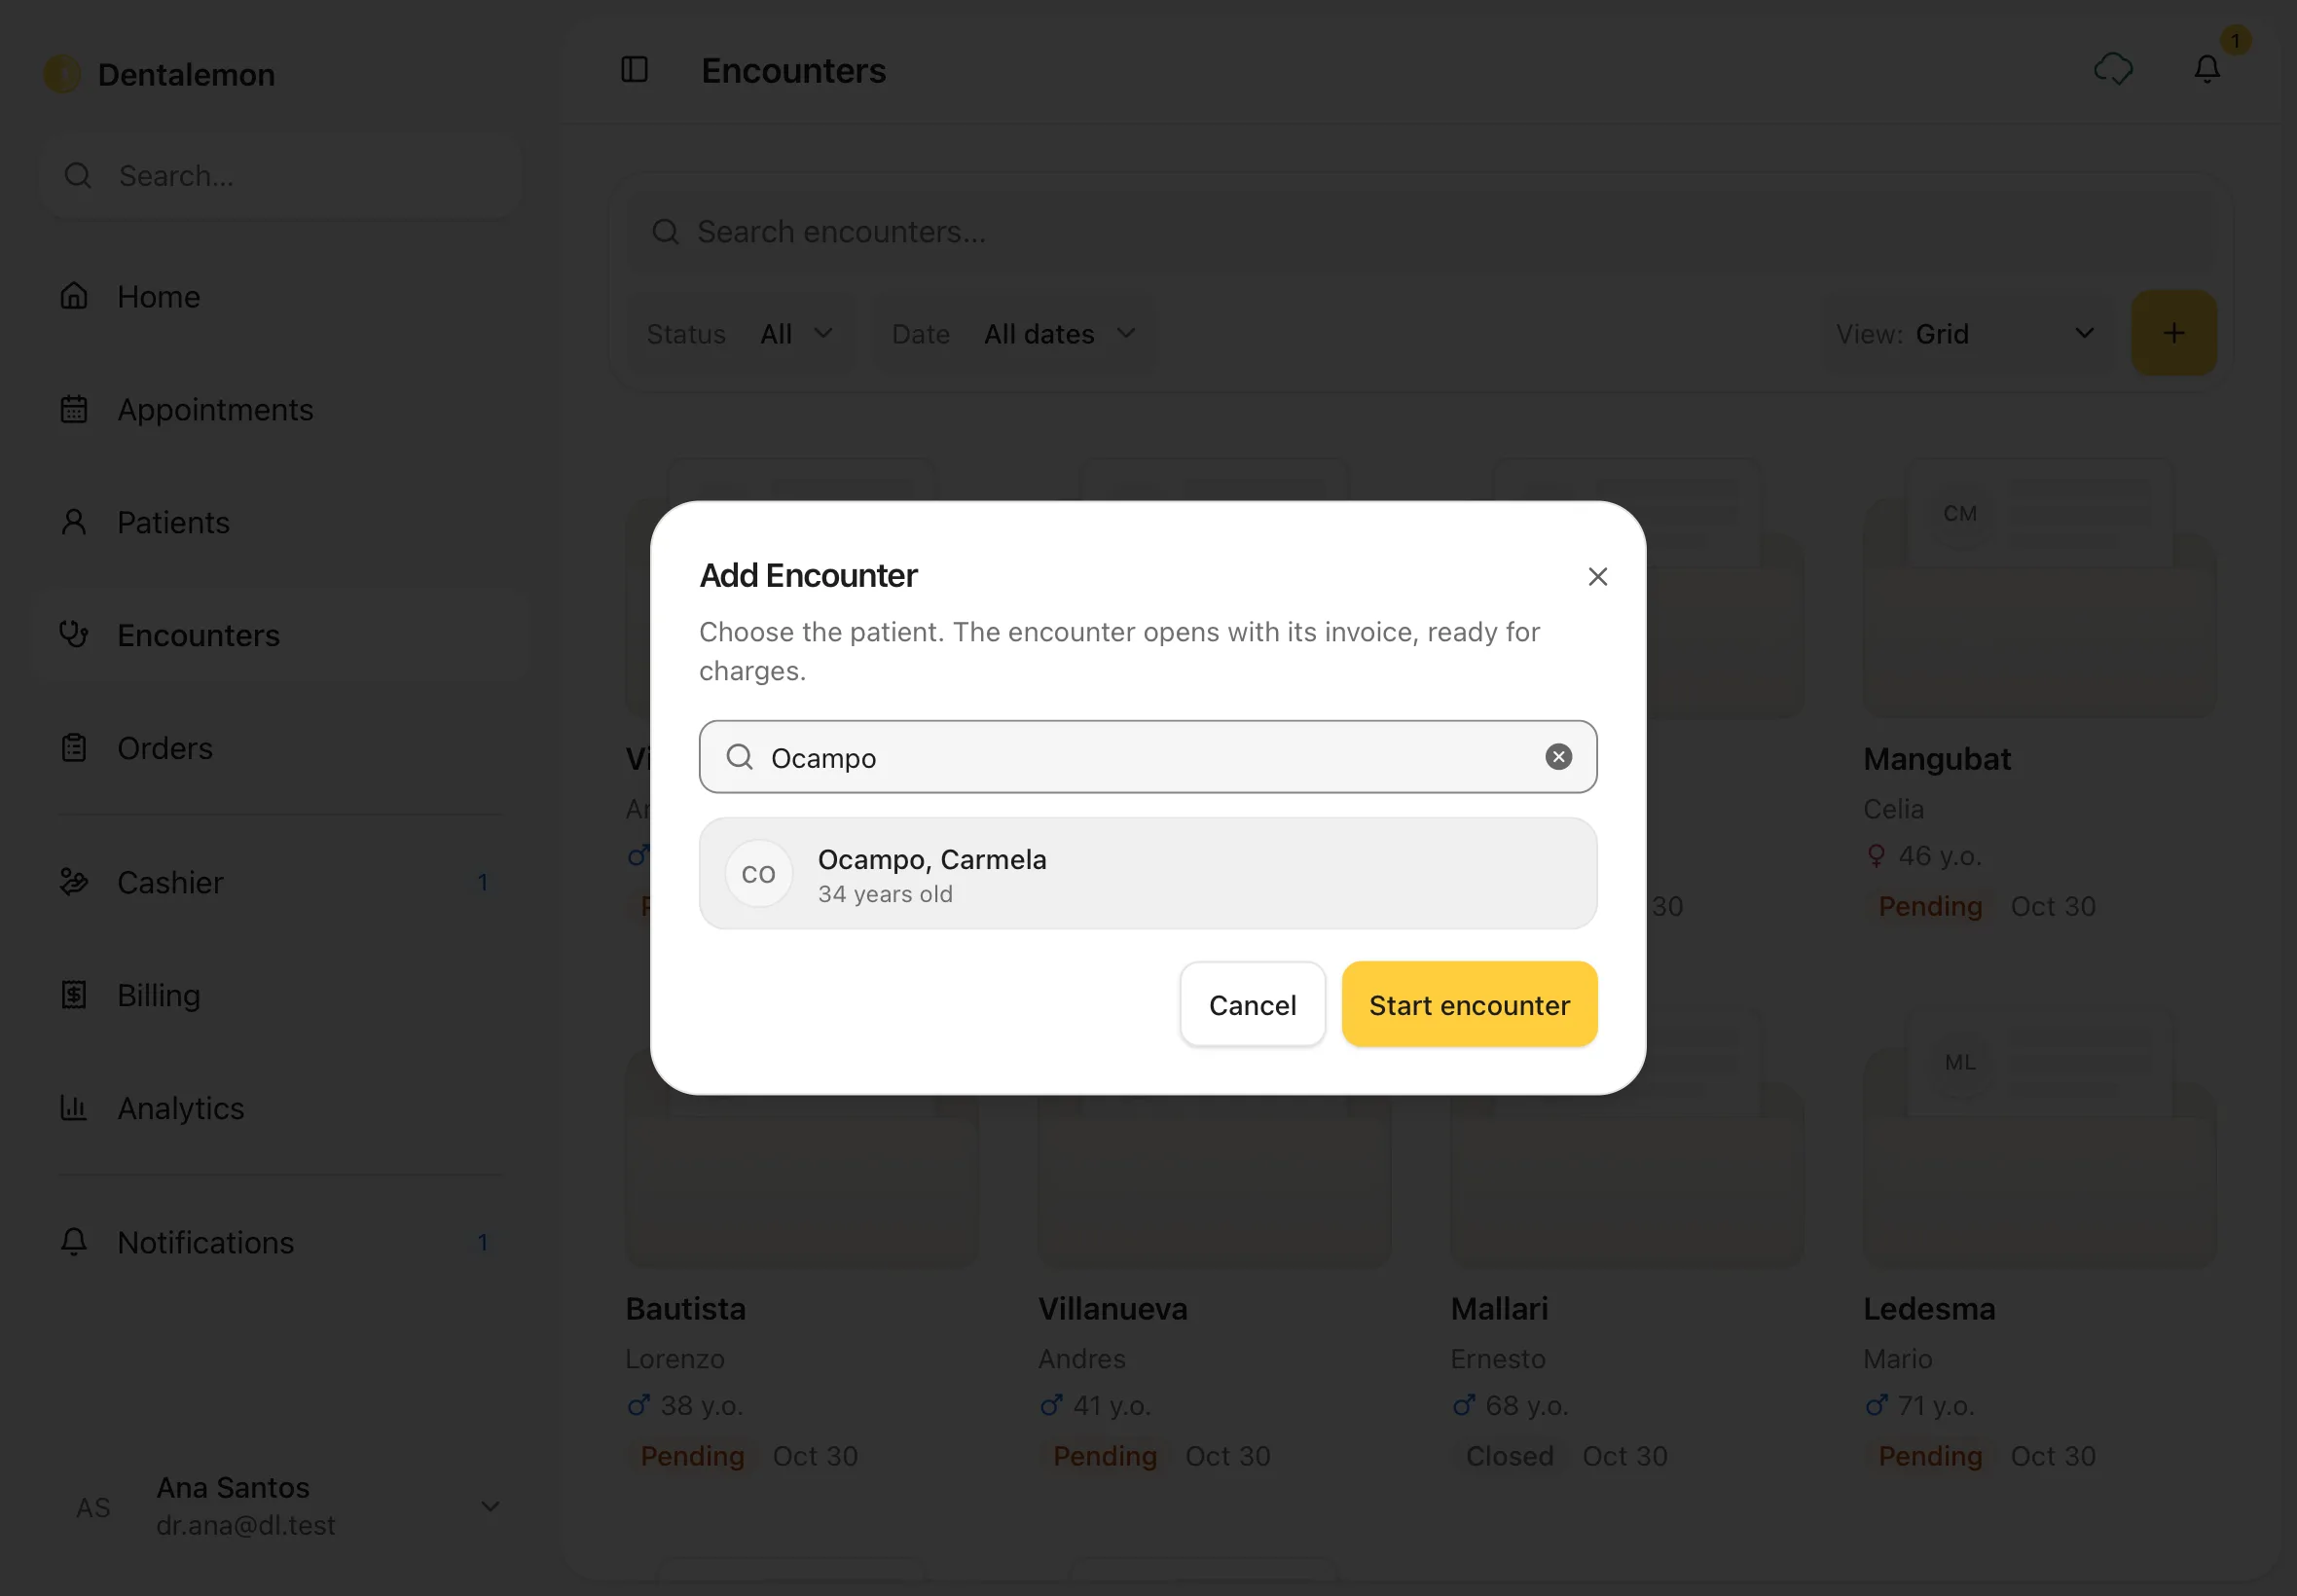
Dentalemon confirms with Encounter started for name, and the new encounter appears first in the list. Tap it to open it.
Tips
The bill is ready too
Every encounter opens with its own invoice. Work you mark as done can go straight onto the bill. See Charges and the Cashier.
If something goes wrong
A patient in Add Encounter can't be picked. They already have an open encounter, shown with an Open encounter tag. Open that one from their page.
Good to know
An encounter stays open until you tap End encounter. See Finish the visit.