Notes, prescriptions, orders and attachments
Before you start
- Open the patient's encounter. See Start an encounter.
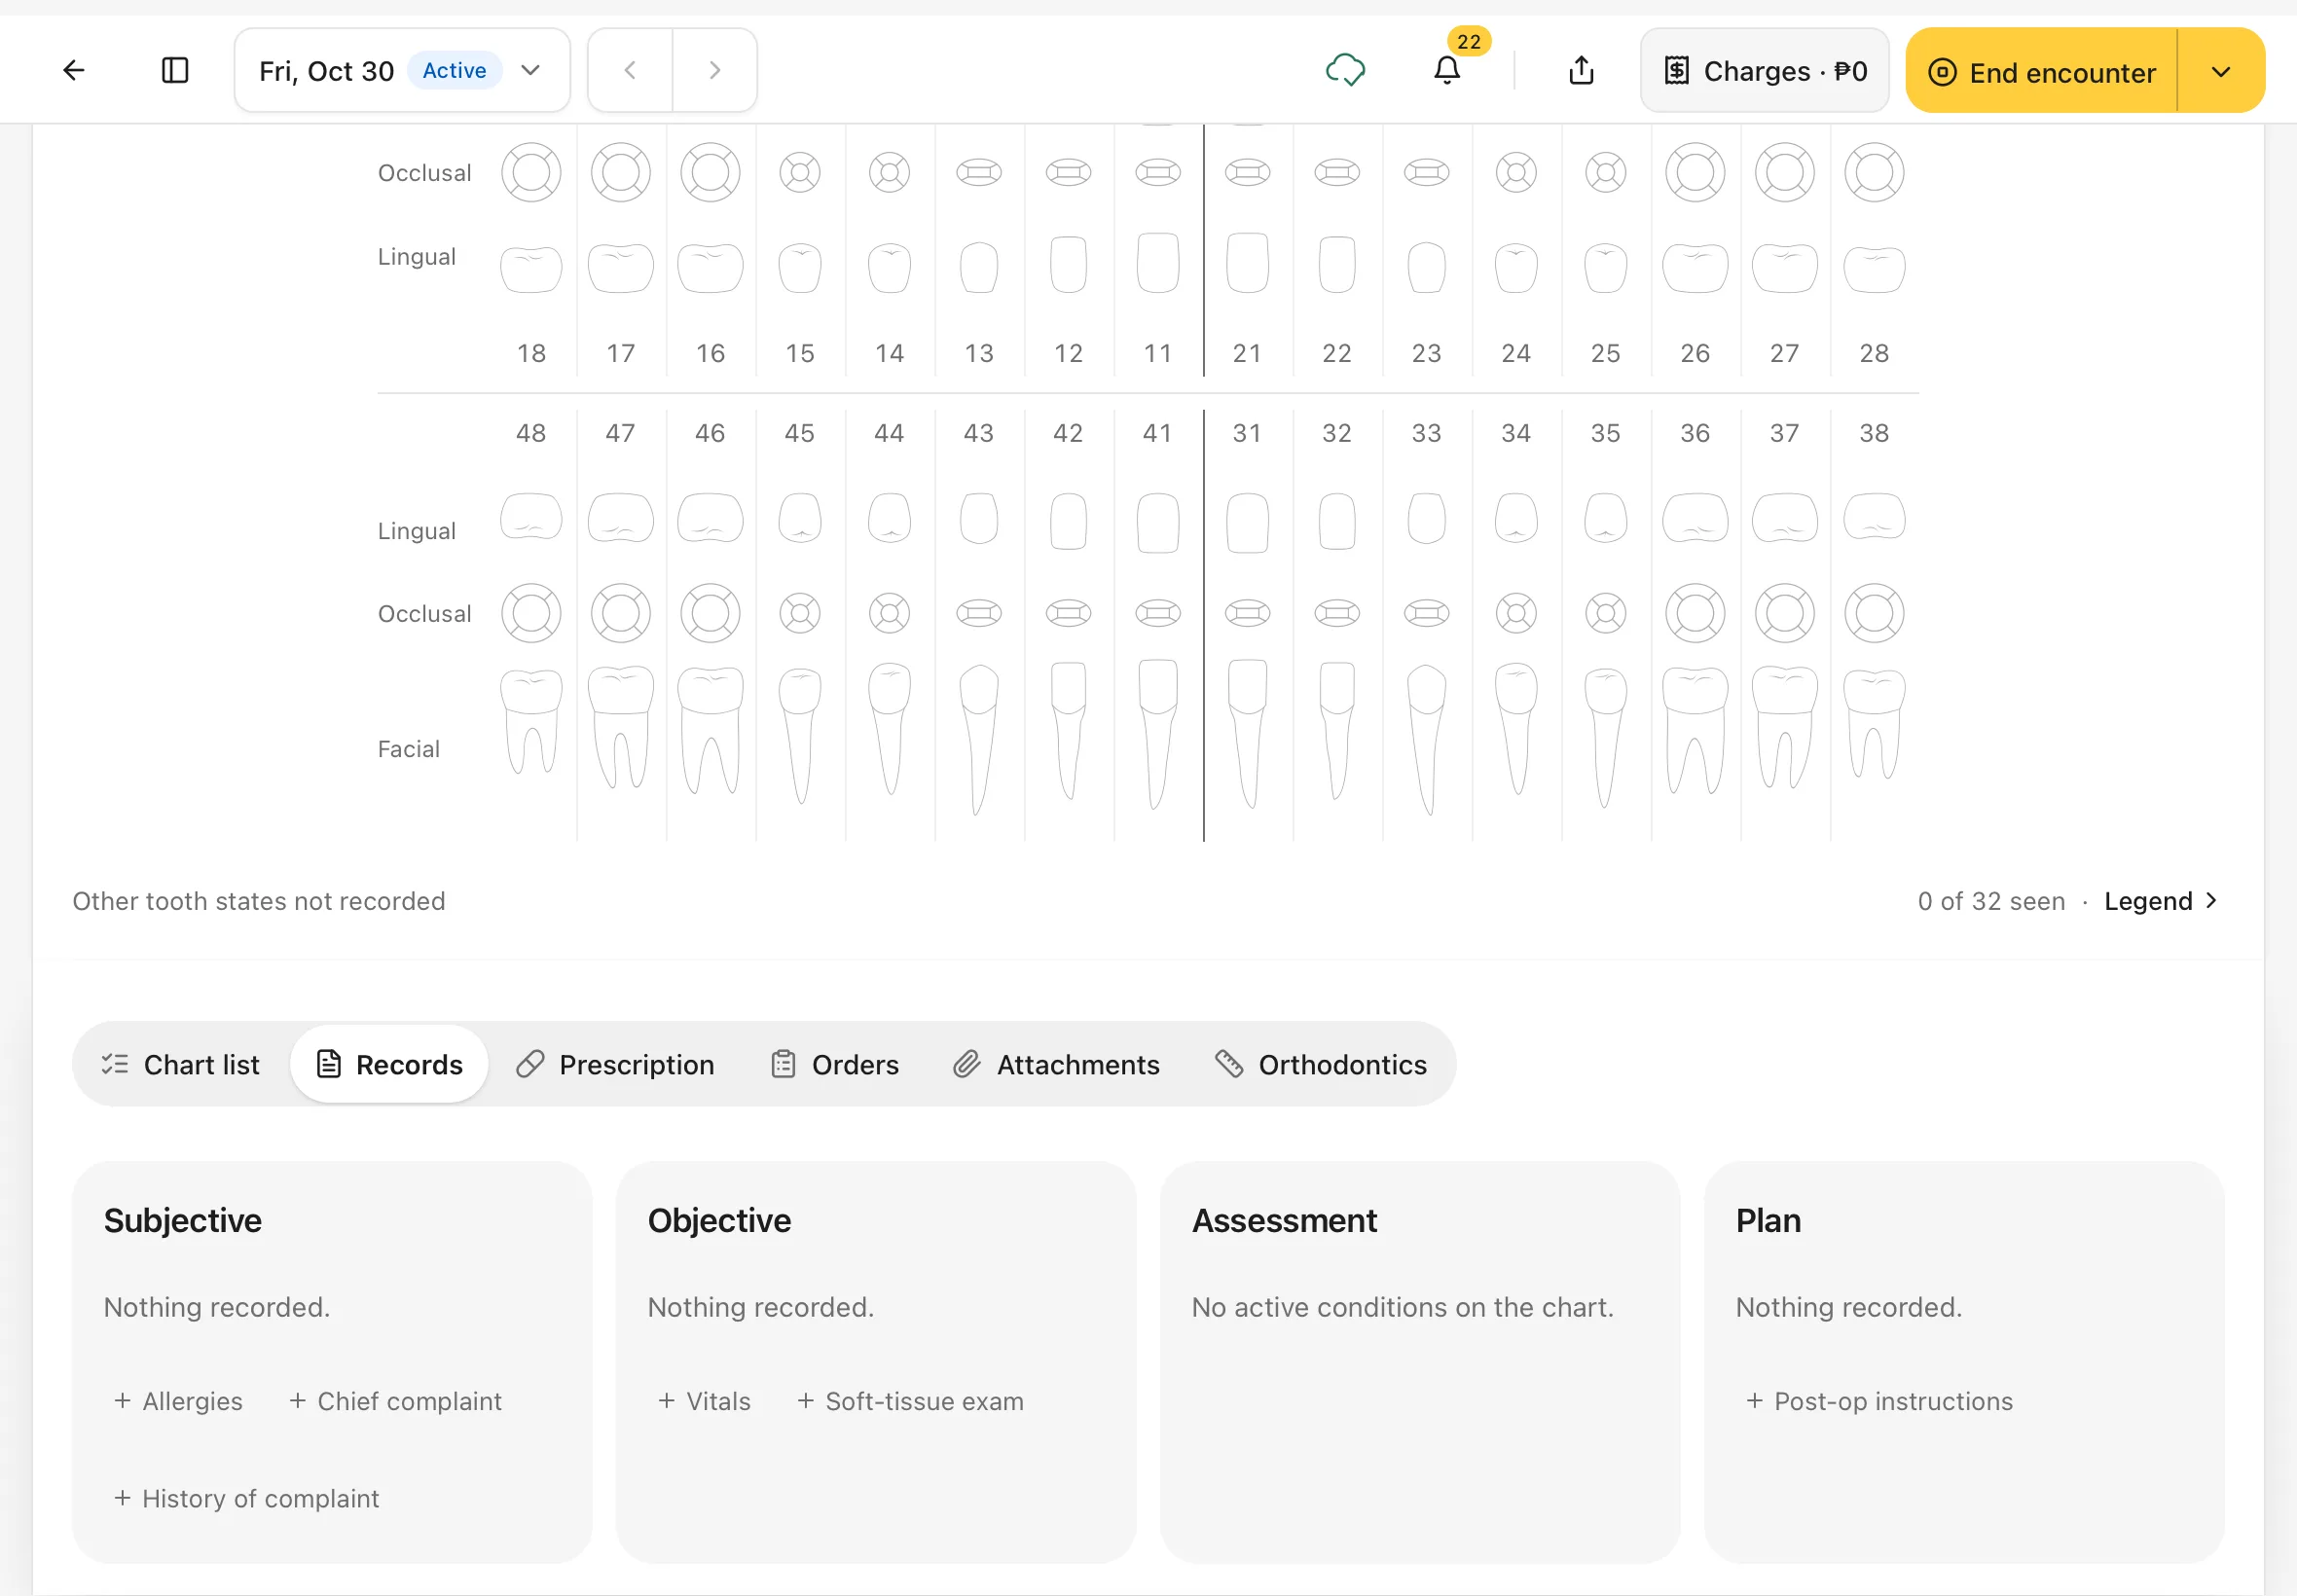
- Everything on this page is in the row of views under the chart: Chart list, Records, Prescription, Orders, Attachments and Orthodontics. Scroll down below the chart to see it.
- To have your licence number printed on prescriptions, add it to your profile first: Settings › Profile. See Settings basics.
Write the visit notes
1. Open Records
Tap Records in the row of views. The notes are laid out in four columns:
- Subjective: what the patient tells you (Allergies, Chief complaint, History of complaint)
- Objective: what you find (Vitals, Soft-tissue exam)
- Assessment: the conditions you've recorded on the chart
- Plan: what happens next (Post-op instructions)
An empty column says Nothing recorded. (Assessment says No active conditions on the chart.) and shows + buttons for what you can add.
You should see: the four columns, with + Chief complaint under Subjective.
2. Add the chief complaint
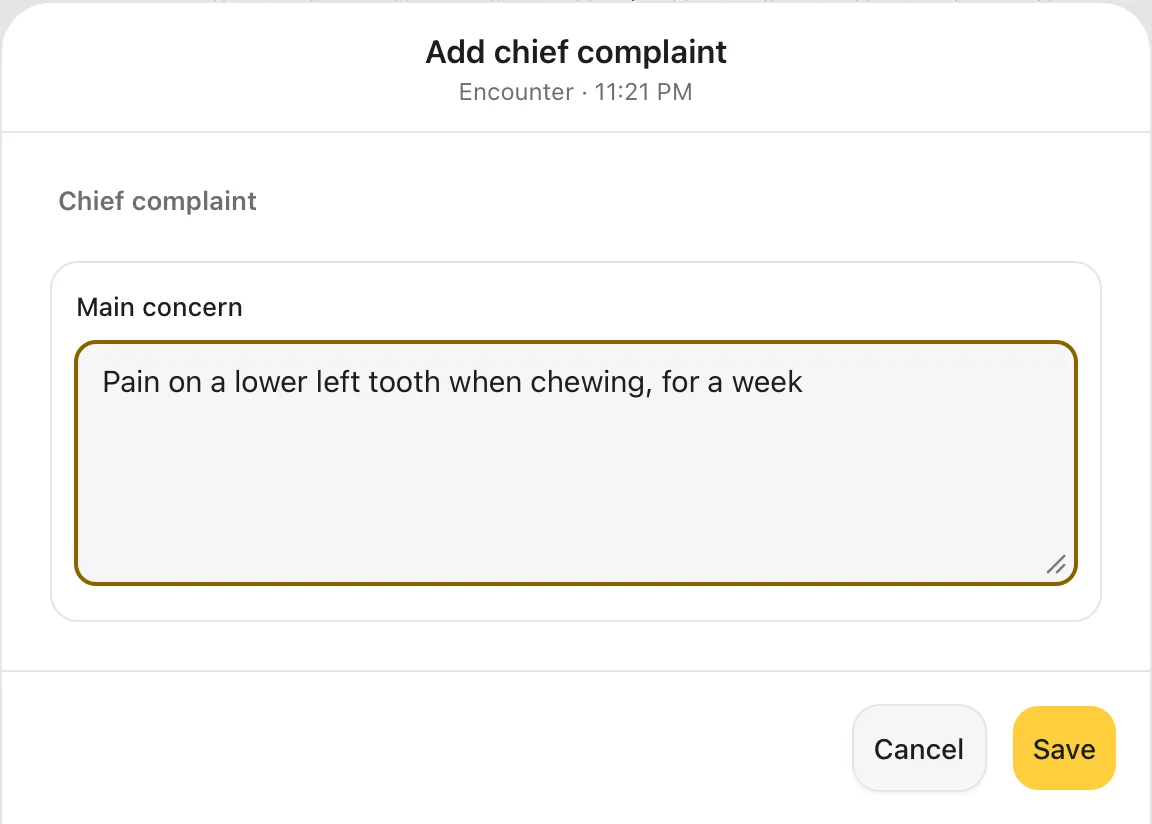
Tap + Chief complaint, type the patient's Main concern, then tap Save. Other notes work the same way.
You should see: Add chief complaint with a Main concern box.
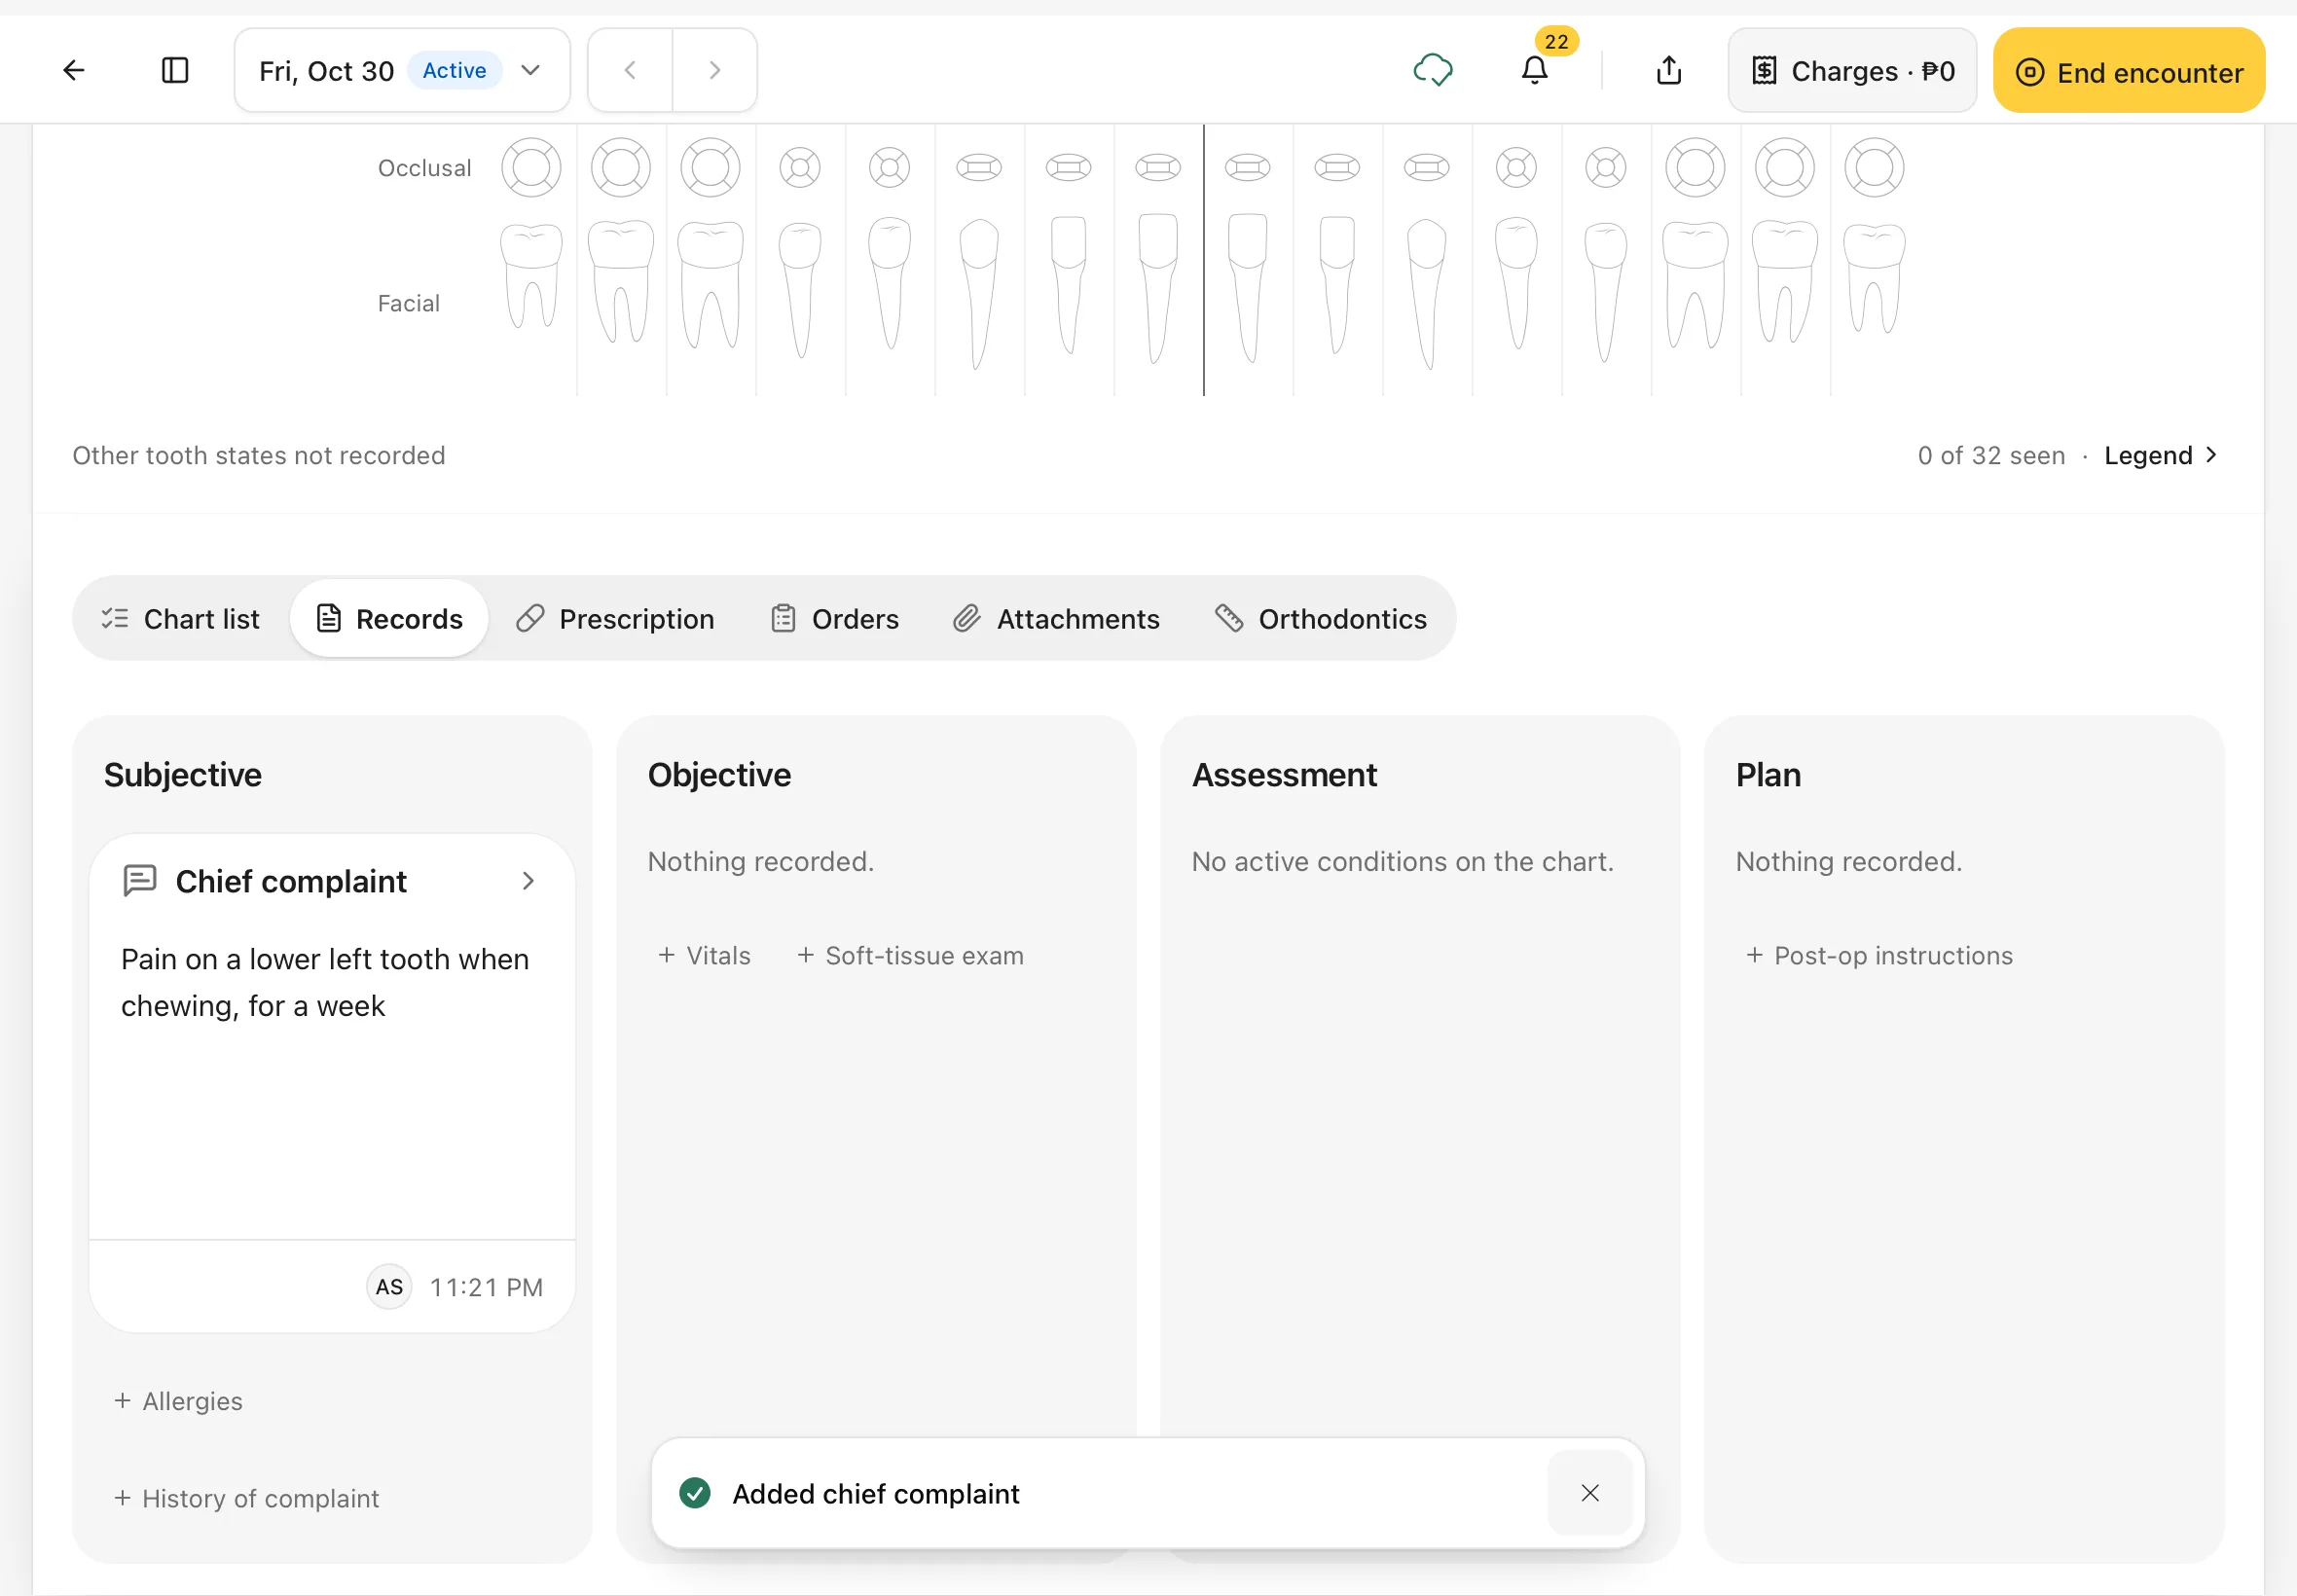
A message says Added chief complaint, and the note appears as a card under Subjective. Tap the card to read or change it.
3. Record allergies
Always check allergies before you treat or prescribe.
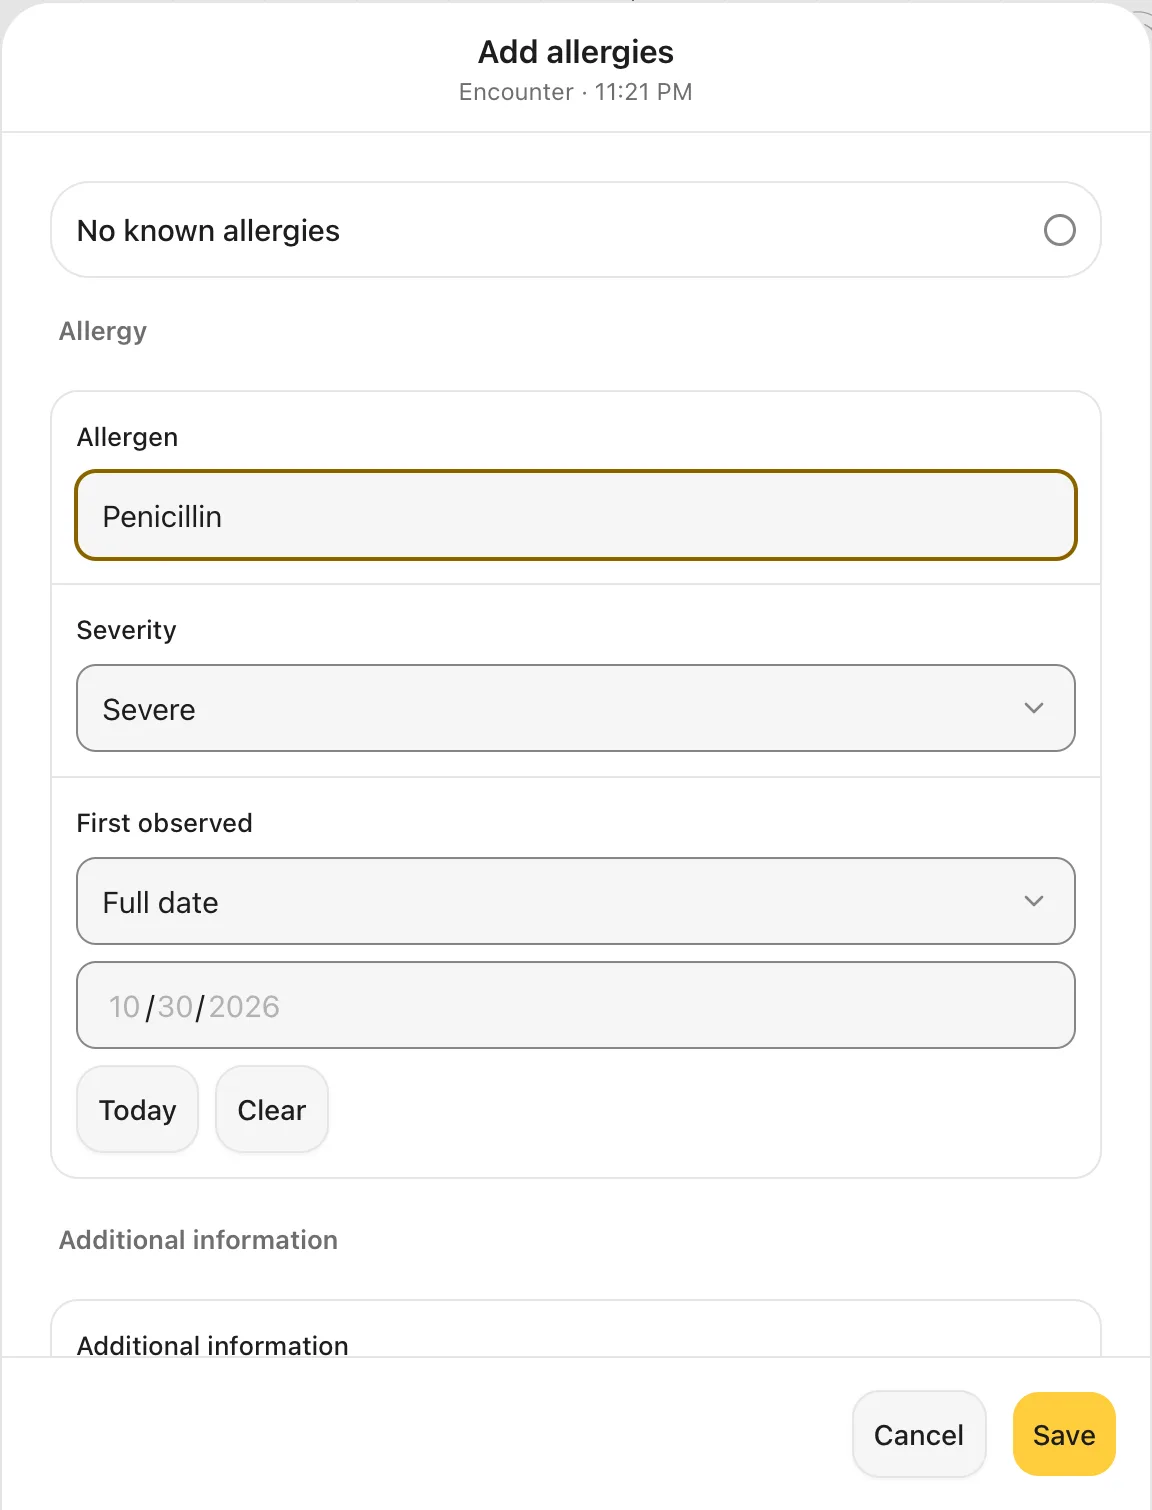
- Under Subjective, tap + Allergies.
- If the patient has none, switch on No known allergies.
- Otherwise, under Allergen, type the start of the name and pick it from the list, for example Penicillin.
- Choose the Severity: Mild, Moderate or Severe.
- Add First observed and Additional information if you know them.
- Tap Save.
You should see: Add allergies with the allergen and severity filled in. Afterwards, an allergy card appears under Subjective; a severe allergy is marked Severe allergy in red.
Allergies recorded at an earlier visit are carried into every new encounter. Tap the card to read them: the reader says where they came from, for example From Oct 30, 2026 encounter, and they can't be edited from this visit.
4. Record vitals
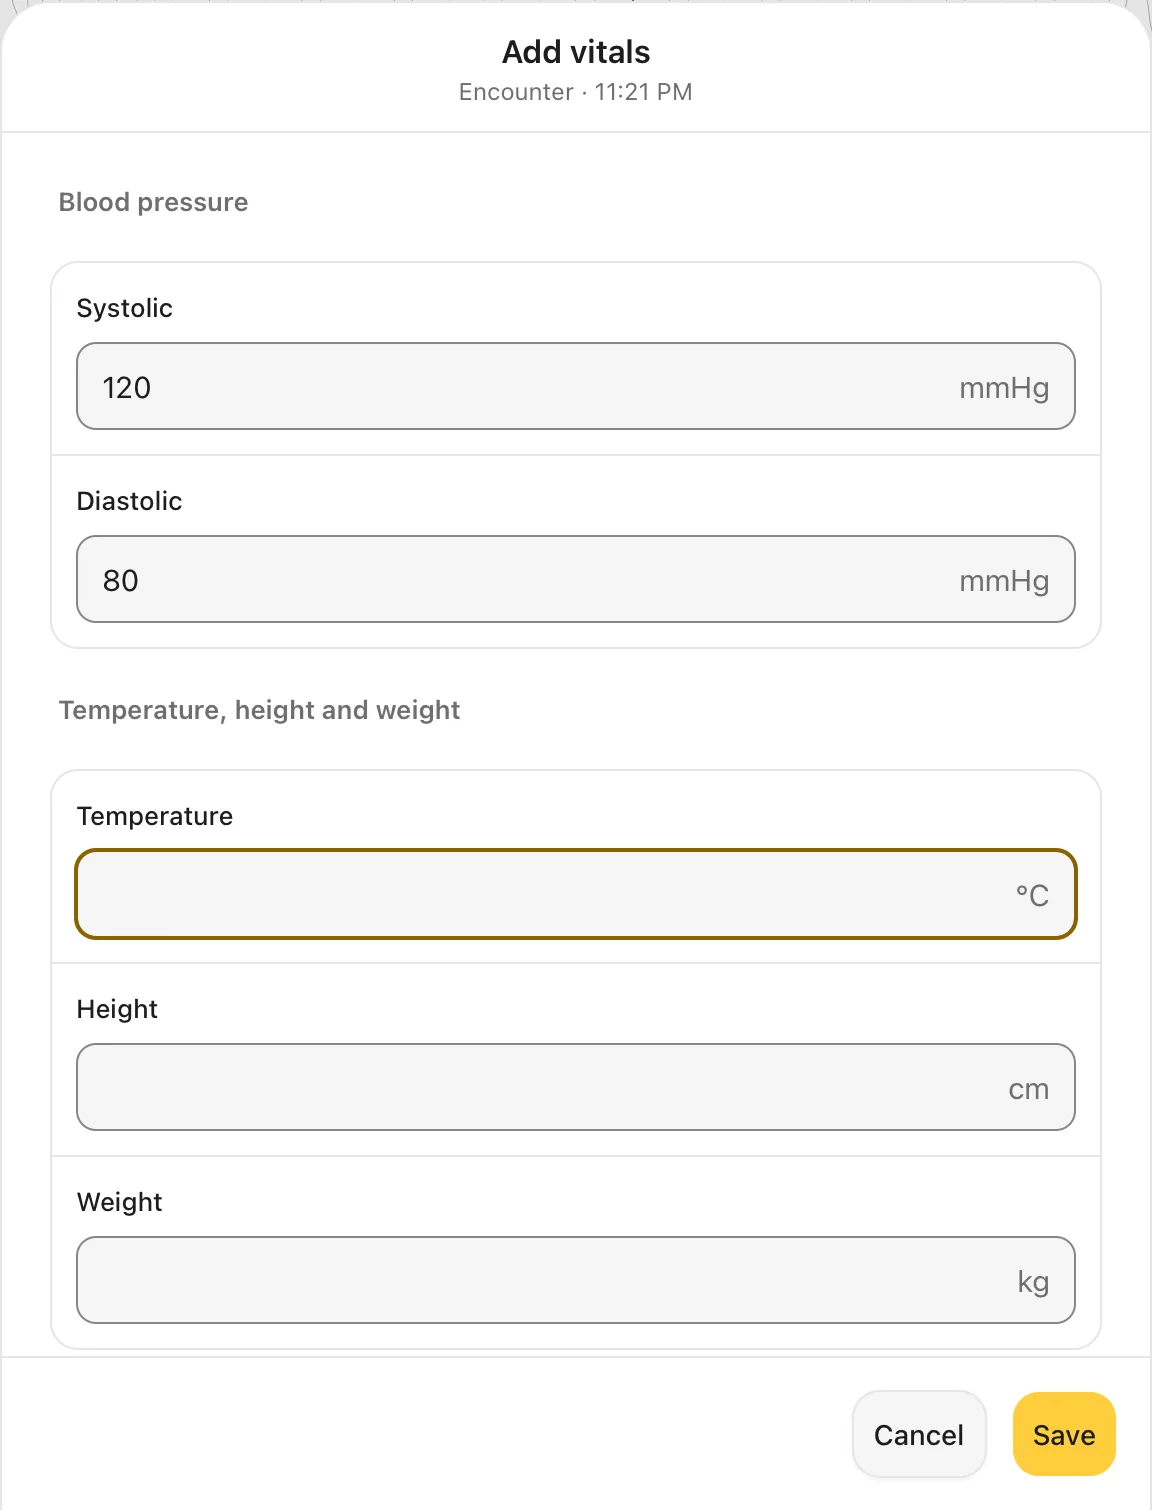
Under Objective, tap + Vitals. Fill in what you measured: Systolic and Diastolic blood pressure, Temperature, Height and Weight. Leave the rest empty. Tap Save.
You should see: a Vitals card under Objective, for example 120/80 BP.
5. Read or change a note
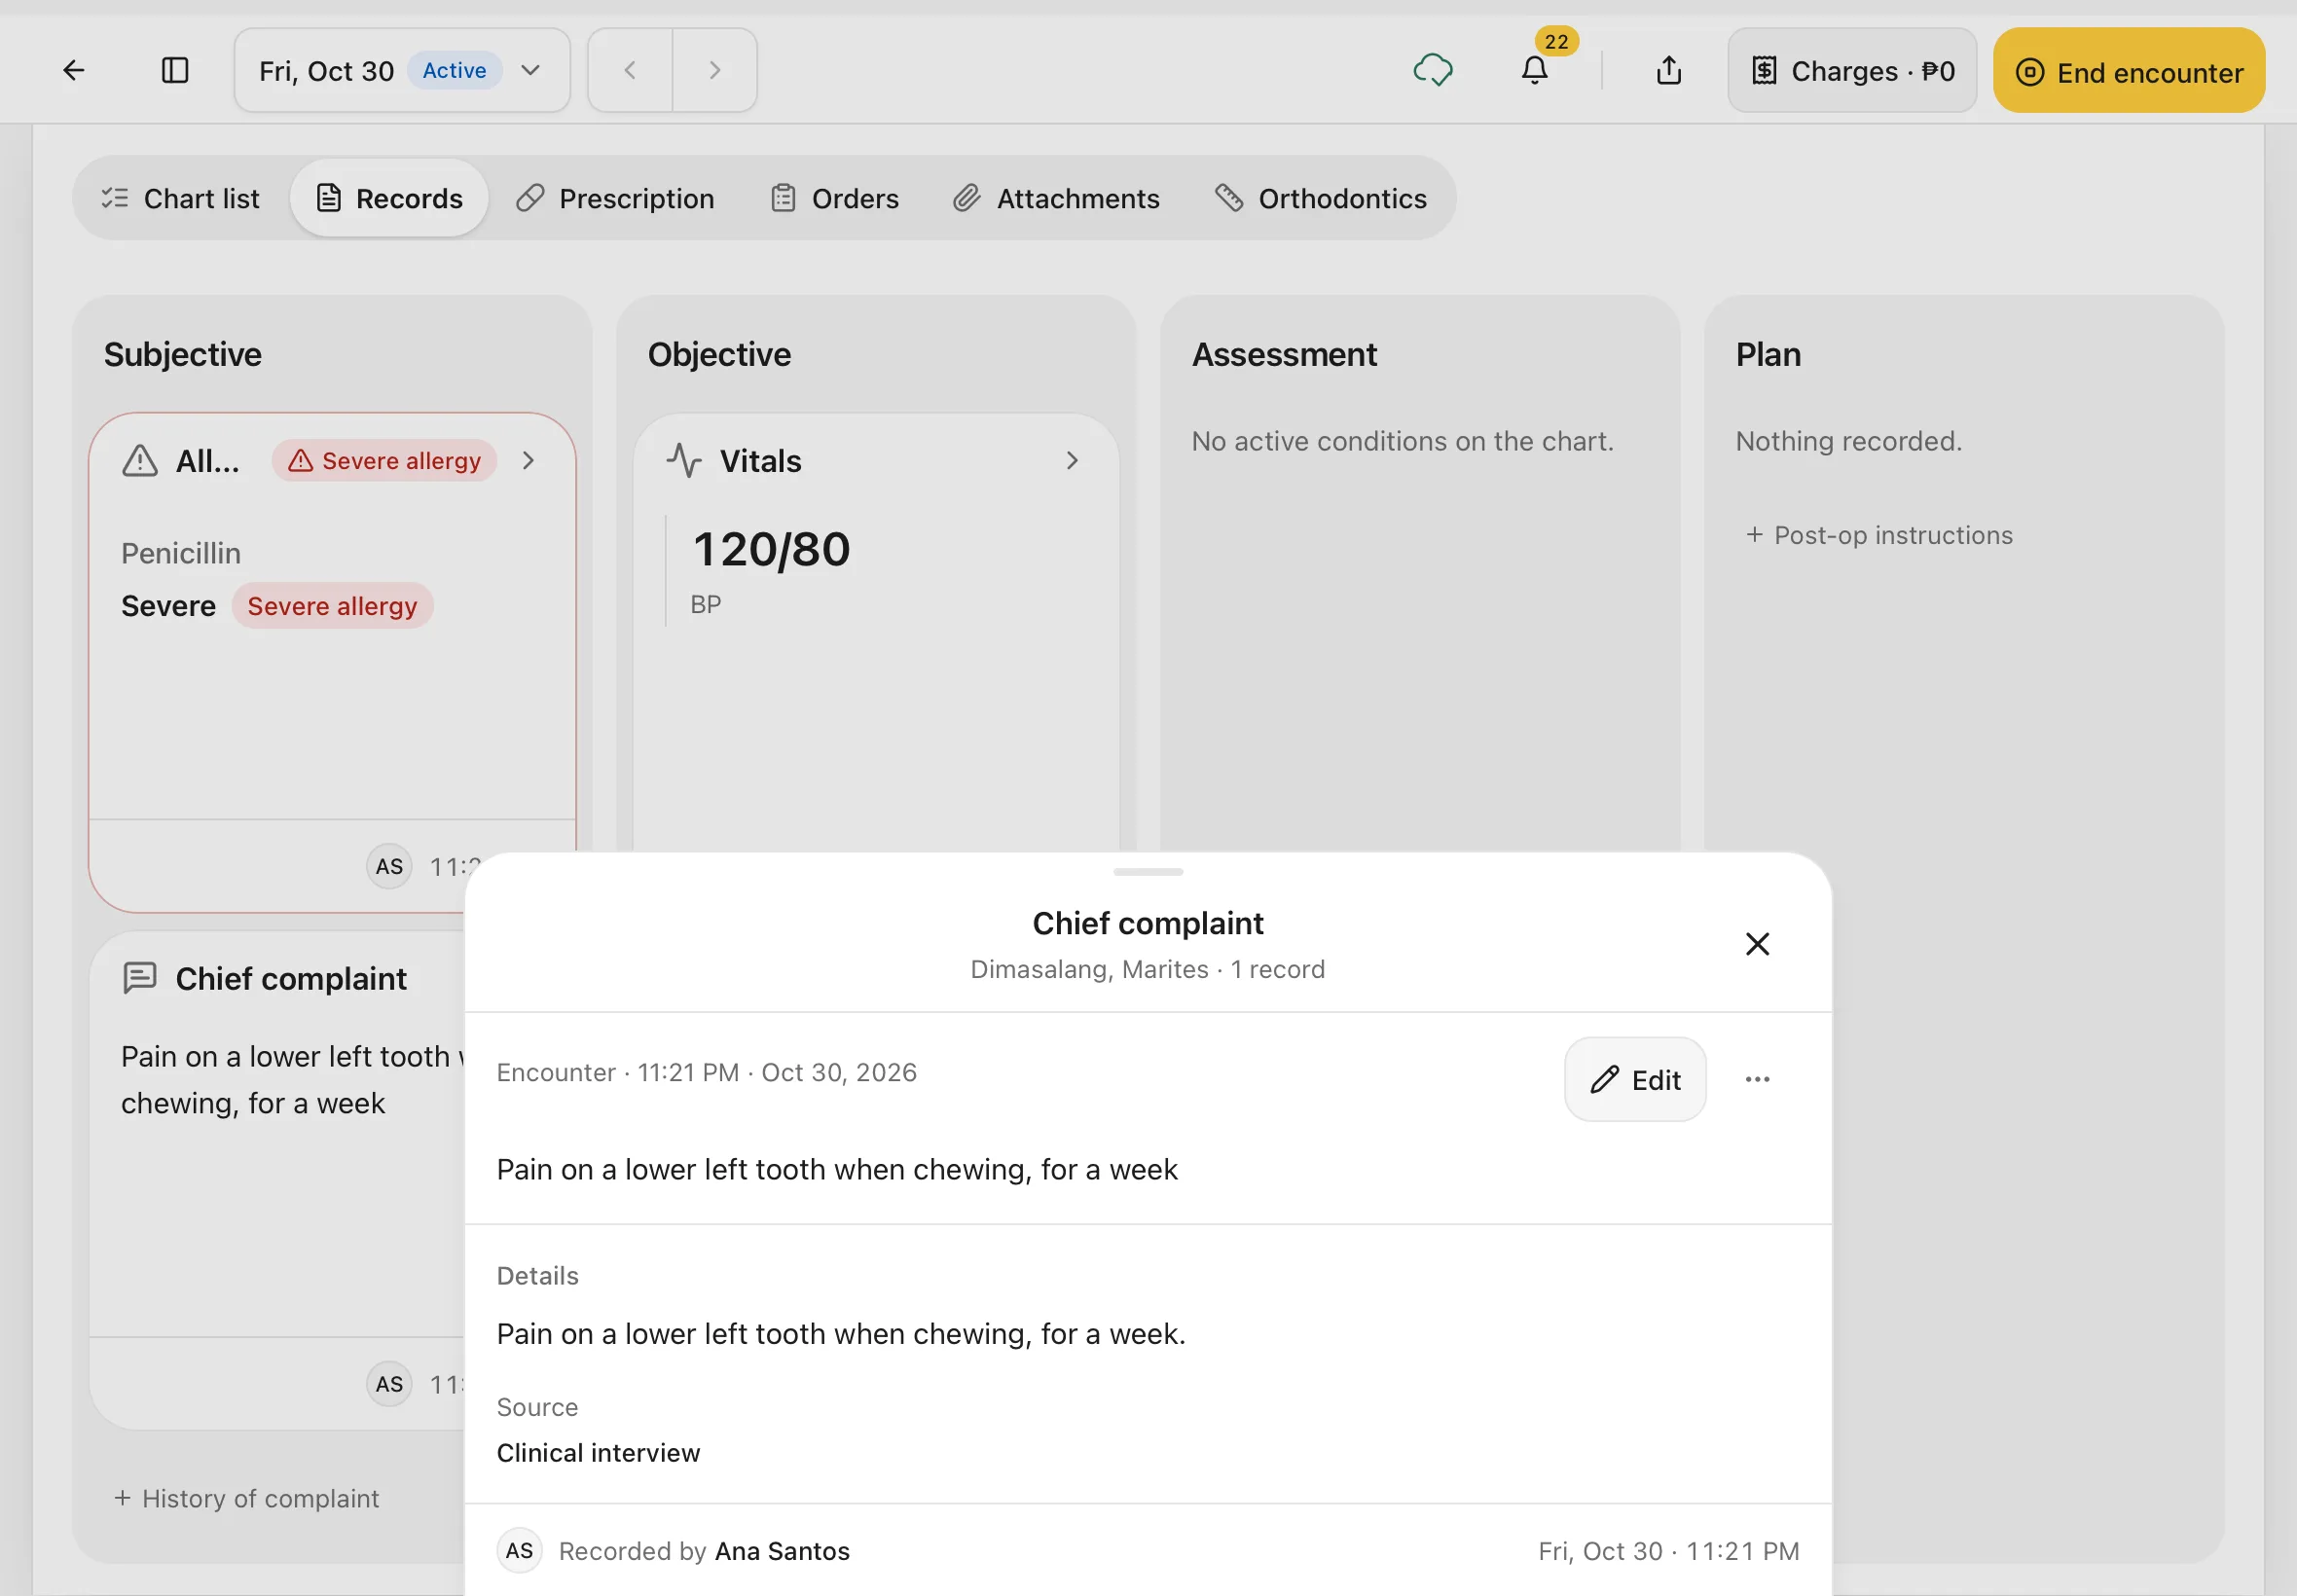
Tap any card to read it in full: who recorded it, when, and the details. While the visit is still open, tap Edit to change it, then Save.
You should see: the note with Edit at the top right.
After the visit has ended
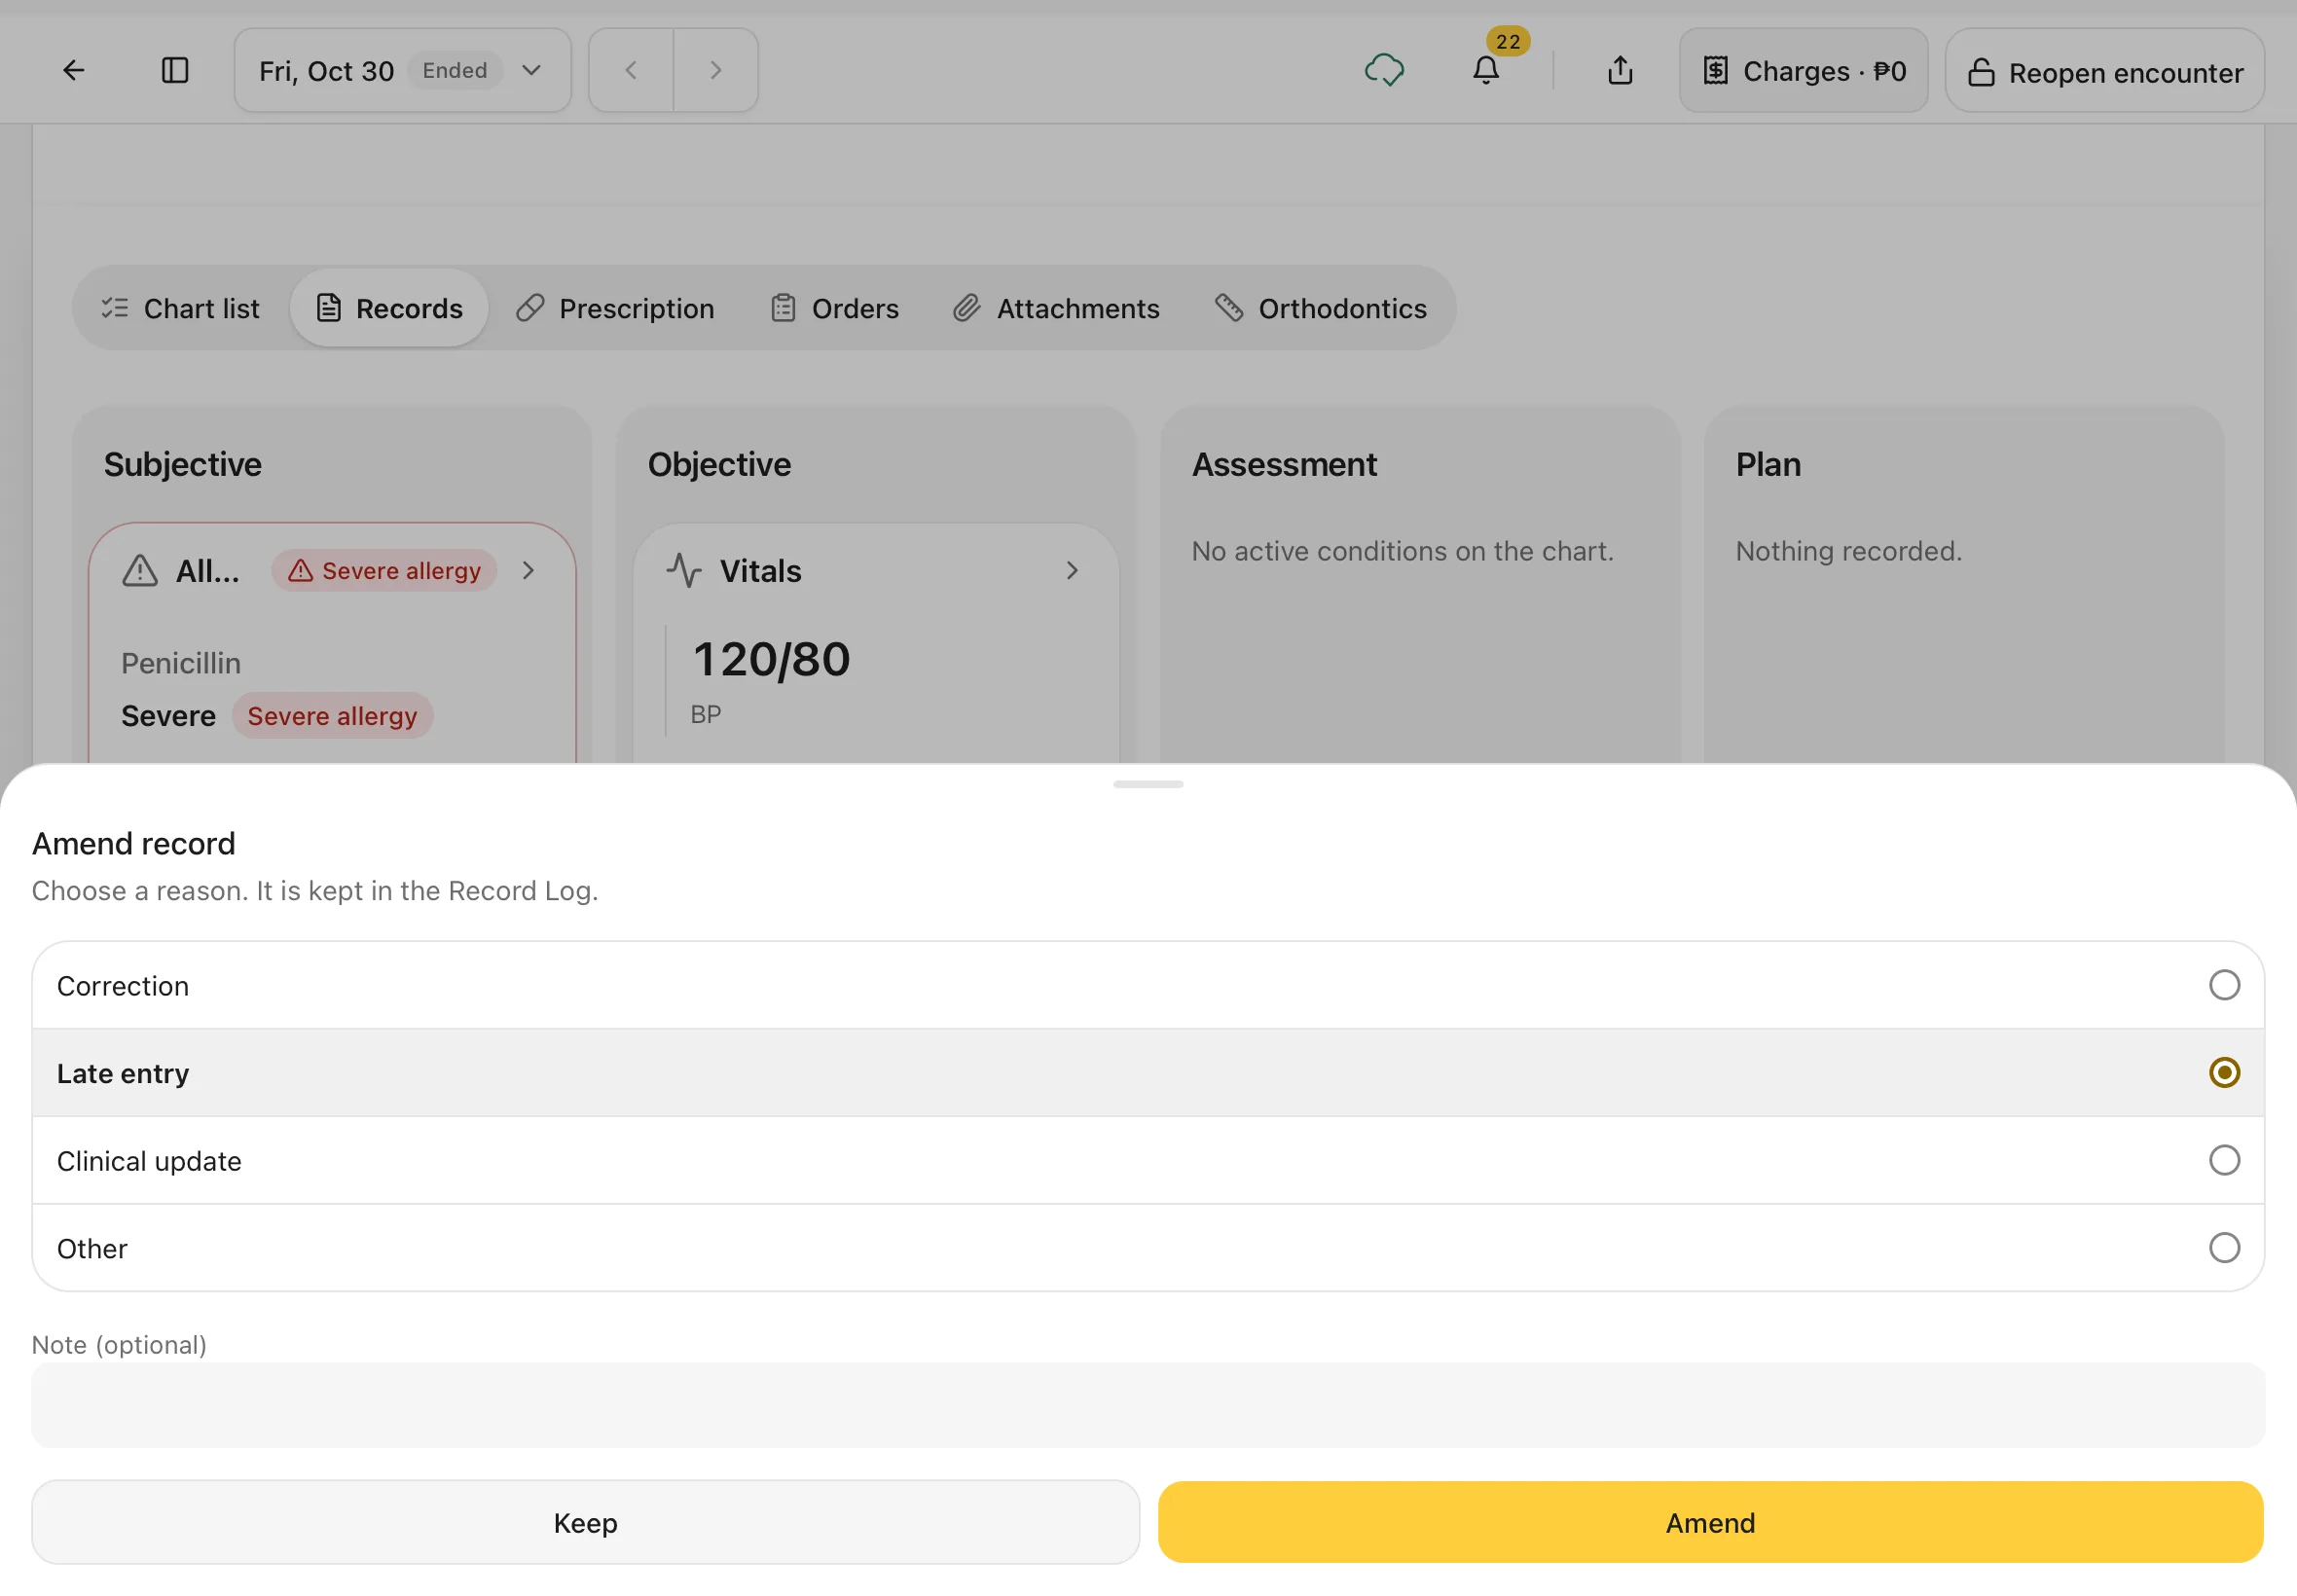
The button reads Amend… instead of Edit. Make your change and tap Continue. Dentalemon then asks why: choose Correction, Late entry, Clinical update or Other, add a note if you want, and tap Amend. The reason is kept in the record's history. Tap Keep to go back without saving.
Prescribe medicine
6. Find the medicine
Tap Prescription in the row of views, then Add prescription.
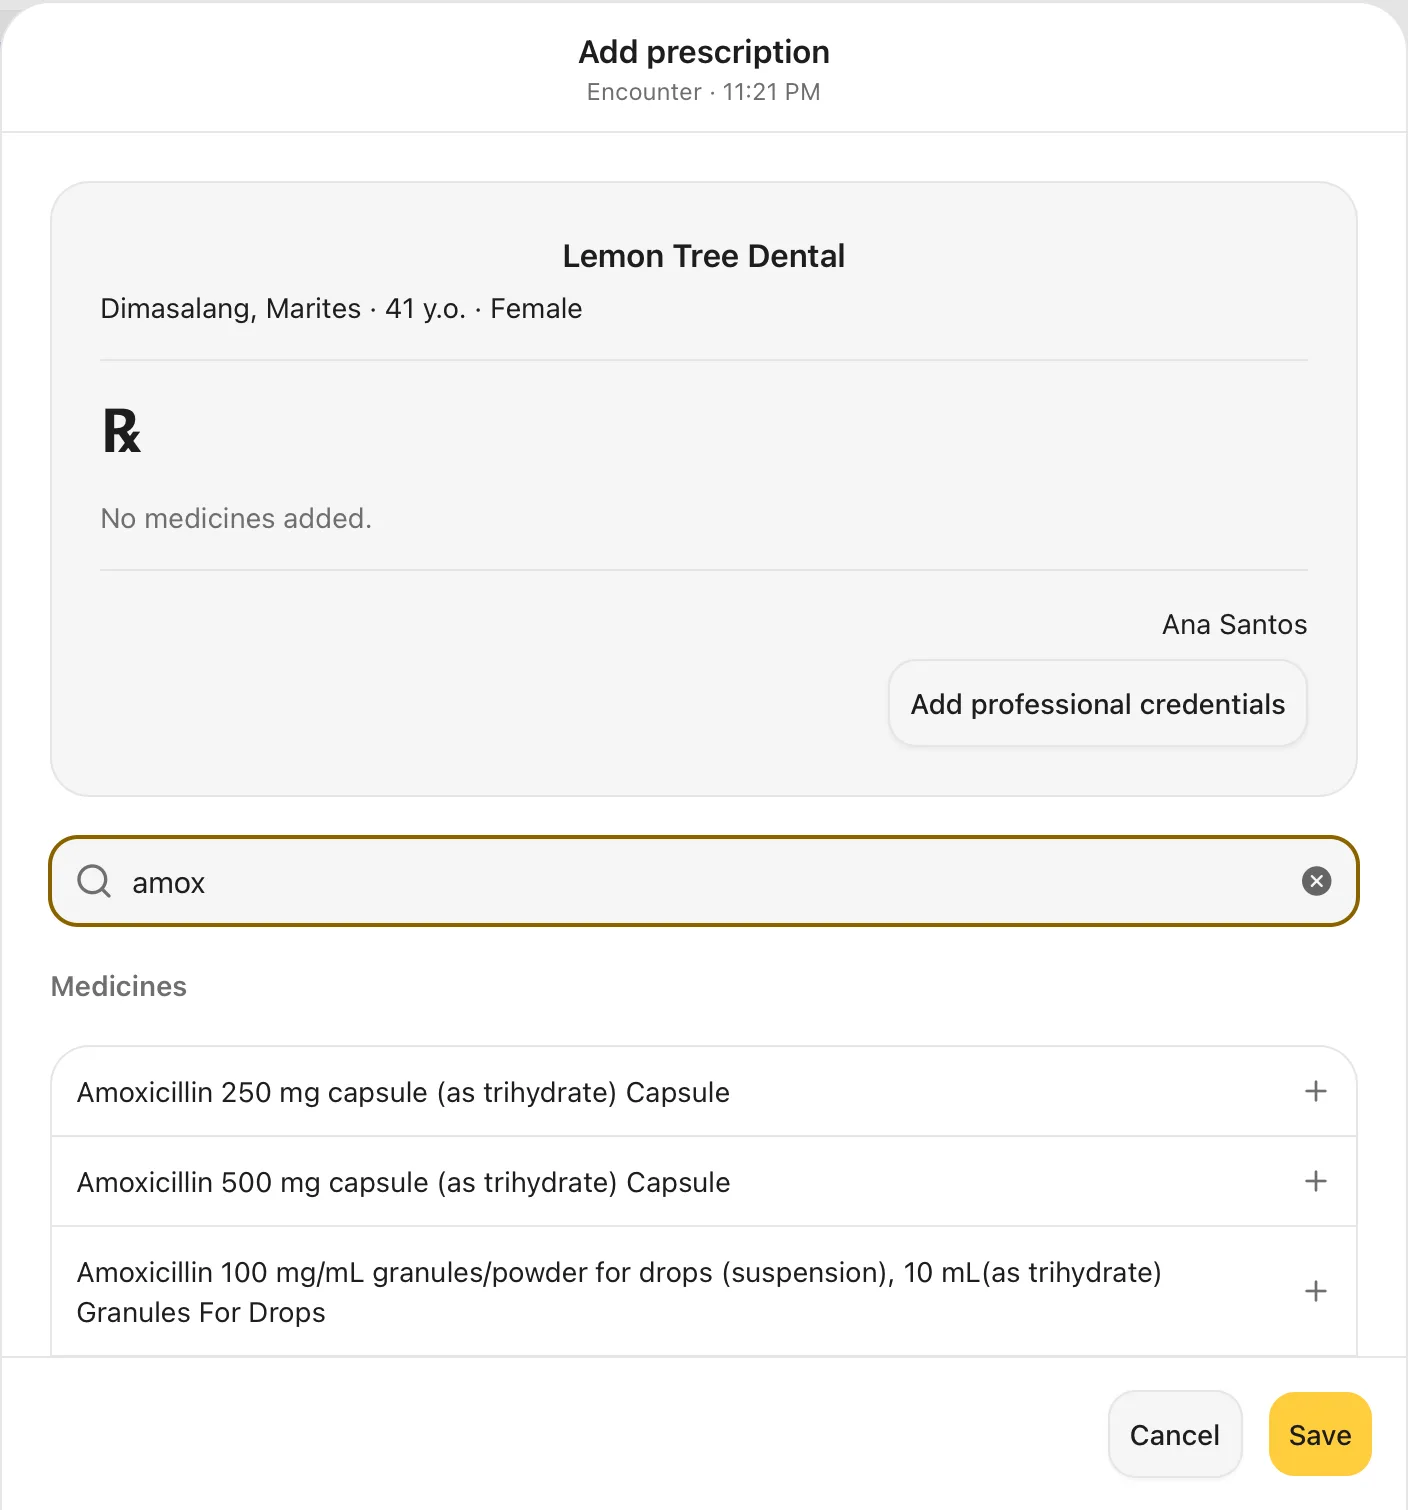
Type part of the name in Search name, brand or strength, for example amox, then tap the medicine and strength you want.
If the patient is allergic
The patient's allergies show in red under their name, for example Penicillin · Severe, and every matching medicine in the list has a red warning sign. When you tap one, Dentalemon warns you before adding it, for example Penicillin allergy on record · Severe. Tap Keep current to go back without adding the medicine, or Choose medicine to add it anyway. Record allergies first (step 3) so this check can work.
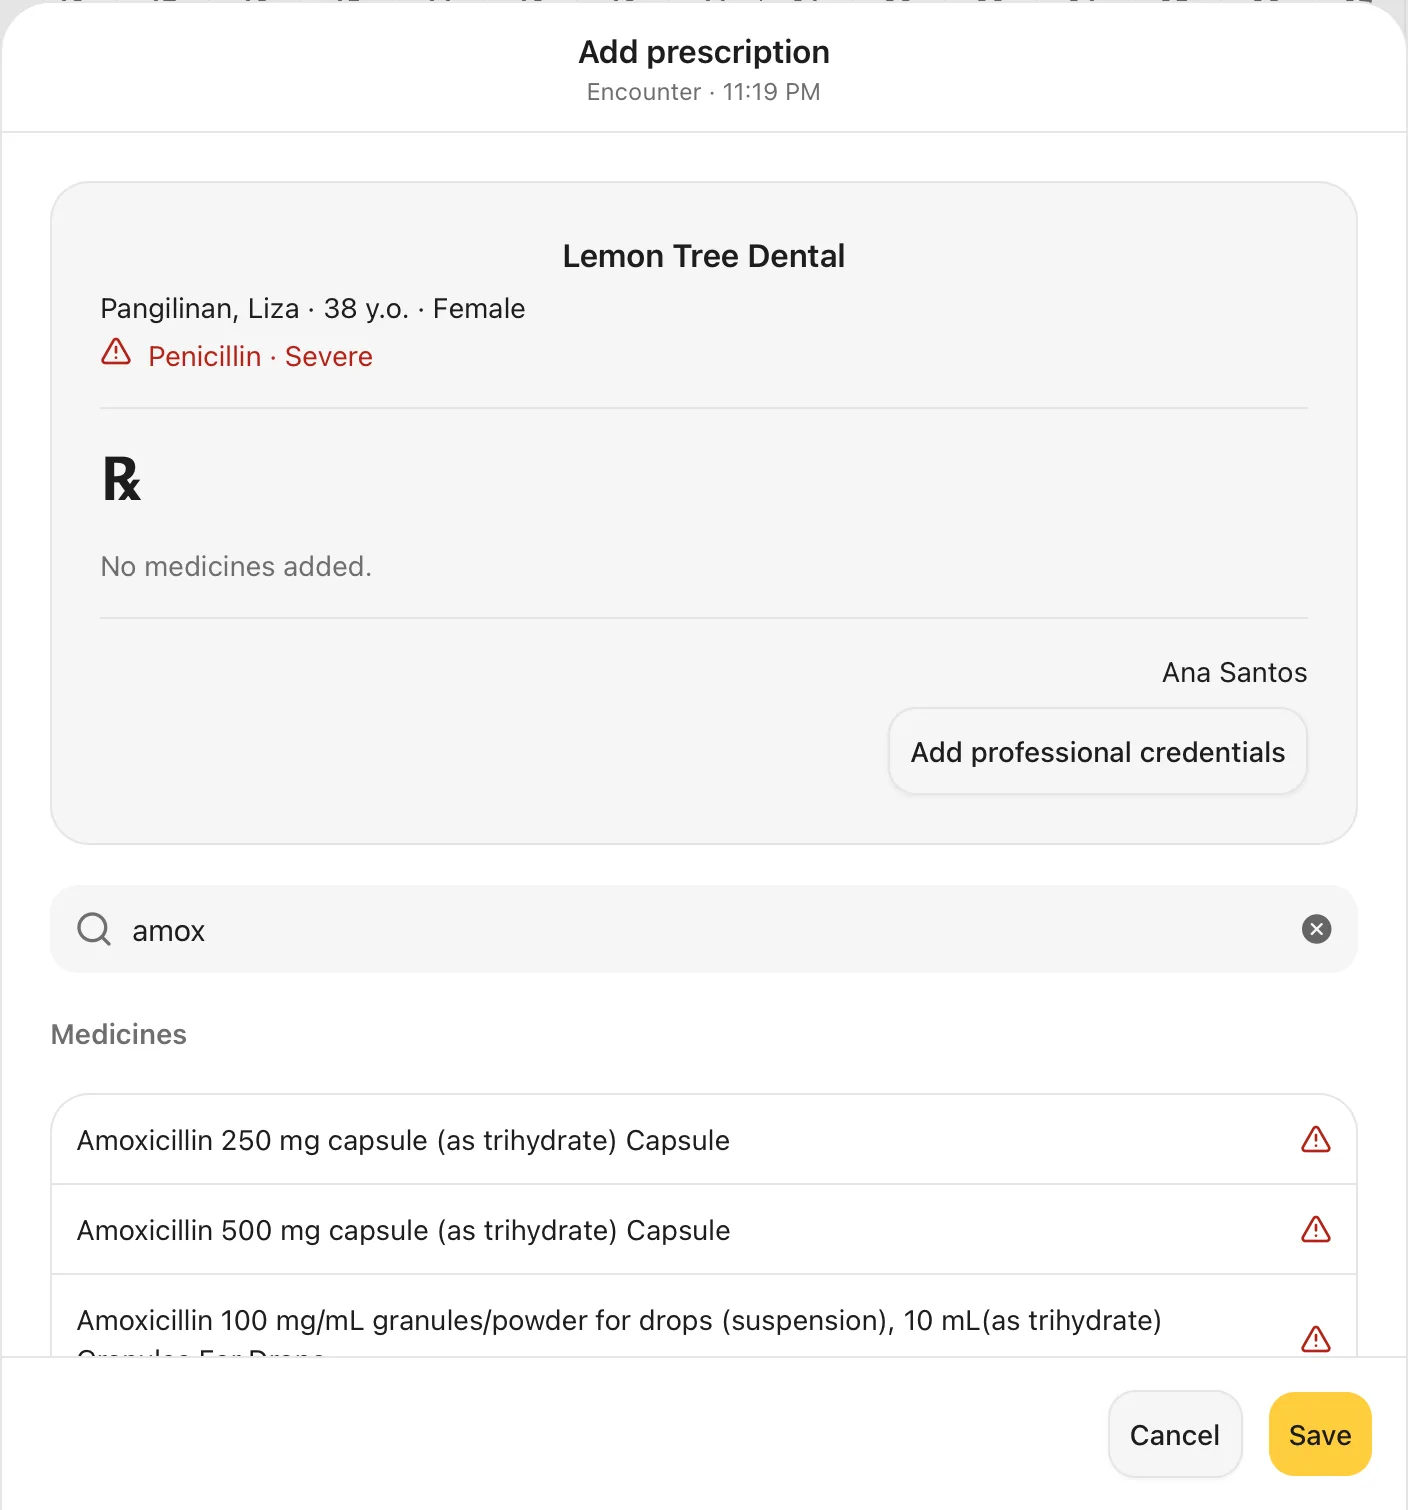
You should see: a list of matching medicines under Medicines.
7. Fill in the directions
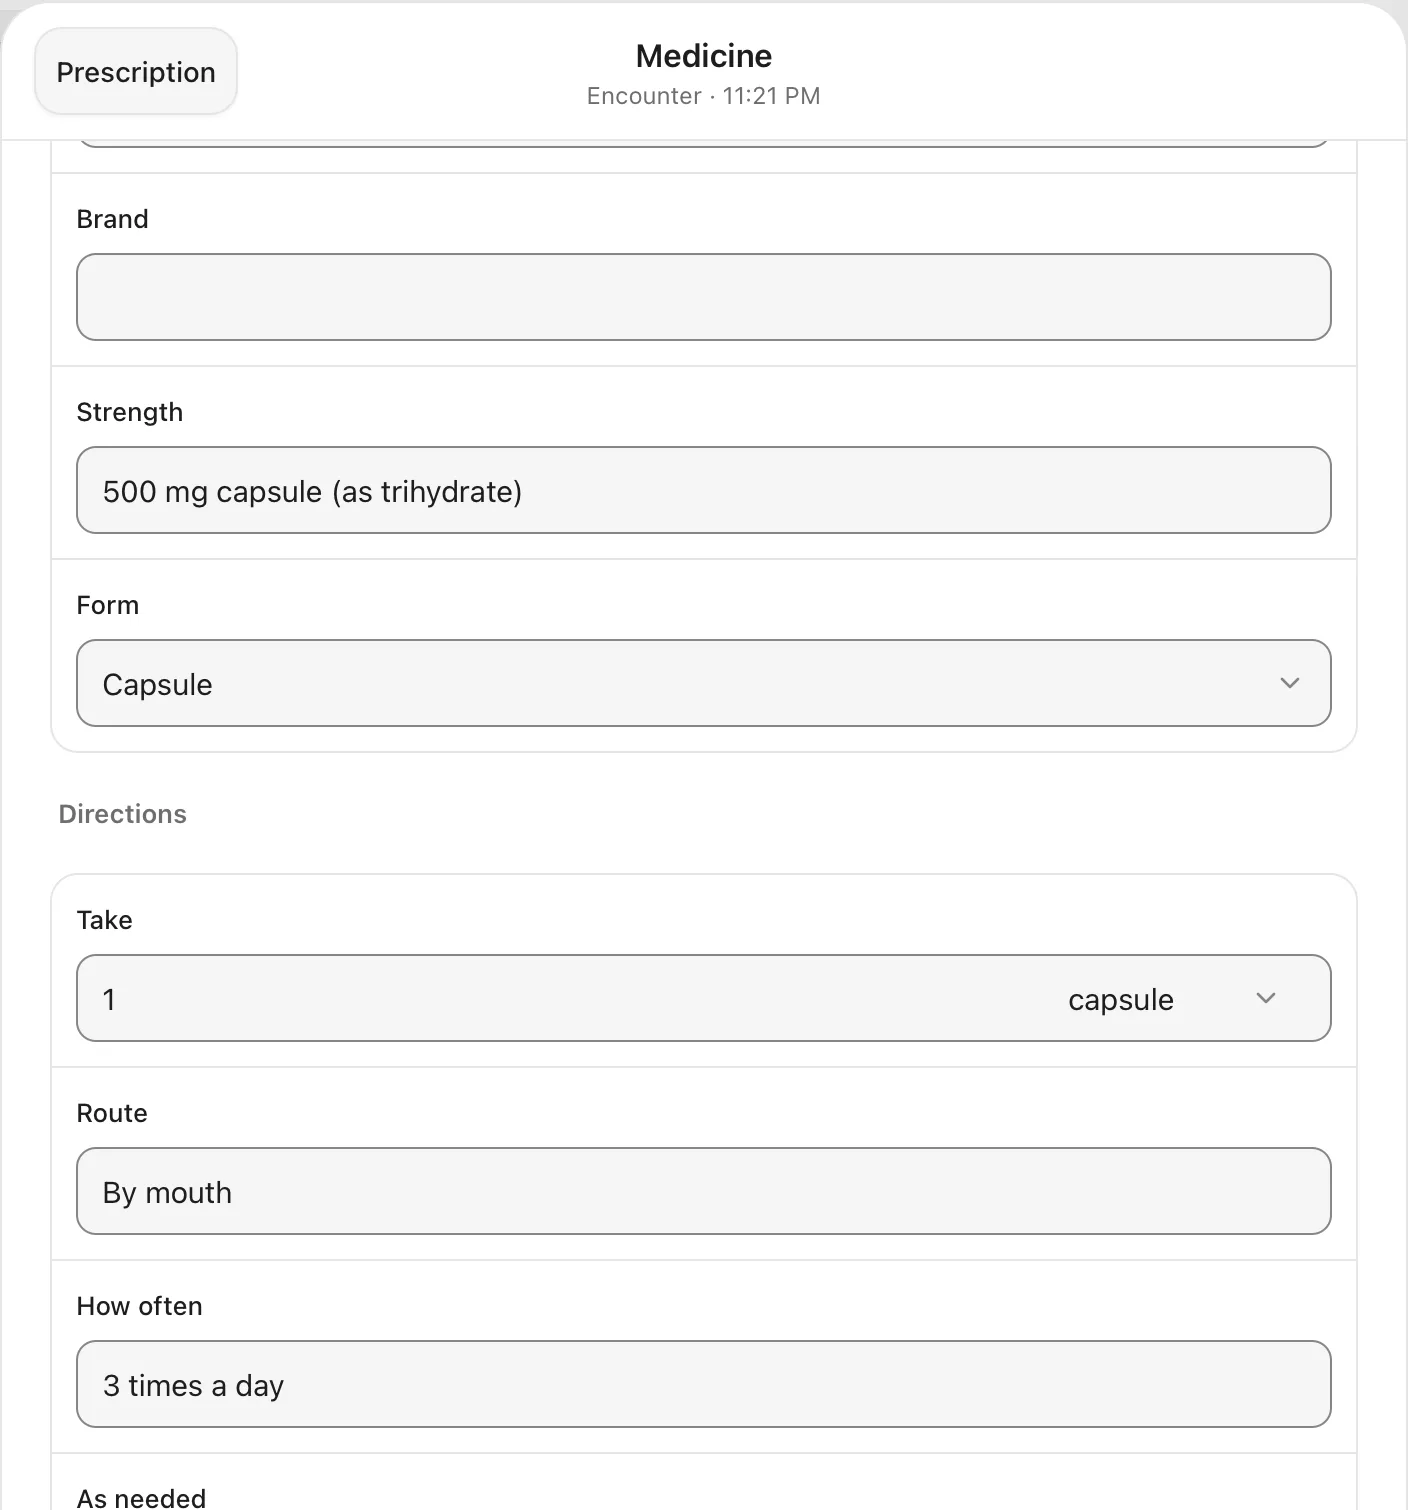
The Medicine page opens with the name, strength and form filled in. Under Directions, fill in:
- Take: the amount and unit, for example 1 capsule
- Route: for example By mouth
- How often: start typing and pick a suggestion, for example 3 times a day
- For how long: for example 7 days
Under Quantity and refills, enter the Quantity to dispense.
Tap Prescription at the top left to go back.
You should see: the medicine details and the Directions you entered.
8. Check and save the prescription
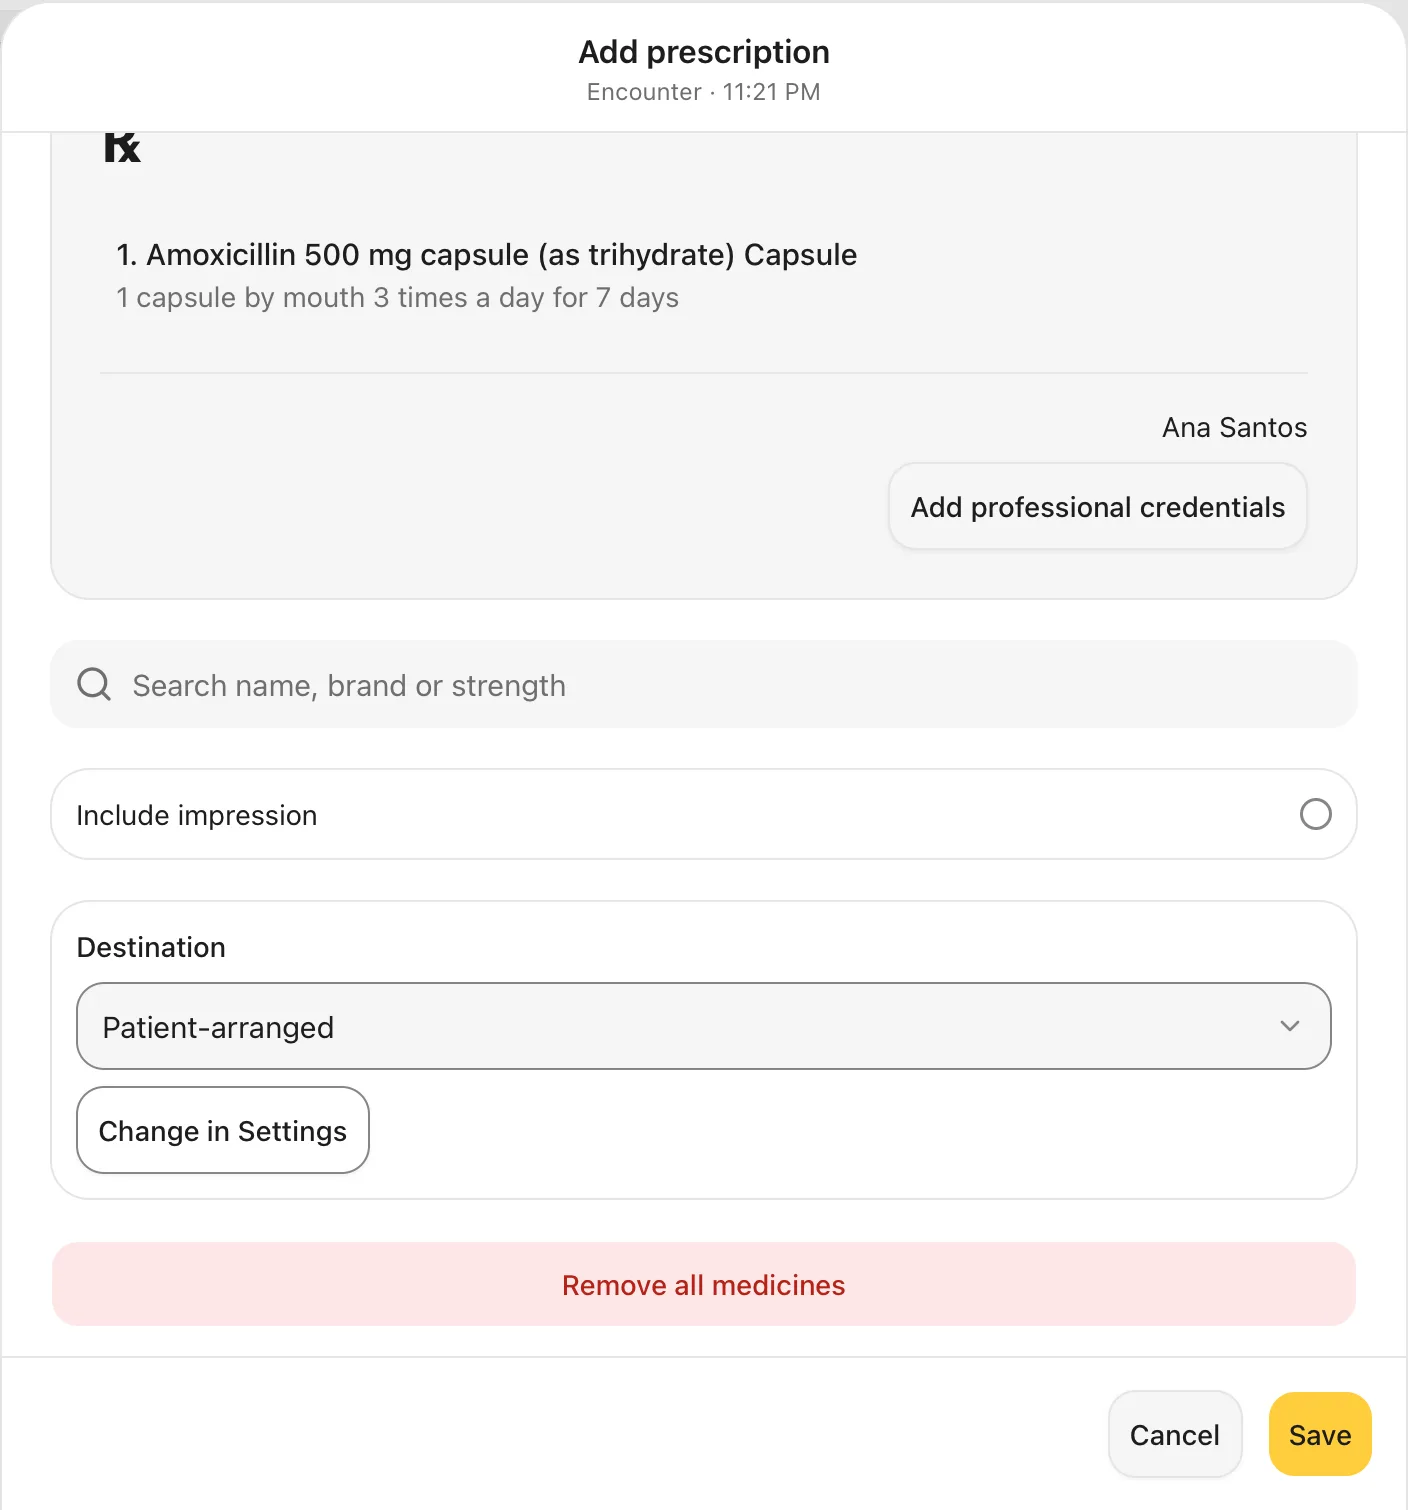
The prescription now lists the medicine with its directions in plain words. To add another medicine, search again.
Under the medicines:
- Destination: where the patient gets the medicine, Patient-arranged unless you change it. Change in Settings opens Settings › Partners in front of the prescription, where your clinic's referral partners are kept.
- Add professional credentials (under your name) opens Settings › Profile, where you add your licence numbers.
- Remove all medicines clears the list and starts again.
Tap Save.
You should see: 1. Amoxicillin 500 mg capsule… with 1 capsule by mouth 3 times a day for 7 days under it.
9. Print it
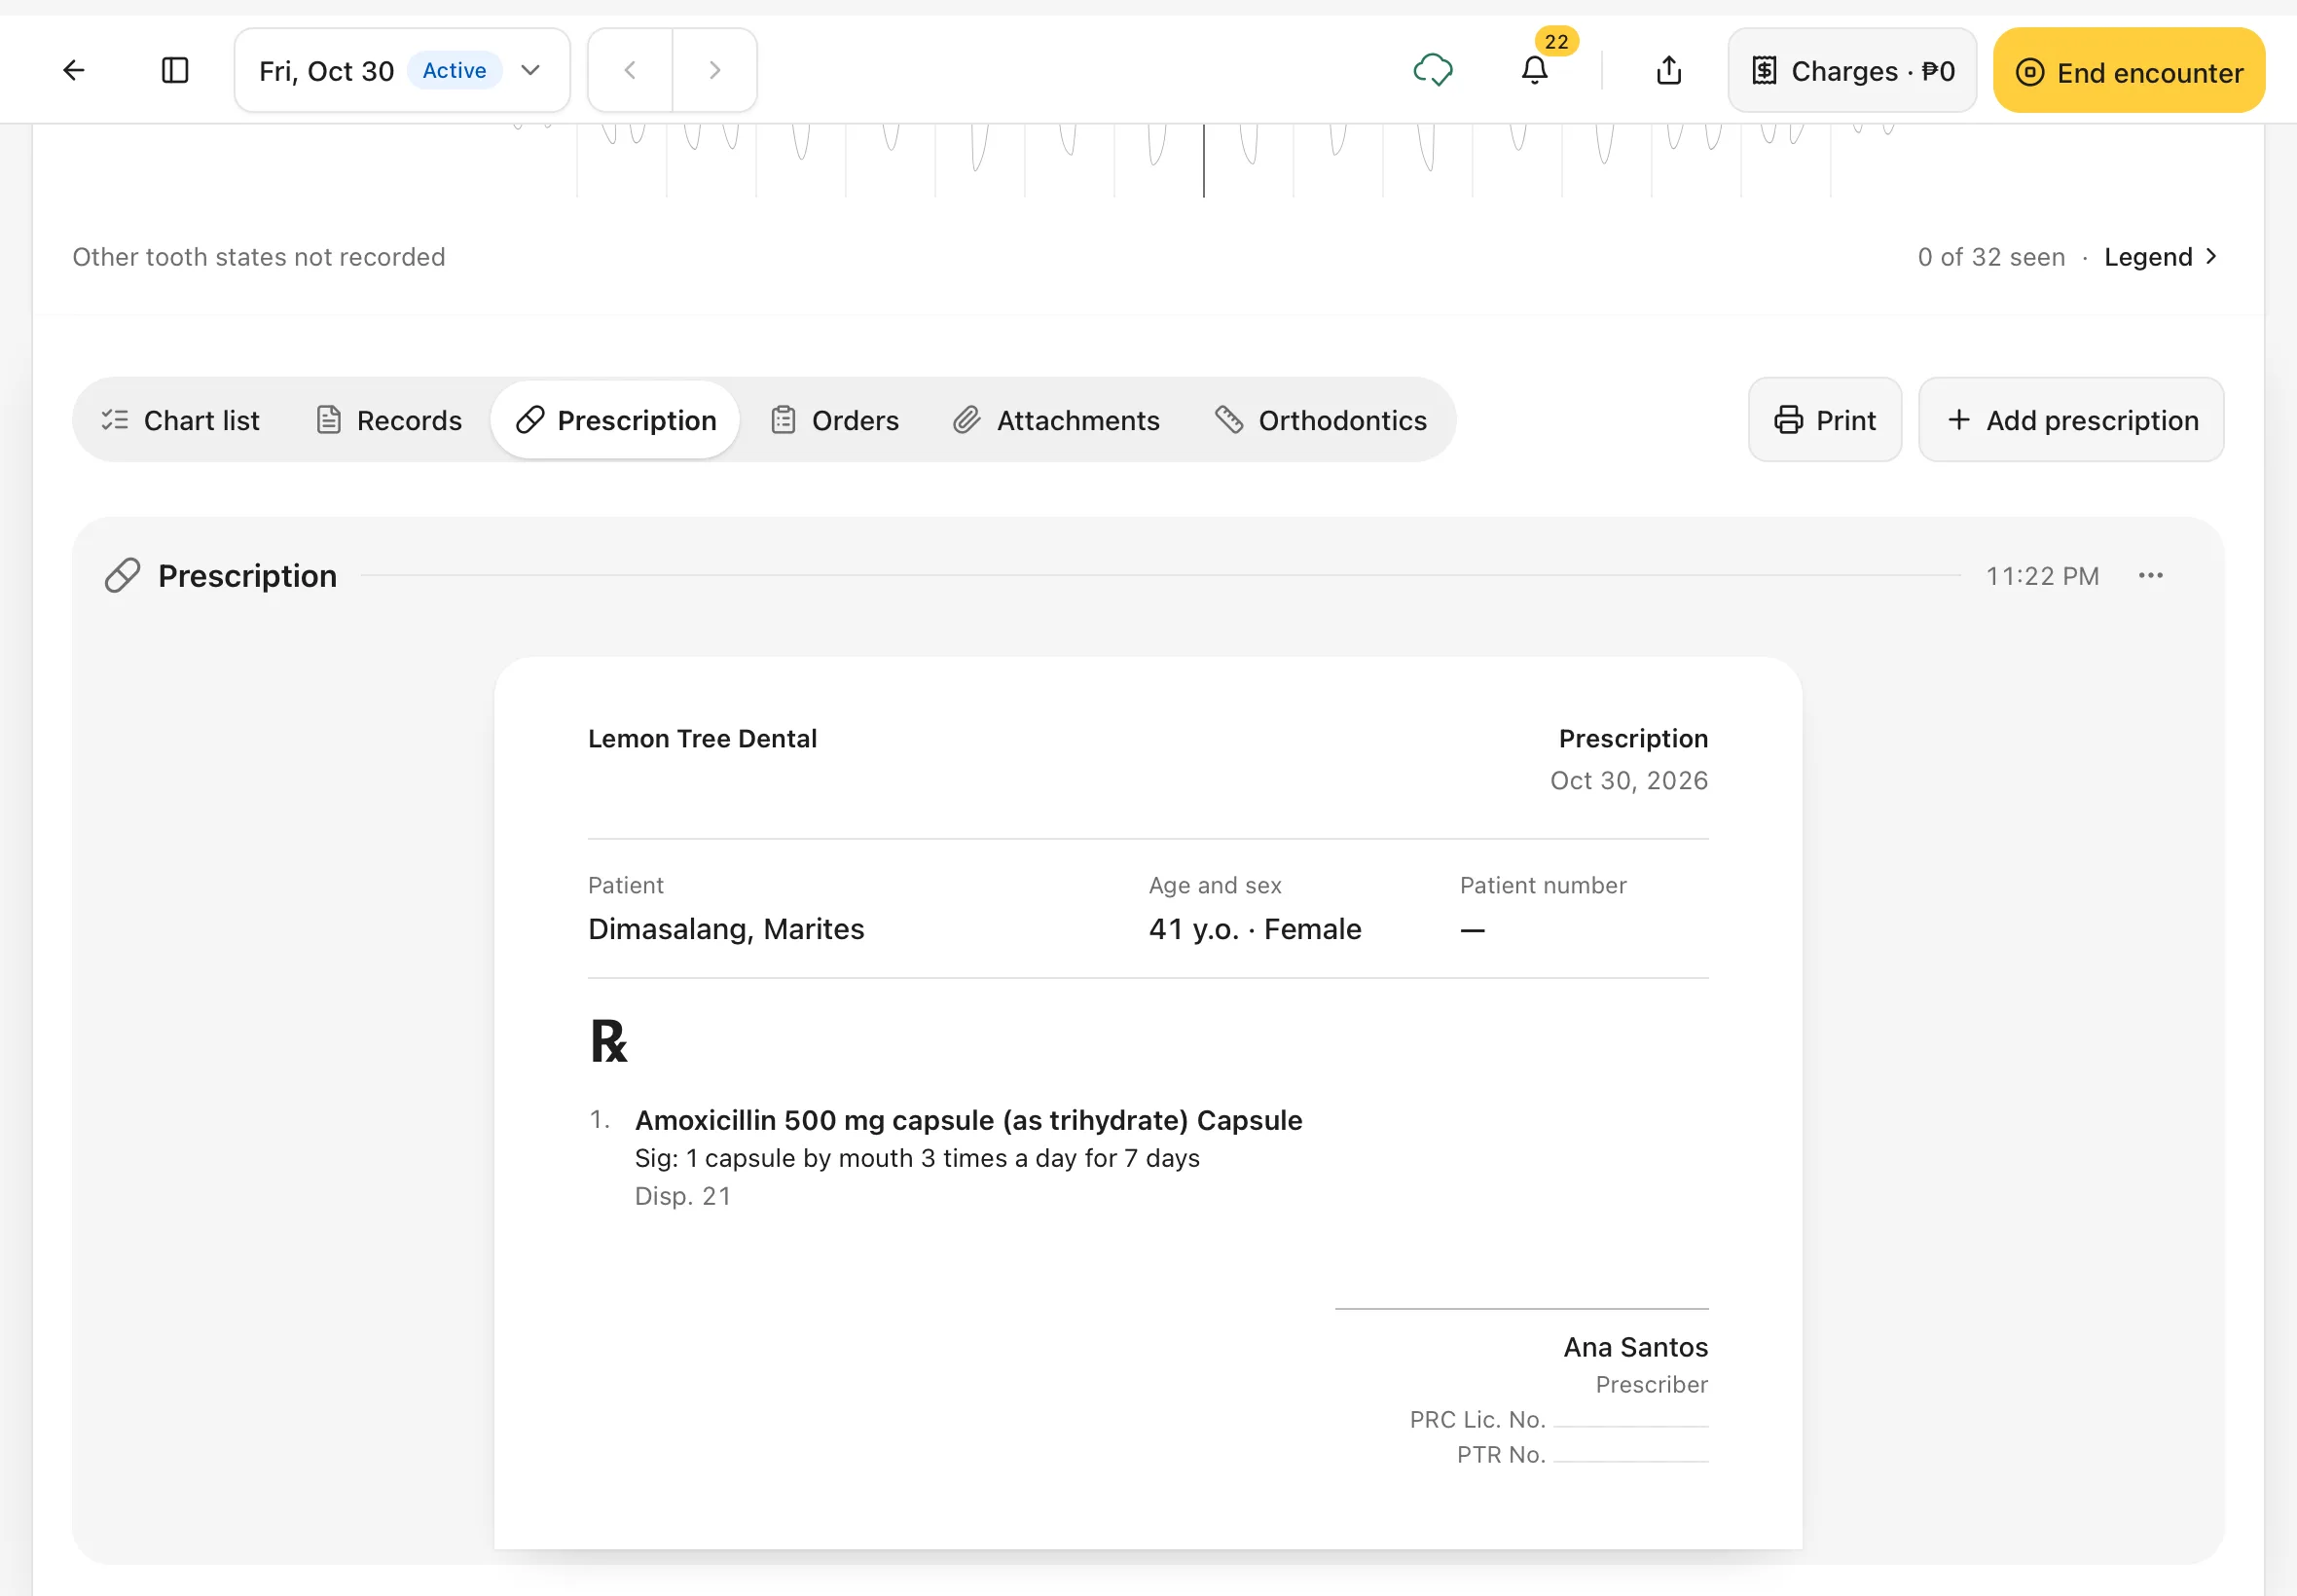
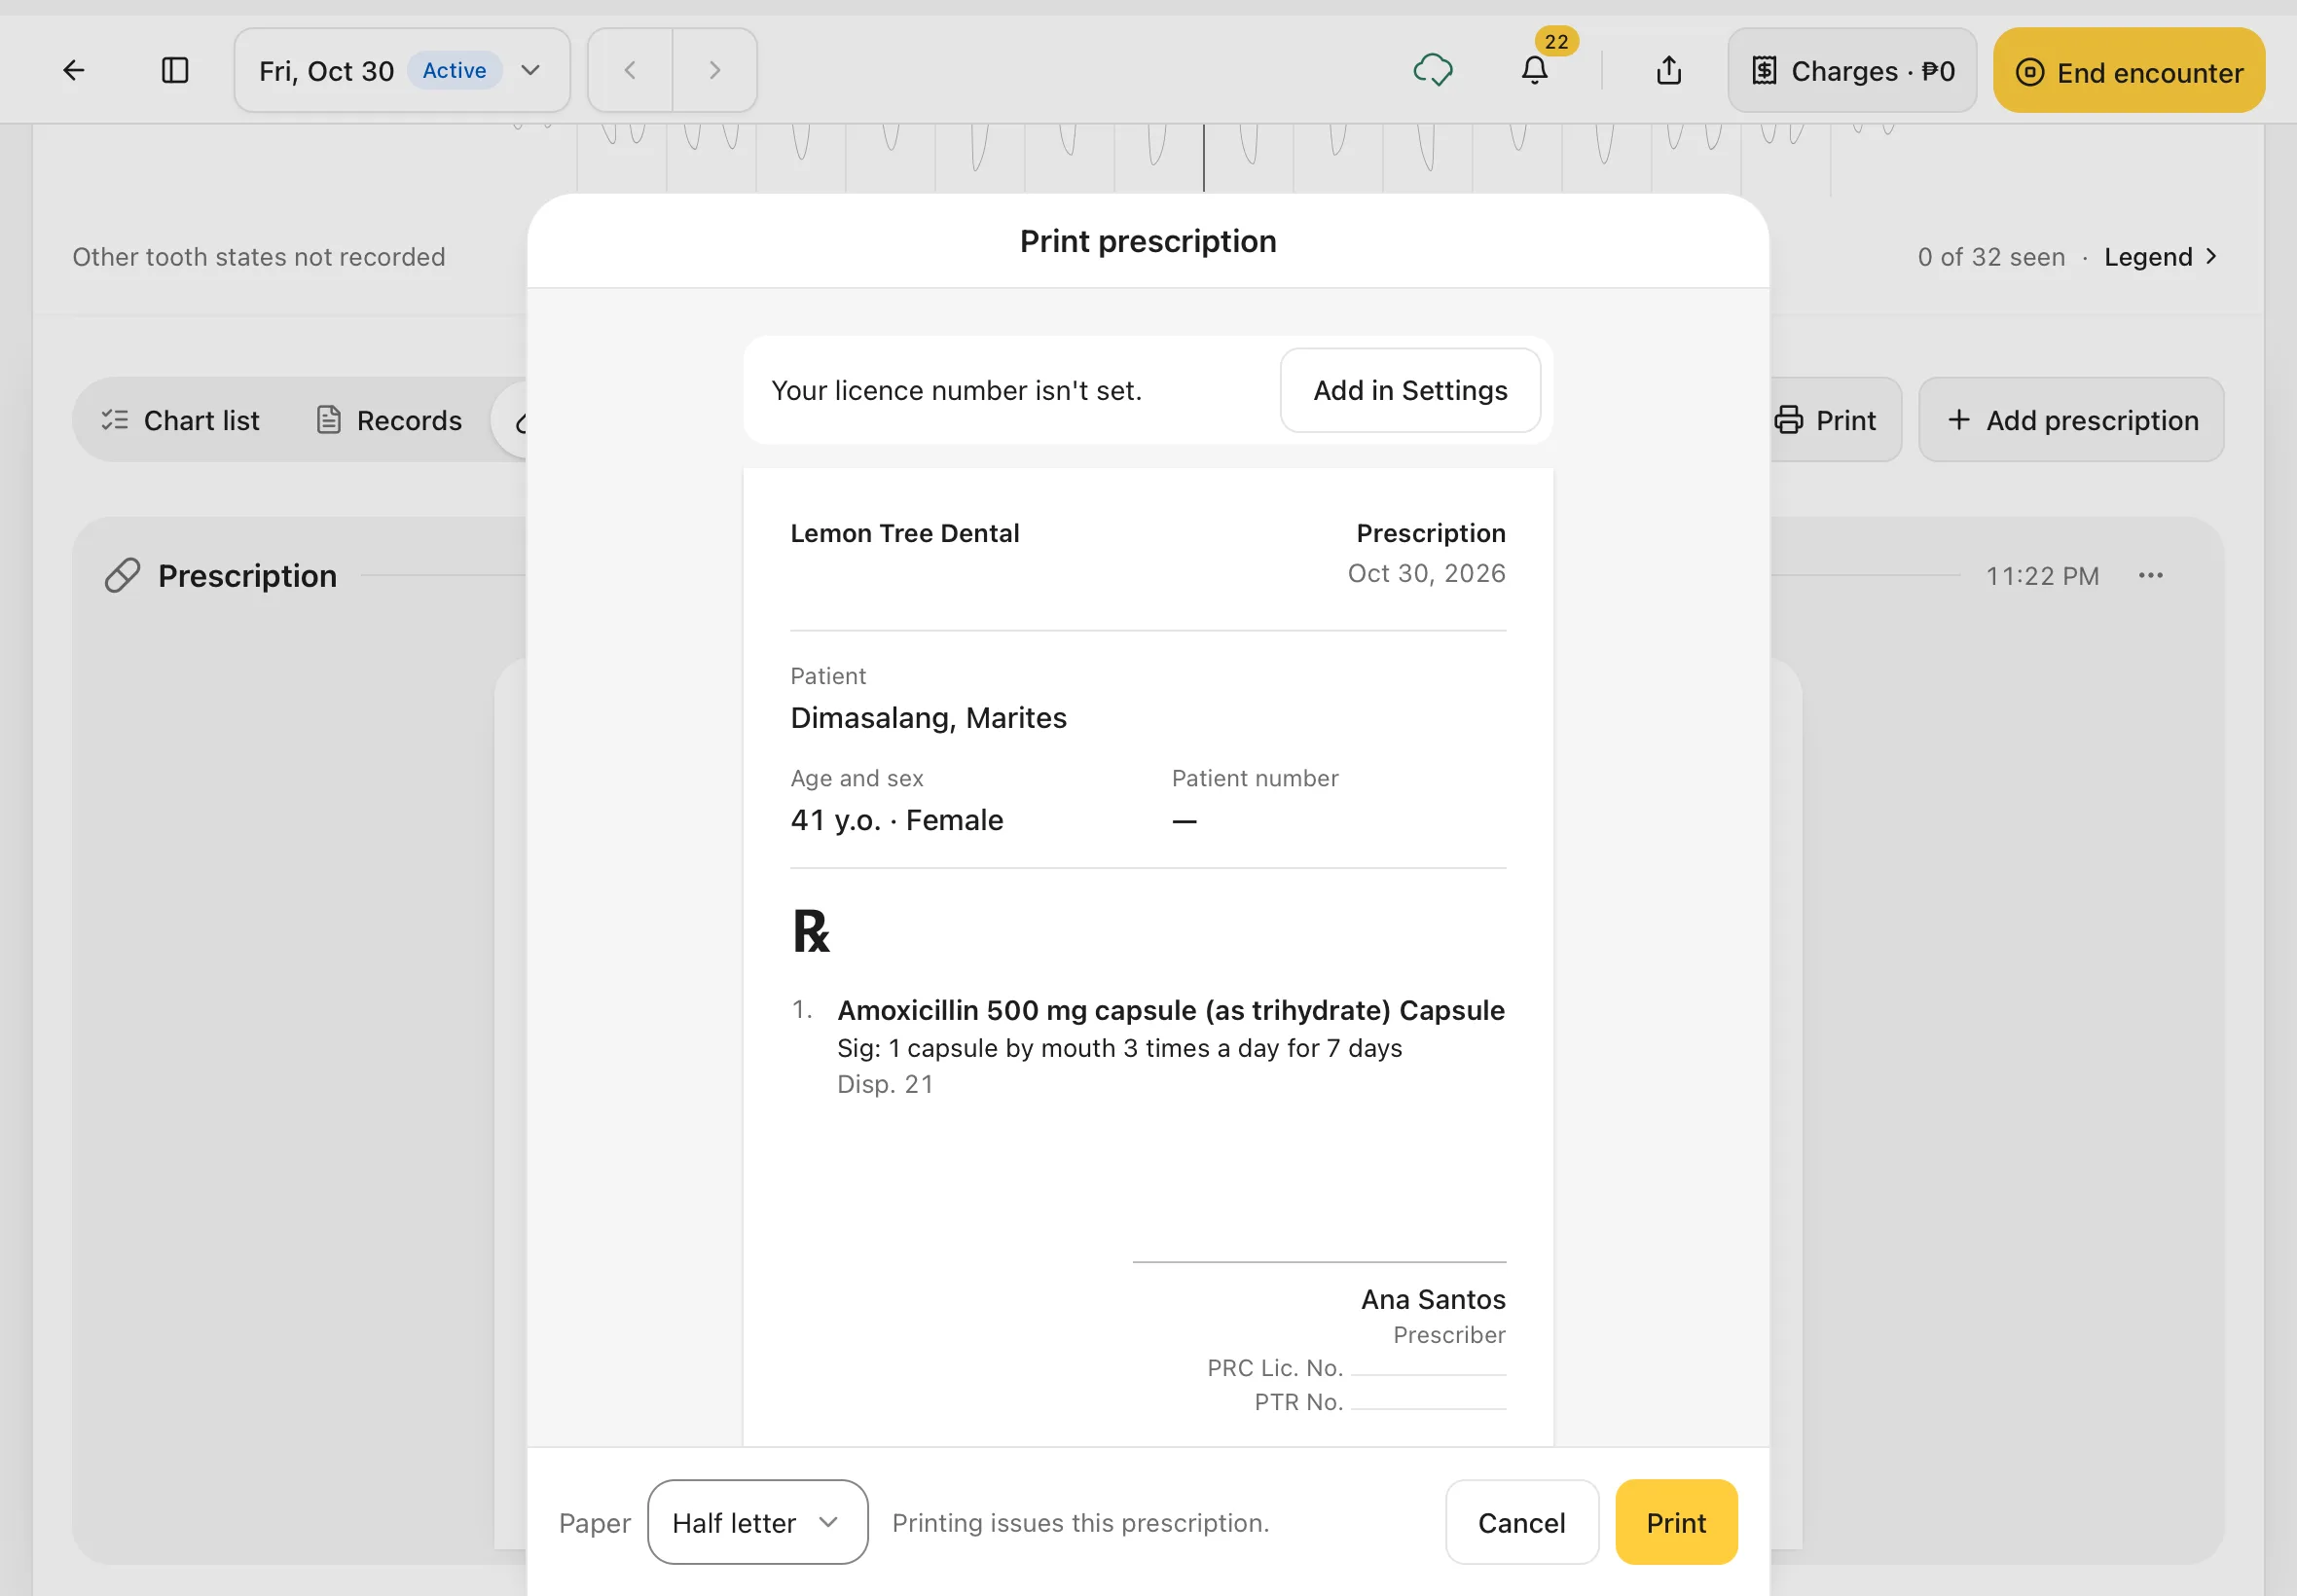
The prescription appears in the Prescription view, laid out as it will print: your clinic, the patient, the Rx with Sig: and Disp., and your name and licence numbers.
You should see: the prescription with Print and Add prescription above it.
Tap Print. Print prescription opens with a preview. Choose the Paper size (Half letter, A5 or Letter; Dentalemon remembers your choice), then tap Print to print it or save it as a PDF. A draft prescription is issued when you print it: the sheet says Printing issues this prescription.
If your licence number isn't set, the sheet says Your licence number isn't set. Tap Add in Settings to add it, or print with a blank line to write on.
You should see: Print prescription with the paper preview, Paper, Cancel and Print.
Order lab or imaging work
10. Add an order
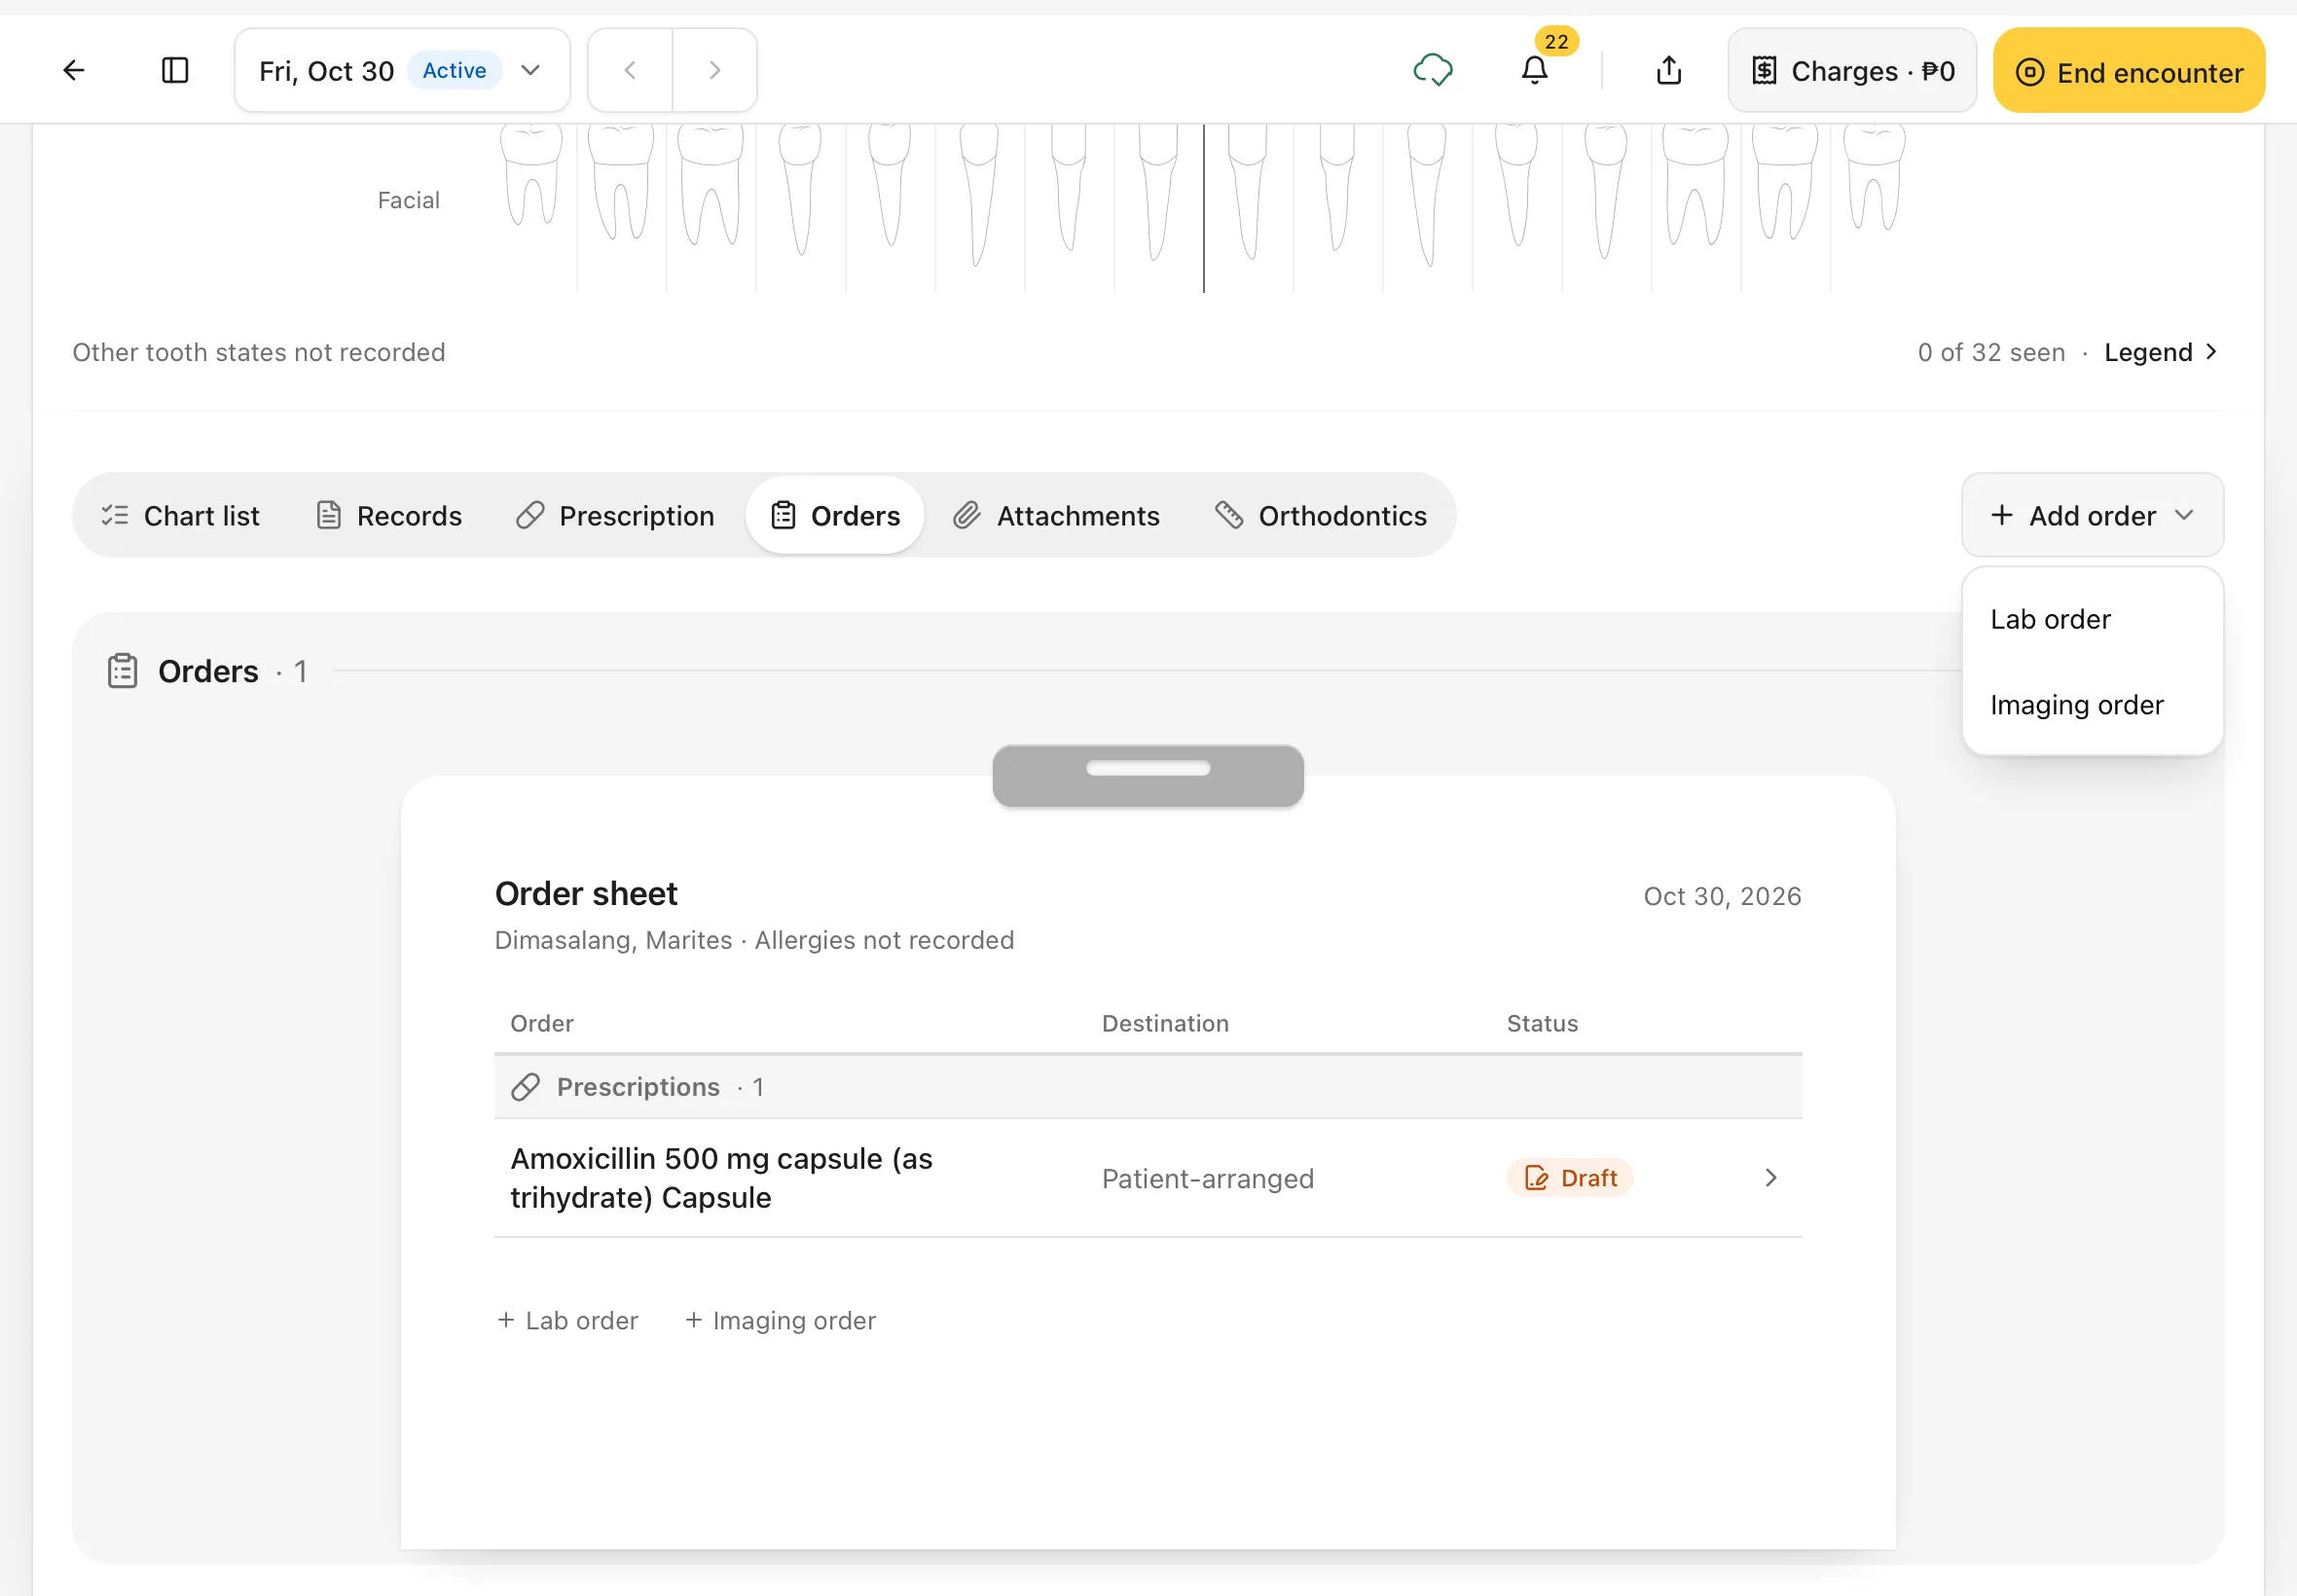
Tap Orders in the row of views, then Add order, and choose Lab order or Imaging order.
You should see: a small menu with Lab order and Imaging order.
11. Choose the tests
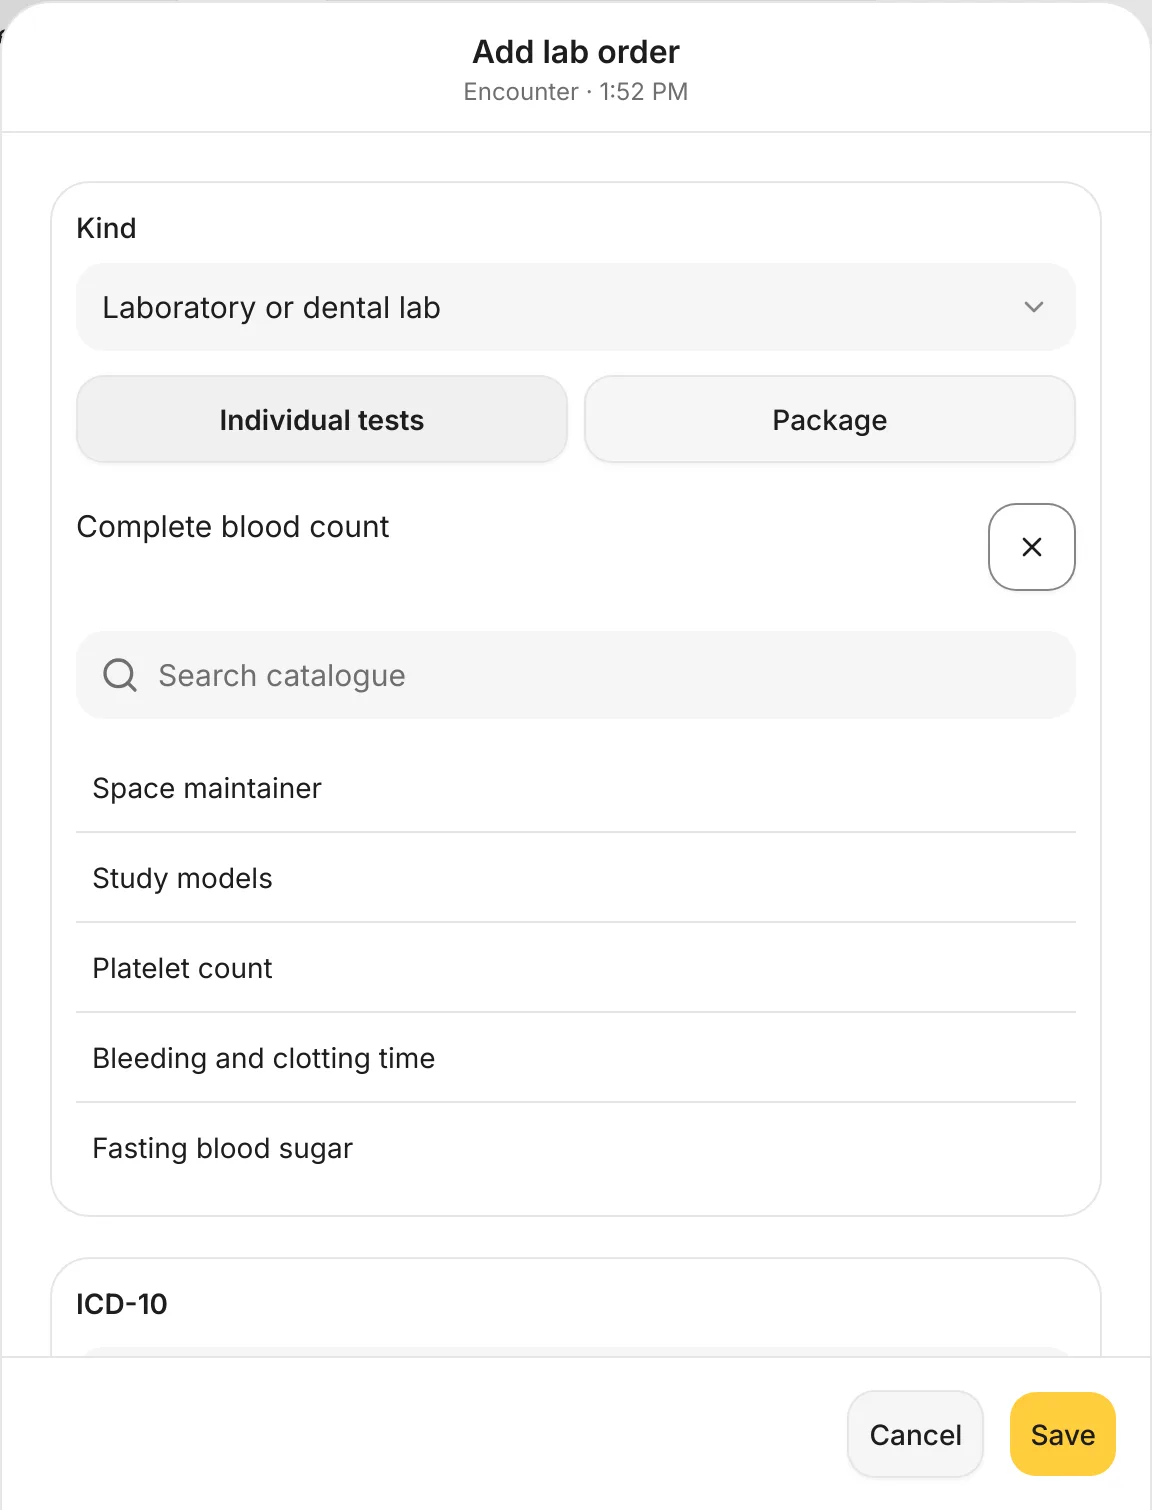
- Pick the Kind, for example Laboratory or dental lab.
- Choose Individual tests or Package.
- Tick the tests you want, or use Search catalogue. The list includes dental lab work (crowns, dentures, night guards) and blood tests. If a test isn't listed, type its name and tap Use "…". Work from the patient's treatment plan is offered under From the treatment plan.
- Under ICD-10, search by code or name to add the diagnosis if you need to.
- Under Clinical reason, say why you're ordering it.
- Check the Destination: In-house, Referral partner or Patient-arranged.
- Tap Save.
You should see: a tick beside each test you chose, and the chosen tests listed under the catalogue, each with ✕ to remove it. The list stays where it is while you tick, and your search stays in the box.
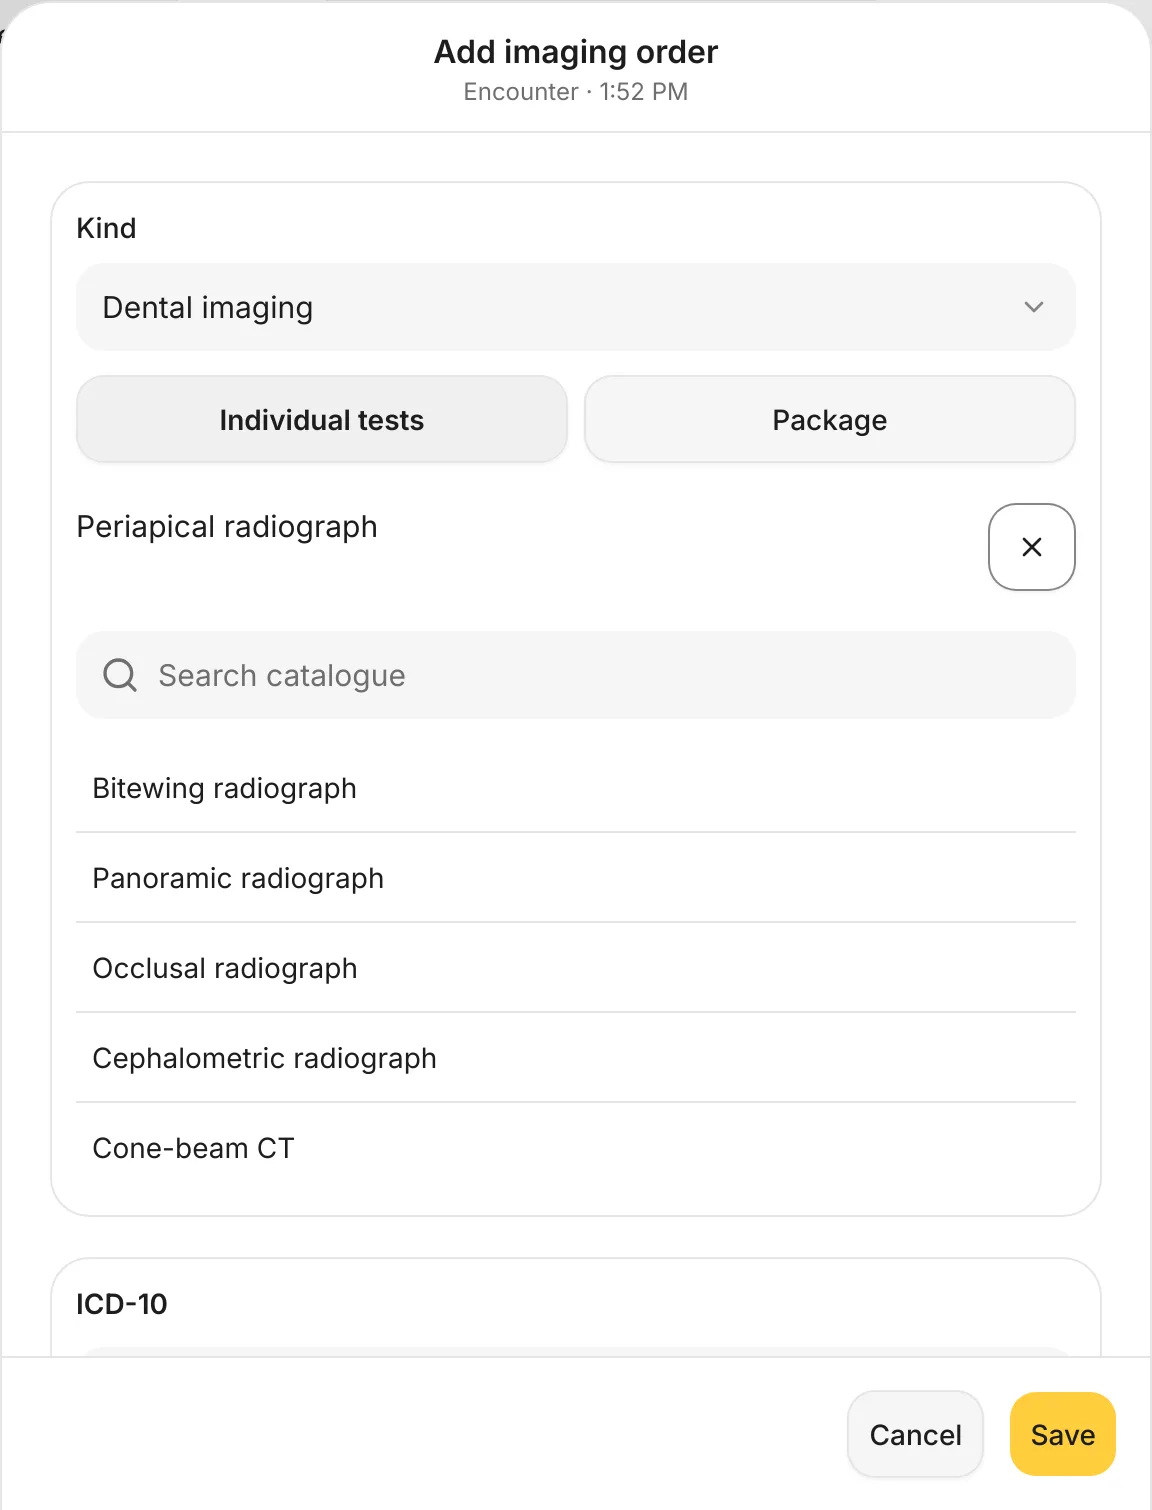
An Imaging order works the same way. Its Kind is Dental imaging, and the list has X-rays such as Periapical radiograph, Bitewing radiograph, Panoramic radiograph and Cone-beam CT.
12. Check the order sheet
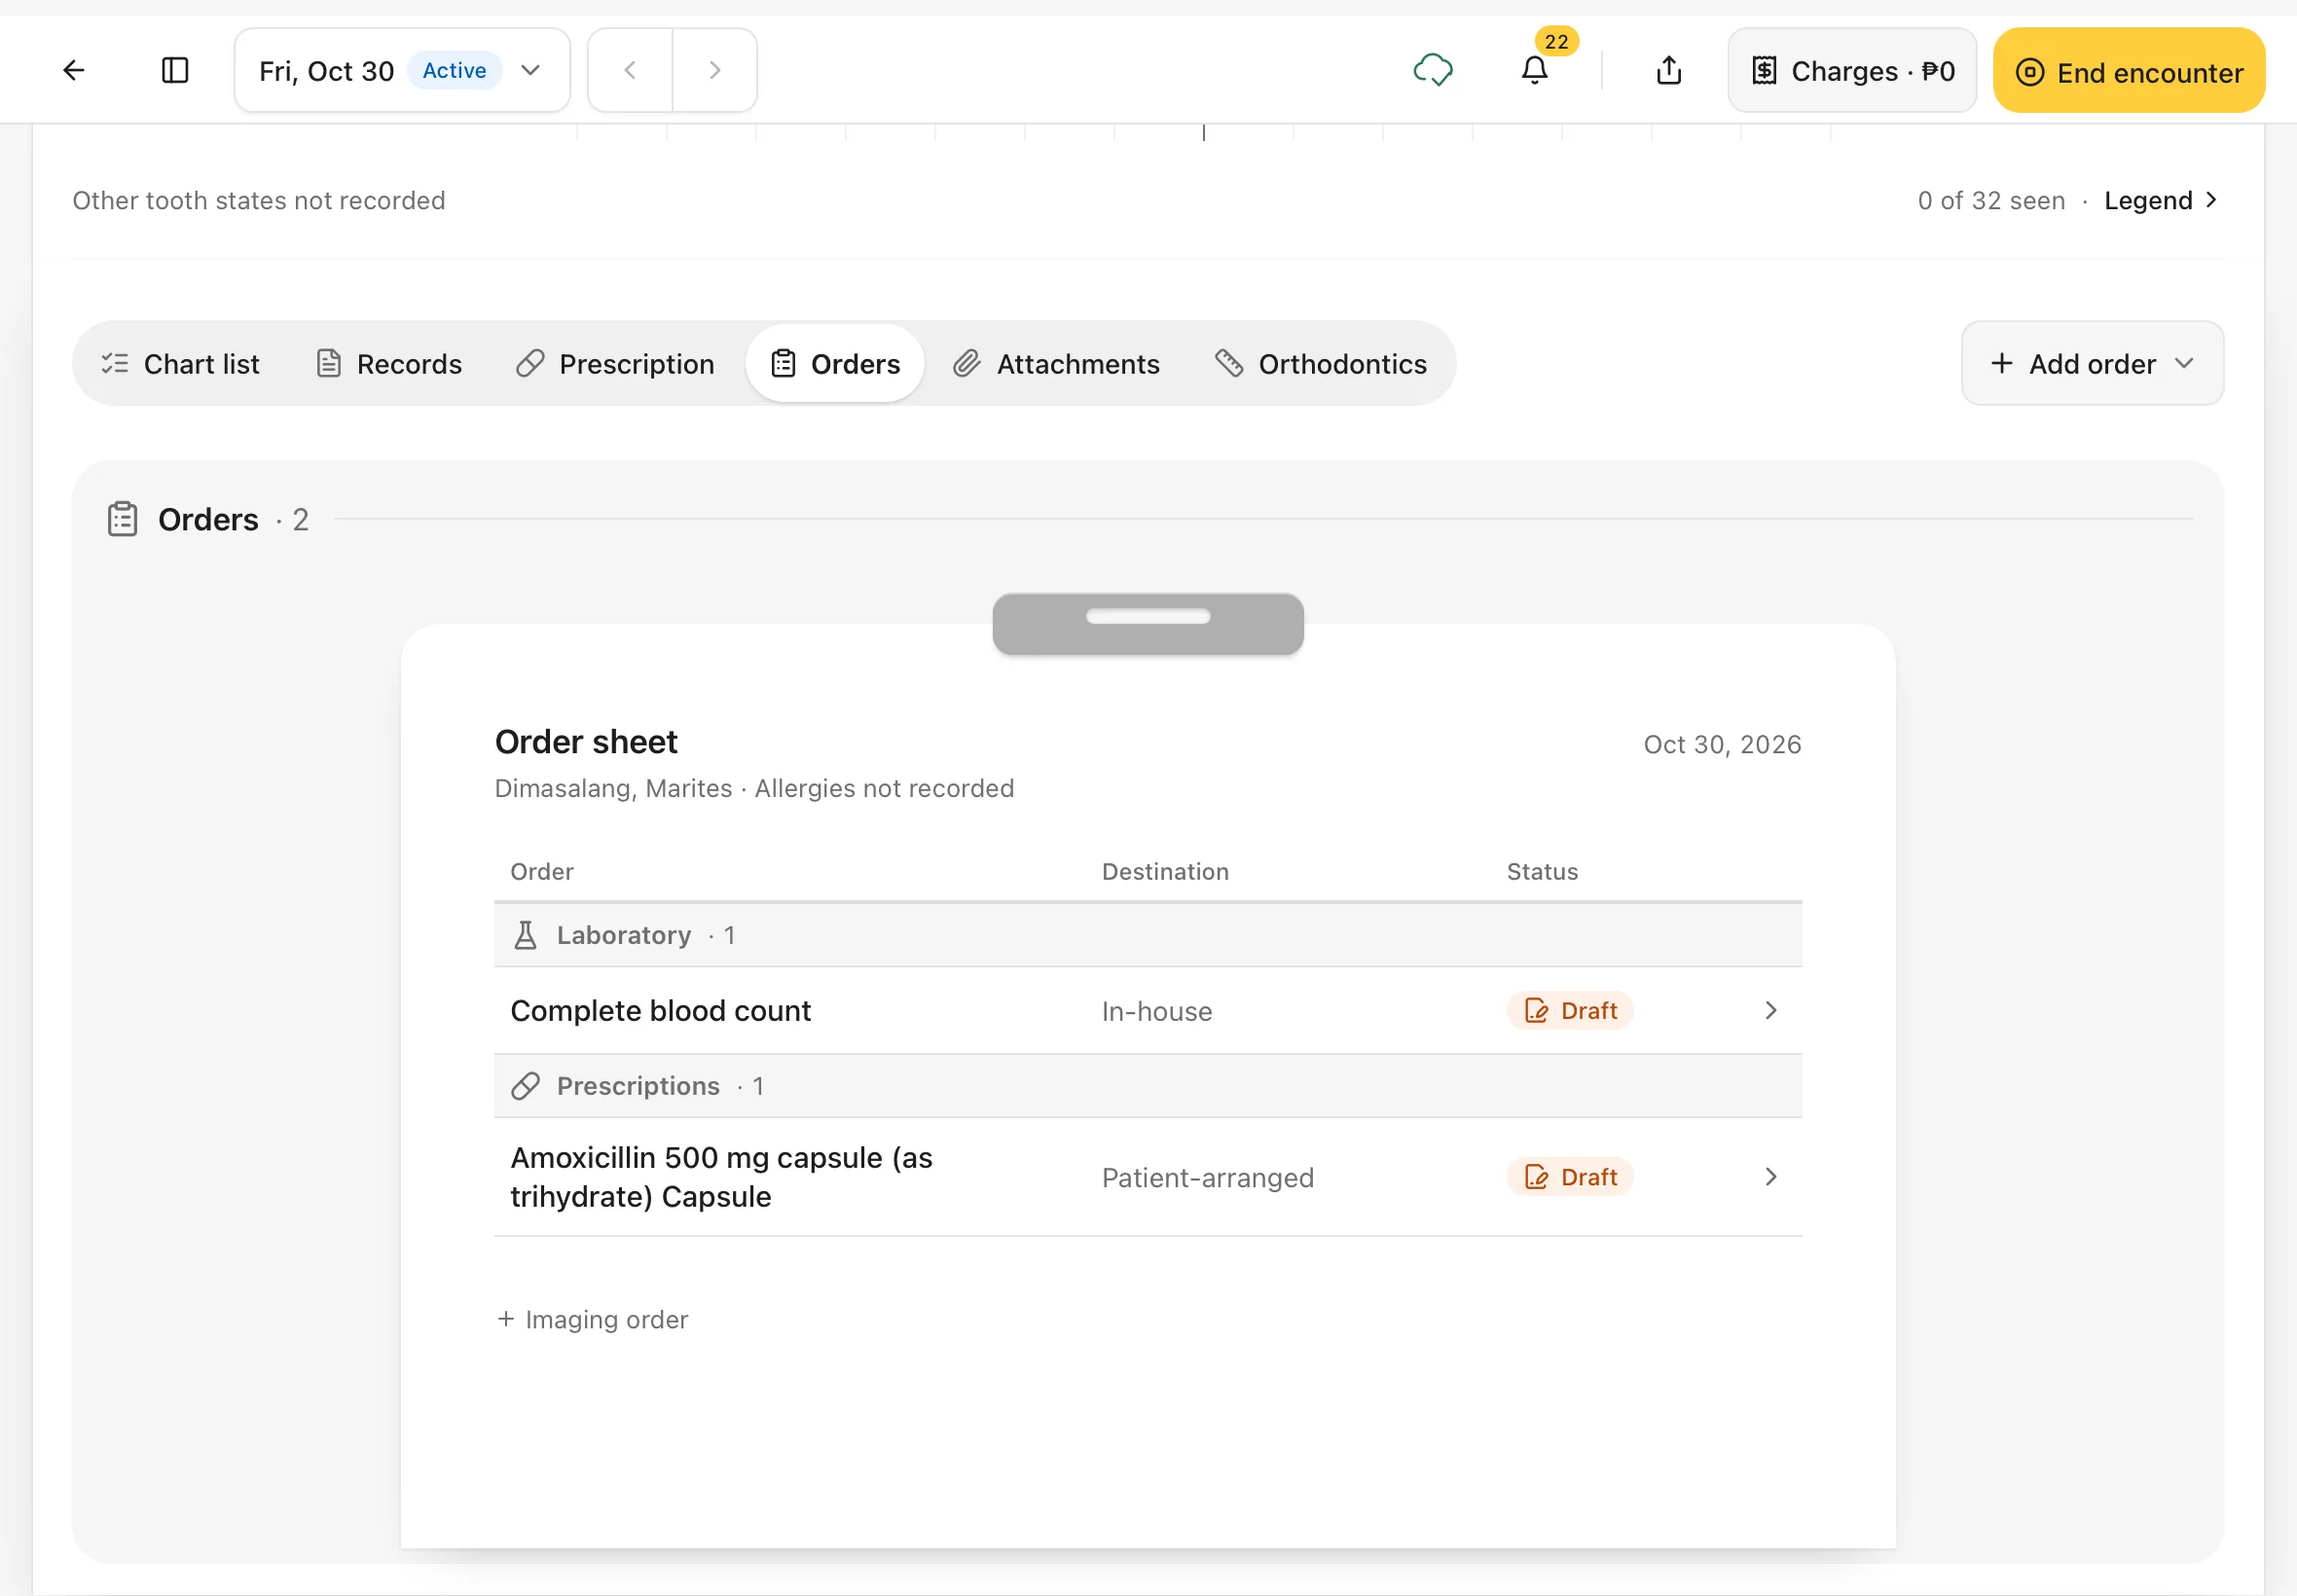
The Orders view shows every order for this visit on one order sheet, grouped by kind (Laboratory, Imaging, Prescriptions), with each one's Destination and Status.
New orders start as Draft. Tap a line to see its details. The + Lab order and + Imaging order links under the list add a kind of order the sheet doesn't have yet.
You should see: your order listed with the status Draft.
13. Send orders from the Orders page
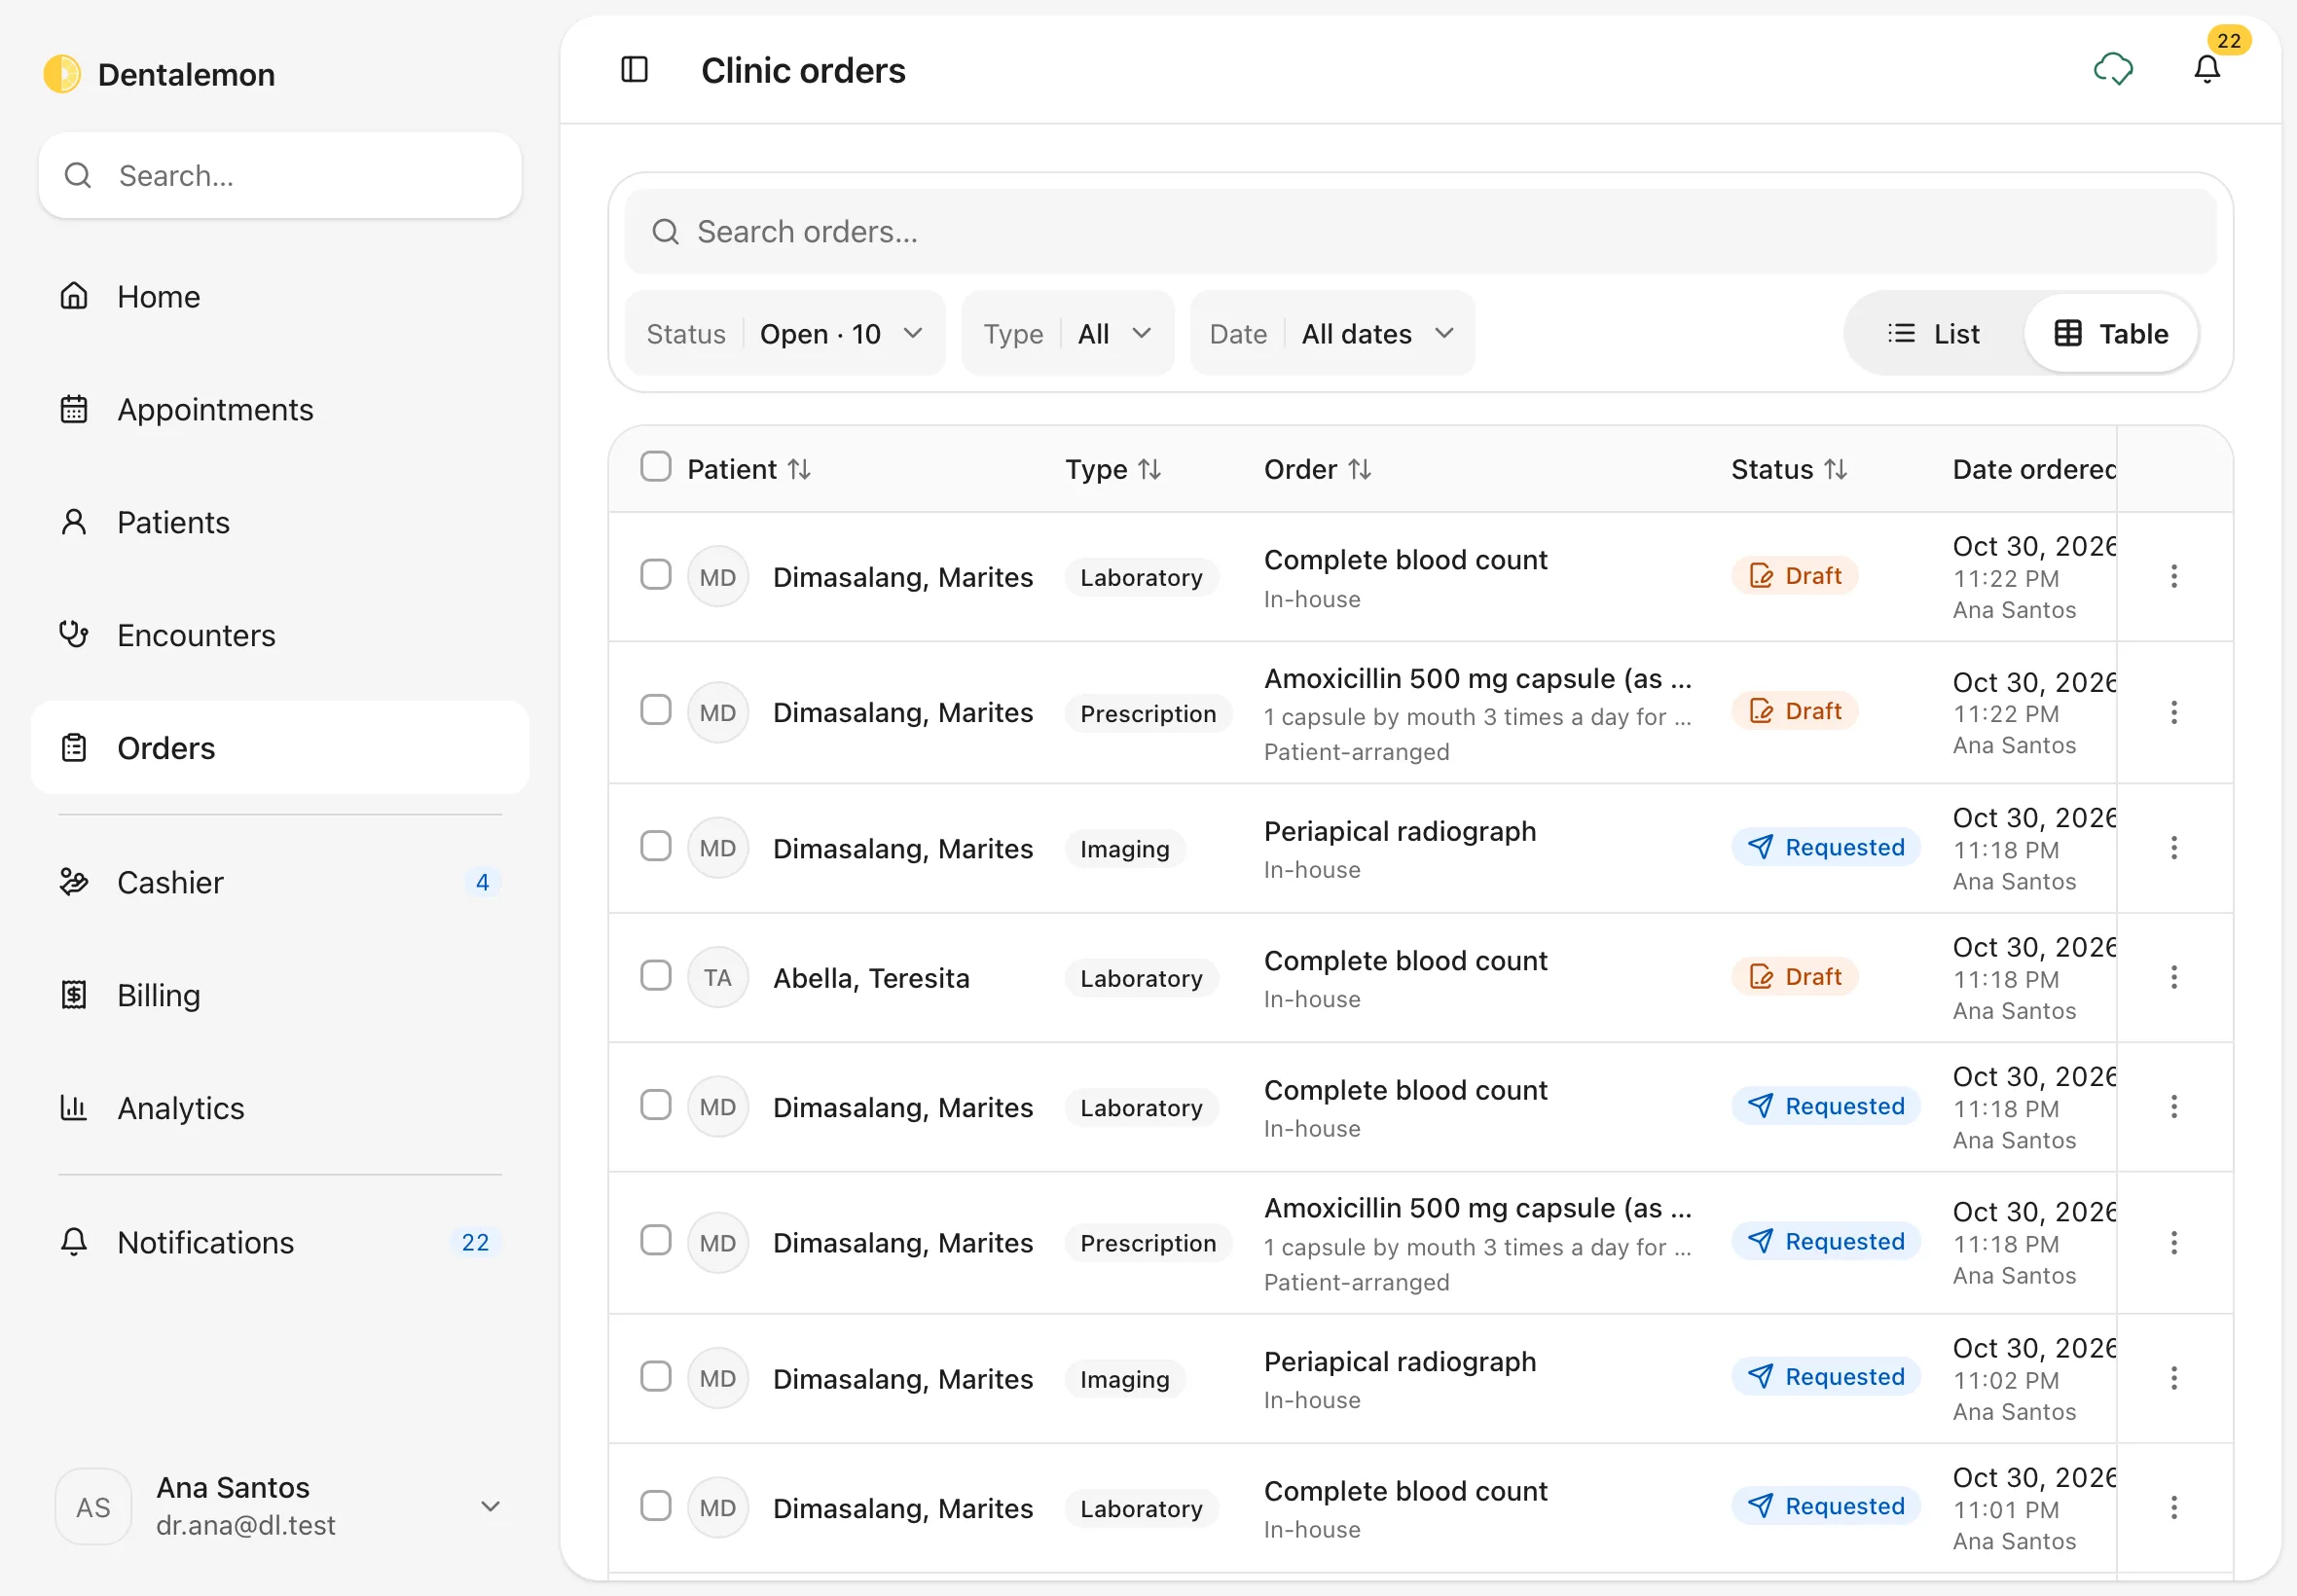
Draft orders are sent when you finish the visit (see Finish the visit). To send one sooner, or to follow up on orders across the clinic, tap Orders in the sidebar.
Clinic orders lists every order in your clinic. By default it shows Open orders (Draft and Requested). Use the Status, Type and Date filters, or Search orders… by patient name. List and Table switch the layout. A row's ⋮ menu has View encounter and Record logs.
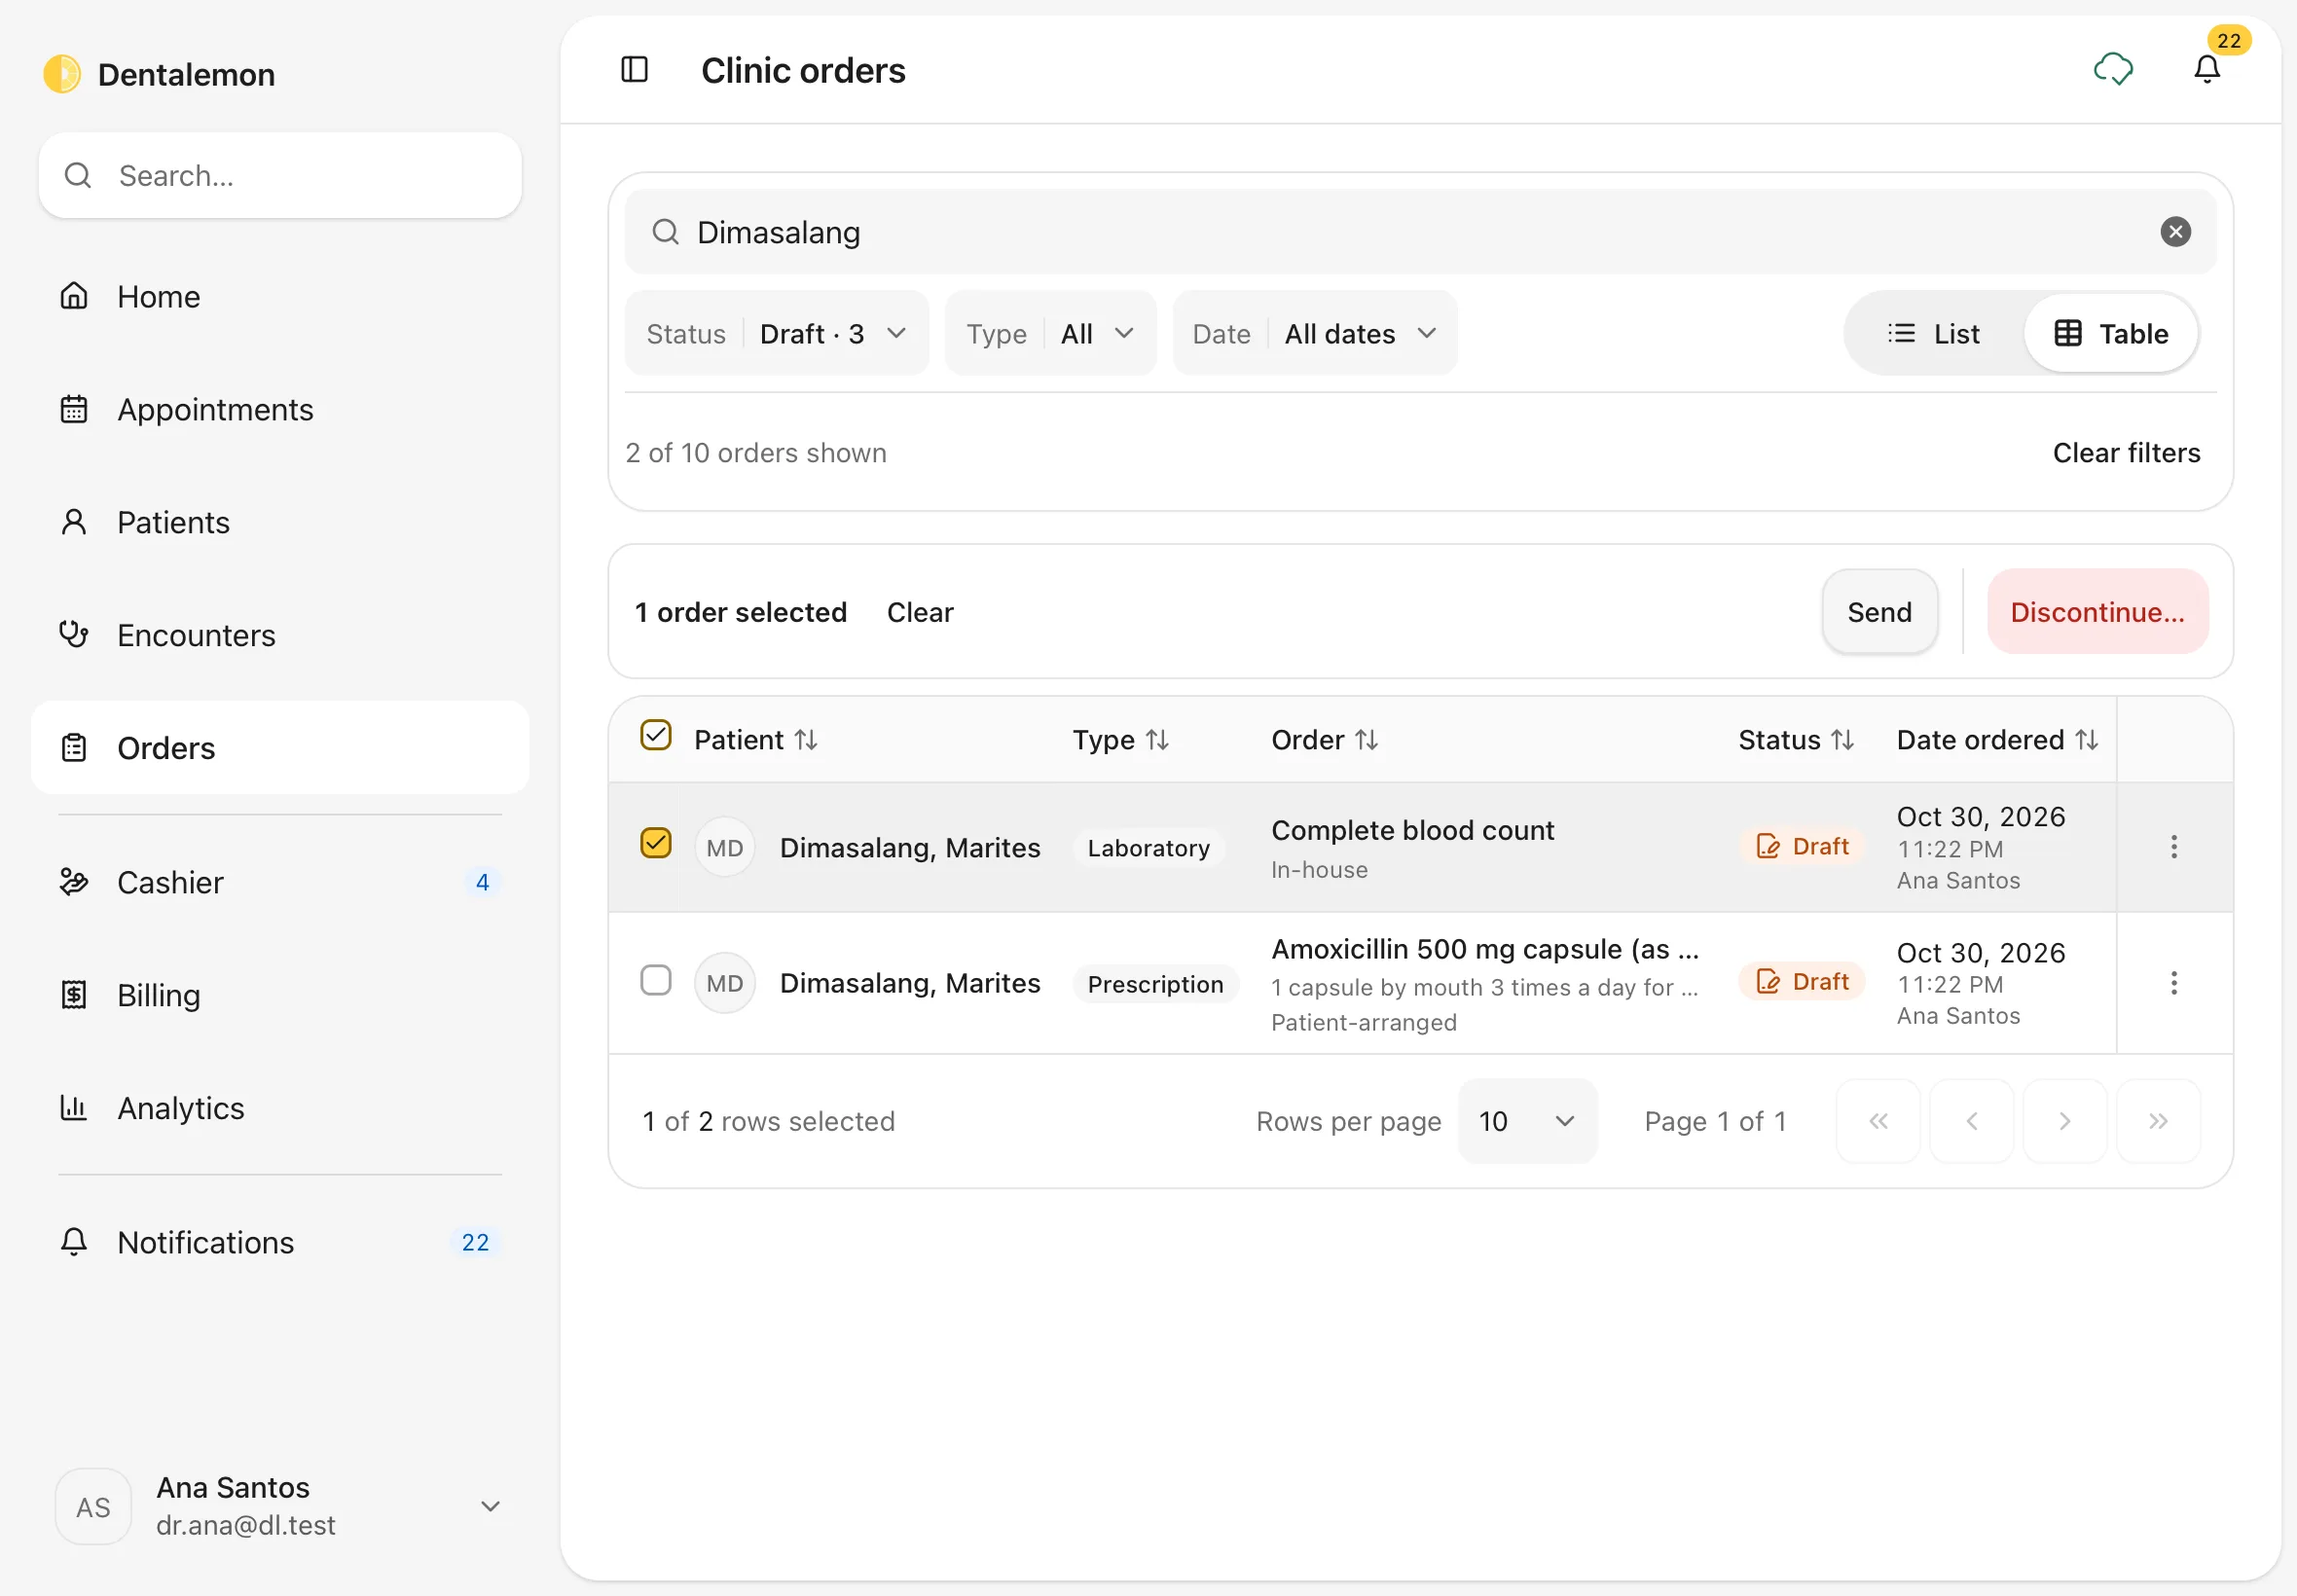
To send an order, tick it, then tap Send. Discontinue… cancels it (you'll be asked why).
You should see: 1 order selected with Send and Discontinue….
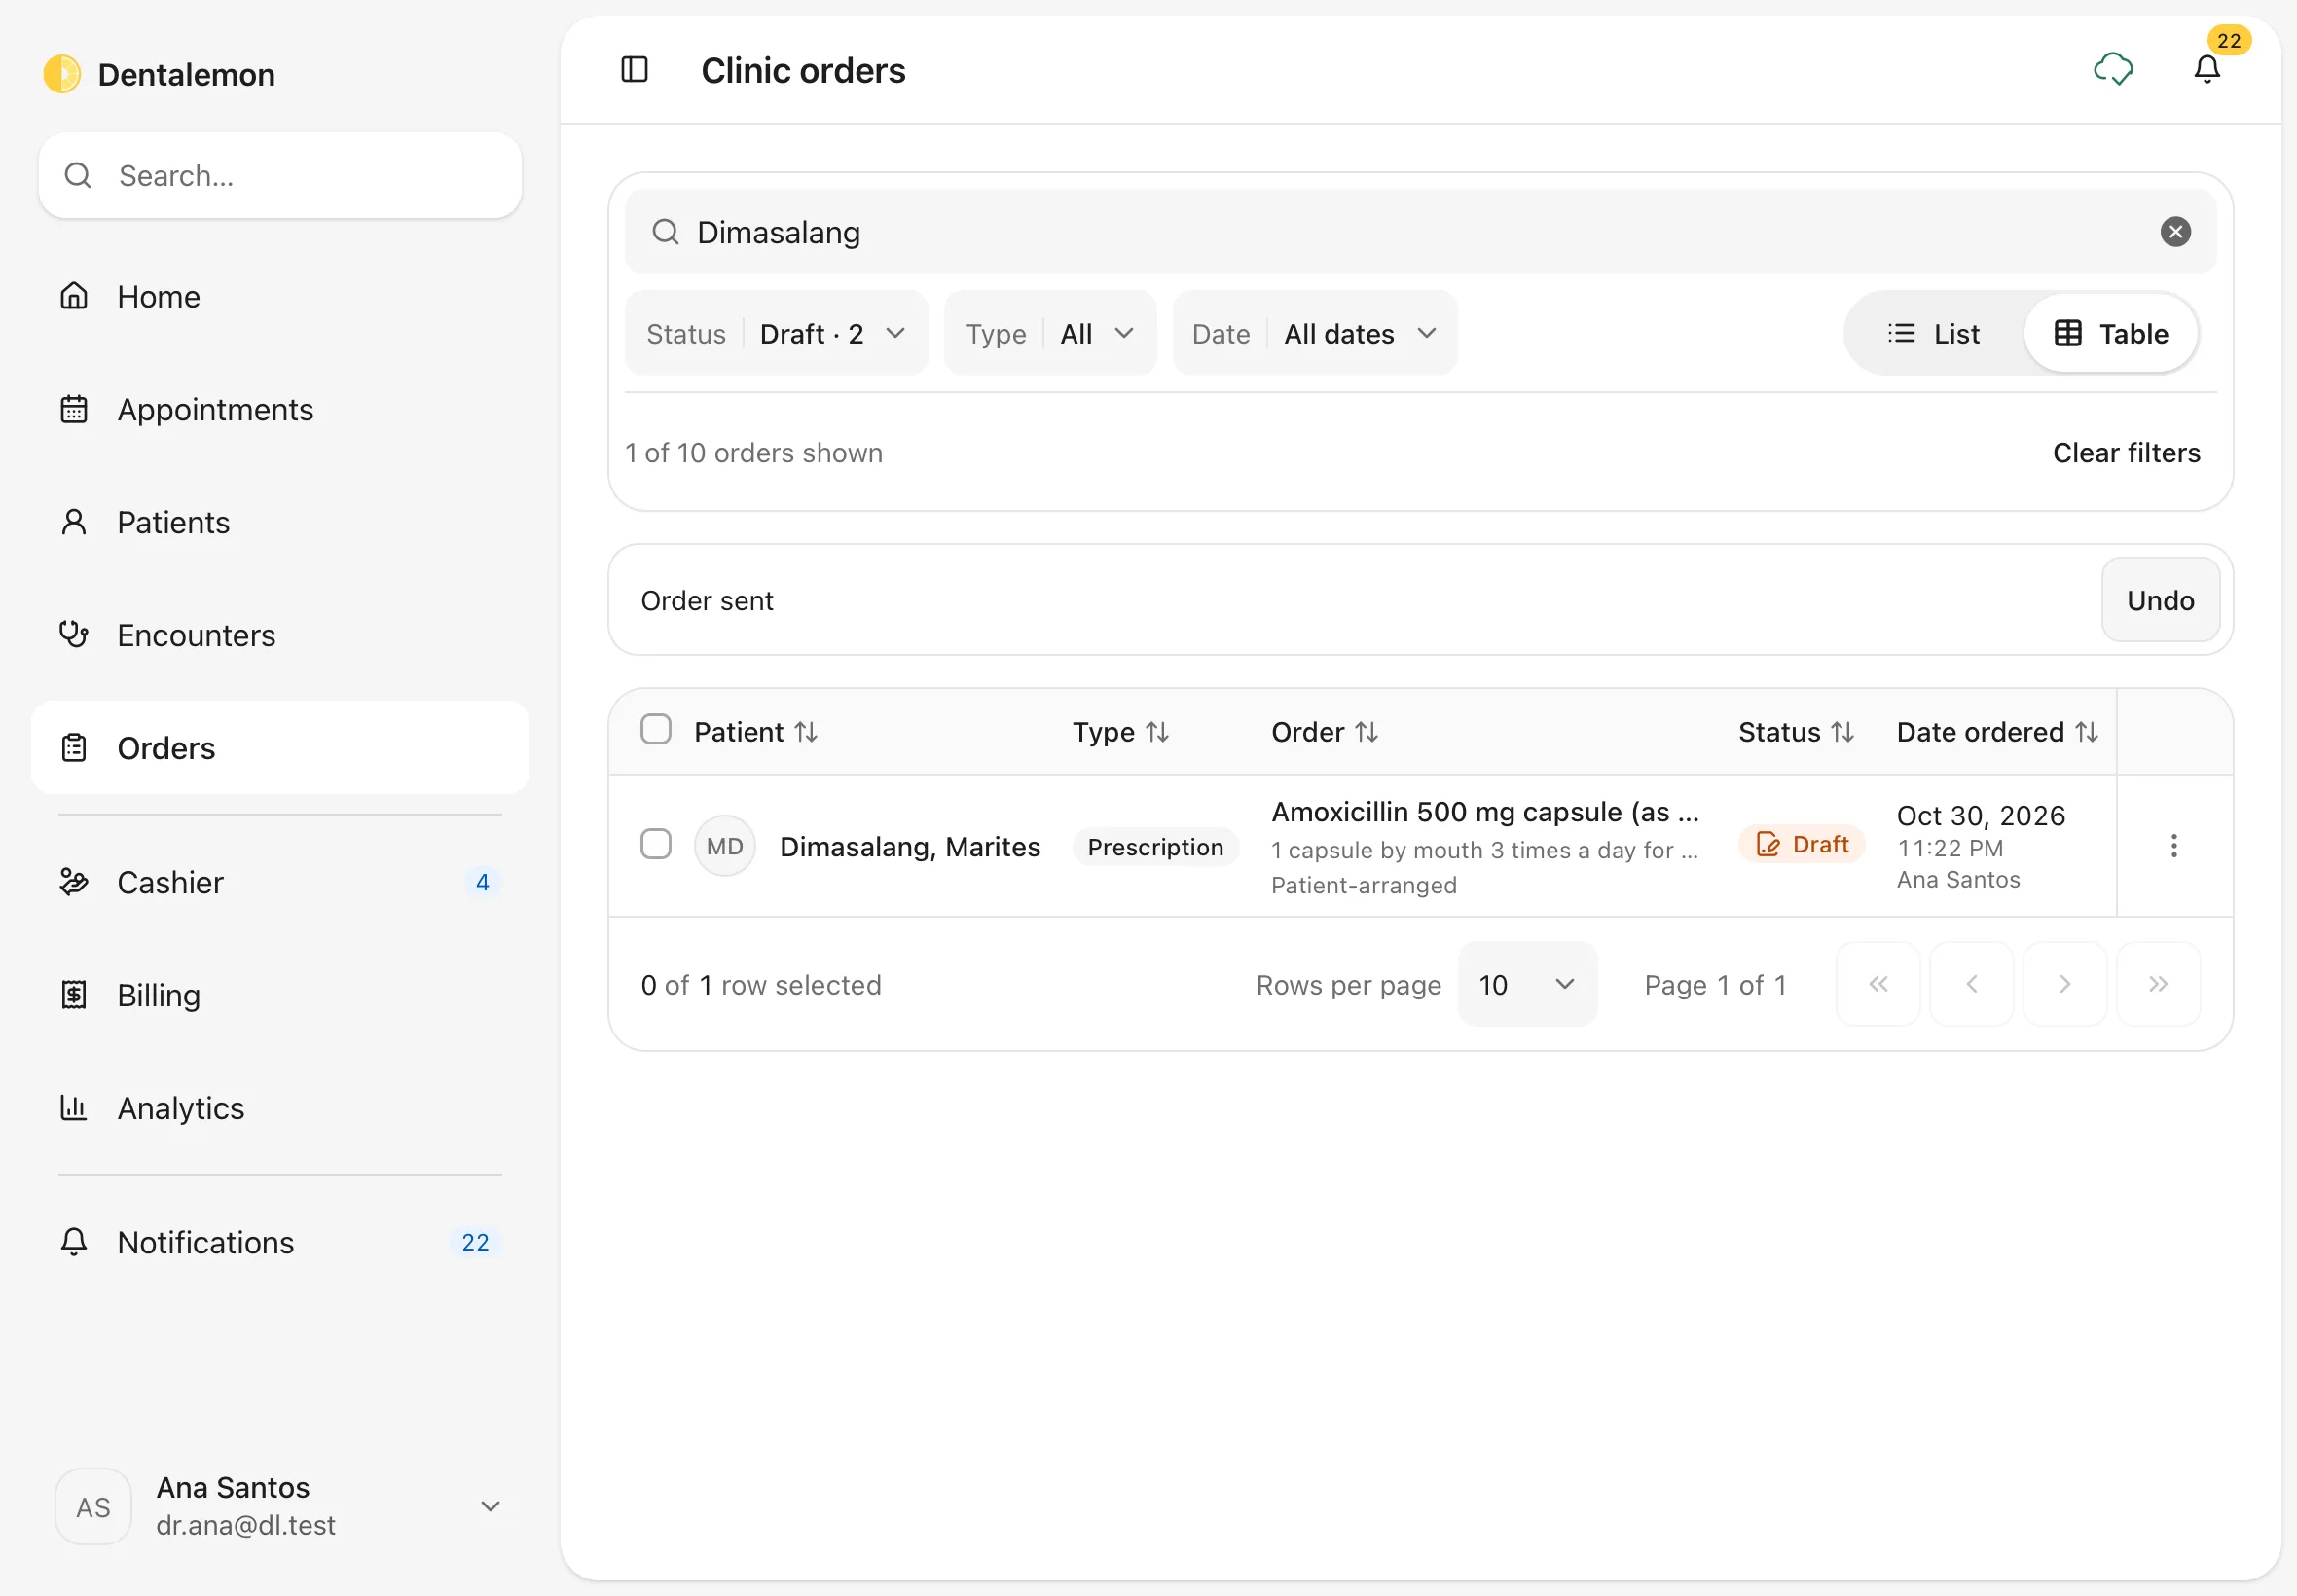
Order sent appears with Undo. The order is now Requested, so it leaves the Draft list.
Attach photos and documents
14. Add an attachment
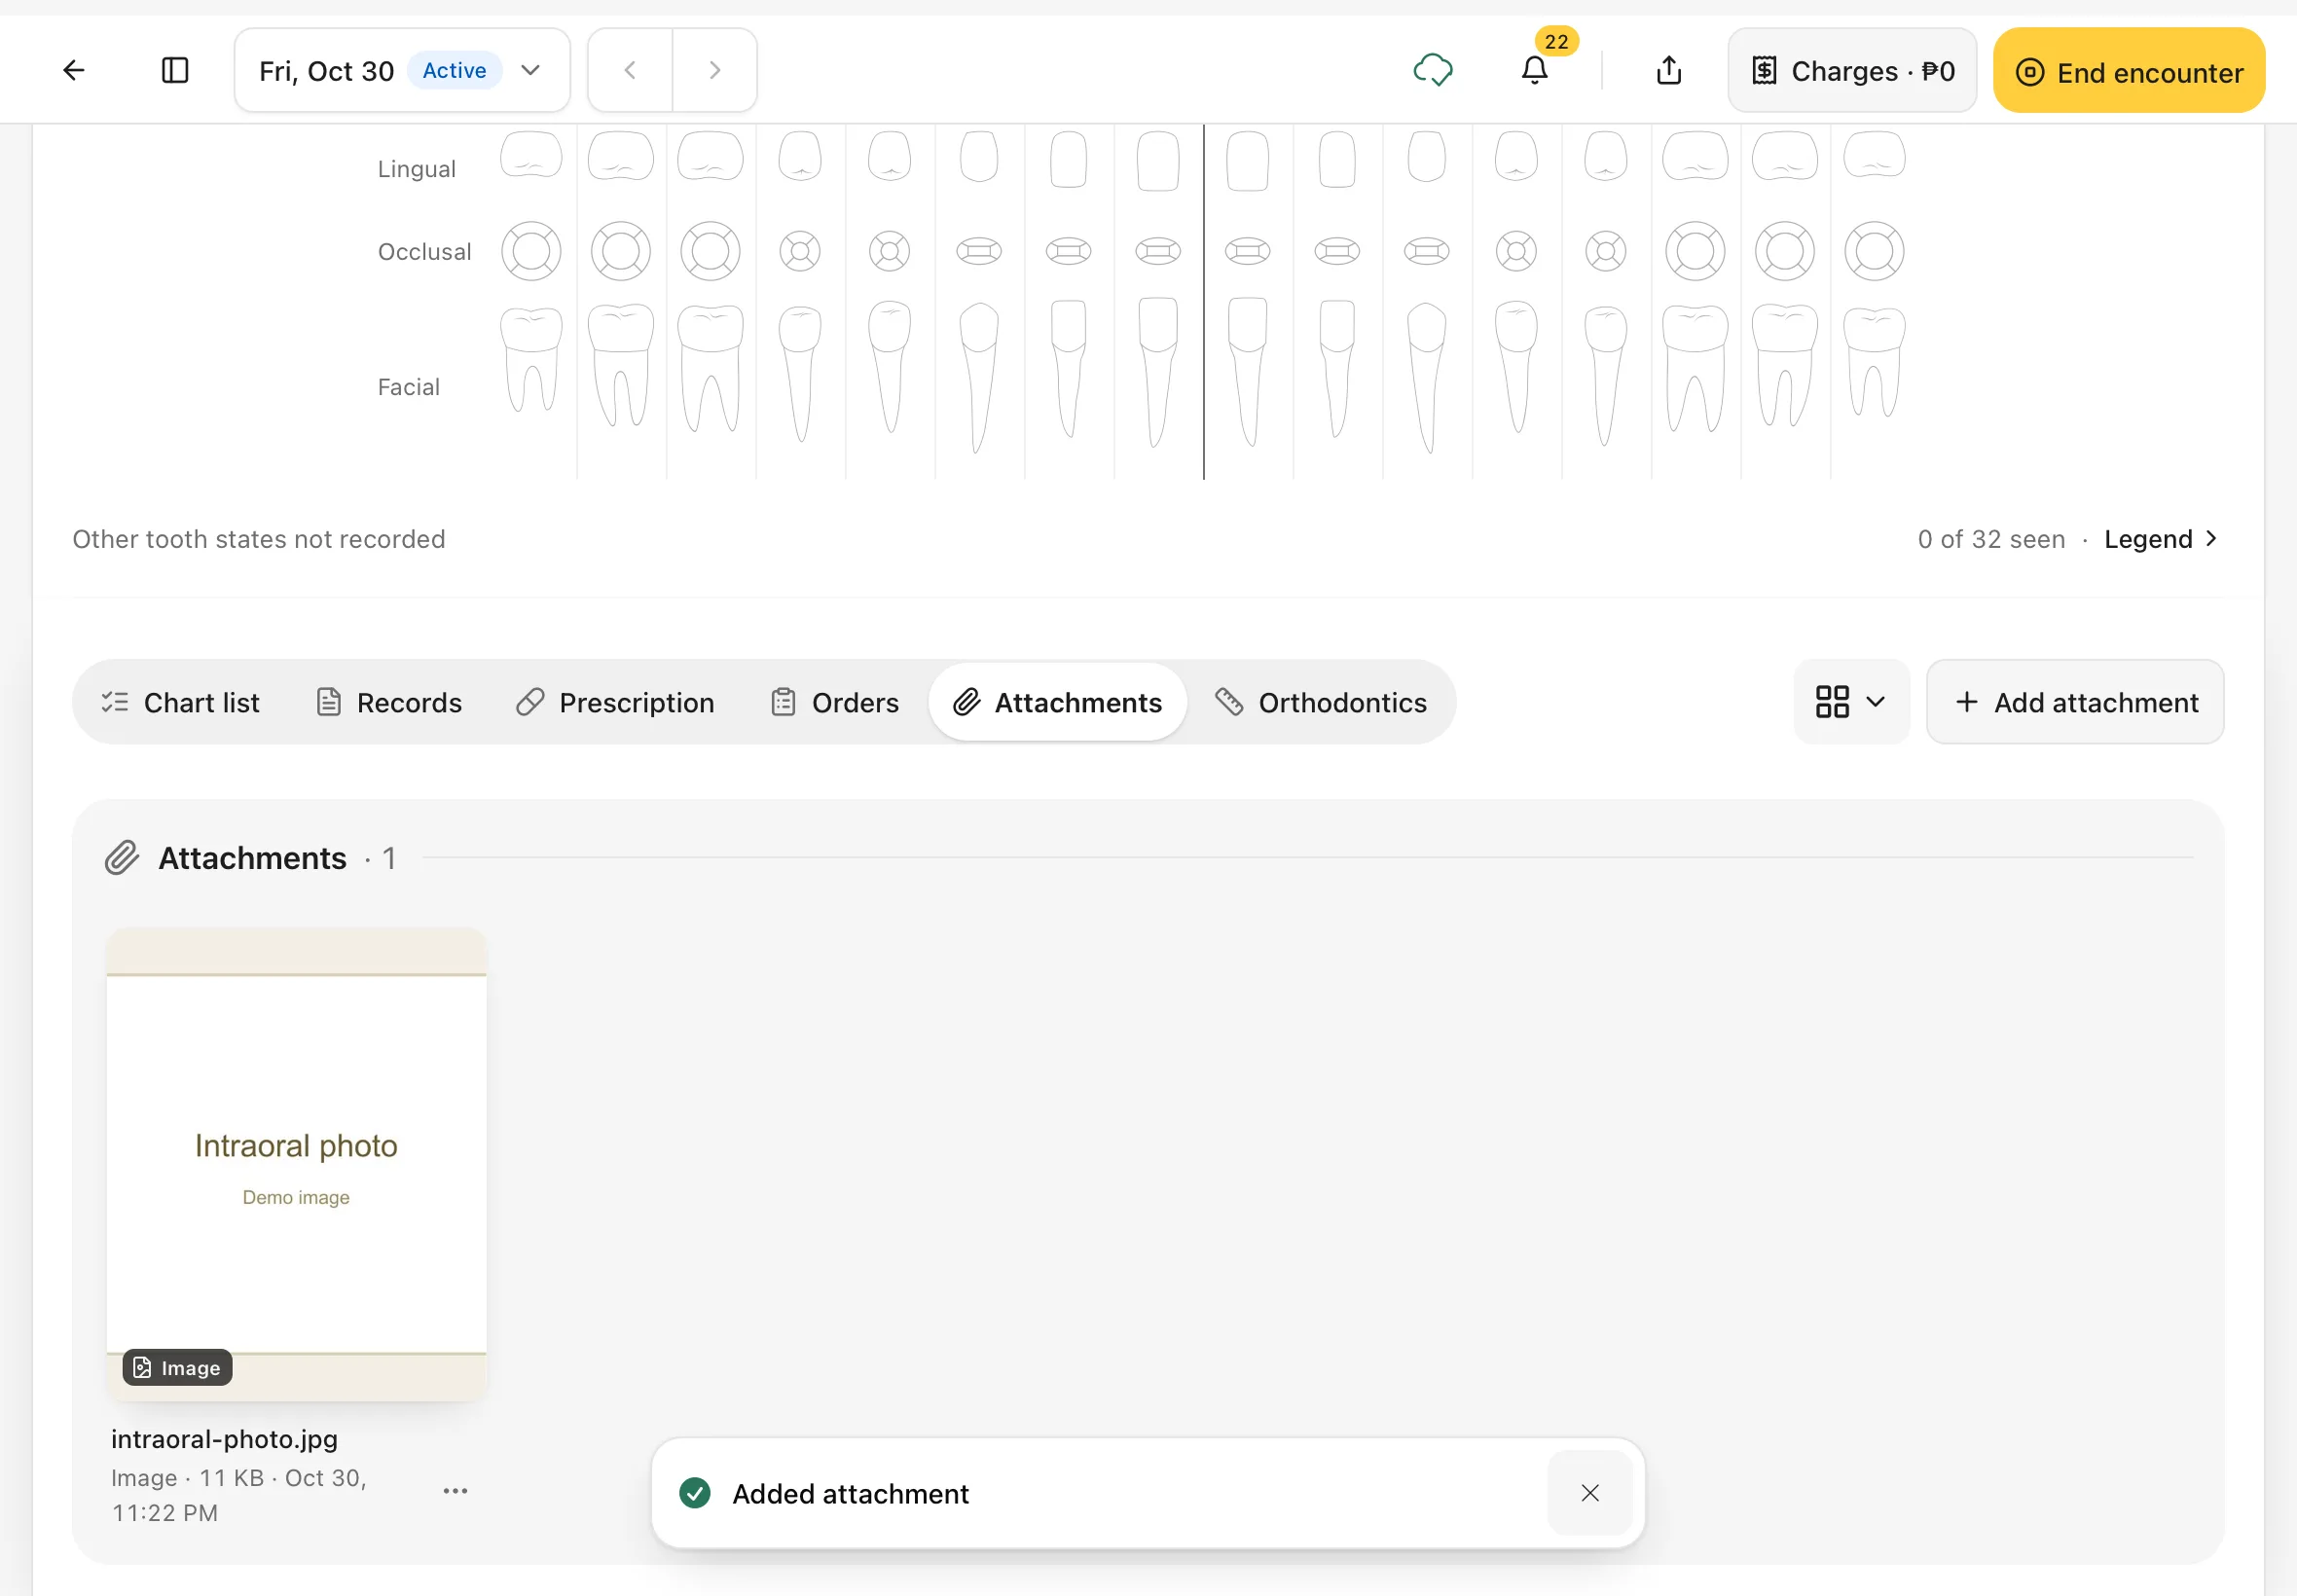
Tap Attachments in the row of views, then Add attachment.
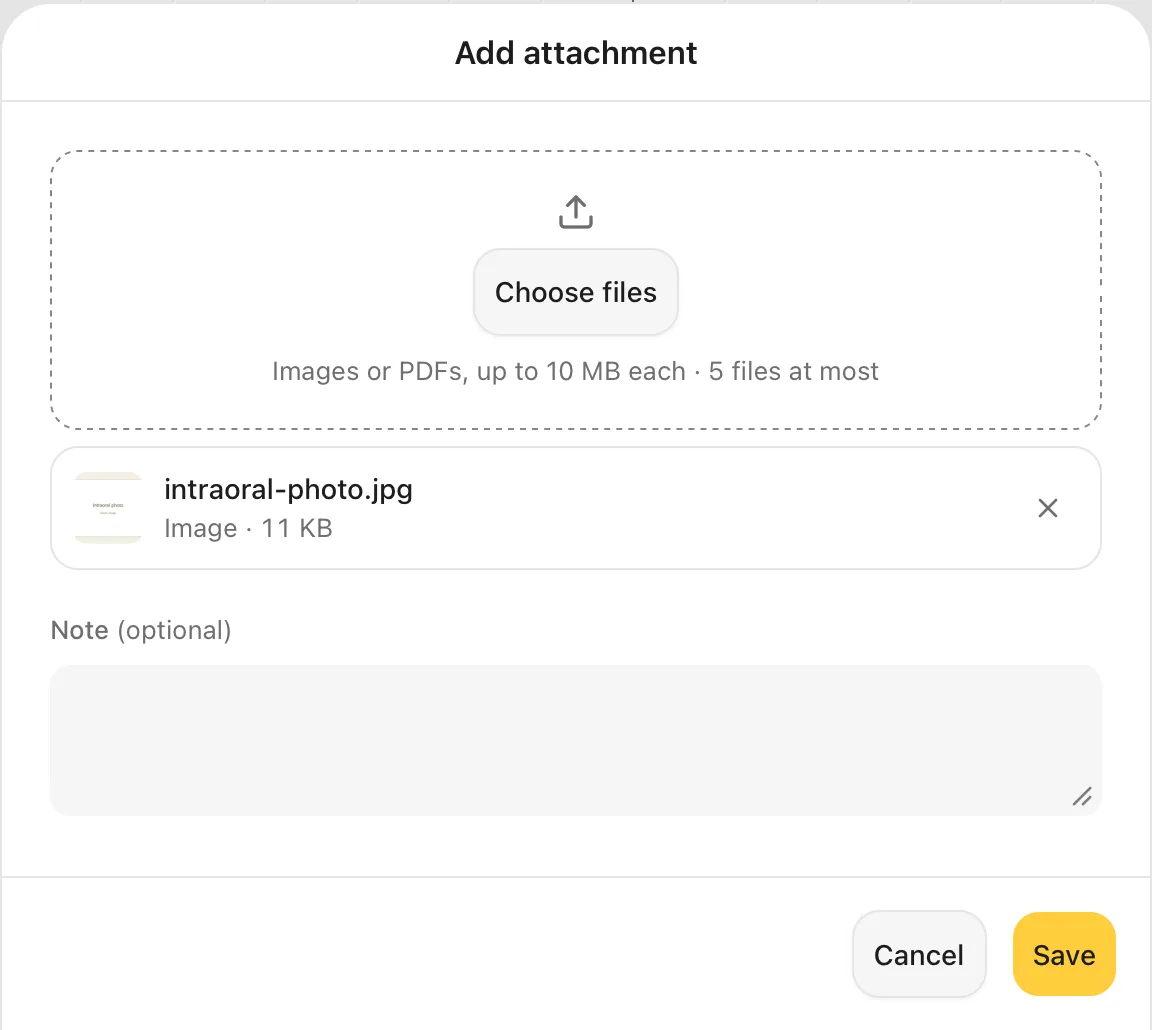
Tap Choose files and pick photos or PDFs: up to 10 MB each, 5 files at a time. Add a Note if you want, then tap Save.
On an iPad you can take a photo with the camera or pick one from your photo library.
You should see: your file listed under Choose files.
The file appears in the Attachments view. To switch the layout, tap the grid button, then Grid or List.
15. Open an attachment
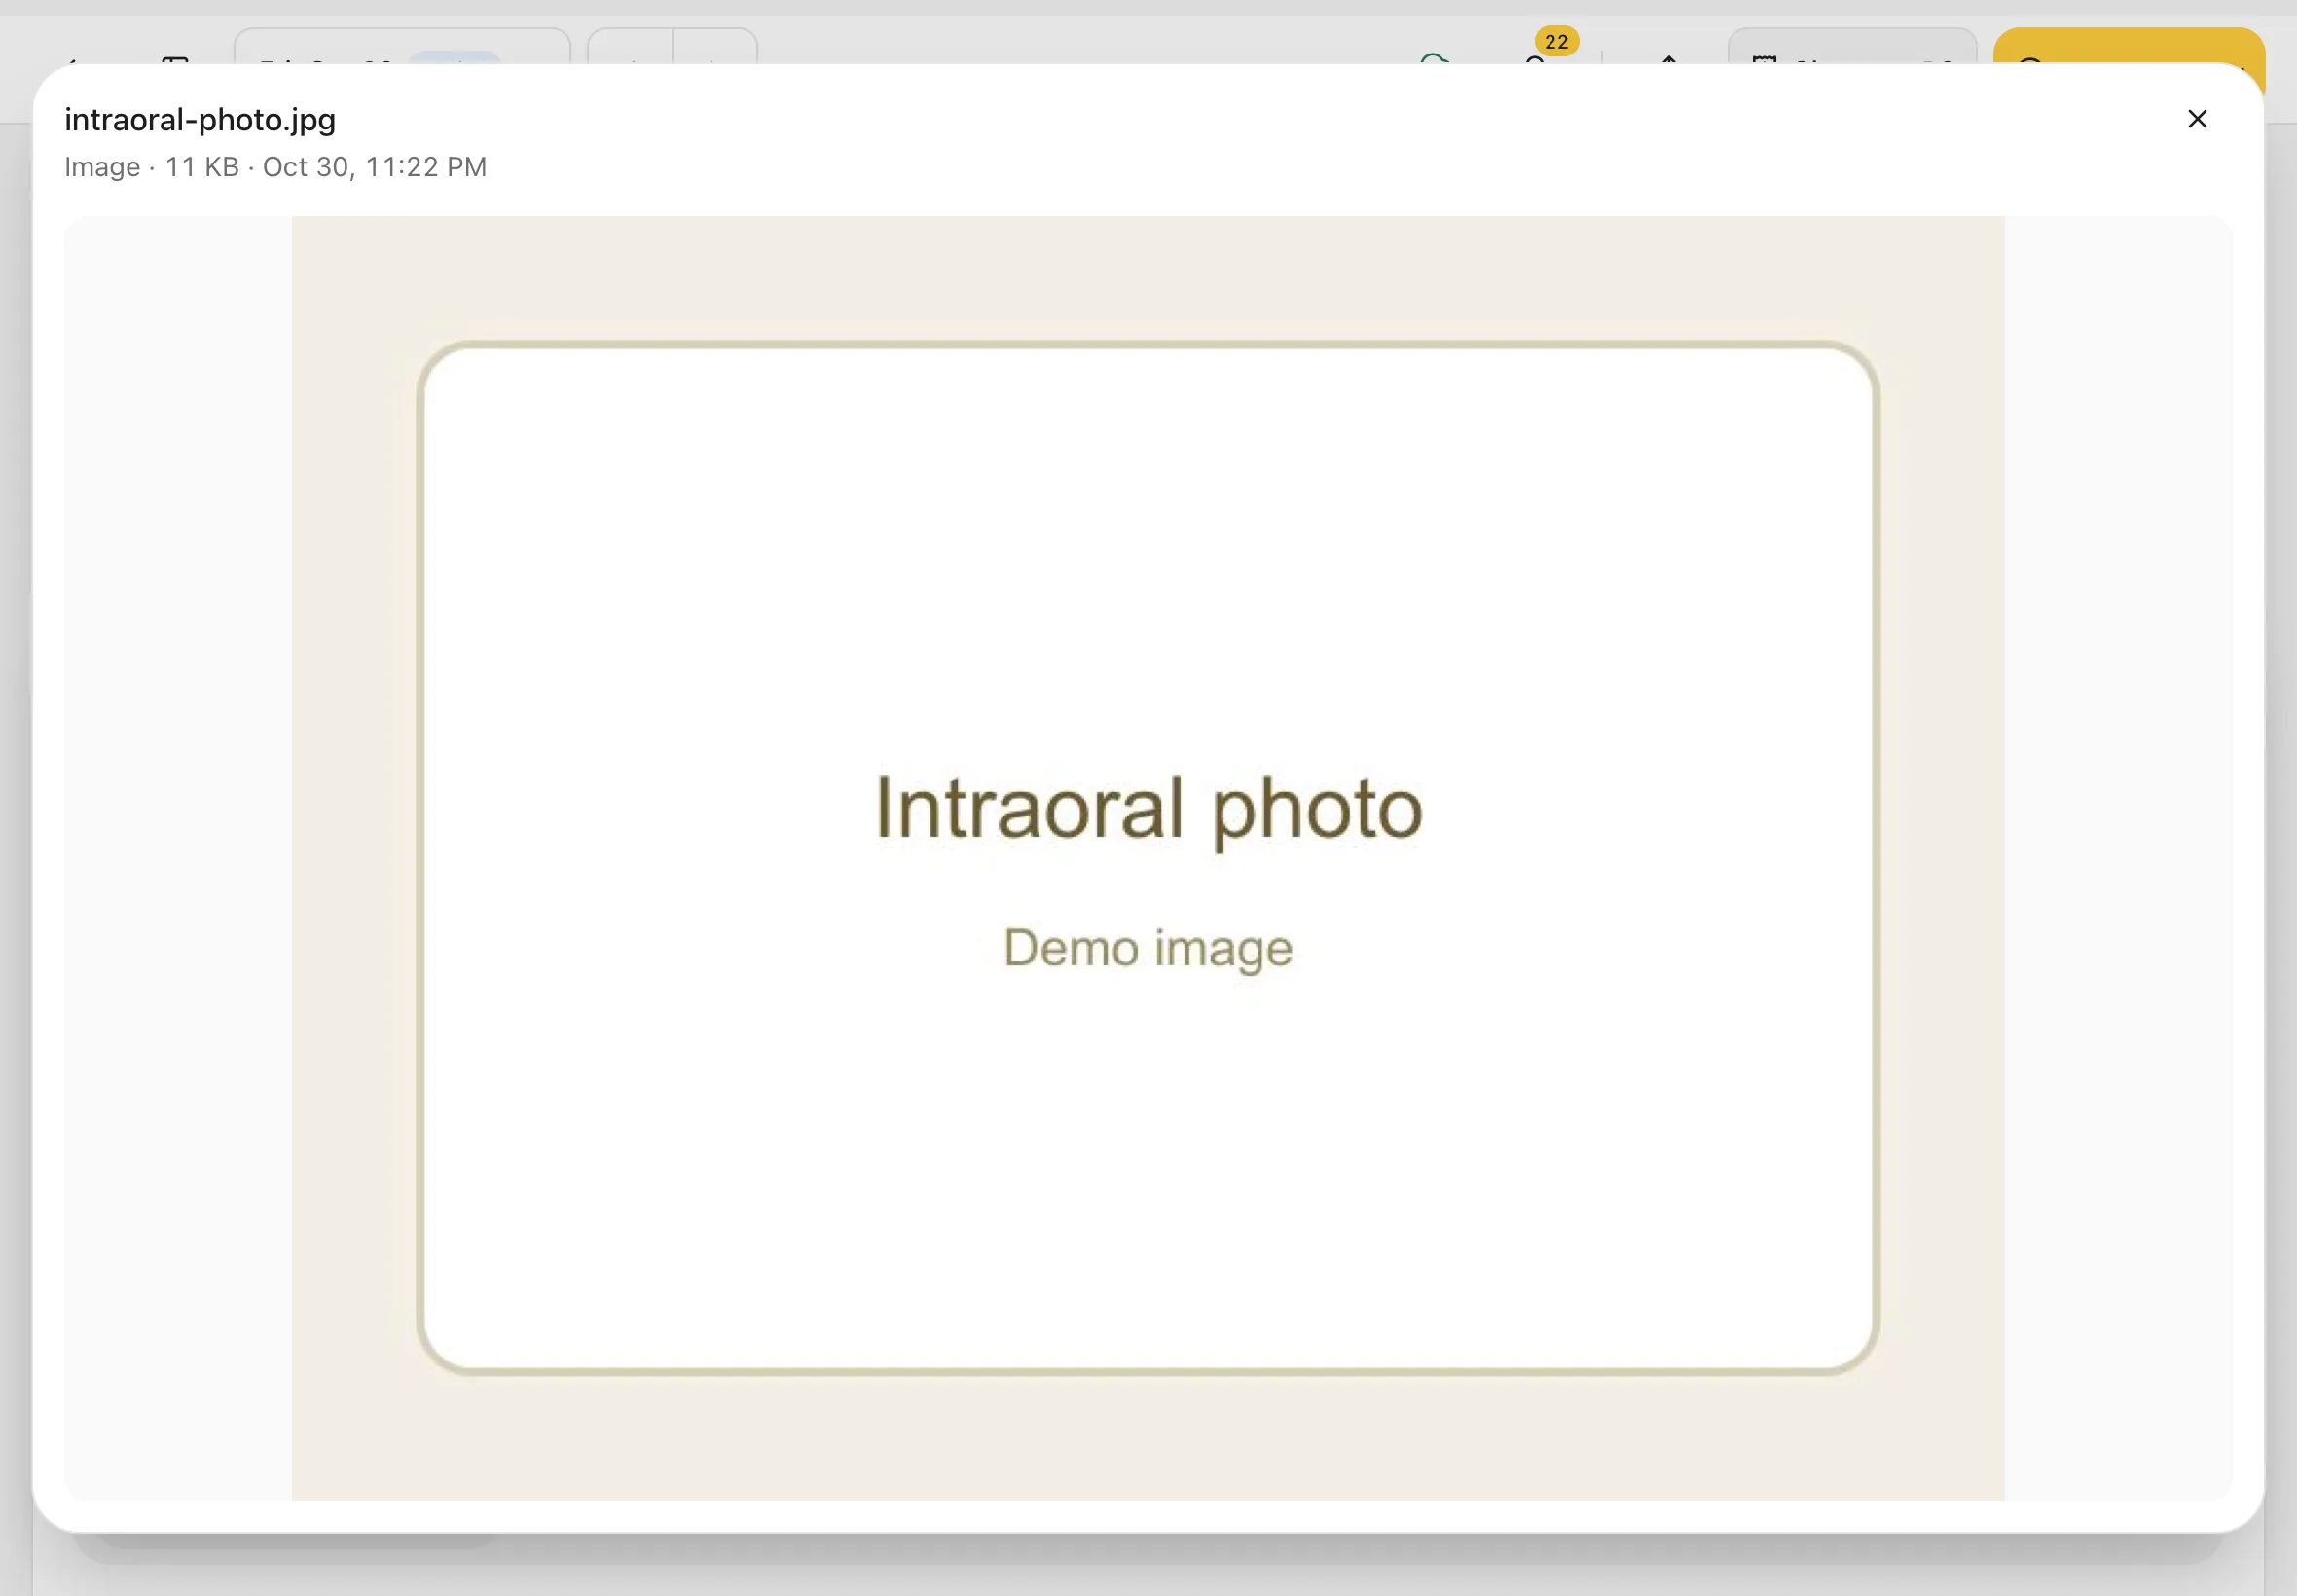
Tap the picture or file. It opens large, with its name, type, size and the date it was added. Tap ✕ at the top right to close it.
Tips
Check allergies before you prescribe
The order sheet shows the patient's allergies under their name. If it says Allergies not recorded, ask the patient and add them in Records › + Allergies (step 3).
If something goes wrong
- The medicine isn't in the list. Try fewer letters, or the generic name. You can also type the details yourself on the Medicine page.
- Your licence number is blank on the prescription. Add it in Settings › Profile.
- You sent an order by mistake. Tap Undo right away. Later, use Discontinue… on the Orders page.
Good to know
- You can add Lab order and Imaging order only. Older visits may show other kinds of order, but you can't create them.
- Send marks the order as requested in Dentalemon. It doesn't send anything to an outside lab: give the patient the printout or contact the lab yourself.
- Photos are made smaller when they're saved, to keep the app quick.