The patient page and profile
Before you start
- Open the patient: tap Patients in the sidebar, then tap their folder. The patient's page opens on Encounters.
Steps
1. Read the Summary
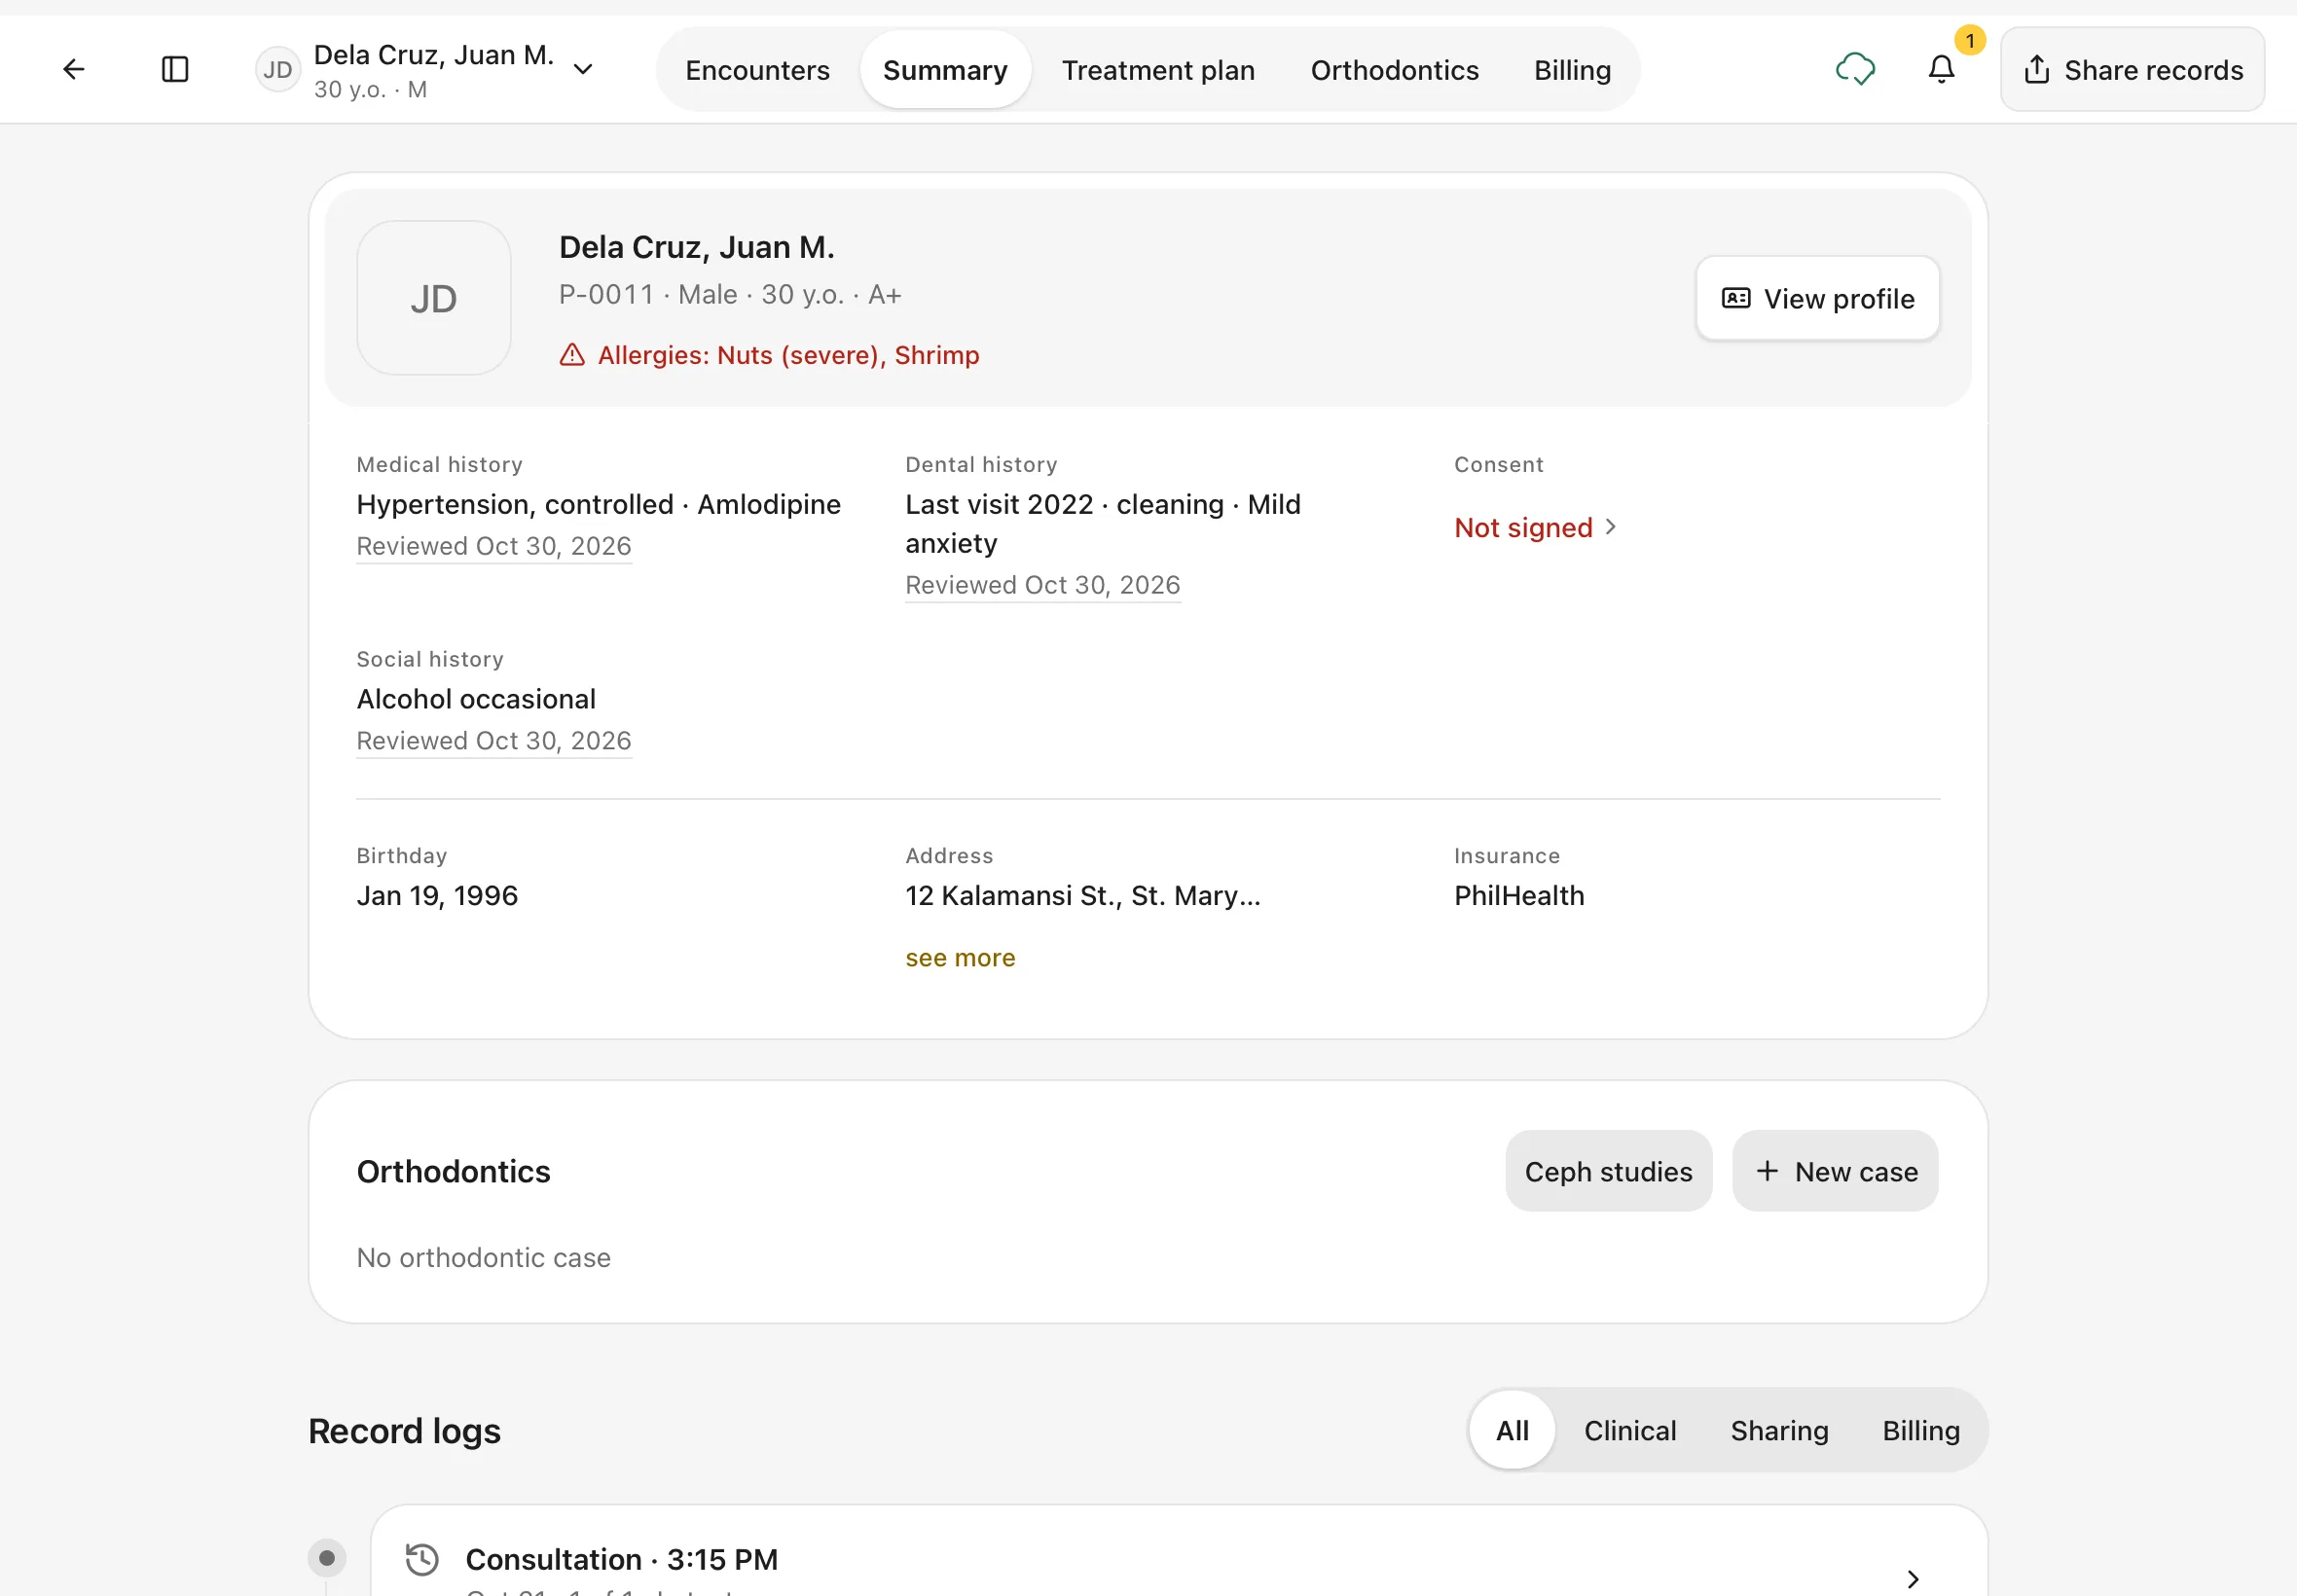
The tabs across the top are Encounters, Summary, Treatment plan, Orthodontics and Billing. Tap Summary.
You should see: the patient's name, patient number, sex, age and blood type, with Allergies in red when there are any. Below are Medical history, Dental history, Social history and Consent, then Birthday, Address and Insurance. Further down, Record logs lists everything recorded for this patient, newest first.
Tip
Use All, Clinical, Sharing and Billing above Record logs to show only one kind of activity.
2. See past visits on Encounters
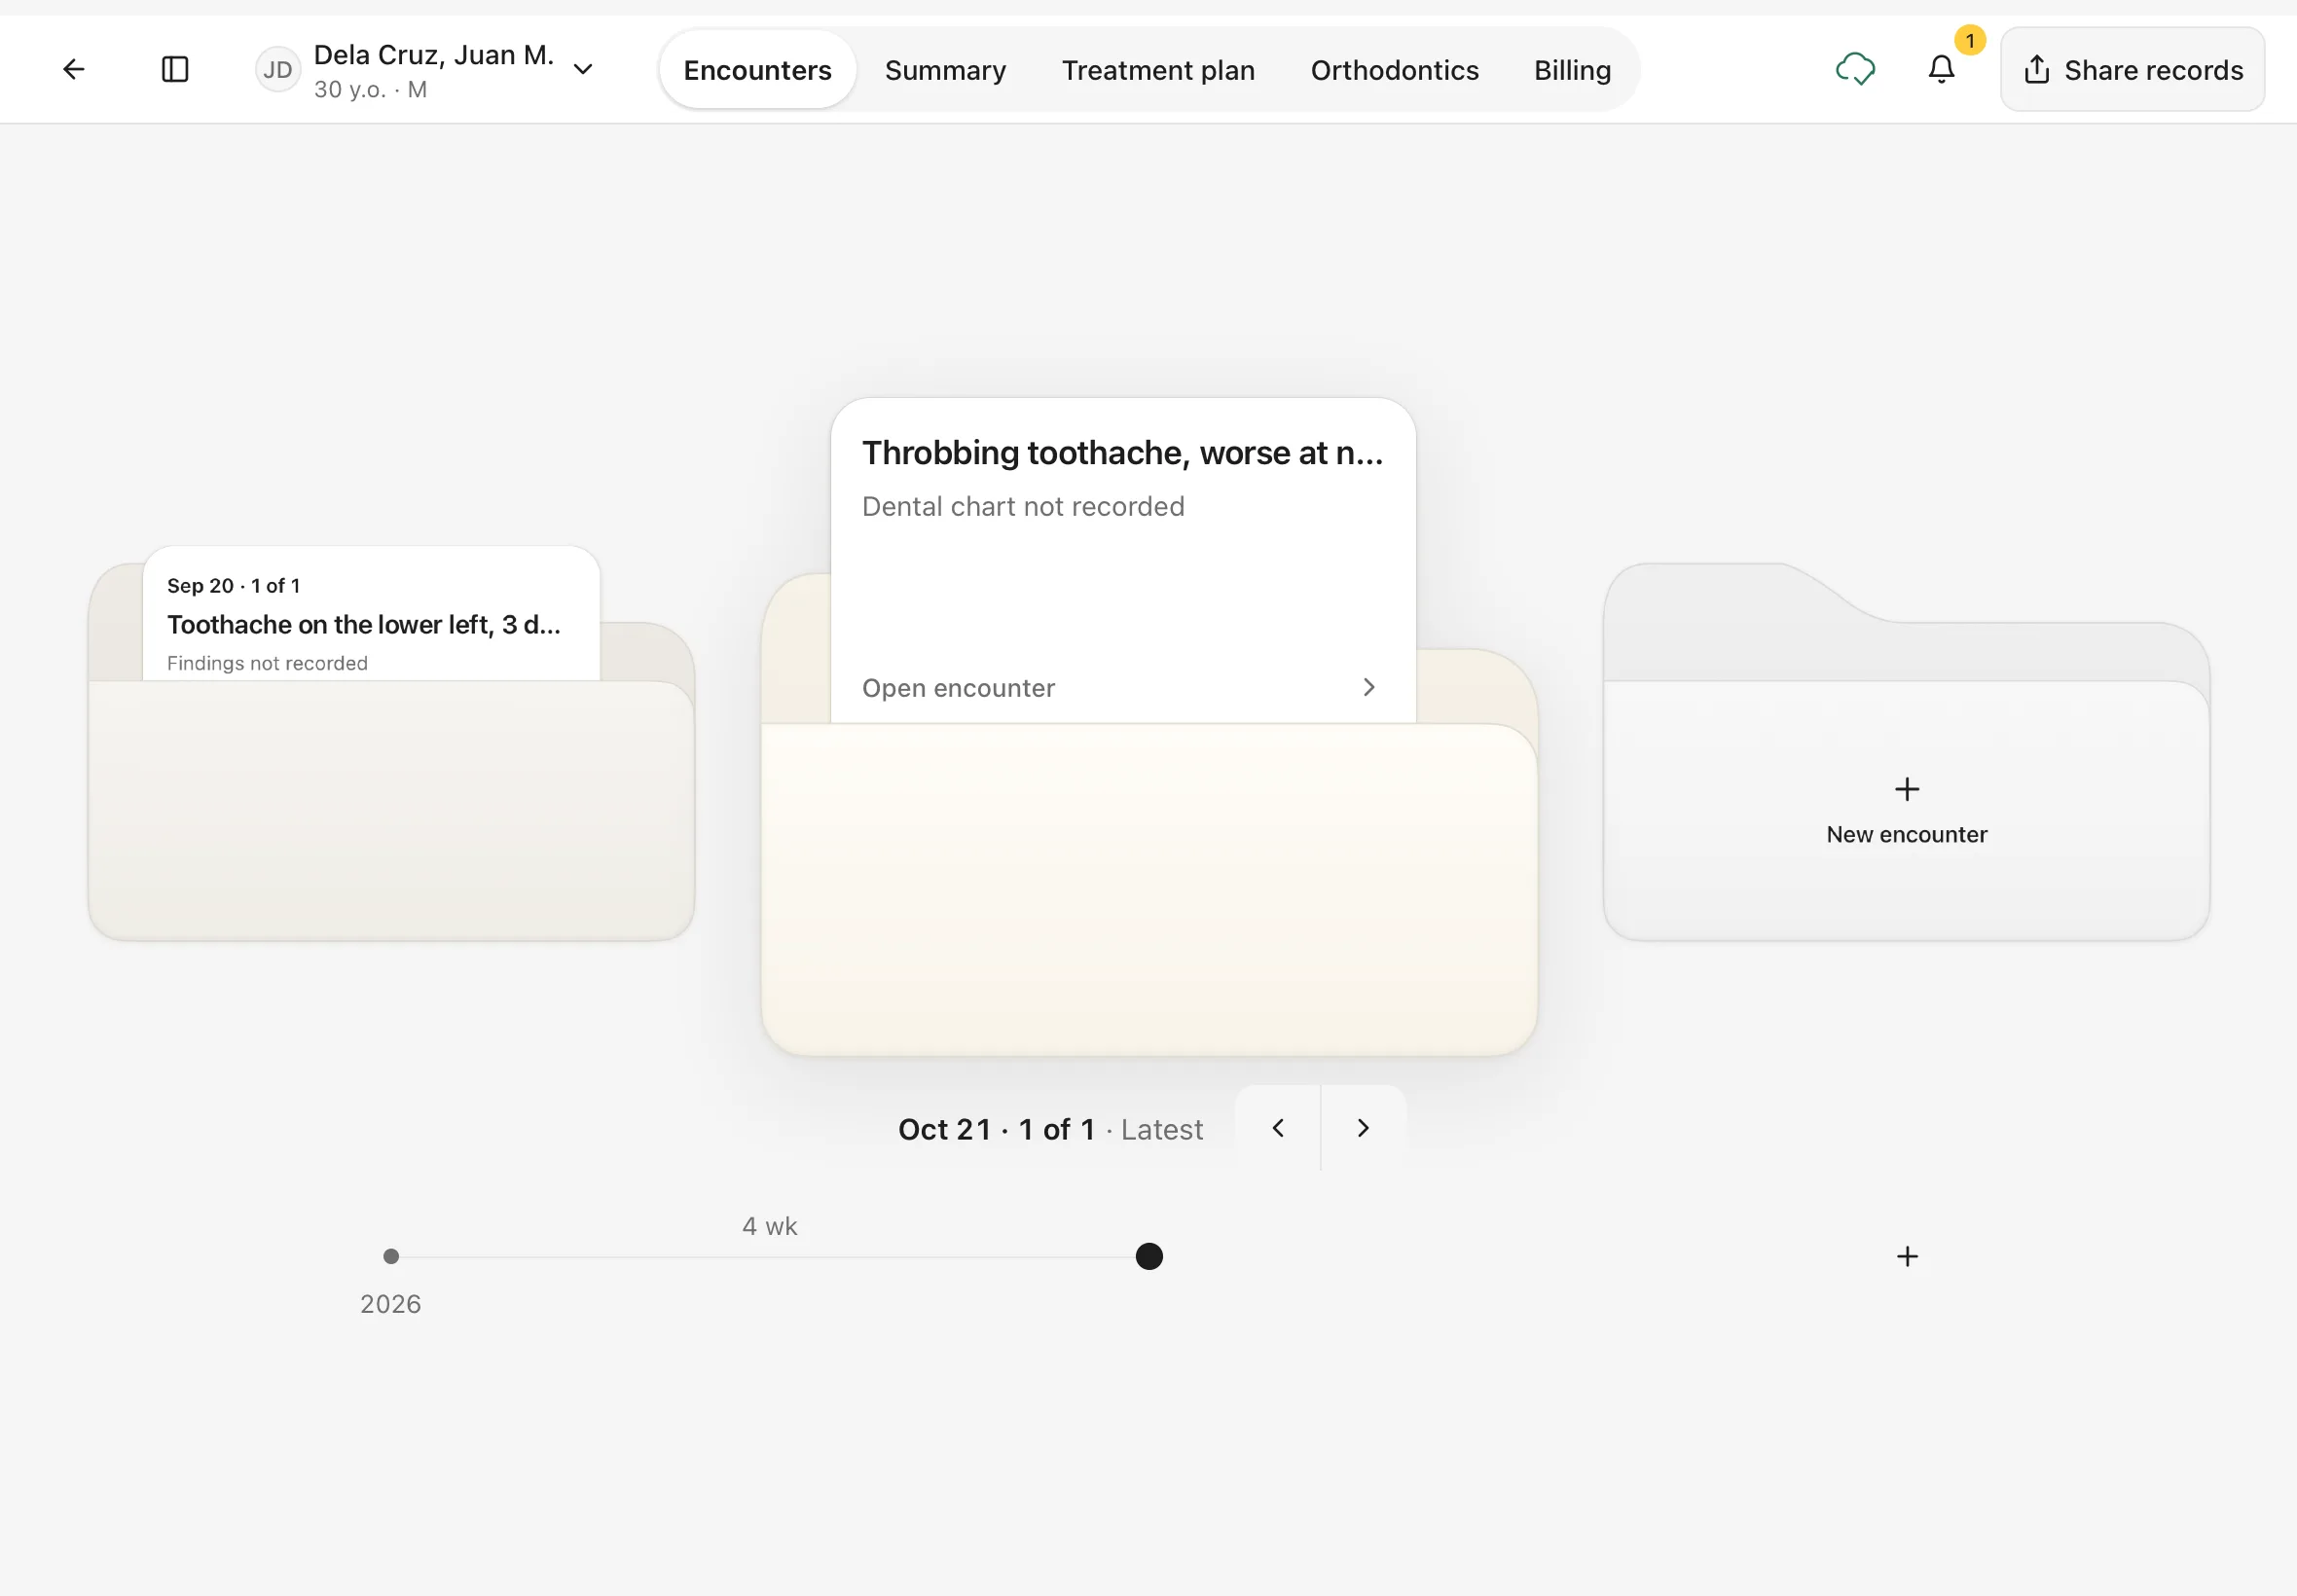
Tap Encounters. Each visit is a folder on a shelf, newest in the middle, with the main complaint on top.
- Tap ‹ and ›, or a dot on the timeline, to move between visits.
- Tap Open encounter to go into a visit.
- The New encounter folder on the right starts a new visit. See Start an encounter.
You should see: the latest visit in the middle, marked Latest.
3. Check what the patient owes on Billing
Tap Billing.
You should see: Balance due (what the patient owes), Owed by payers (what HMOs or PhilHealth owe for this patient) and Last payment. Use View to switch between due invoices, the statement, invoices and claims. Record payment takes a payment for this patient.
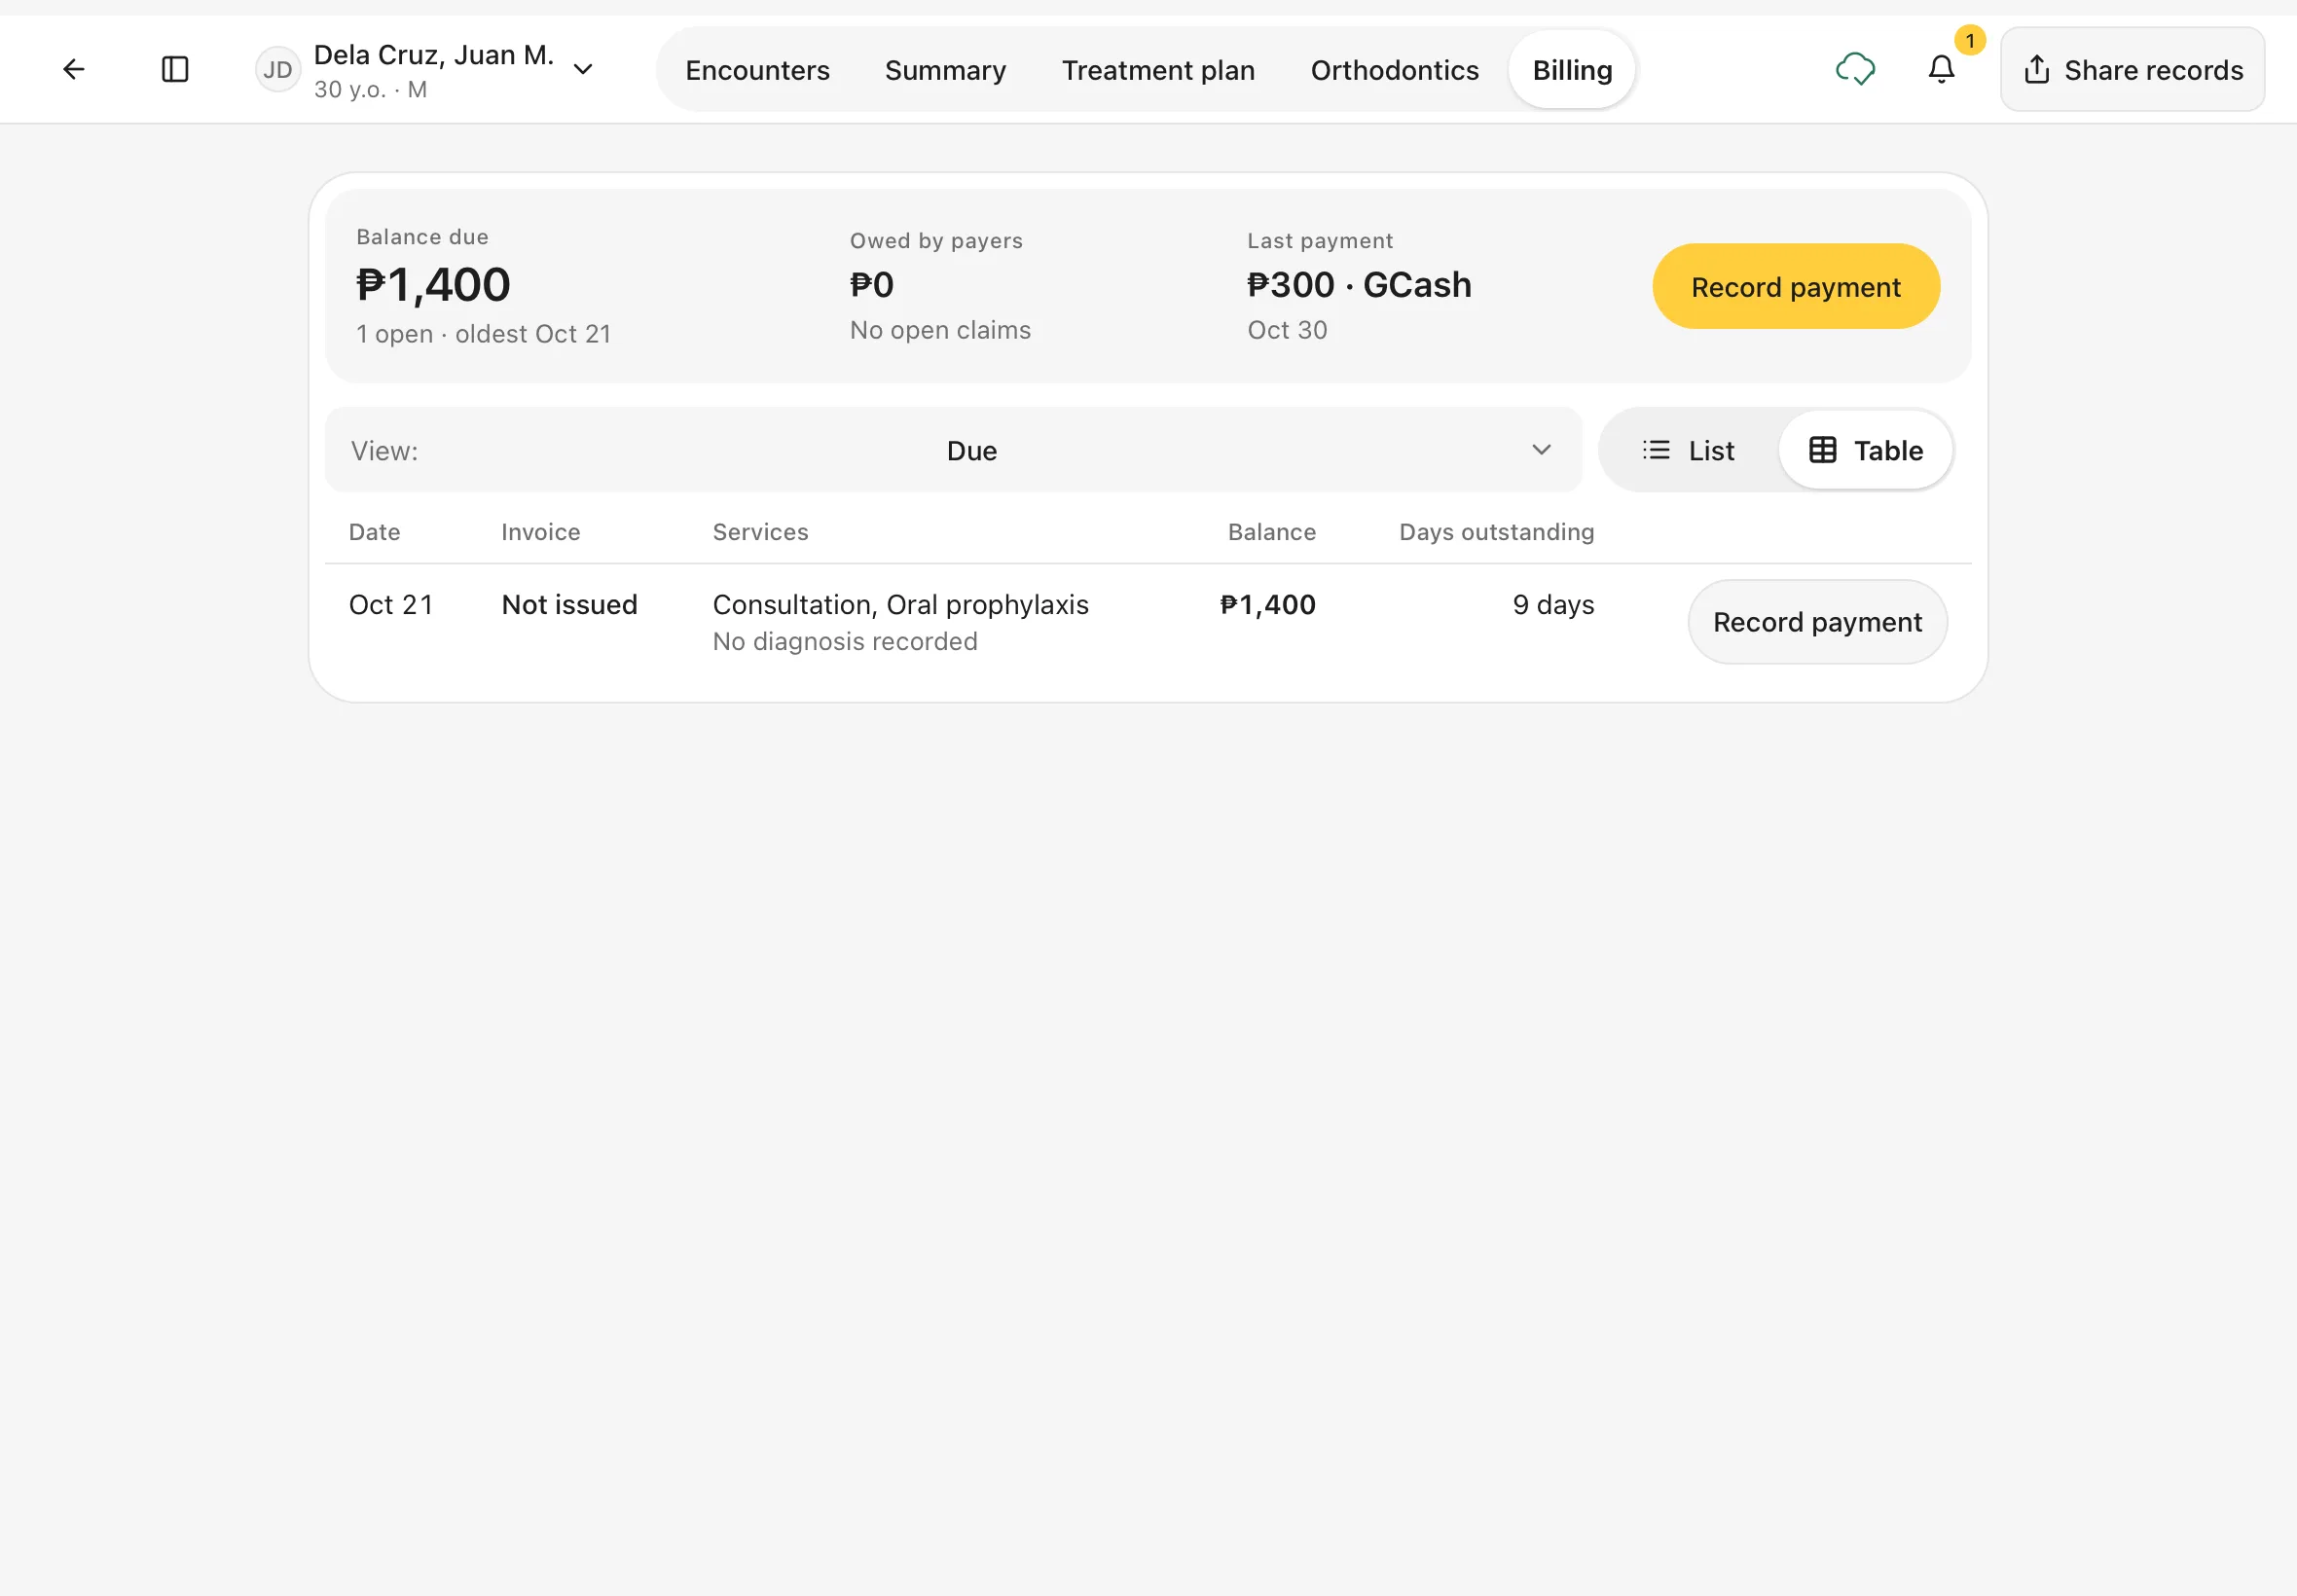
A patient who has never been billed shows No bills yet instead.
More on payments in Billing and balances.
4. Use the patient menu
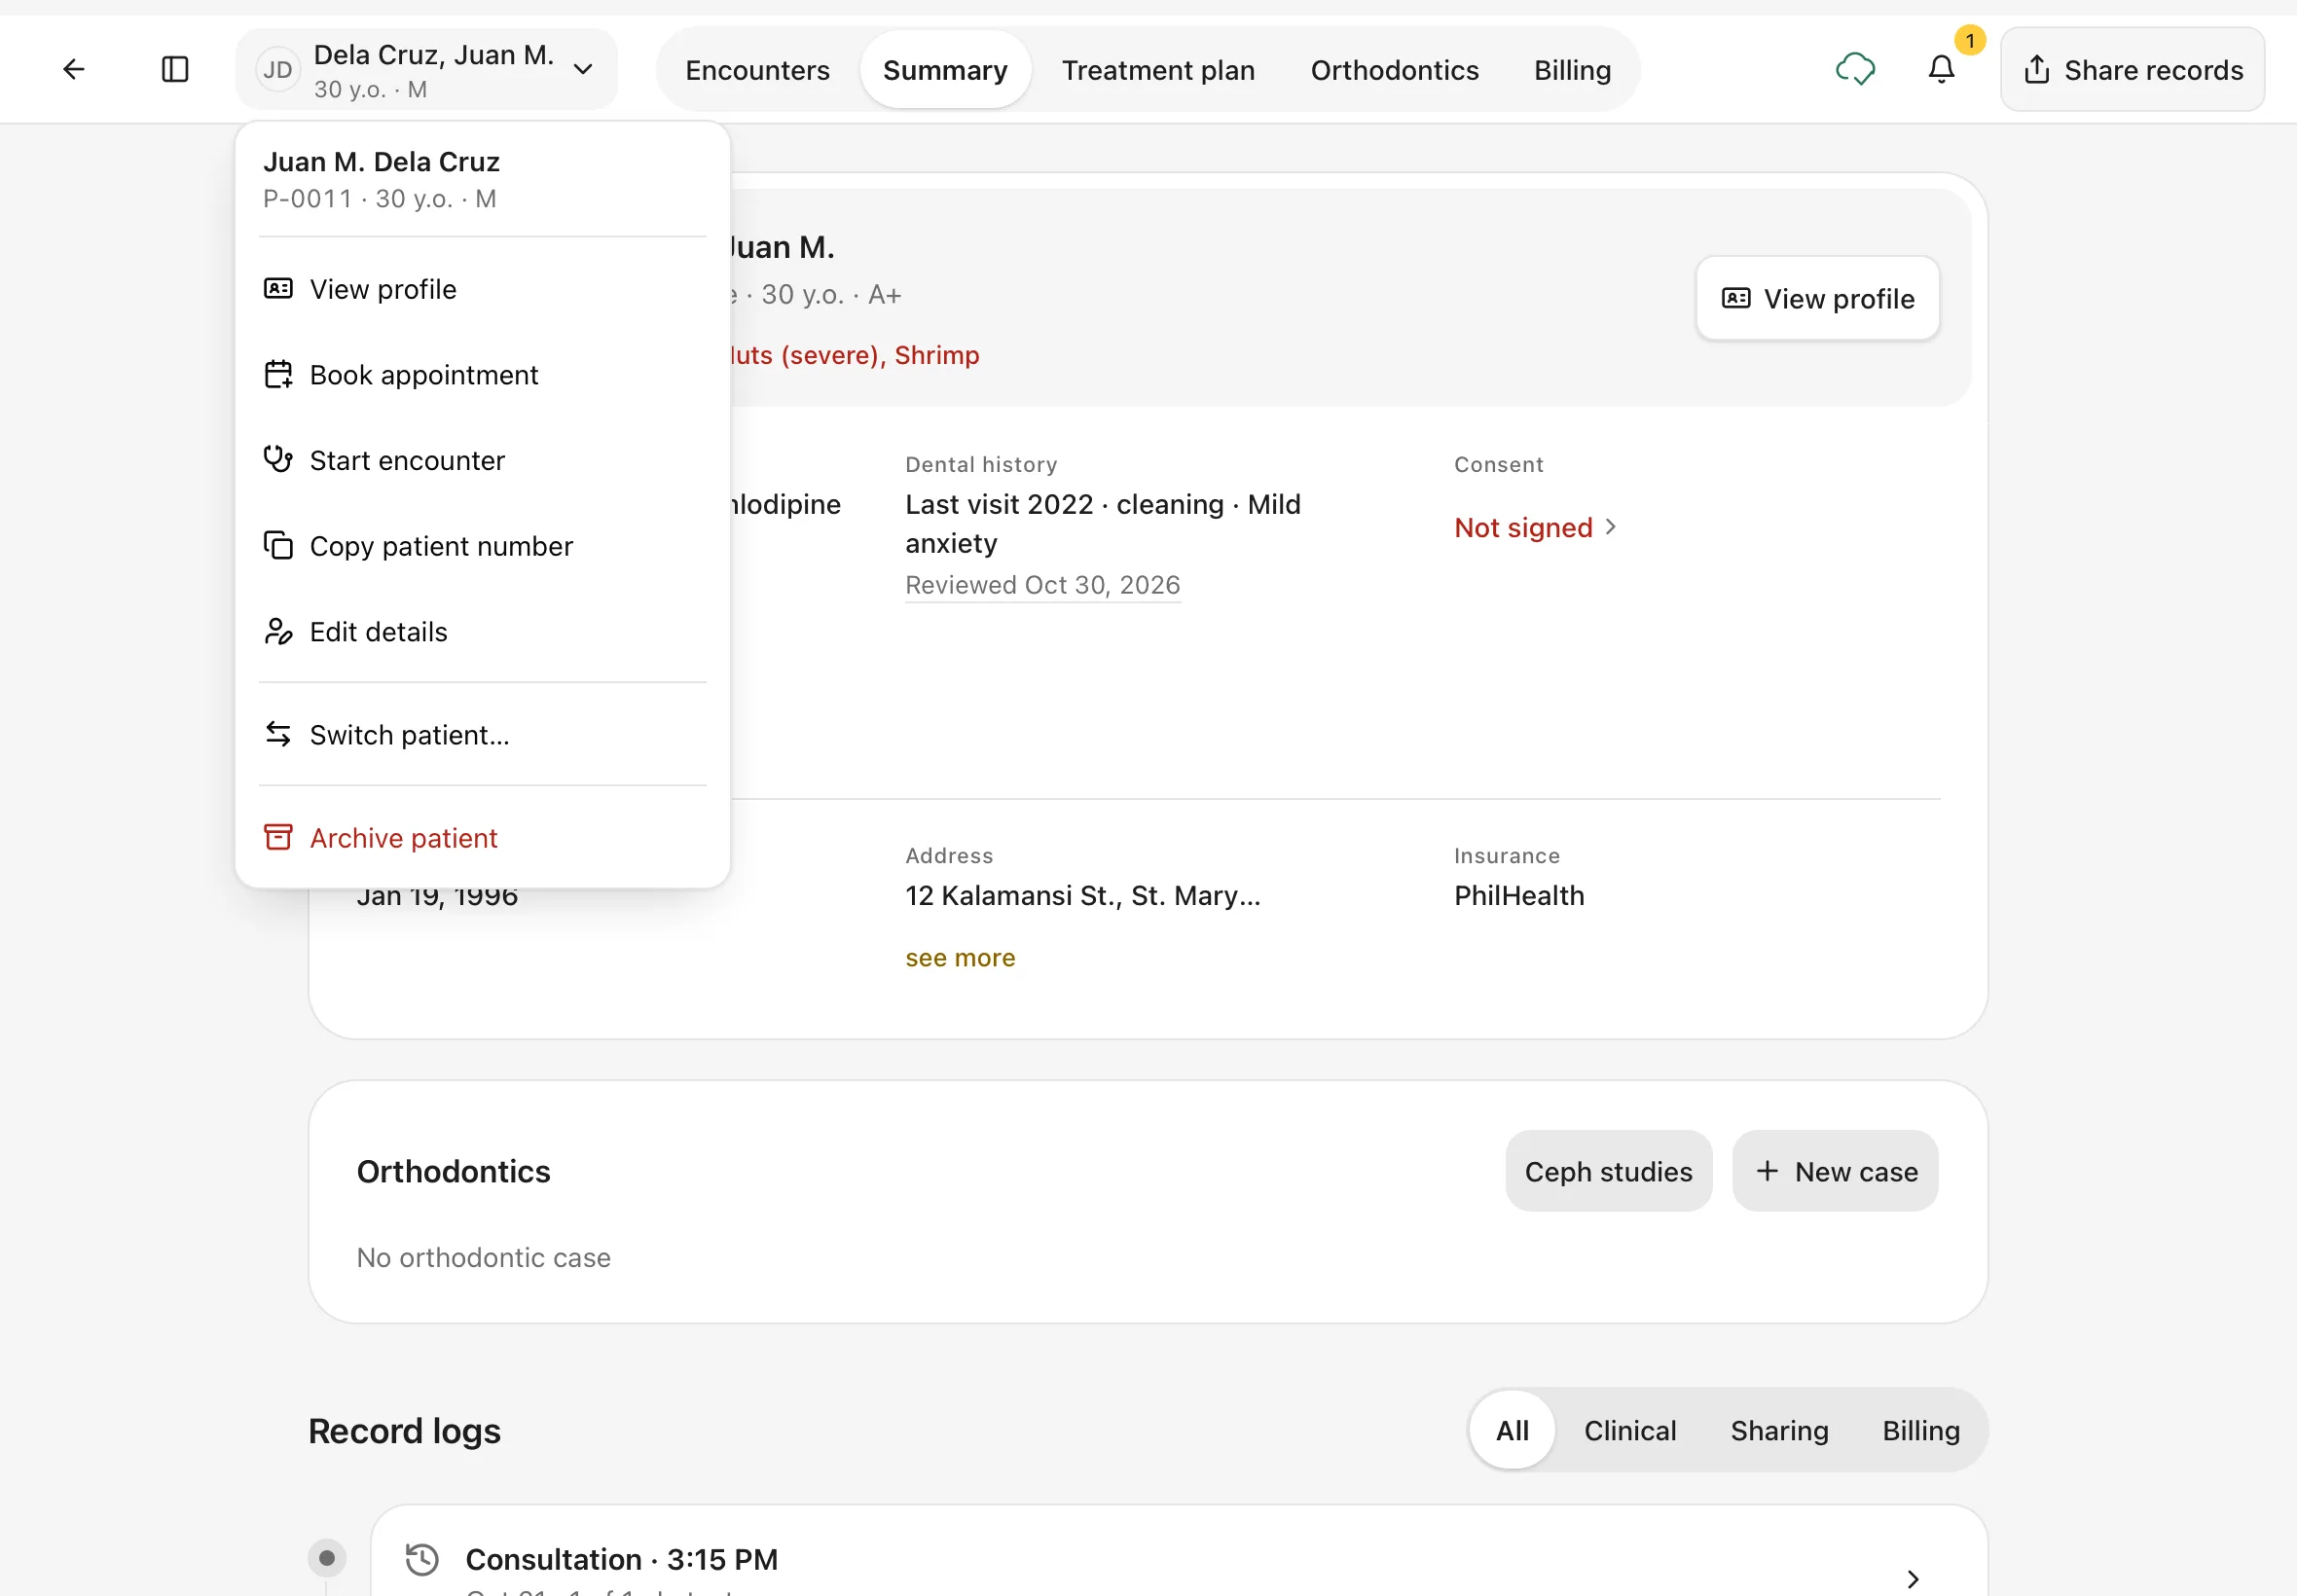
Tap the patient's name at the top left. The menu has:
- View profile: the full patient card (next step).
- Book appointment: book this patient straight away (step 8).
- Start encounter: open a new visit now.
- Copy patient number: copies the number (for example P-0011) so you can paste it elsewhere.
- Edit details: change the patient's details (step 7).
- Switch patient…: jump to another patient (step 5).
- Archive patient: take the patient off your list (step 9).
You should see: the menu under the patient's name.
5. Switch to another patient
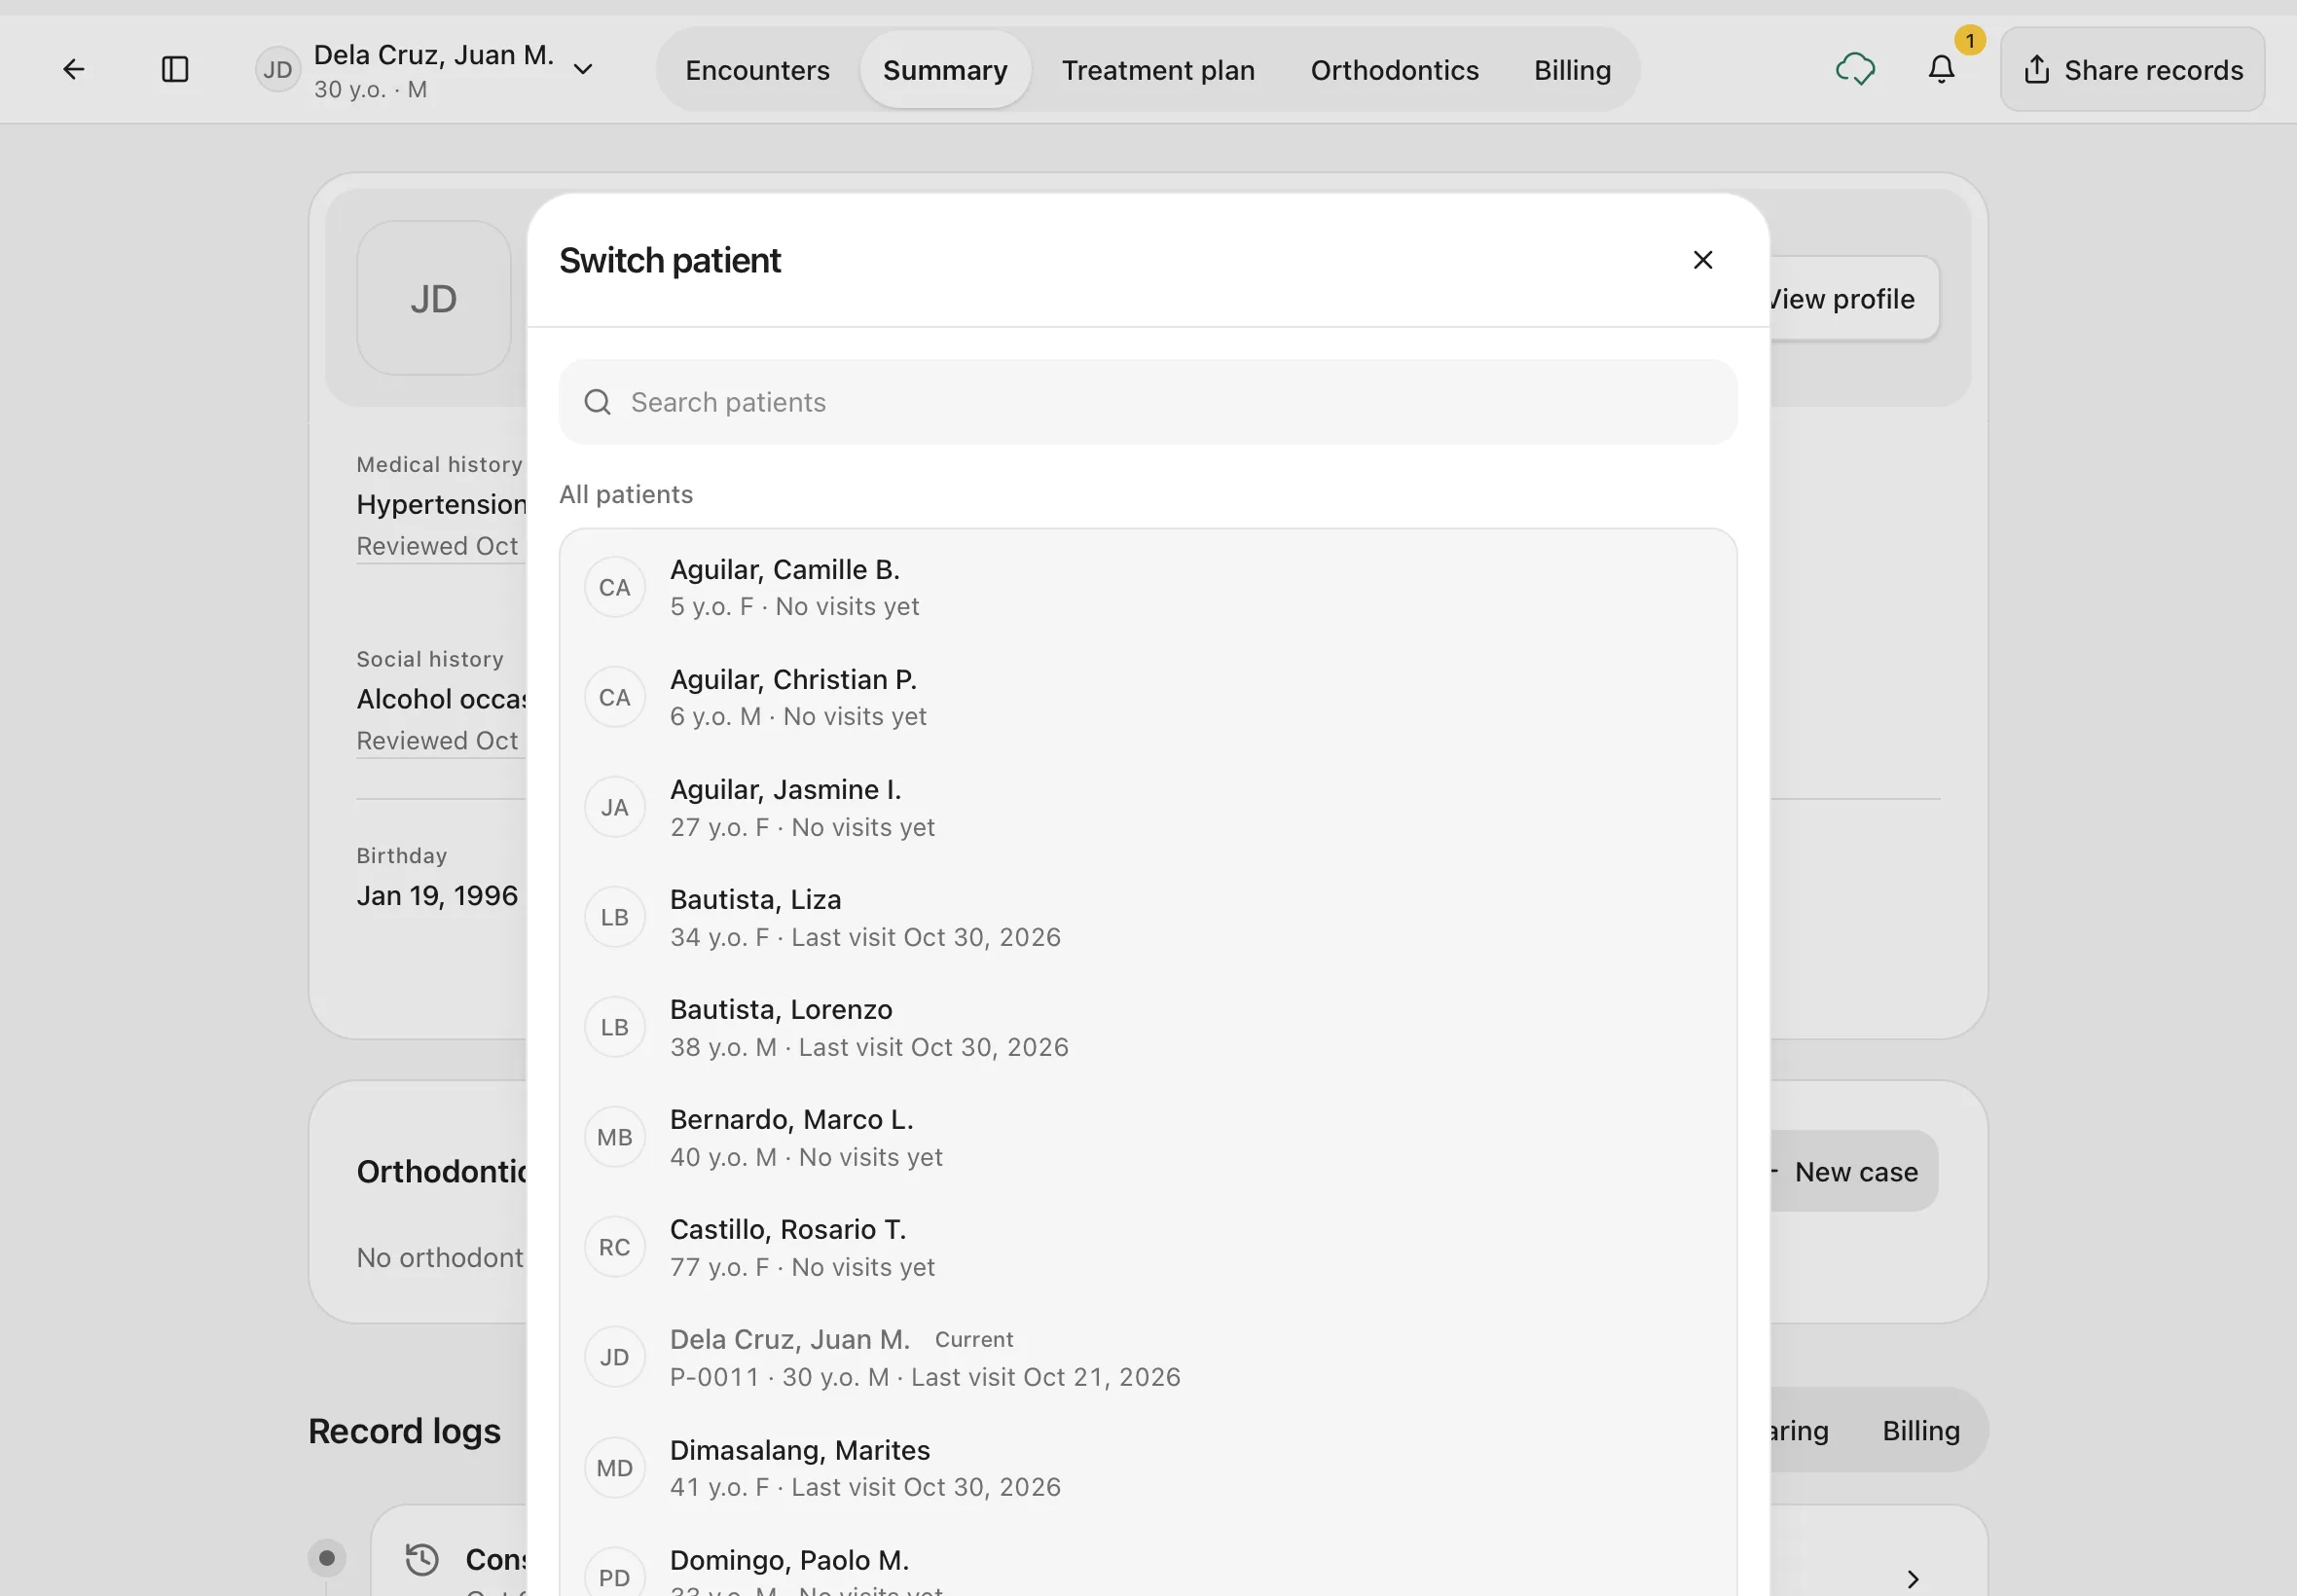
Tap Switch patient….
You should see: Switch patient, with a search box and All patients. When patients are booked for today, a Today list (with their times and status) comes first. Search by name or number, or tap a patient to go to their page.
6. View the full profile
From the patient menu, tap View profile. You can also tap View profile on the Summary.
You should see: the Patient card with your clinic's name, the patient's allergies, PhilHealth number, Senior Citizen and PWD IDs, and emergency contact. The list on the left jumps to Overview, Personal, Contact, Family & emergency, Insurance & benefits, Medical, Records and Policies and consents.
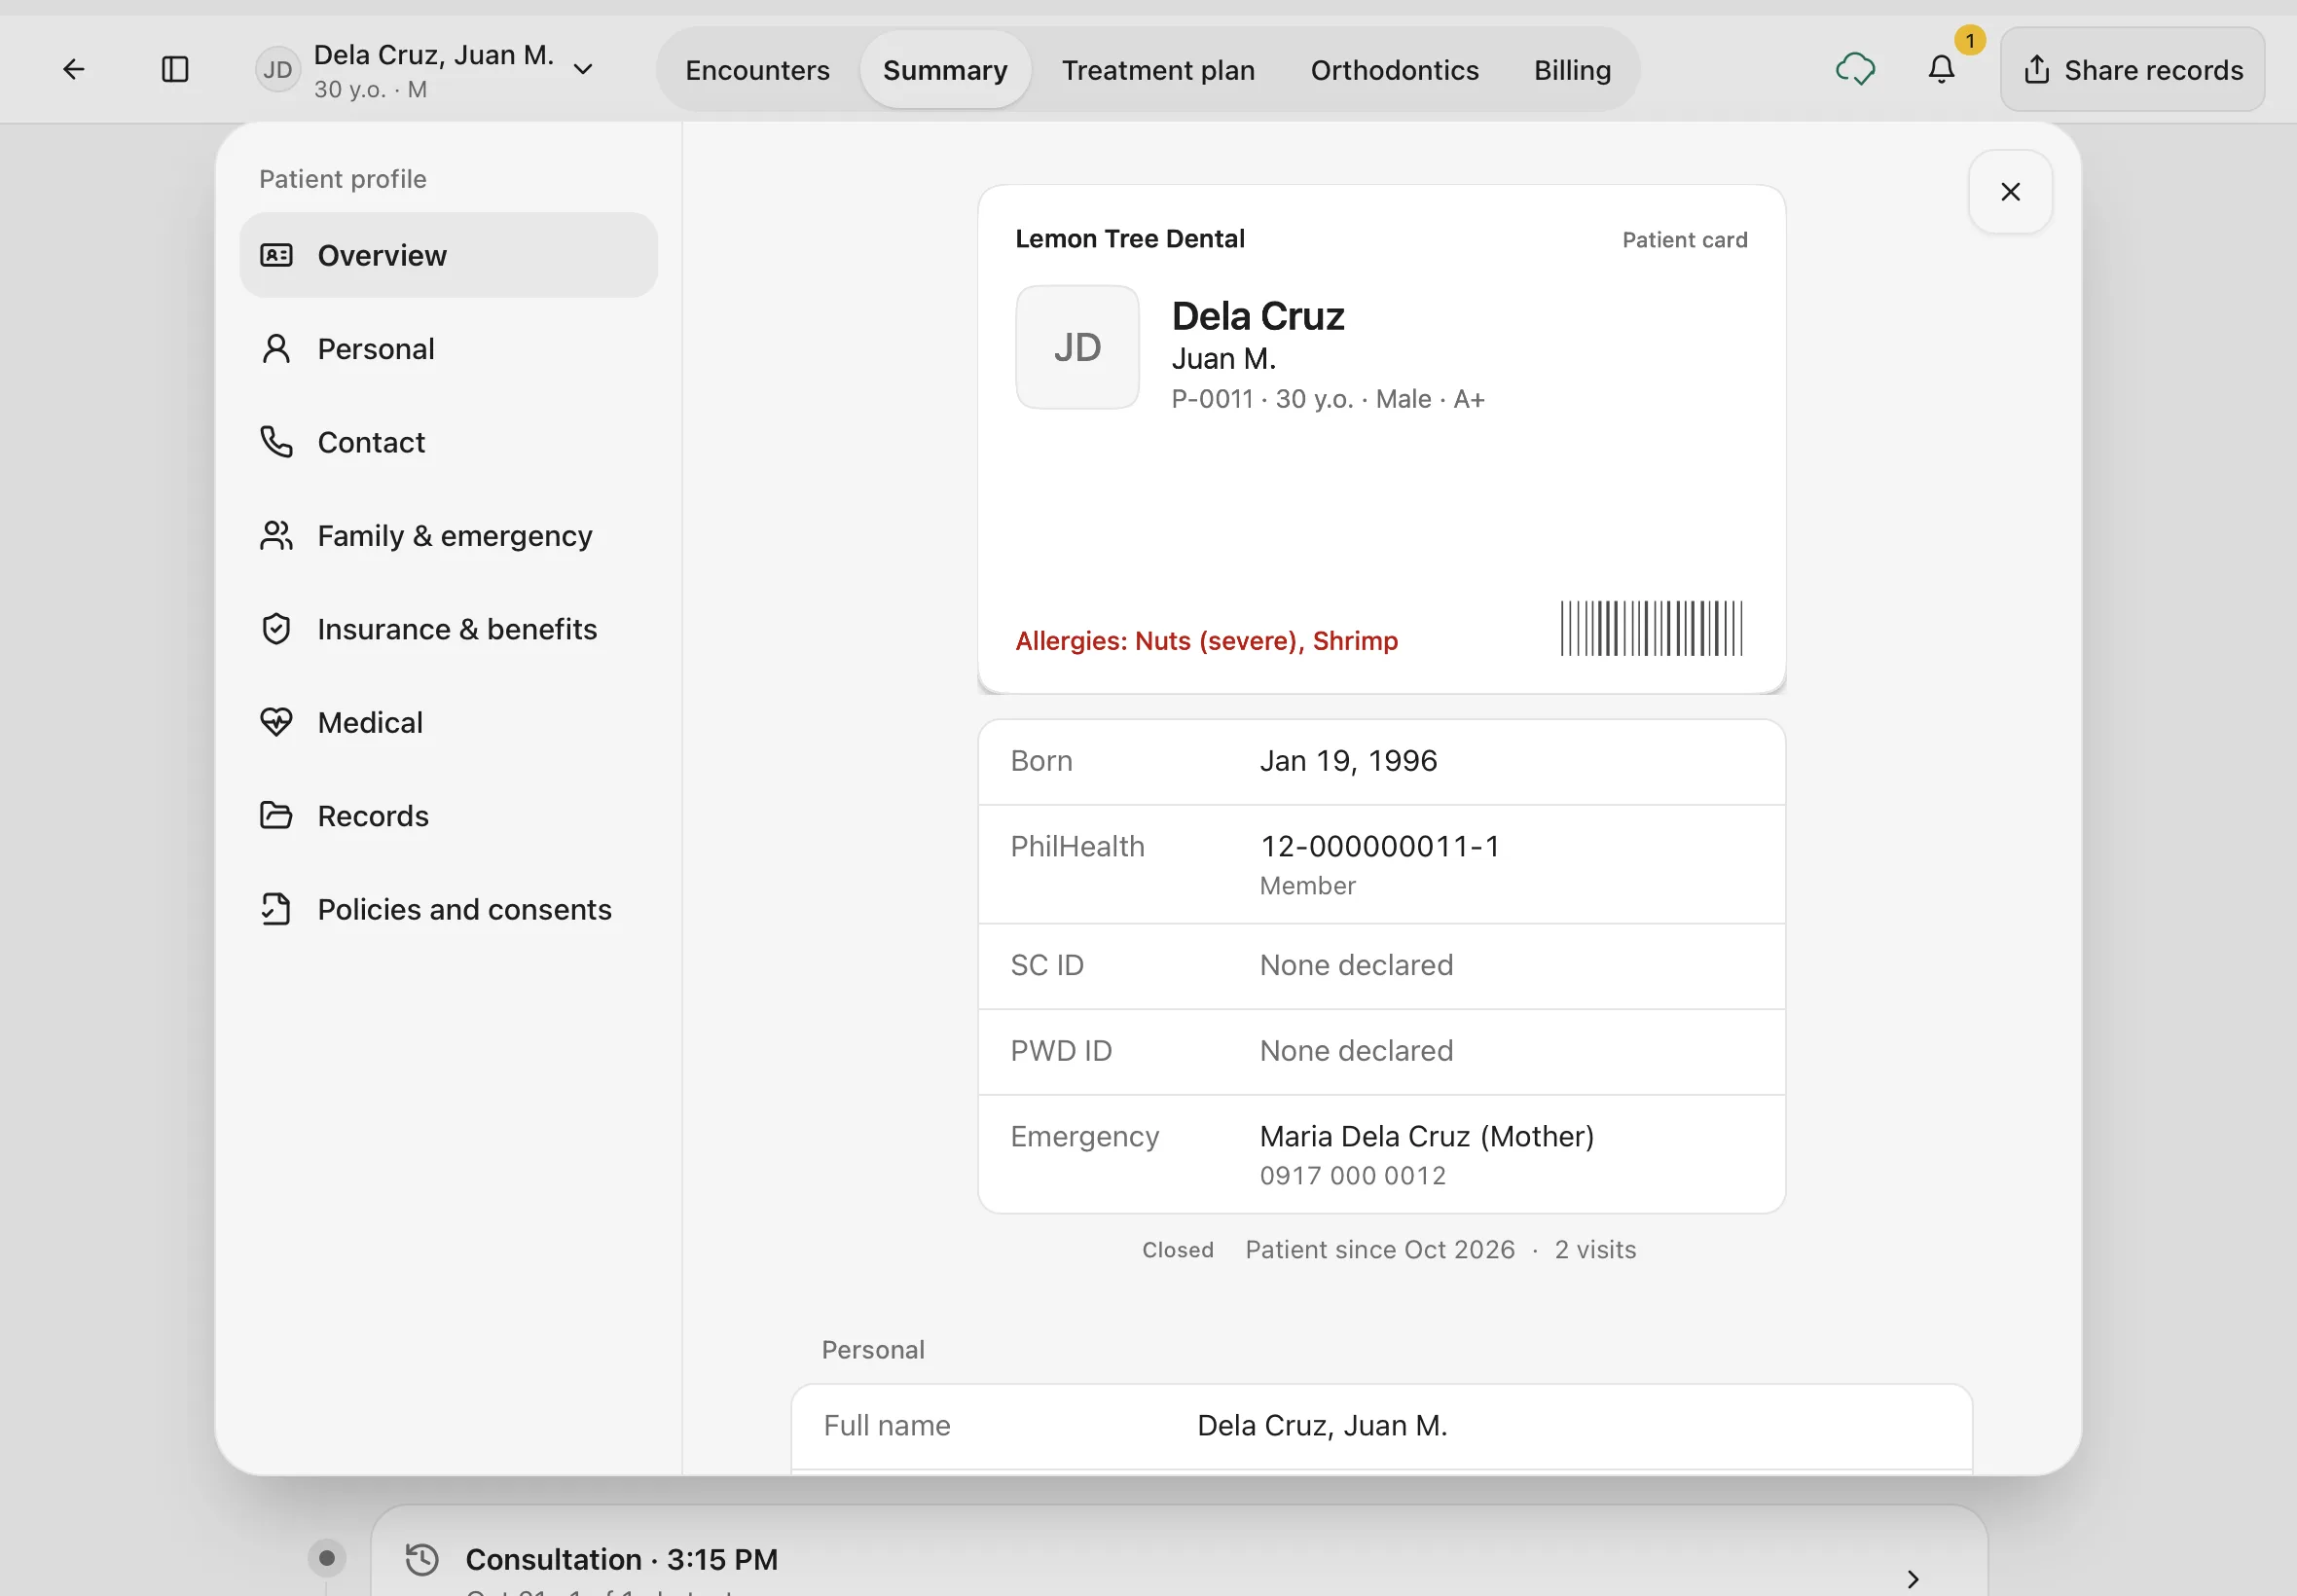
The profile is for reading. To change the patient's details, use Edit details.
To record a signed consent from here, tap Policies and consents, then Record consent at the top, or Record next to the consent you need. See Consents.
7. Edit the patient's details
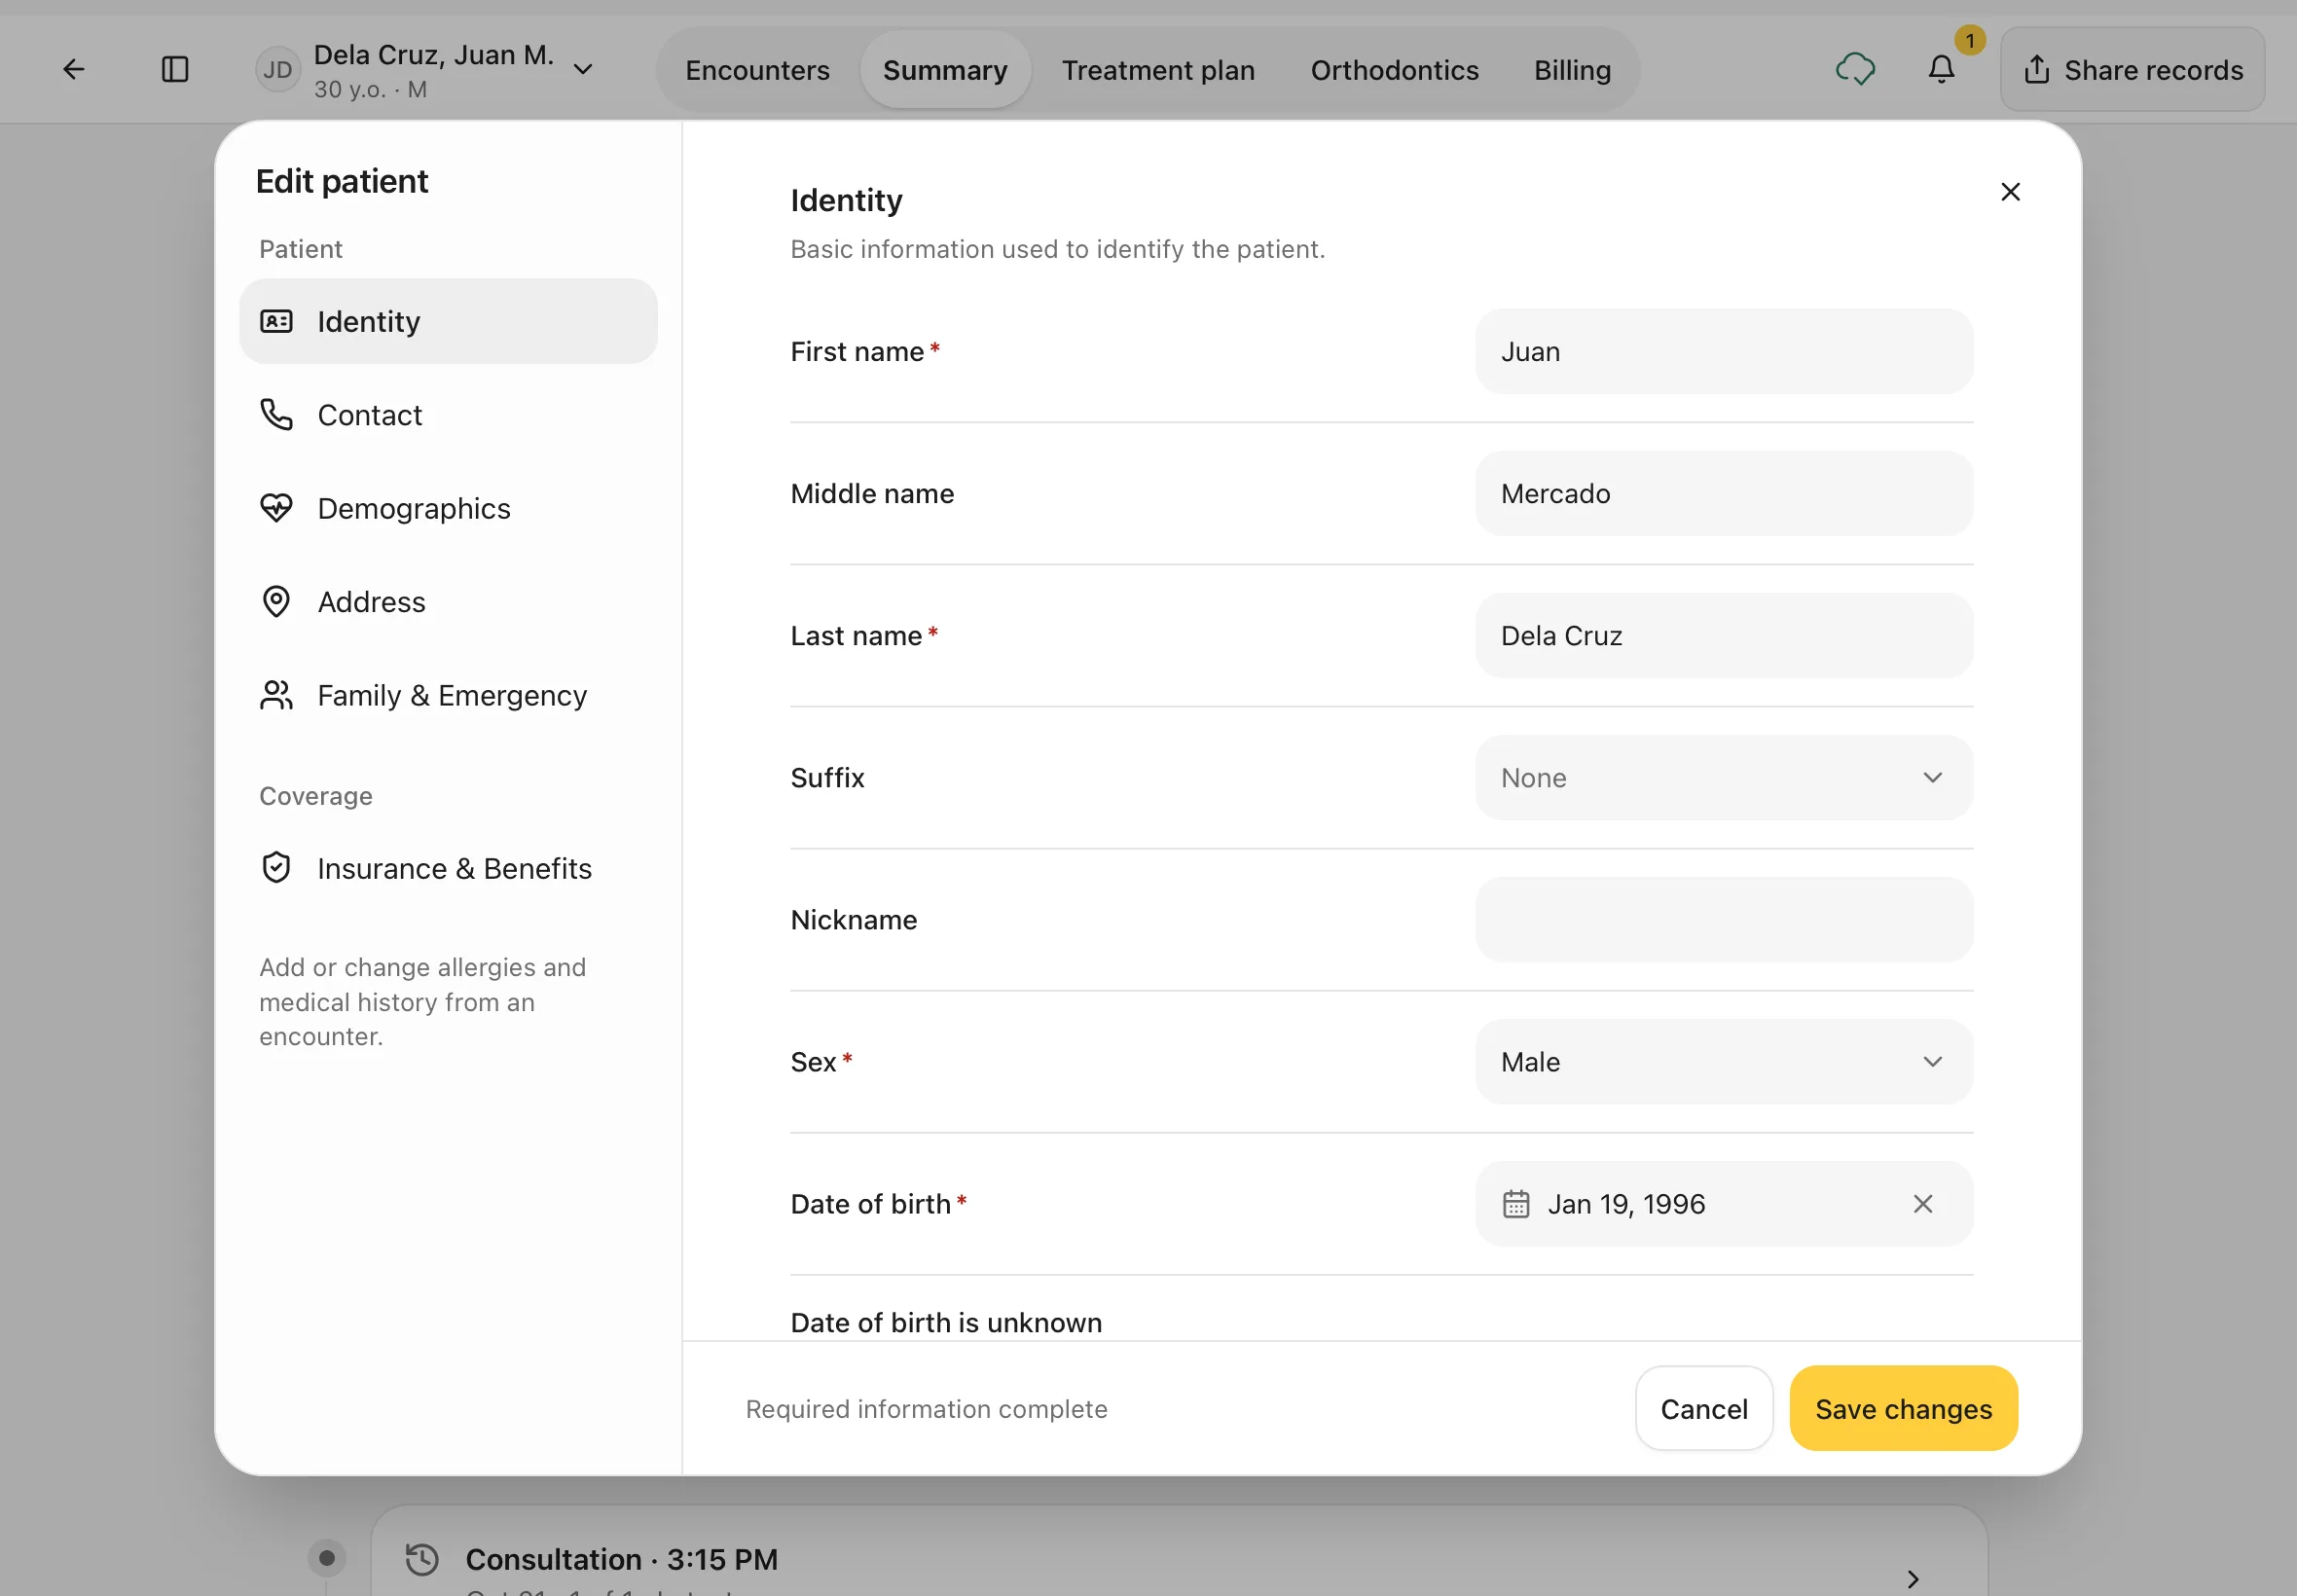
- From the patient menu, tap Edit details.
- Use the list on the left to go to the section you need, for example Contact for a new mobile number, or Insurance & Benefits for a new card.
- Change what you need.
- Tap Save changes. To leave without saving, tap Cancel.
You should see: Edit patient, with the same sections as when you added the patient.
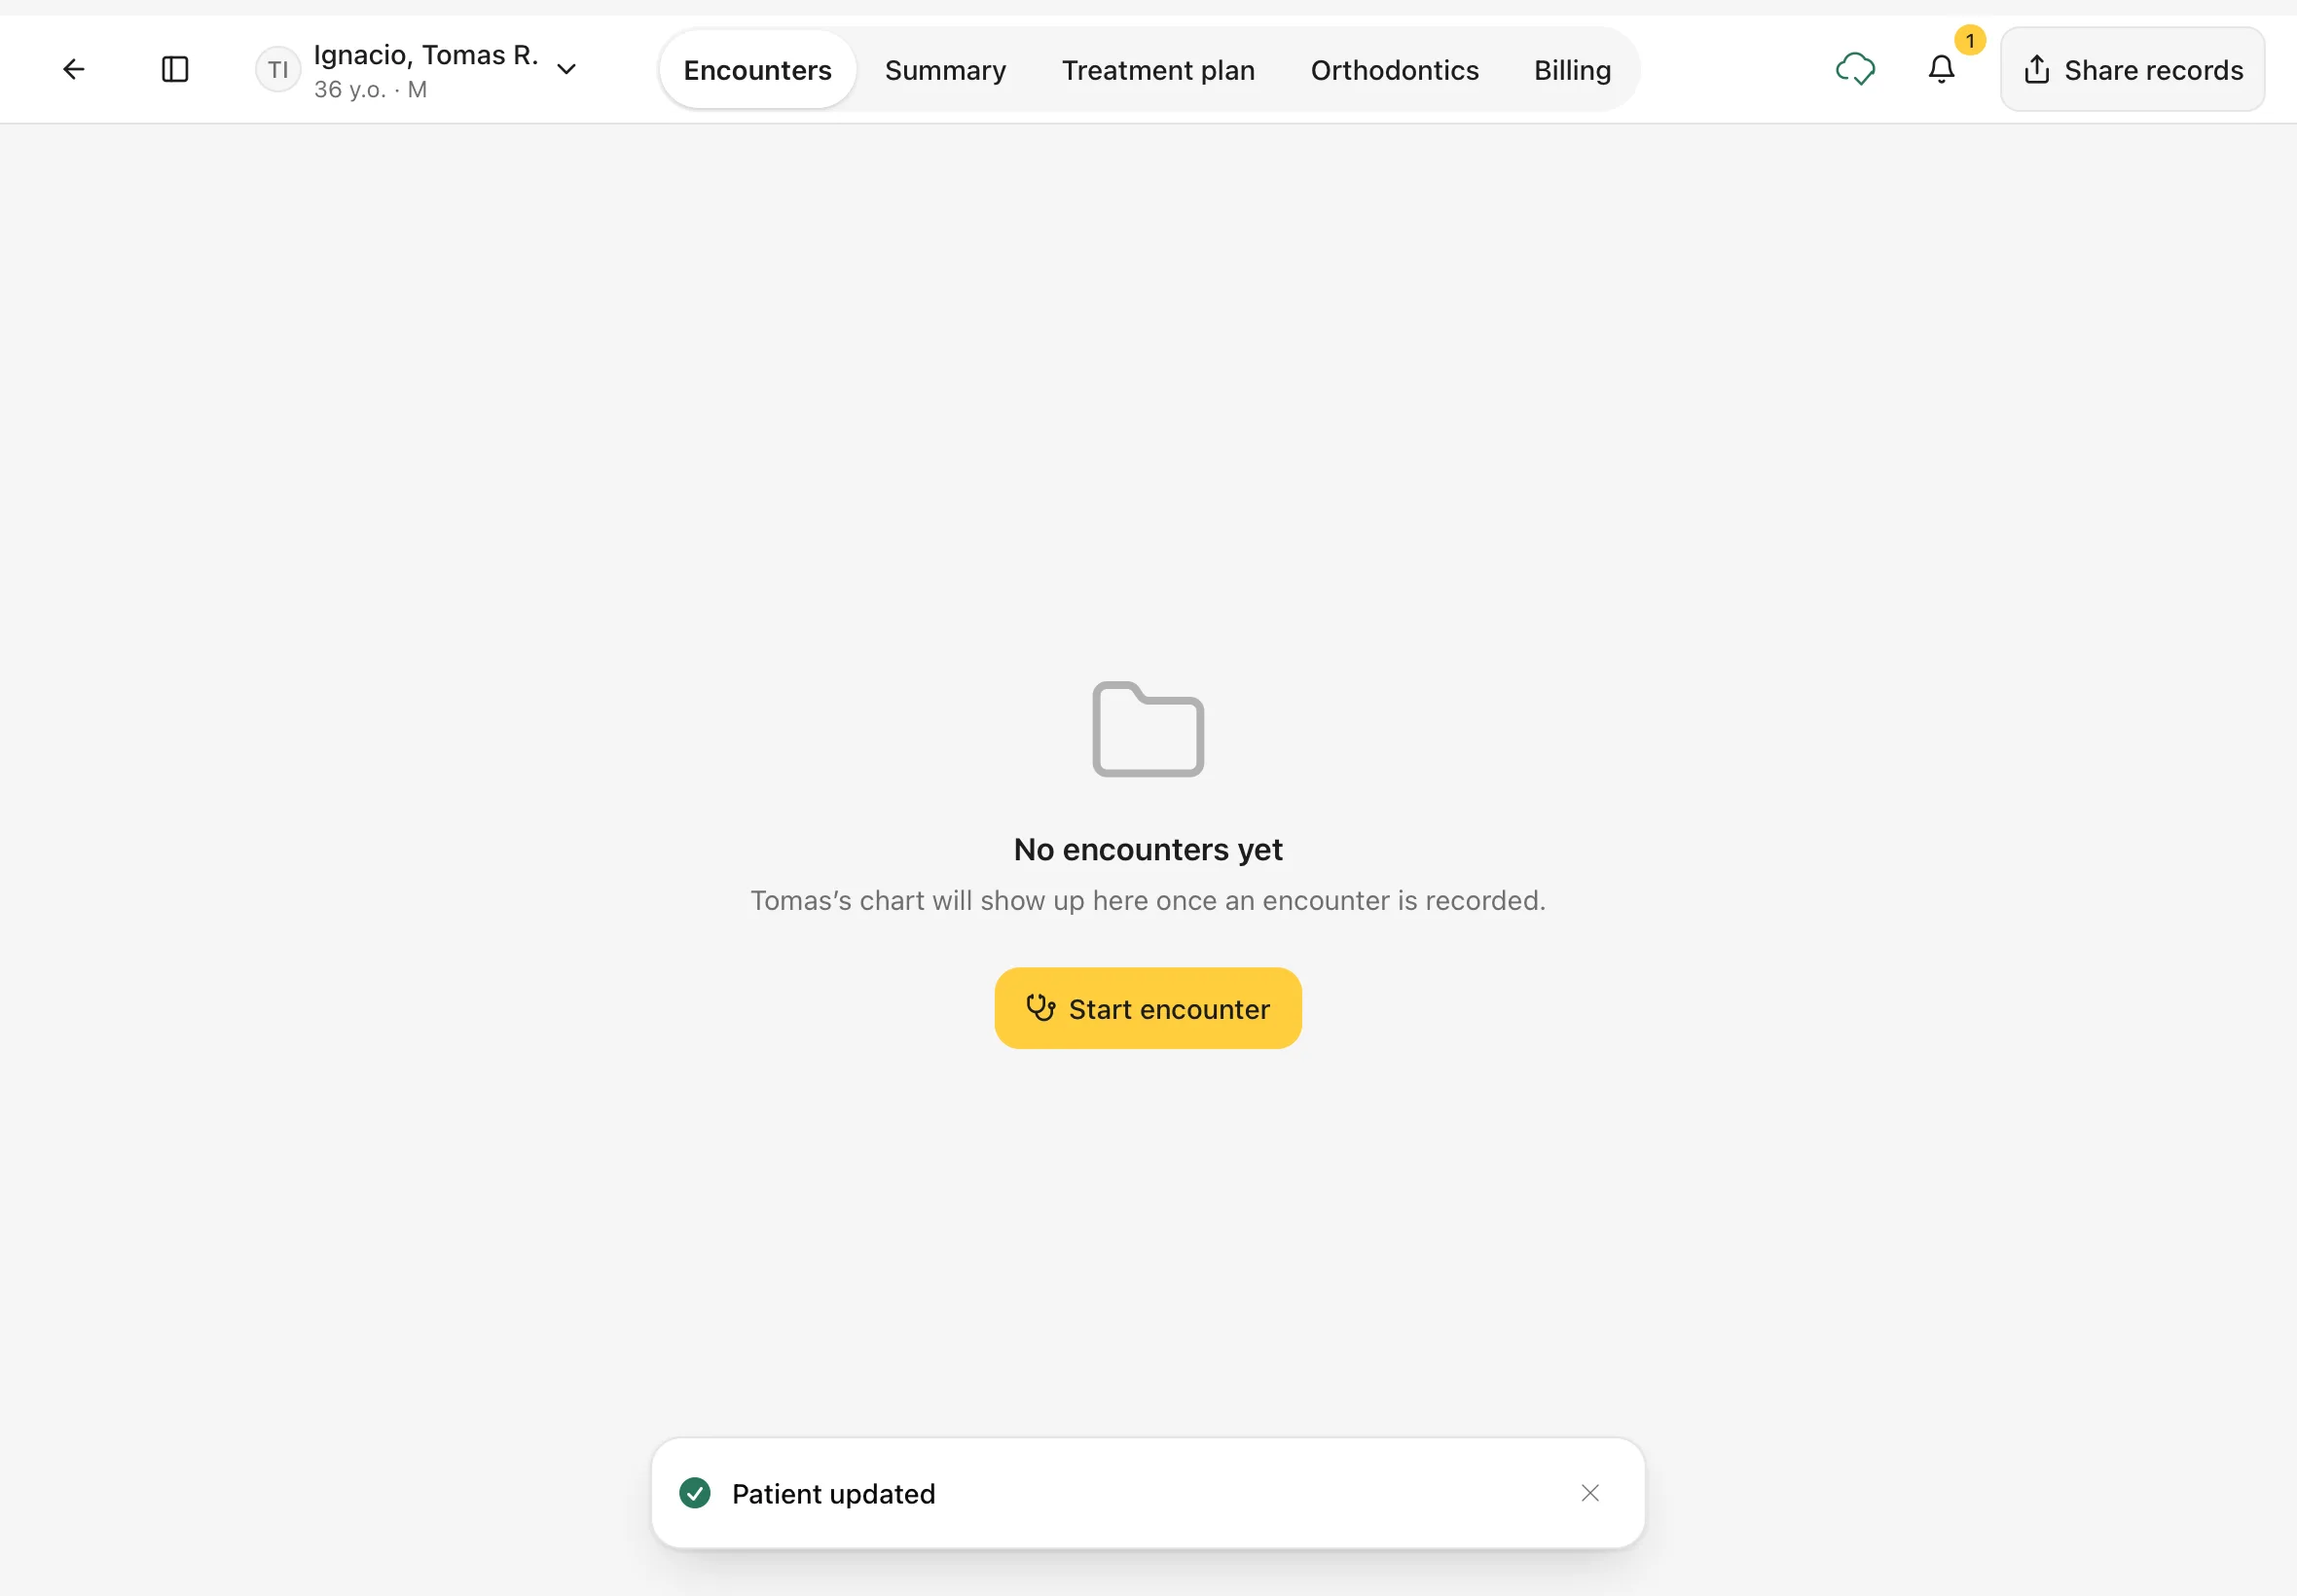
After you save, a Patient updated message appears and the patient's page shows the new details.
Note
Allergies and medical history aren't edited here. Add or change them during an encounter, so each change is dated to a visit: in the encounter, open Records and tap + Allergies.
8. Book an appointment for this patient
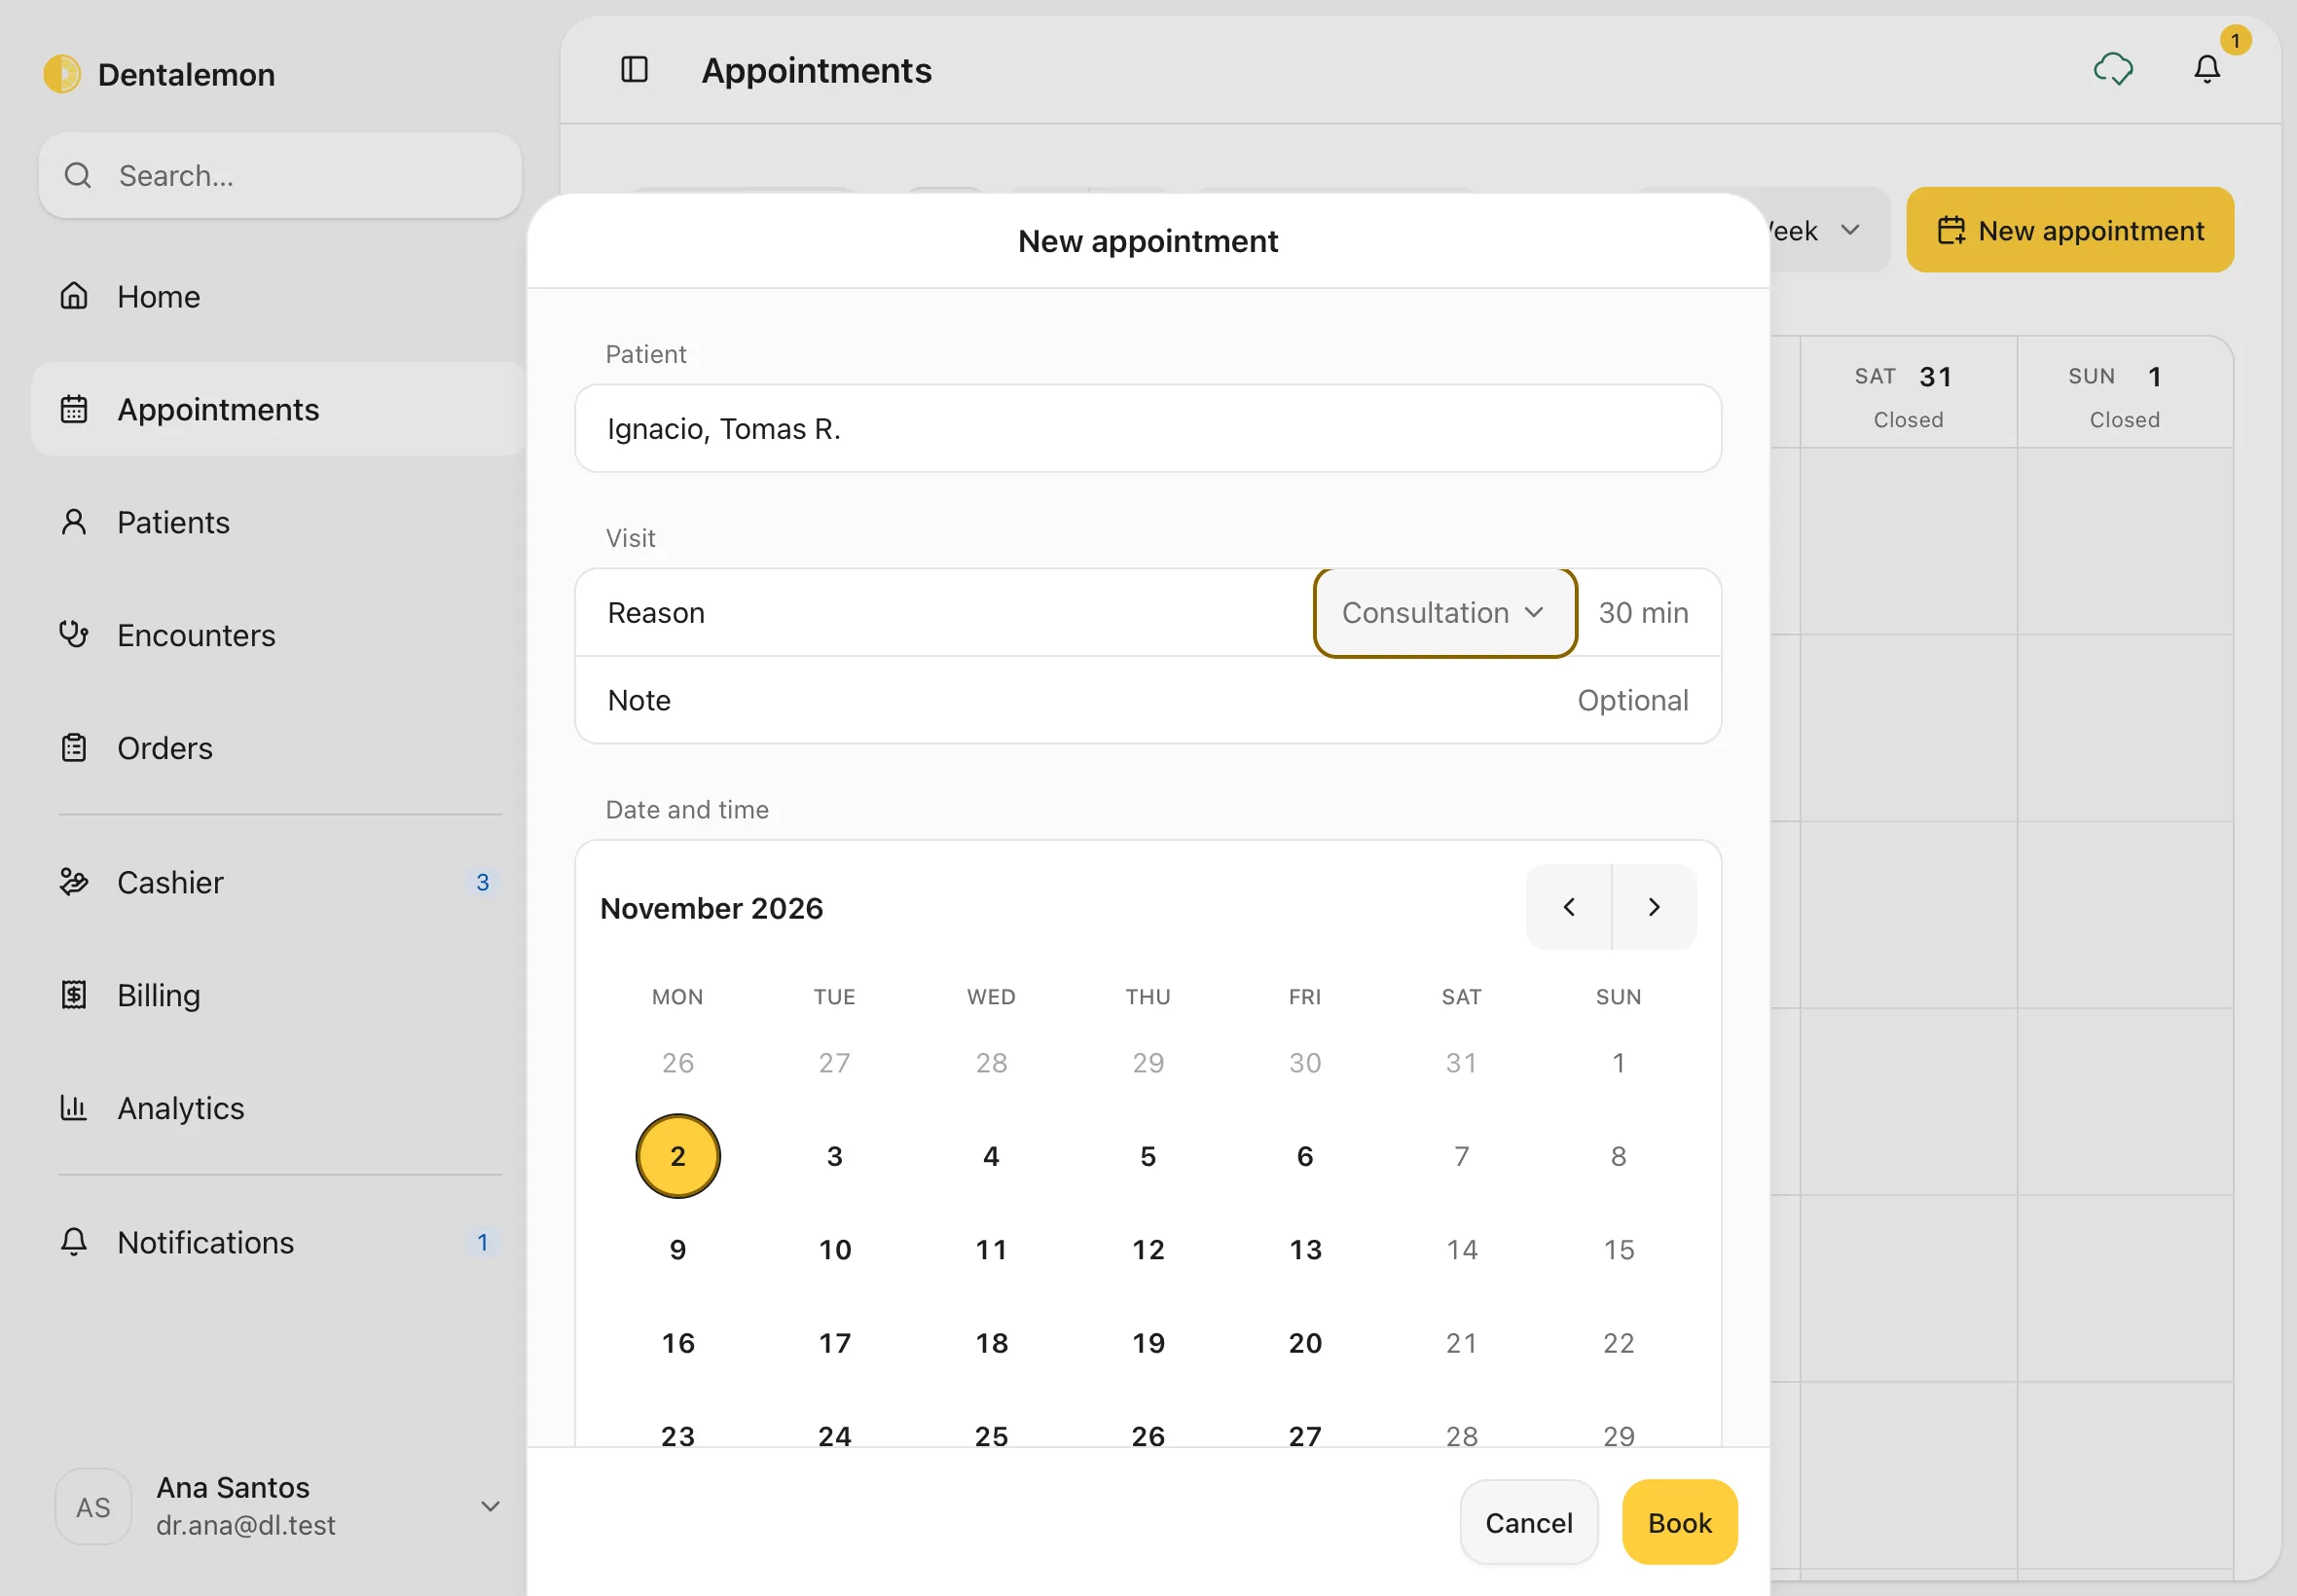
From the patient menu, tap Book appointment. Dentalemon opens Appointments with a New appointment form, and the patient is already filled in.
Choose the Reason, a day and a time, then tap Book. The rest of the booking works the same as from the Appointments page. See Appointments.
You should see: New appointment with the patient's name under Patient.
9. Archive a patient (only when needed)
From the patient menu, tap Archive patient.
You should see: Archive this patient?. Tap Archive to confirm, or Cancel to keep them.
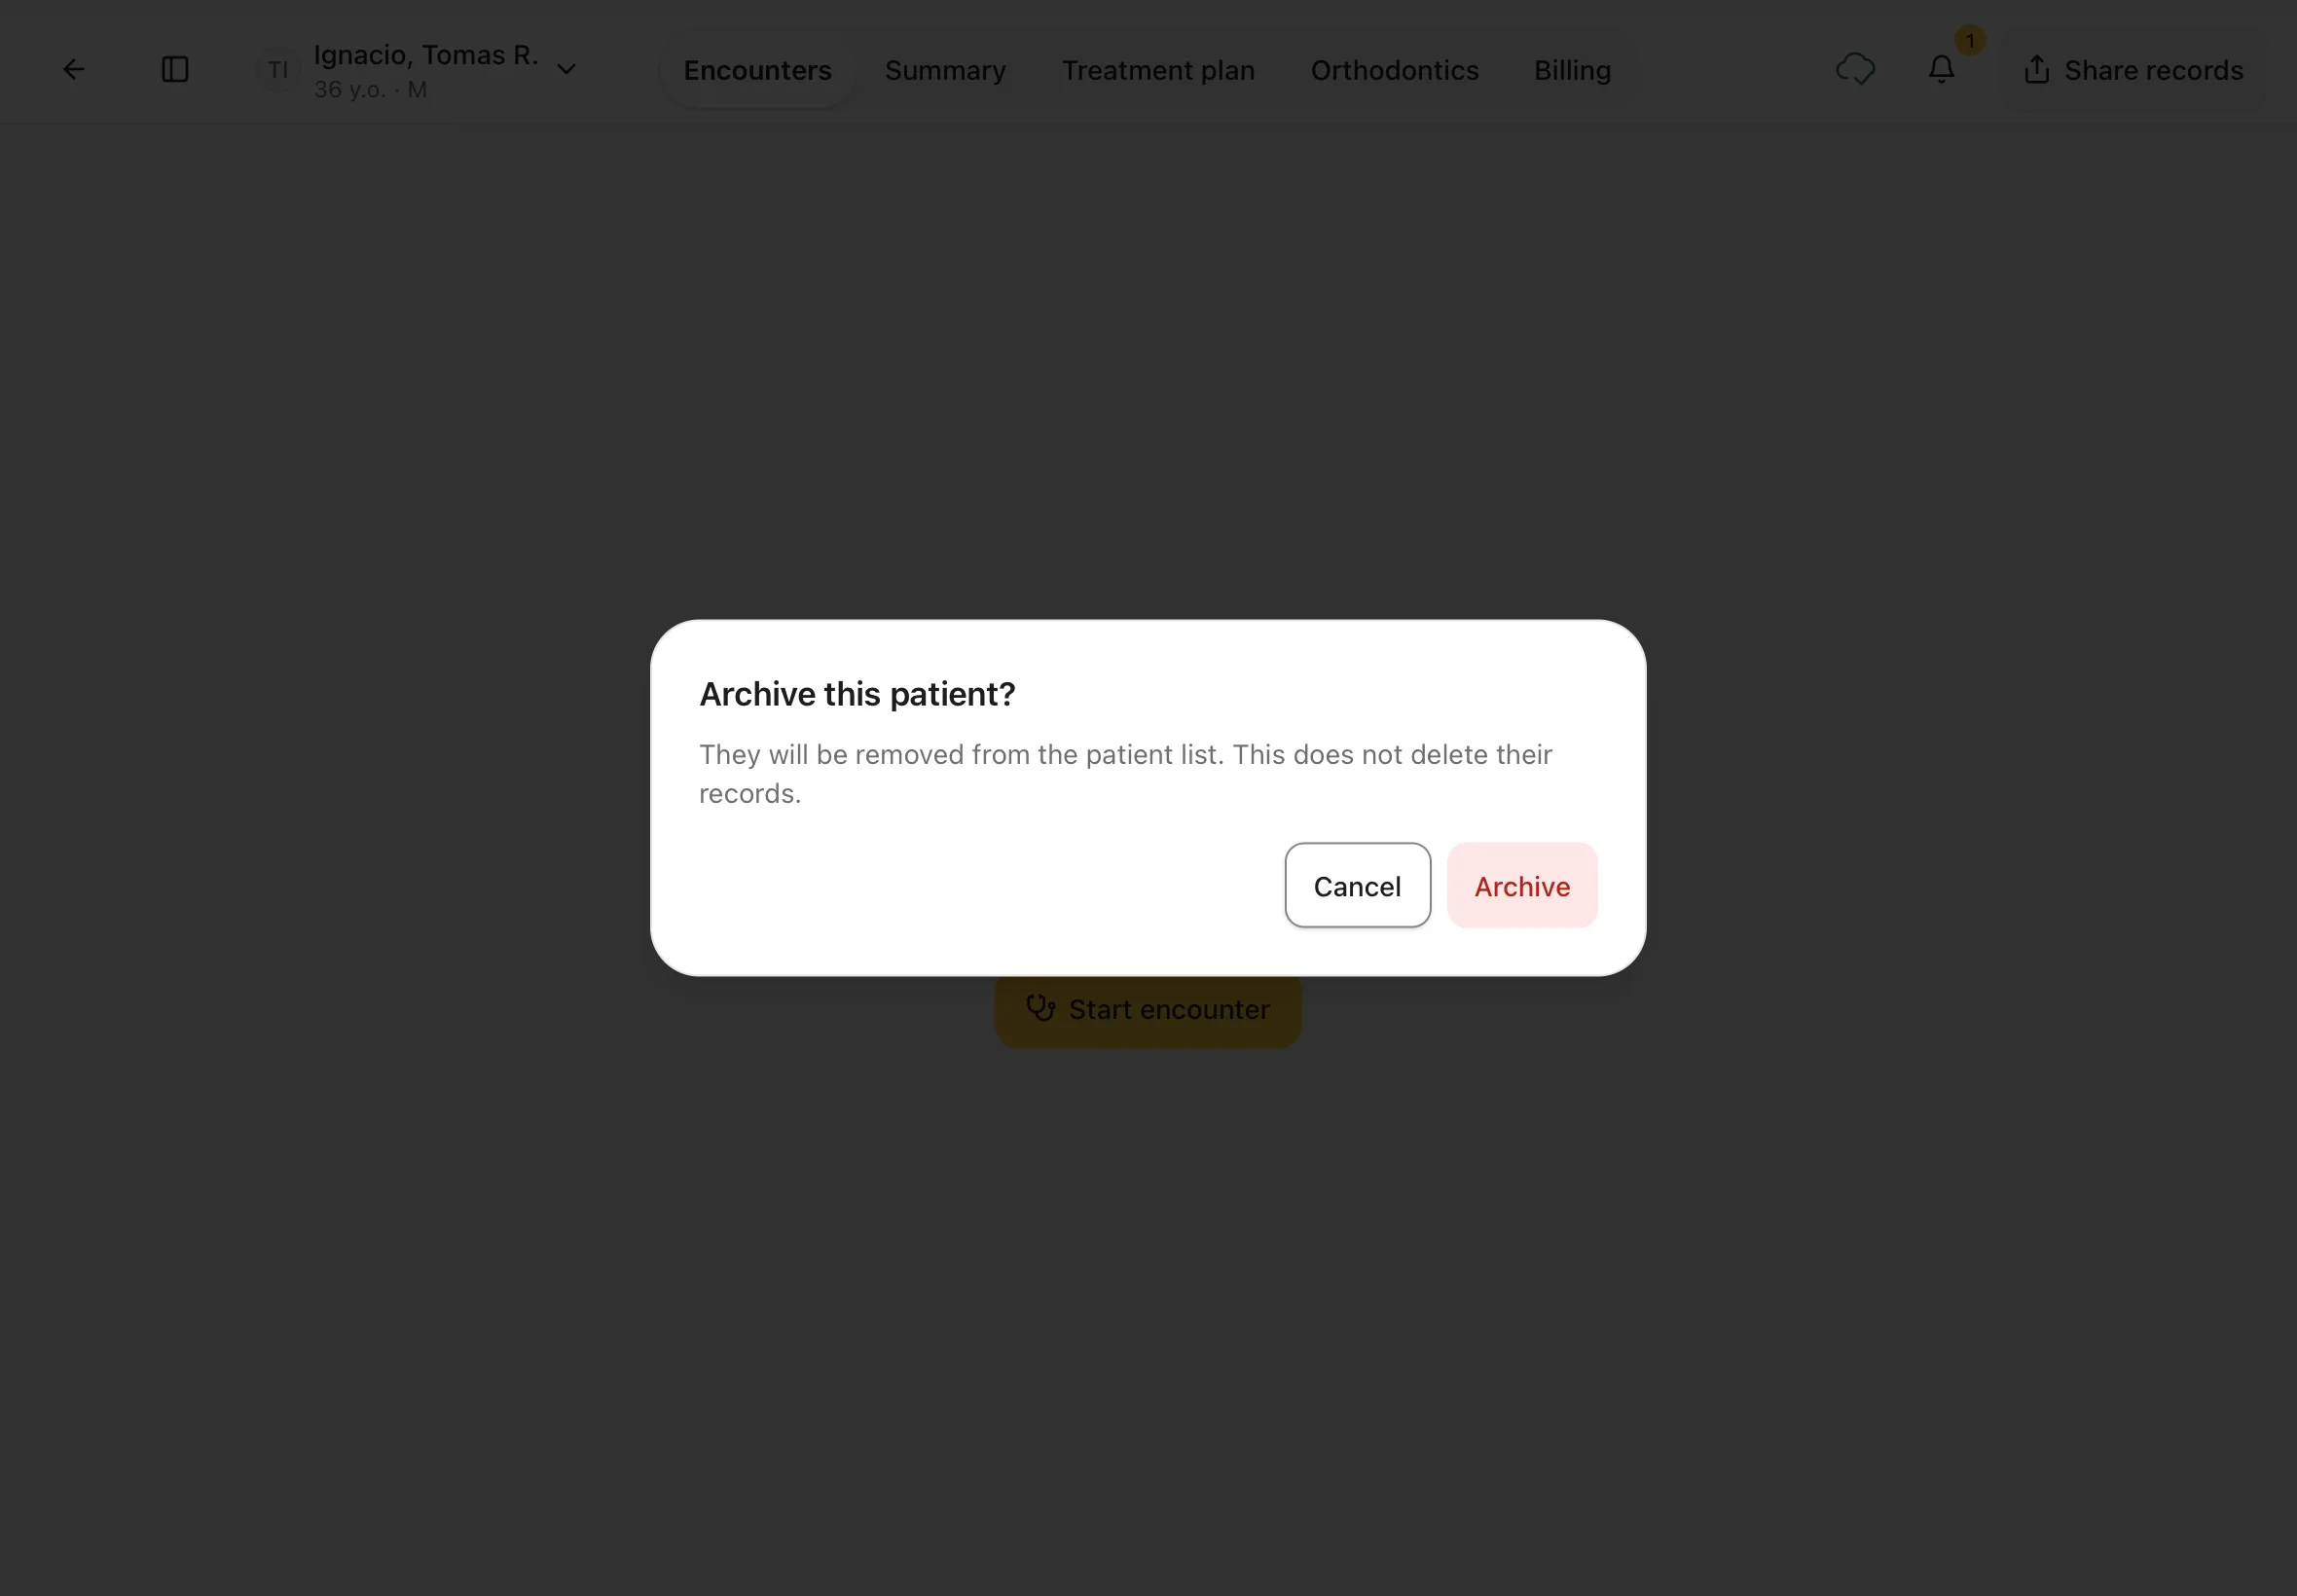
Archiving takes the patient off your patient list. Their records are kept.
Tips
Back to the list
Tap ← at the top left to go back to where you came from.
If something goes wrong
Start encounter is greyed out in the menu. The patient already has an open visit. Open it from Encounters instead of starting a new one.
Good to know
Share records at the top right prints or shares the patient's records from your device. Dentalemon doesn't track who receives a shared copy, and a shared copy can't be taken back.