Appointments
Before you start
- Dentalemon offers only times when your clinic is open. Set your opening hours first.
Steps
1. Open Appointments
Tap Appointments in the sidebar. Switch between List and Calendar at the top left.
In Calendar, choose Day, Week or Month from View. Tap ‹ › to move between days or weeks, and the calendar button with a tick (Today) to come back to today. Tap the date range to jump to another date.
You should see: your appointments in the calendar, with today's date circled. Each appointment shows the patient and its status, such as Confirmed or Pending. A blue line marks the time now.
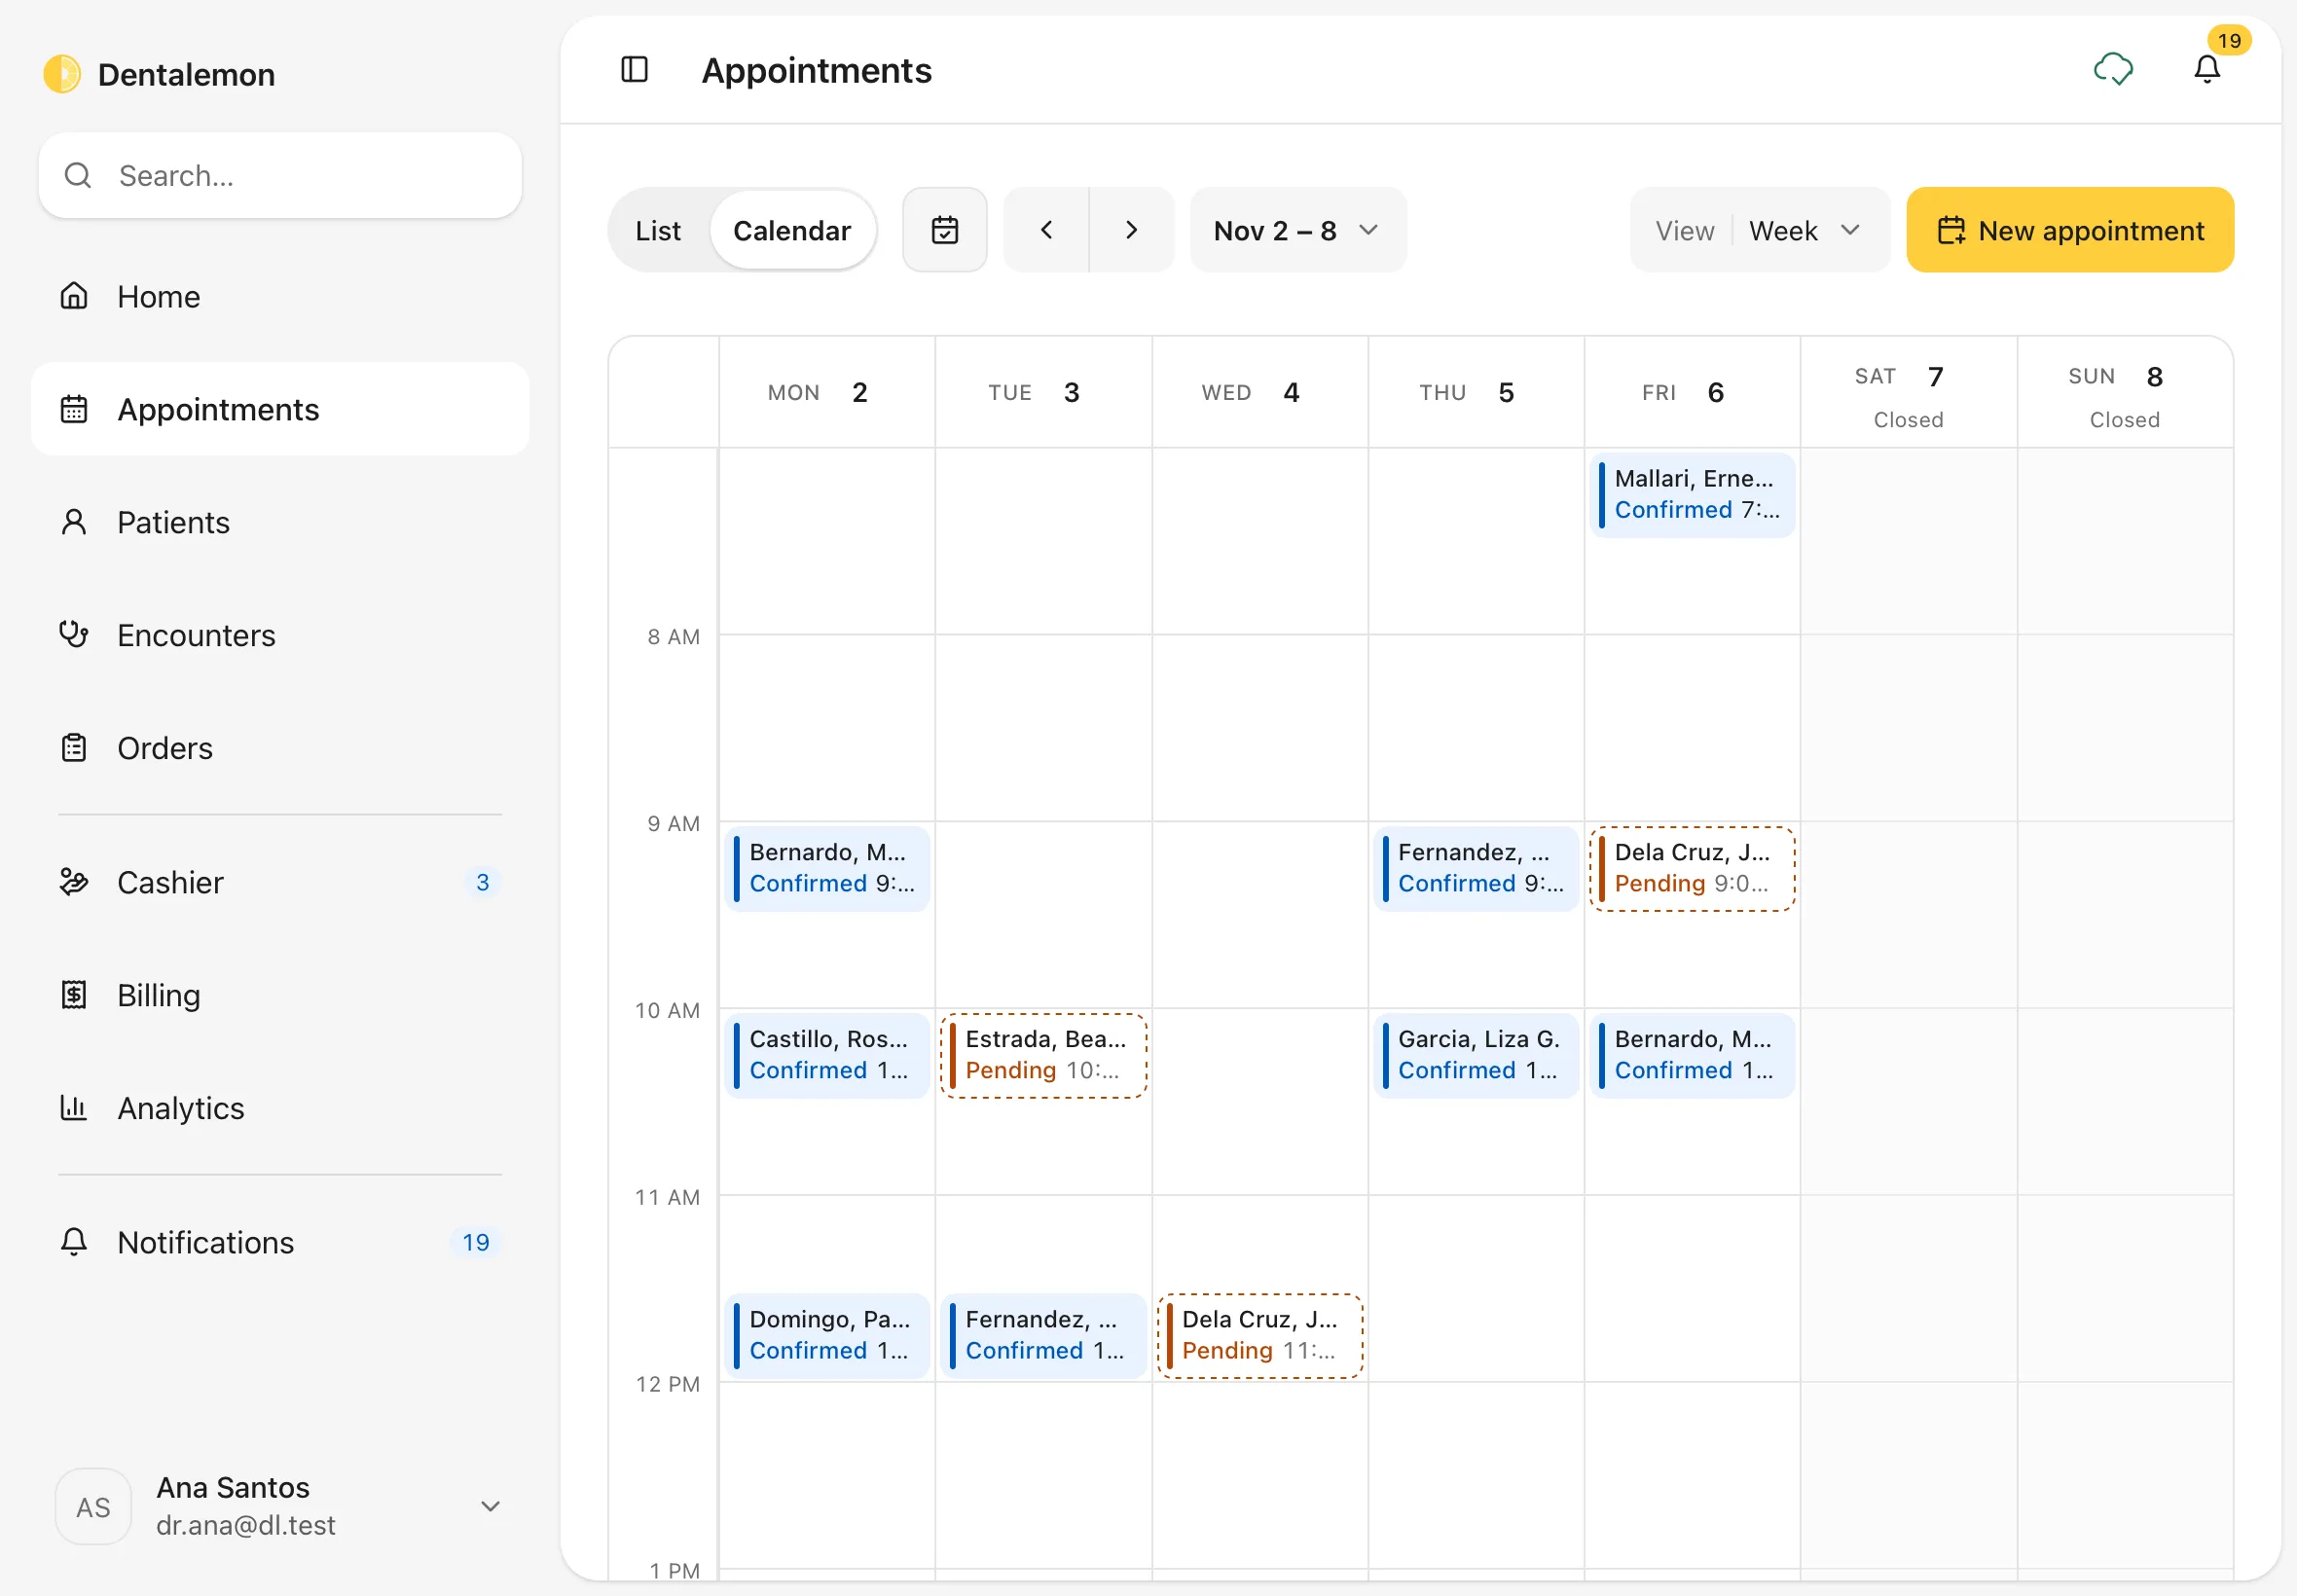
- Day shows one day hour by hour. Use it on a busy day: each block is one patient. Walk-ins (patients seen without a booking) appear as grey blocks.
- Month shows the whole month. Each day lists its first appointments, then +N more. Tap +N more to open that day. Days the clinic is closed say Closed.
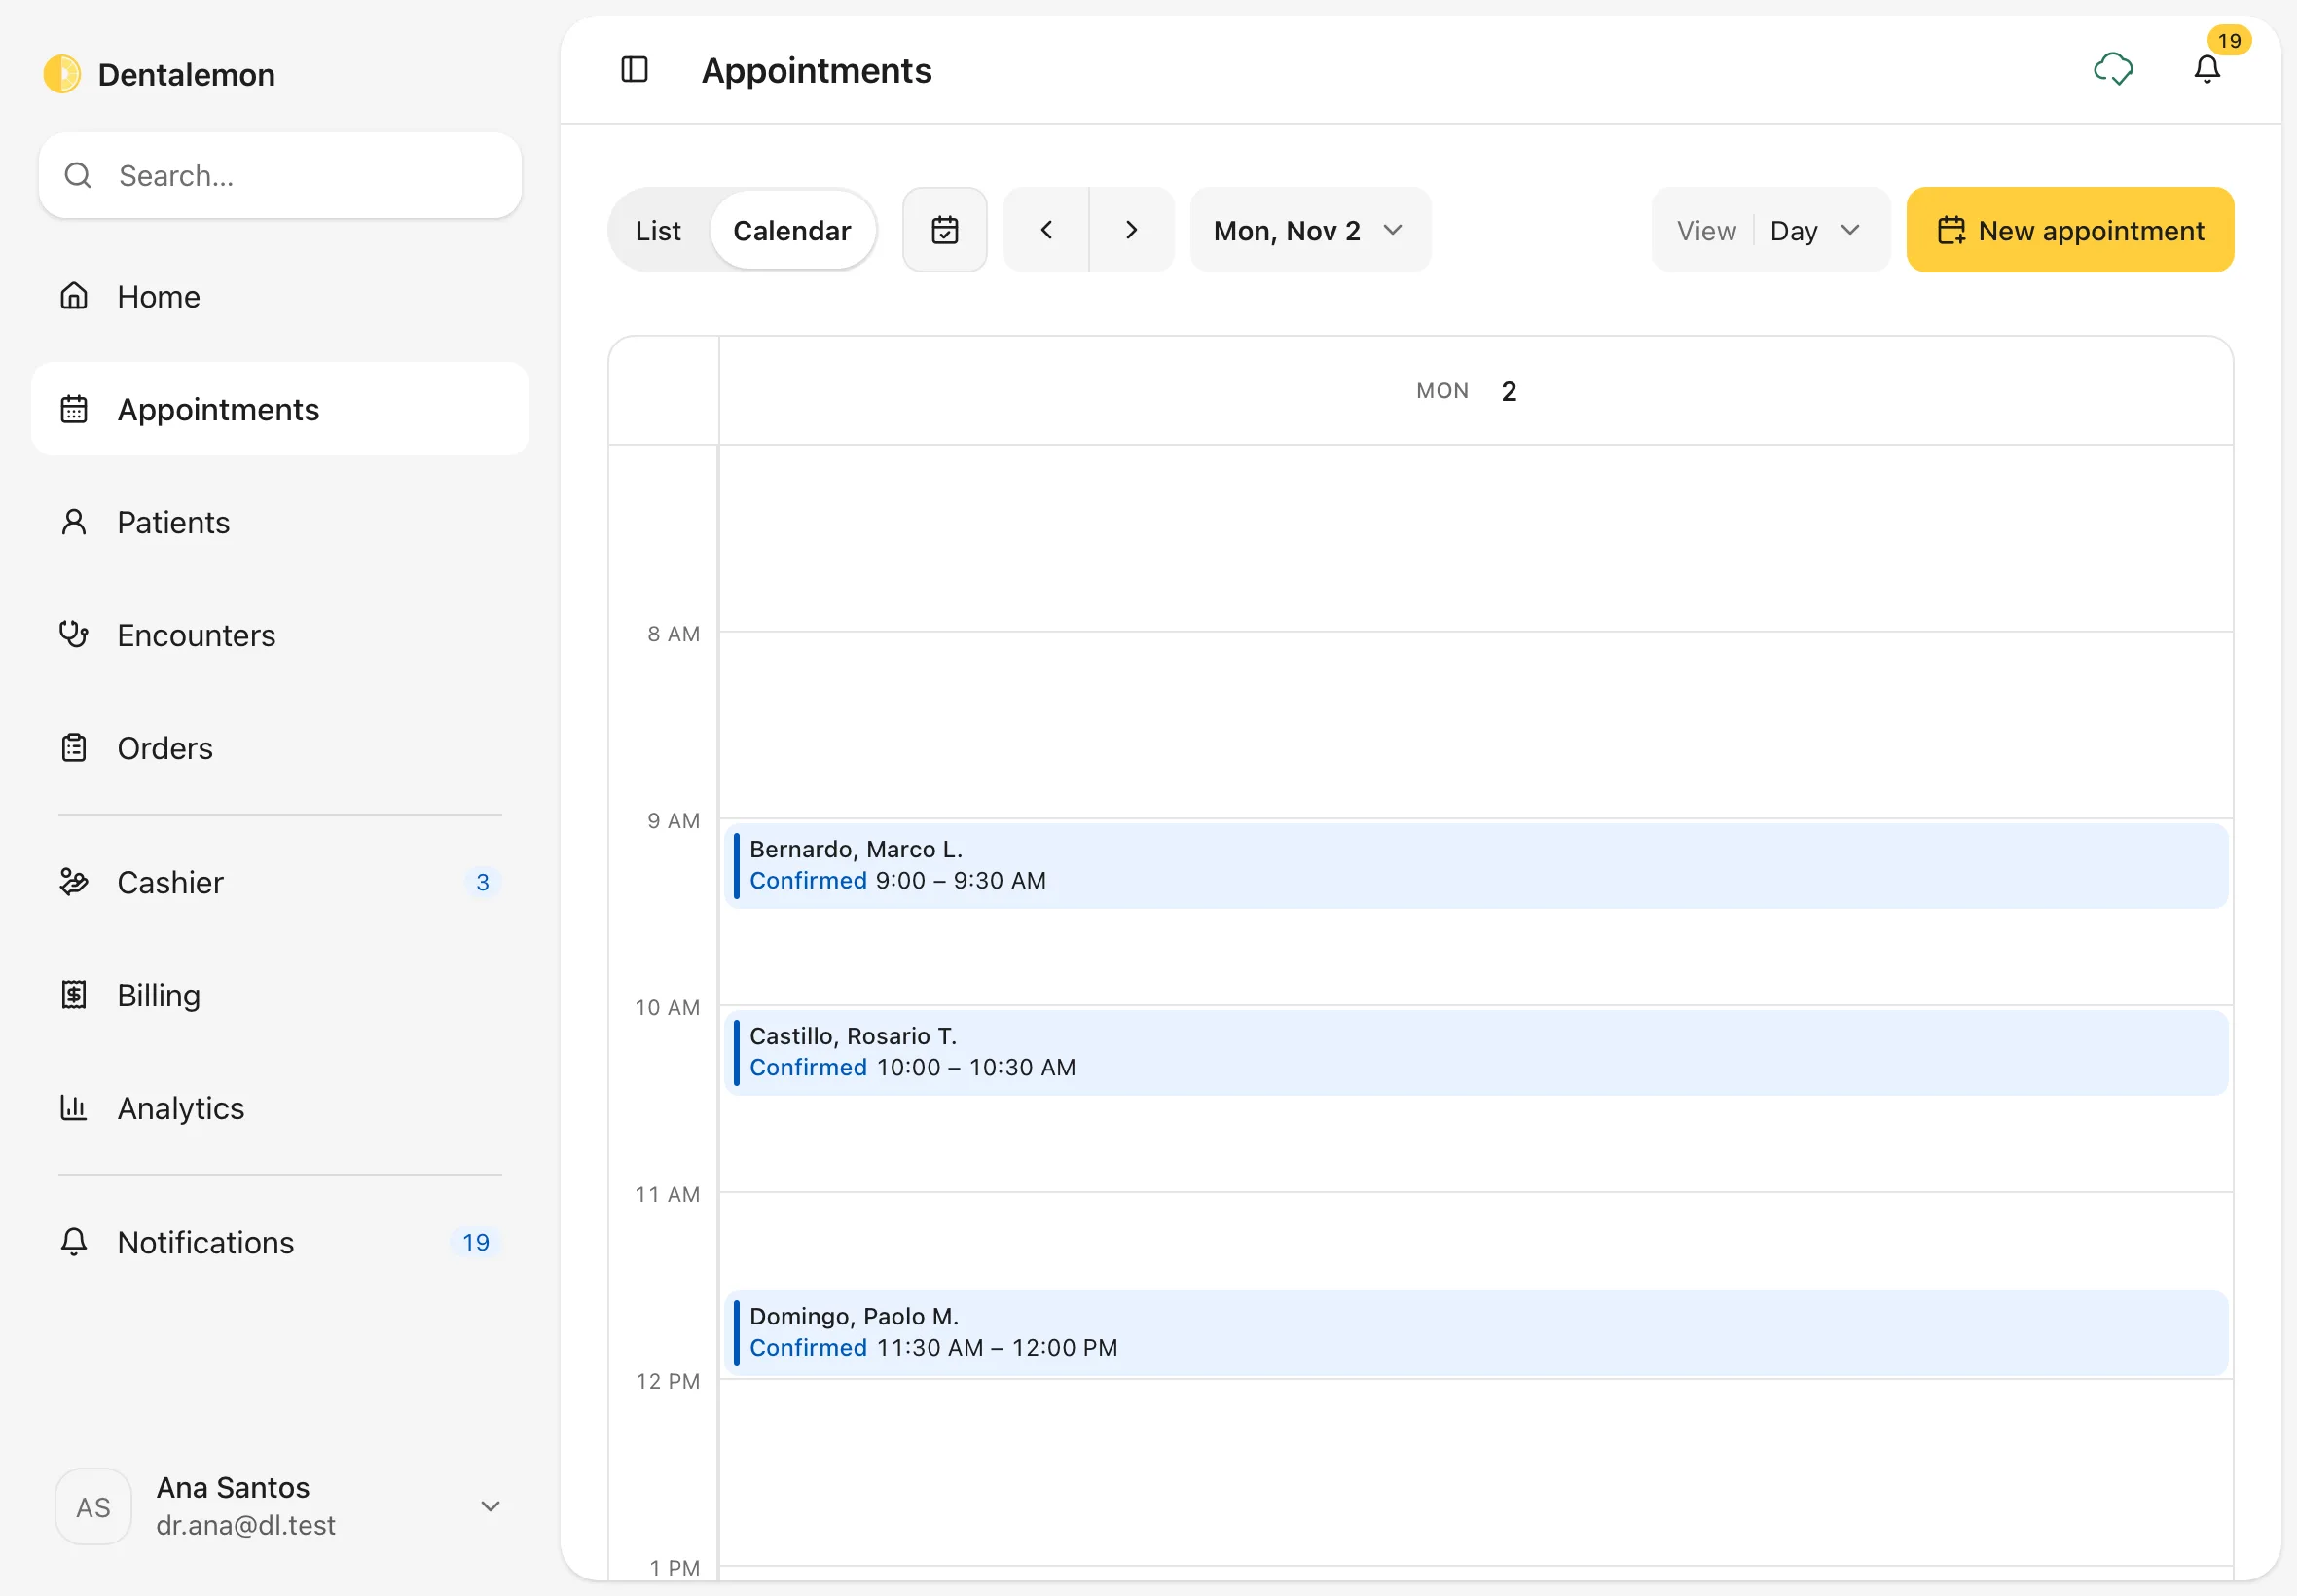
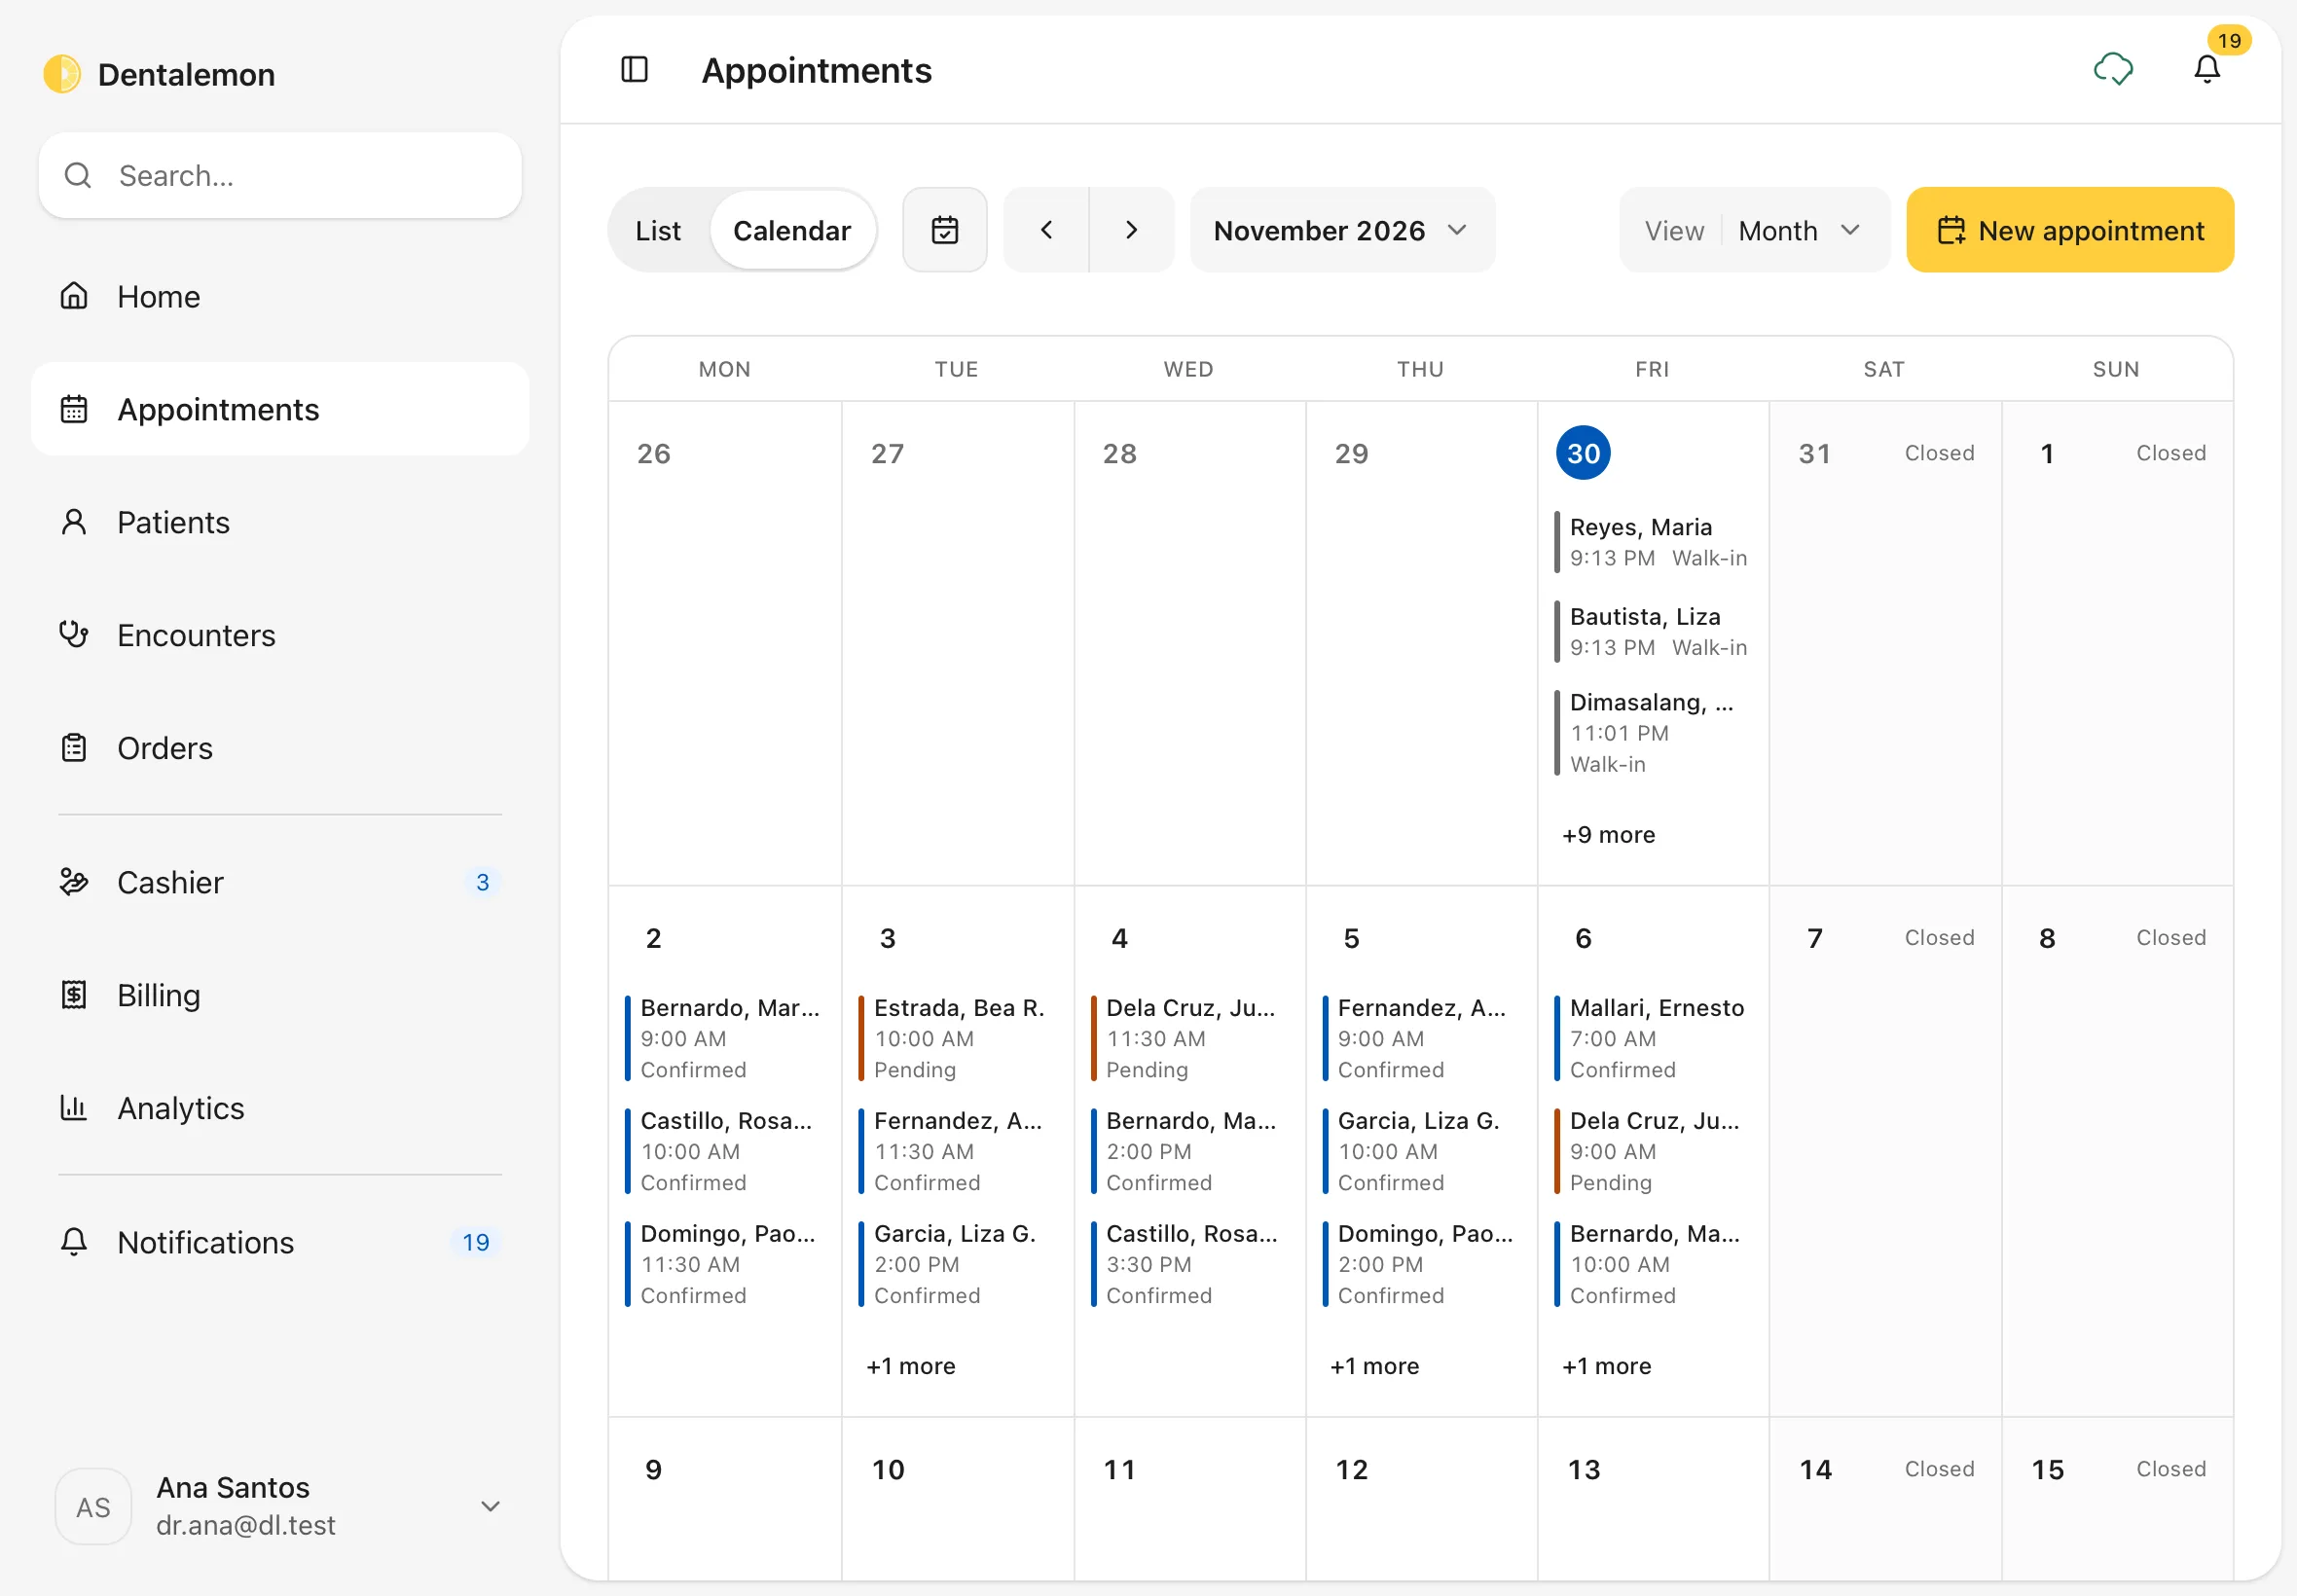
Choose the view that opens first
In Settings › Appointments, set Default view to Day, Week, Month or List. See Settings basics.
2. Use the list
Tap List. The cards at the top show Next available, Awaiting confirmation, This week's fill and No-show rate. Below, filter by Timing (for example Upcoming) and Status, or search for a patient.
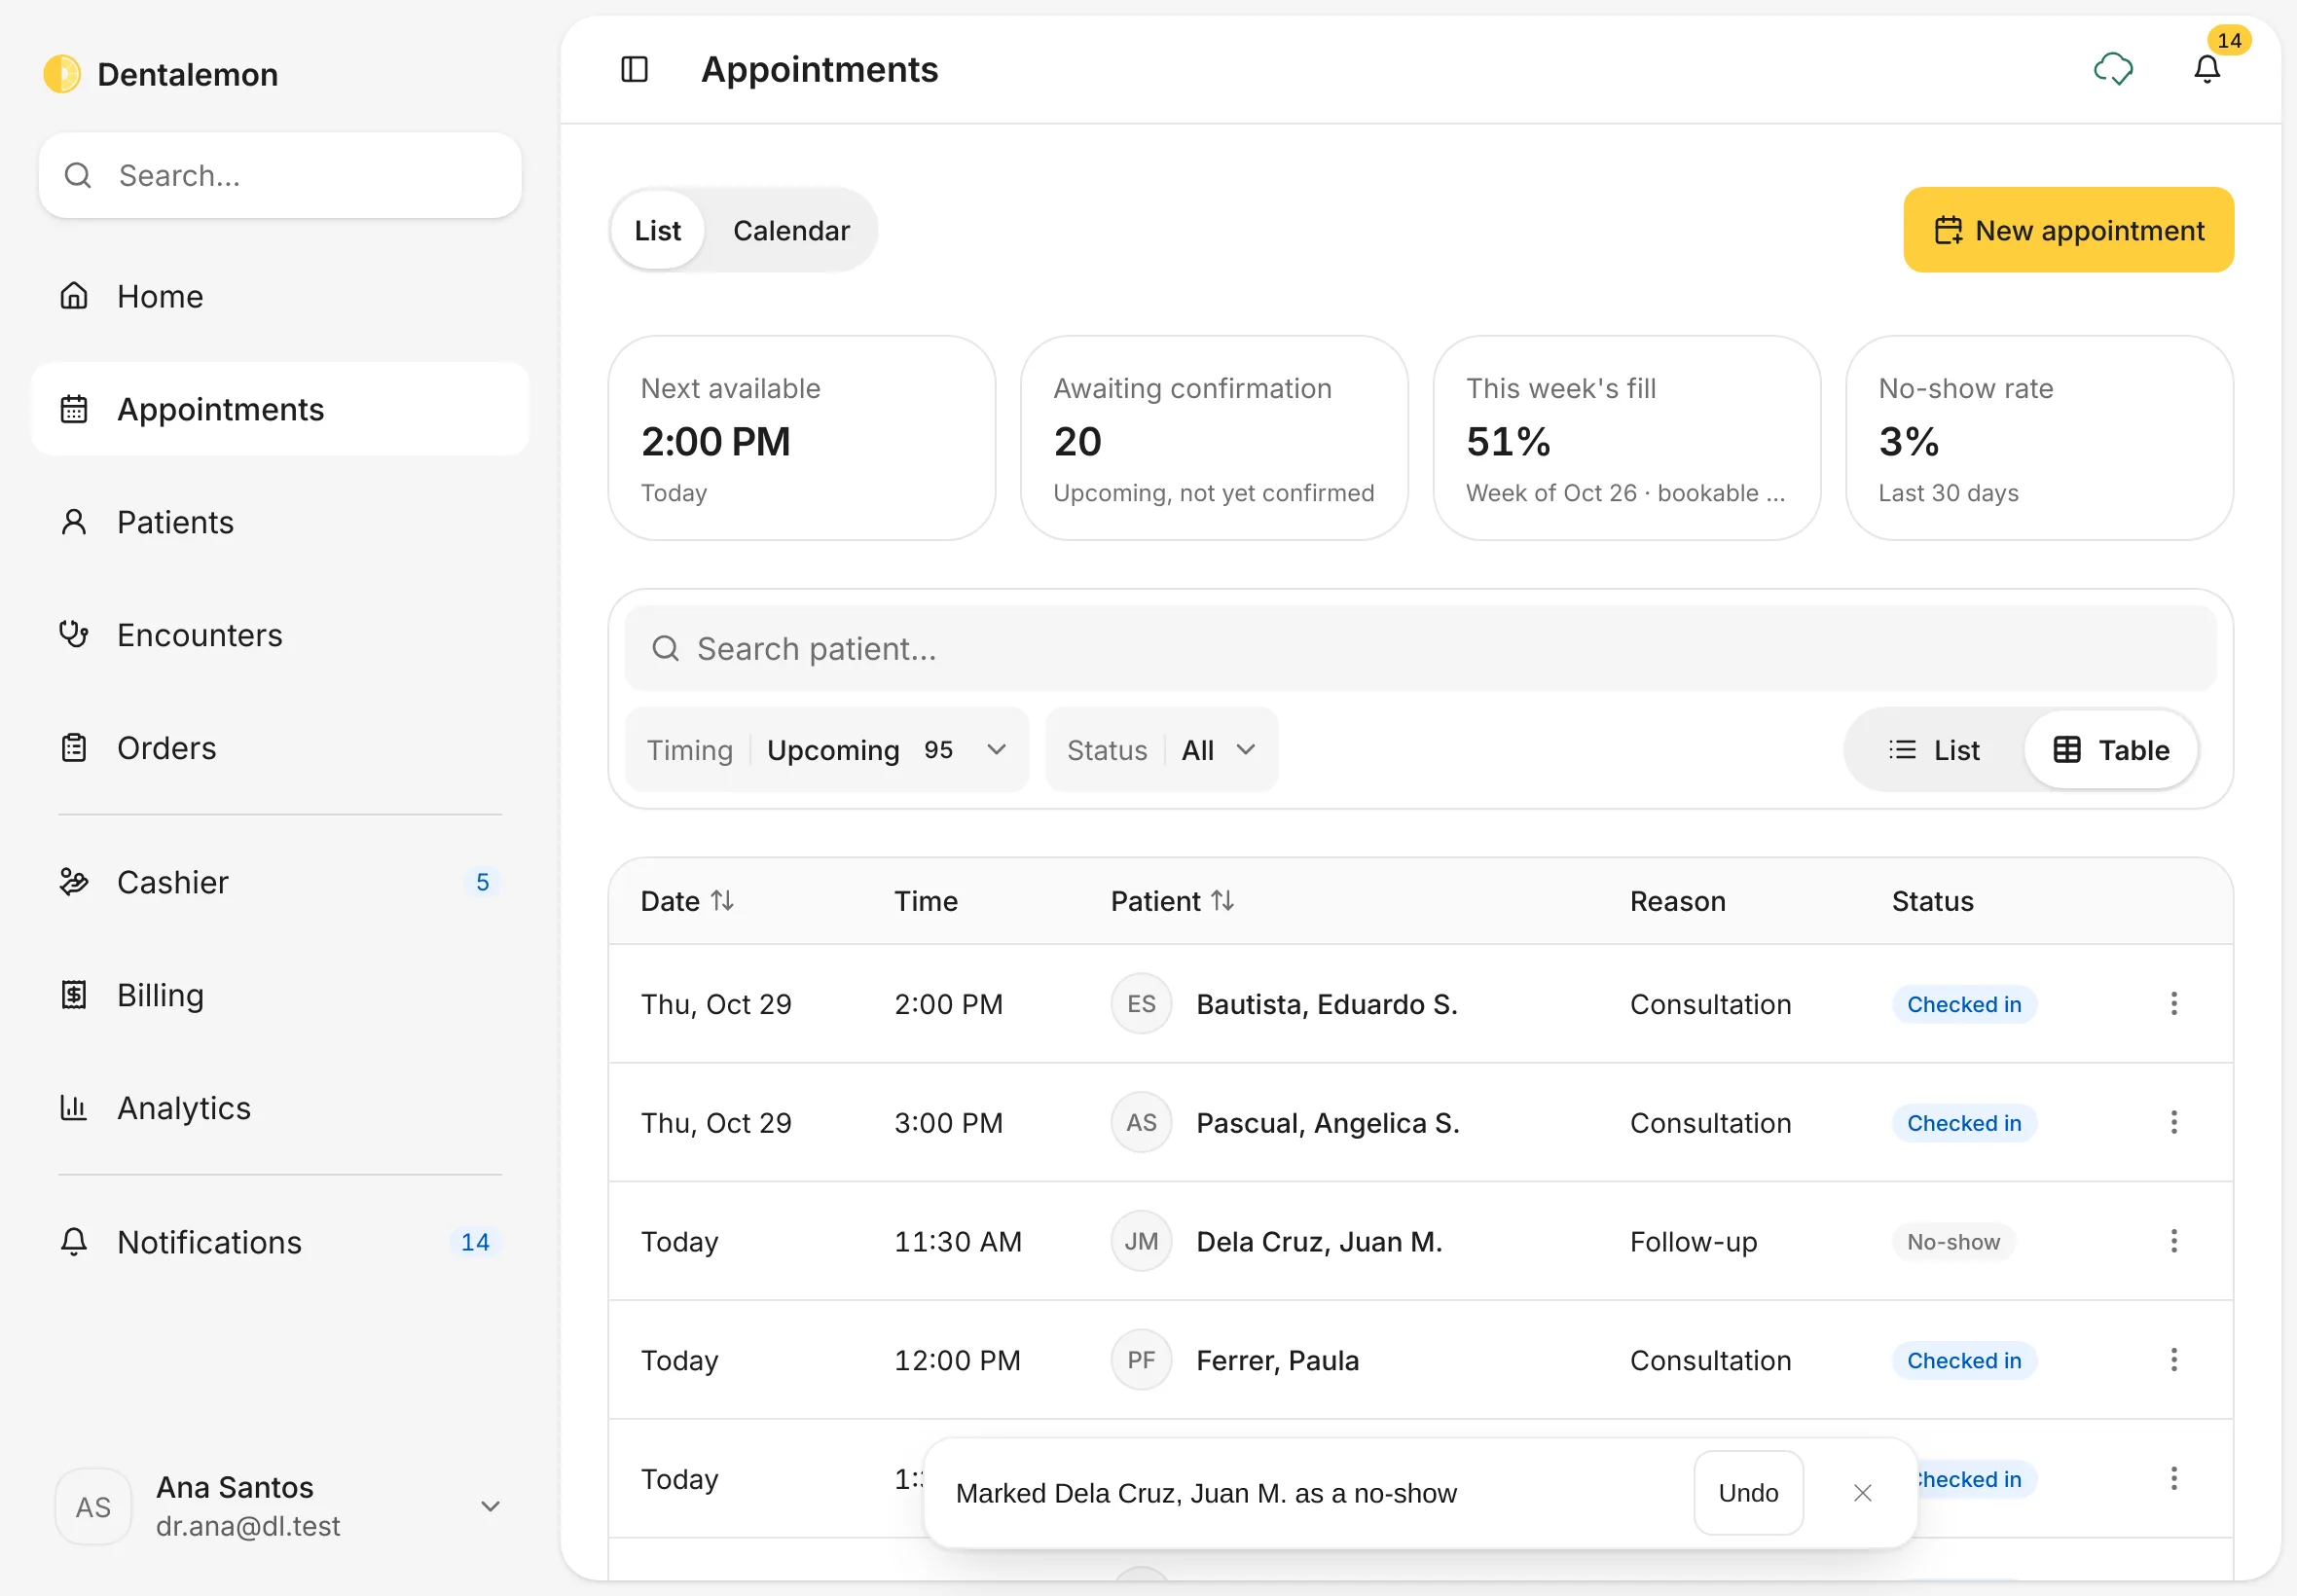
You should see: a table with Date, Time, Patient, Reason and Status.
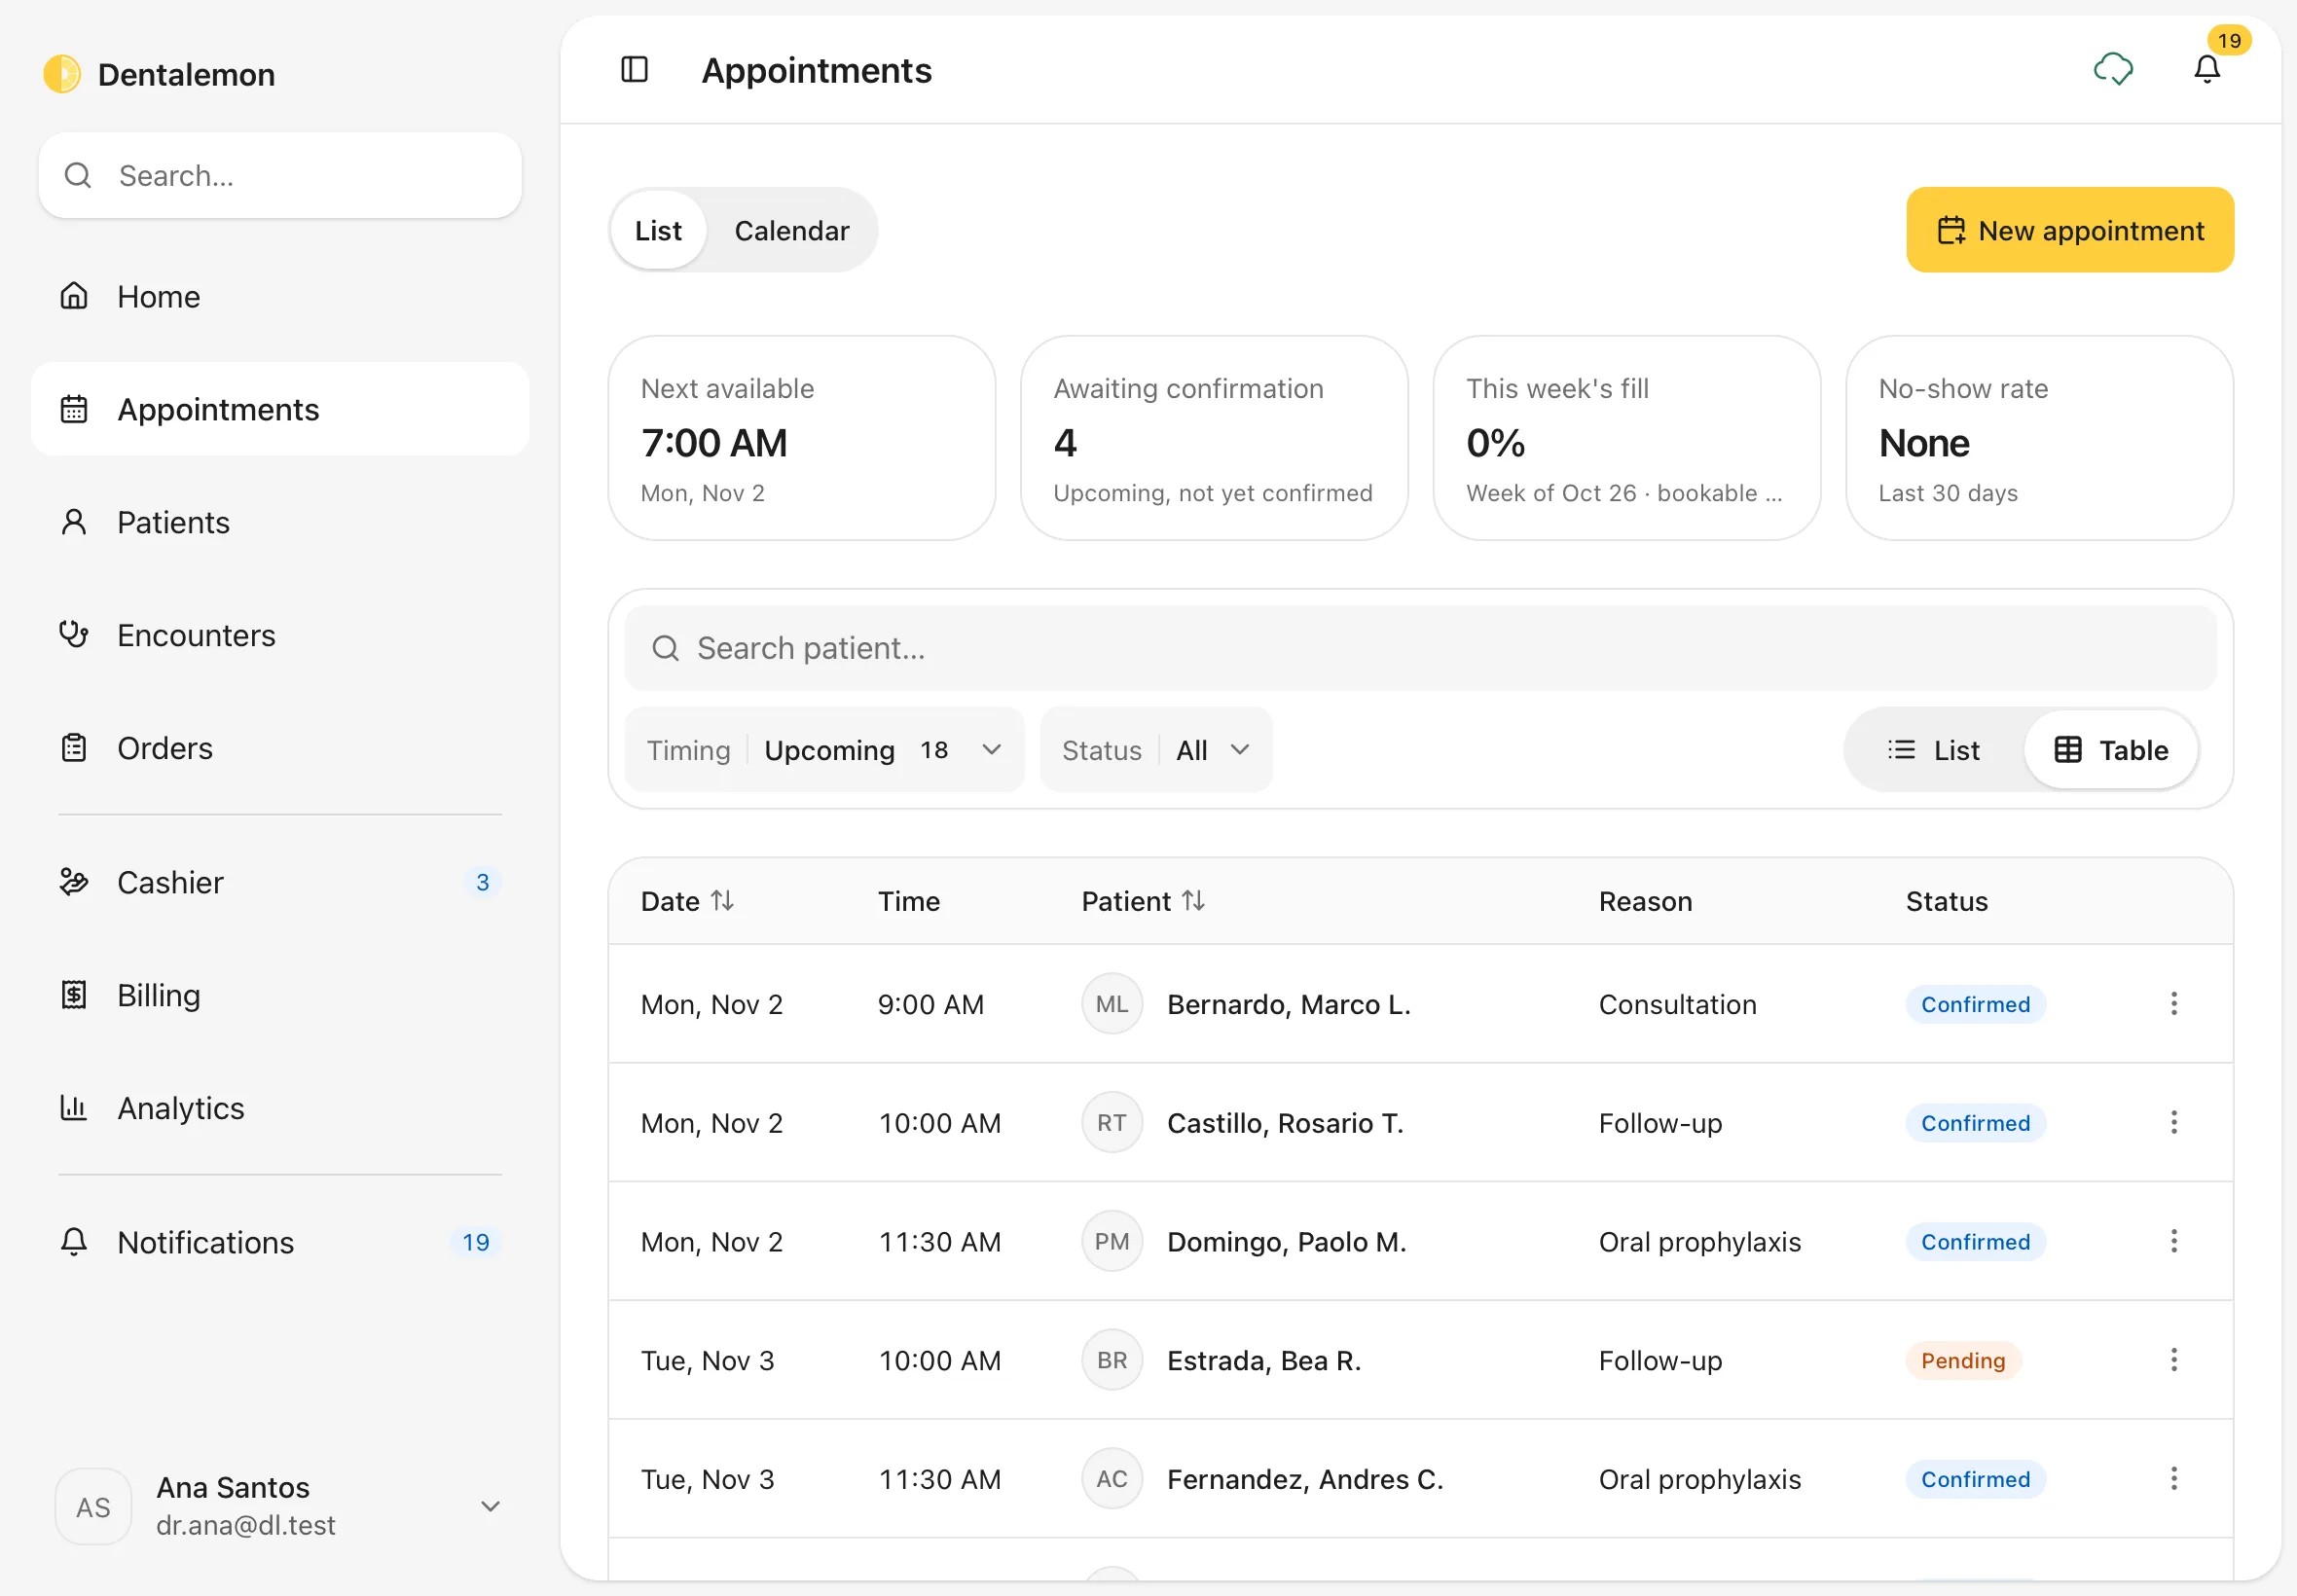
Quick actions from the list
Tap ⋮ at the end of a row for that appointment's actions, such as View details, Confirm, Reschedule, Check in, Mark no-show or Cancel appointment, without opening it first. Only the actions that fit the appointment are shown.
3. Book a new appointment
Tap New appointment. (You can also tap an empty time in the calendar, or use Book appointment in a patient's menu.)
- Patient: type a name and pick the patient. For someone new, tap New patient.
- Visit: choose a Reason, such as Consultation. The length shows next to it. Add a Note if you like.
You should see: the patient's name, and the visit reason with its length.
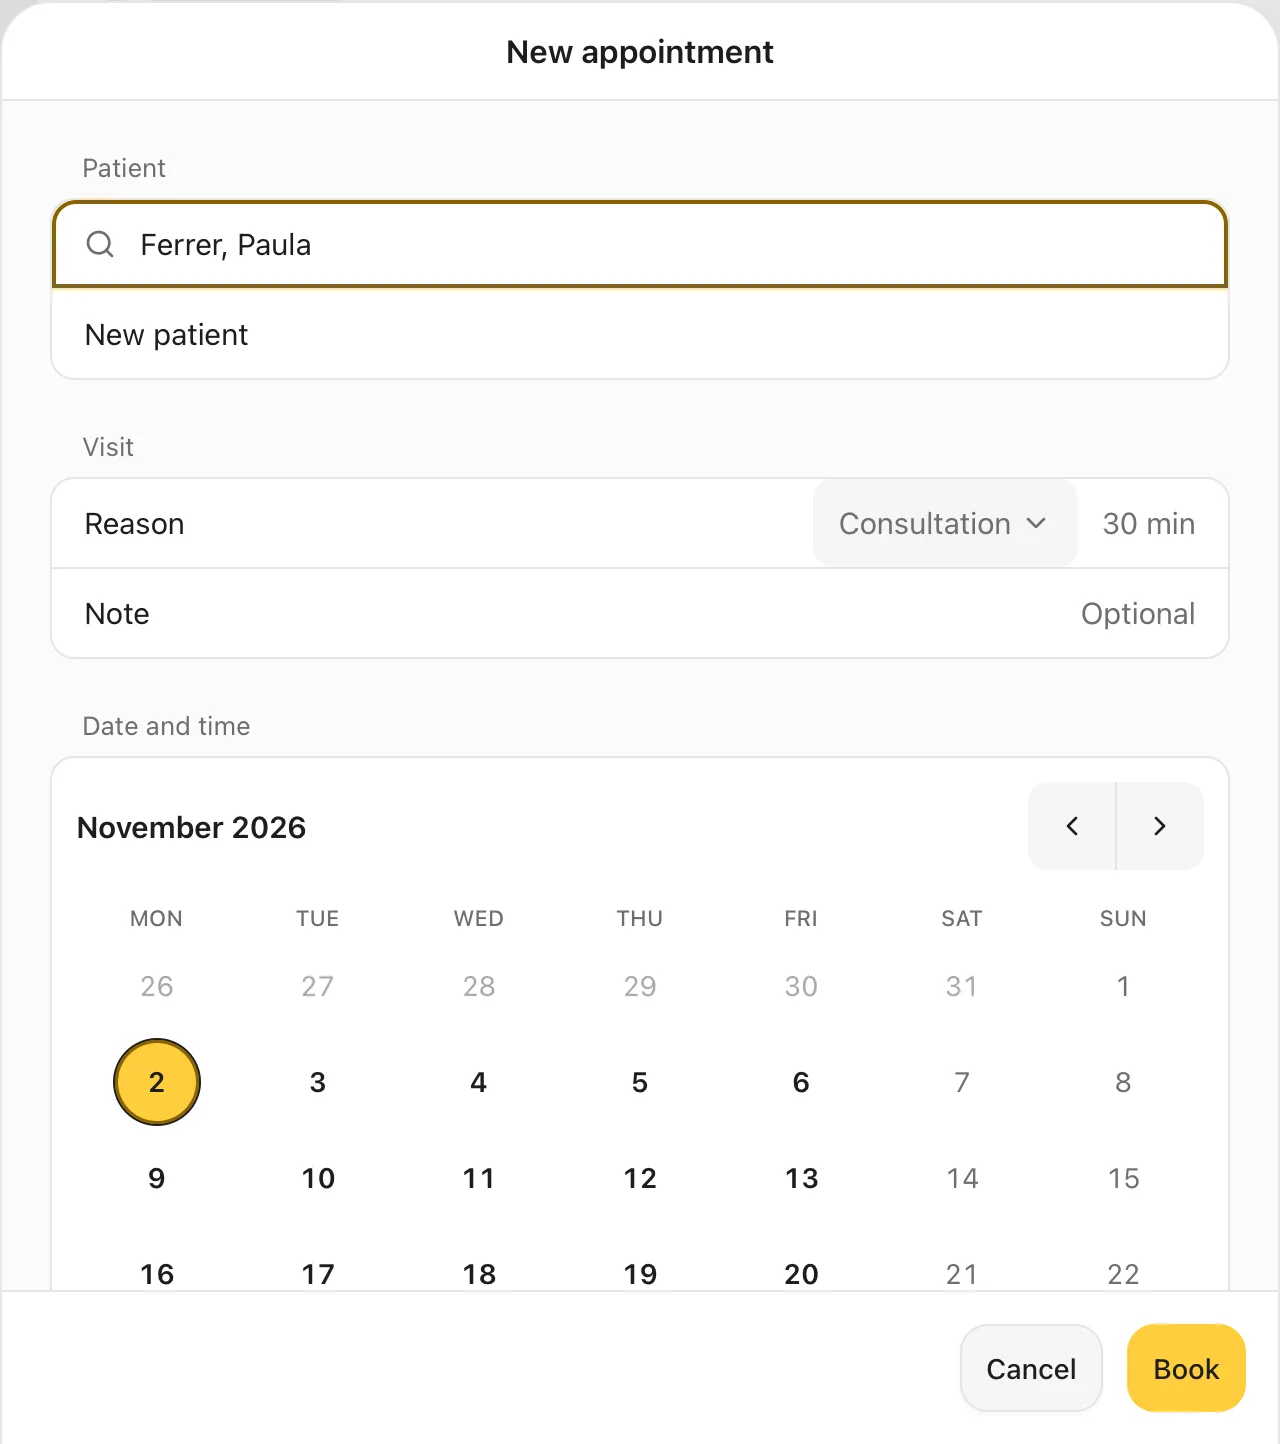
4. Pick a day and time, then book
Scroll to Date and time. Tap a day, then one of the times shown. Only free times appear, and the line above them says how many, for example Mon, Nov 2 · 21 times available.
Under Status, choose Confirmed if the patient has agreed to the time, or Not yet confirmed if you still need to check with them. Tap Book.
You should see: your chosen day circled and the time highlighted in yellow.
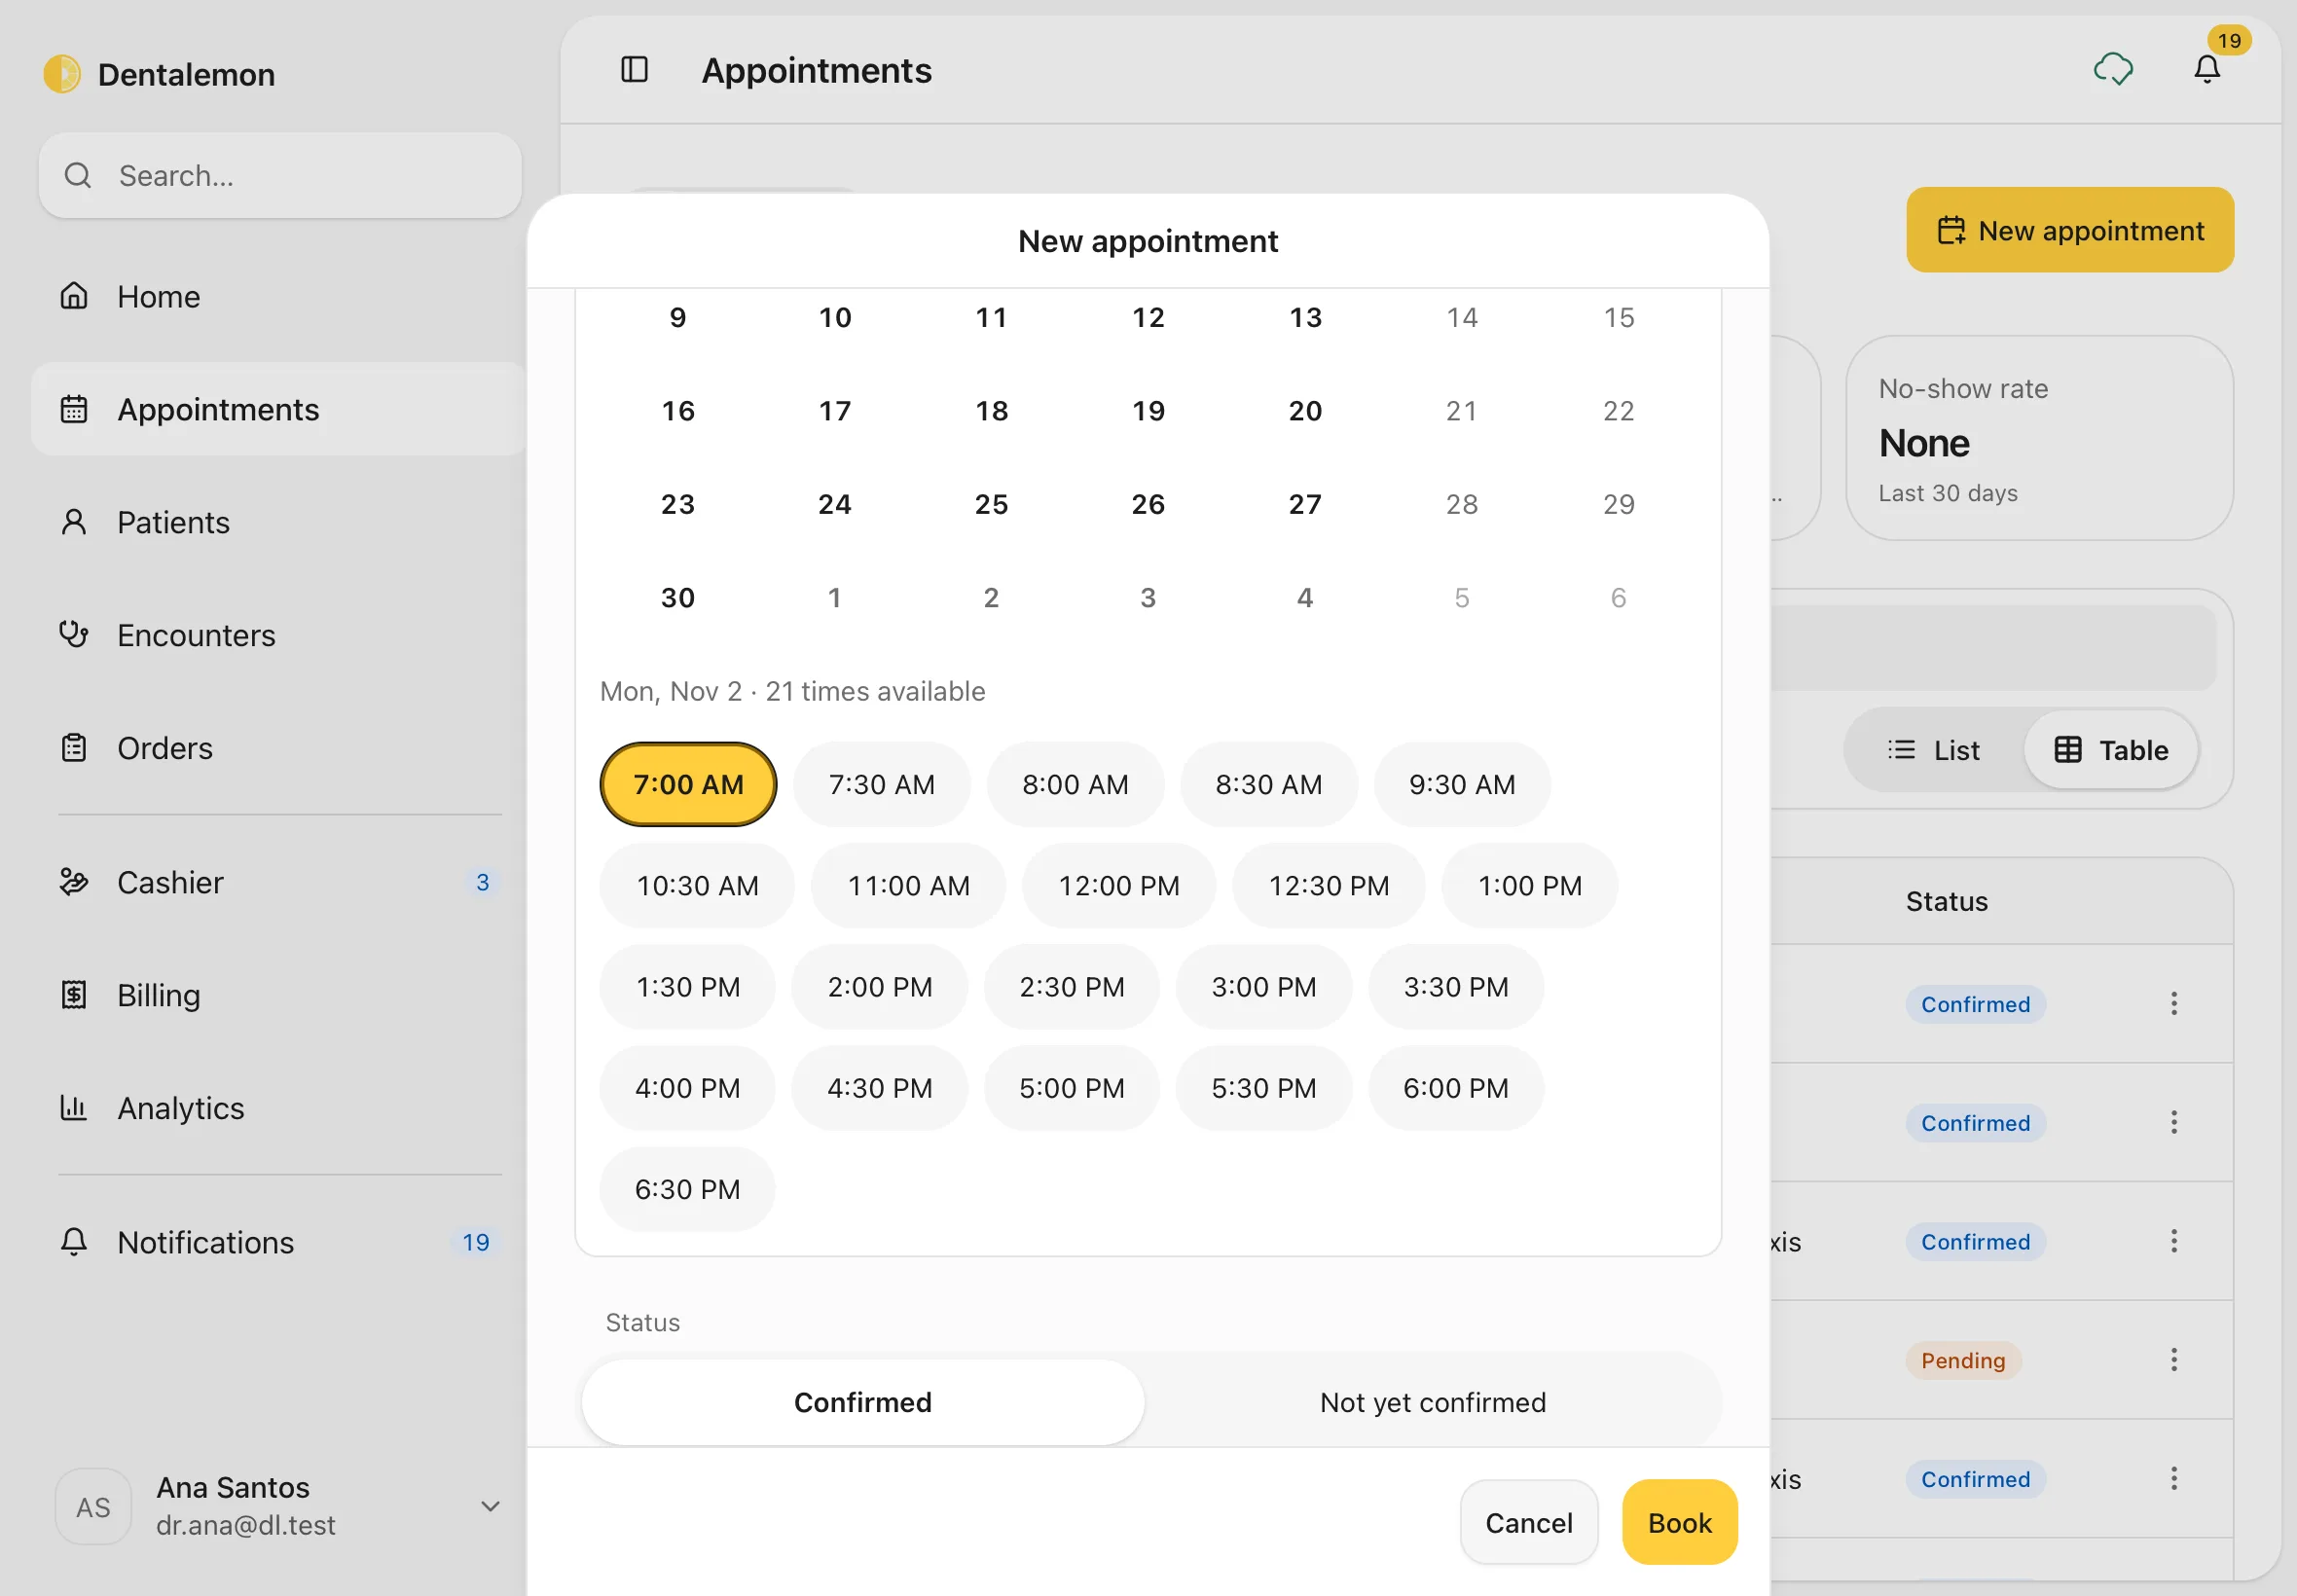
5. Check the booking
A message confirms the booking with the patient, day and time, for example Booked Ferrer, Paula · Mon, Nov 2 · 7:00 – 7:30 AM. Tap View on it to open the appointment.
You should see: the new appointment in the list.
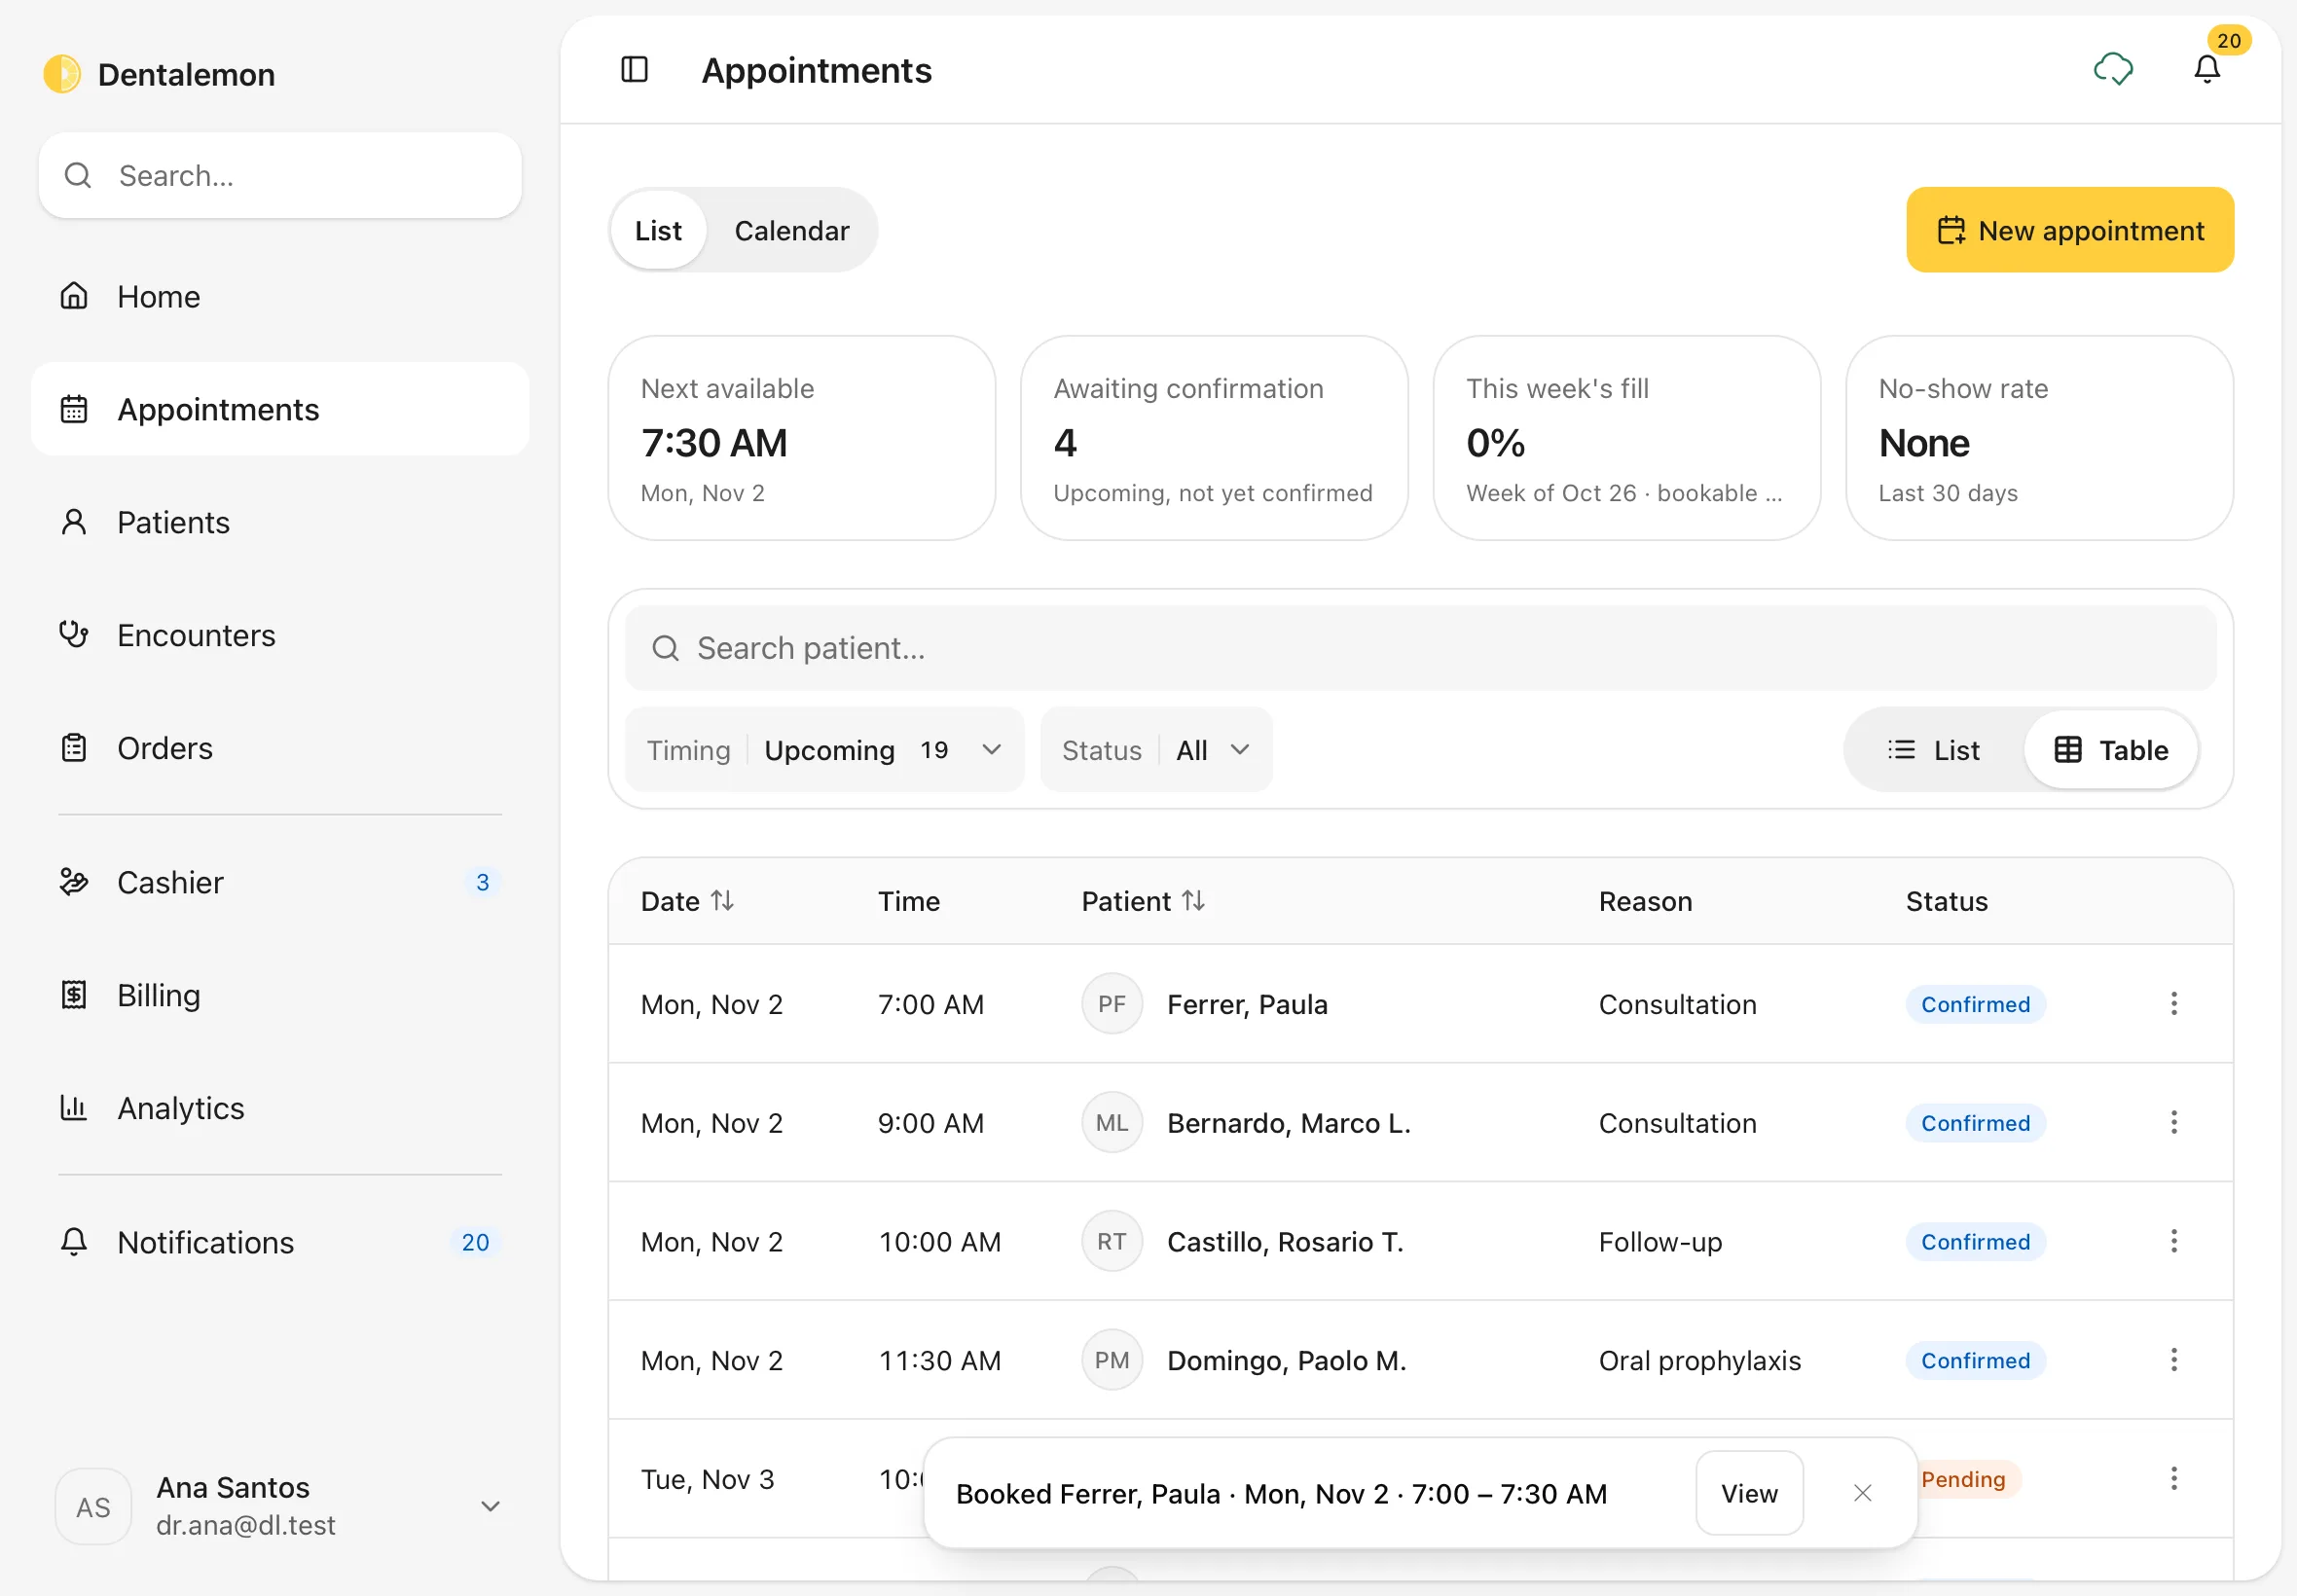
6. Open an appointment
Tap any appointment to open it.
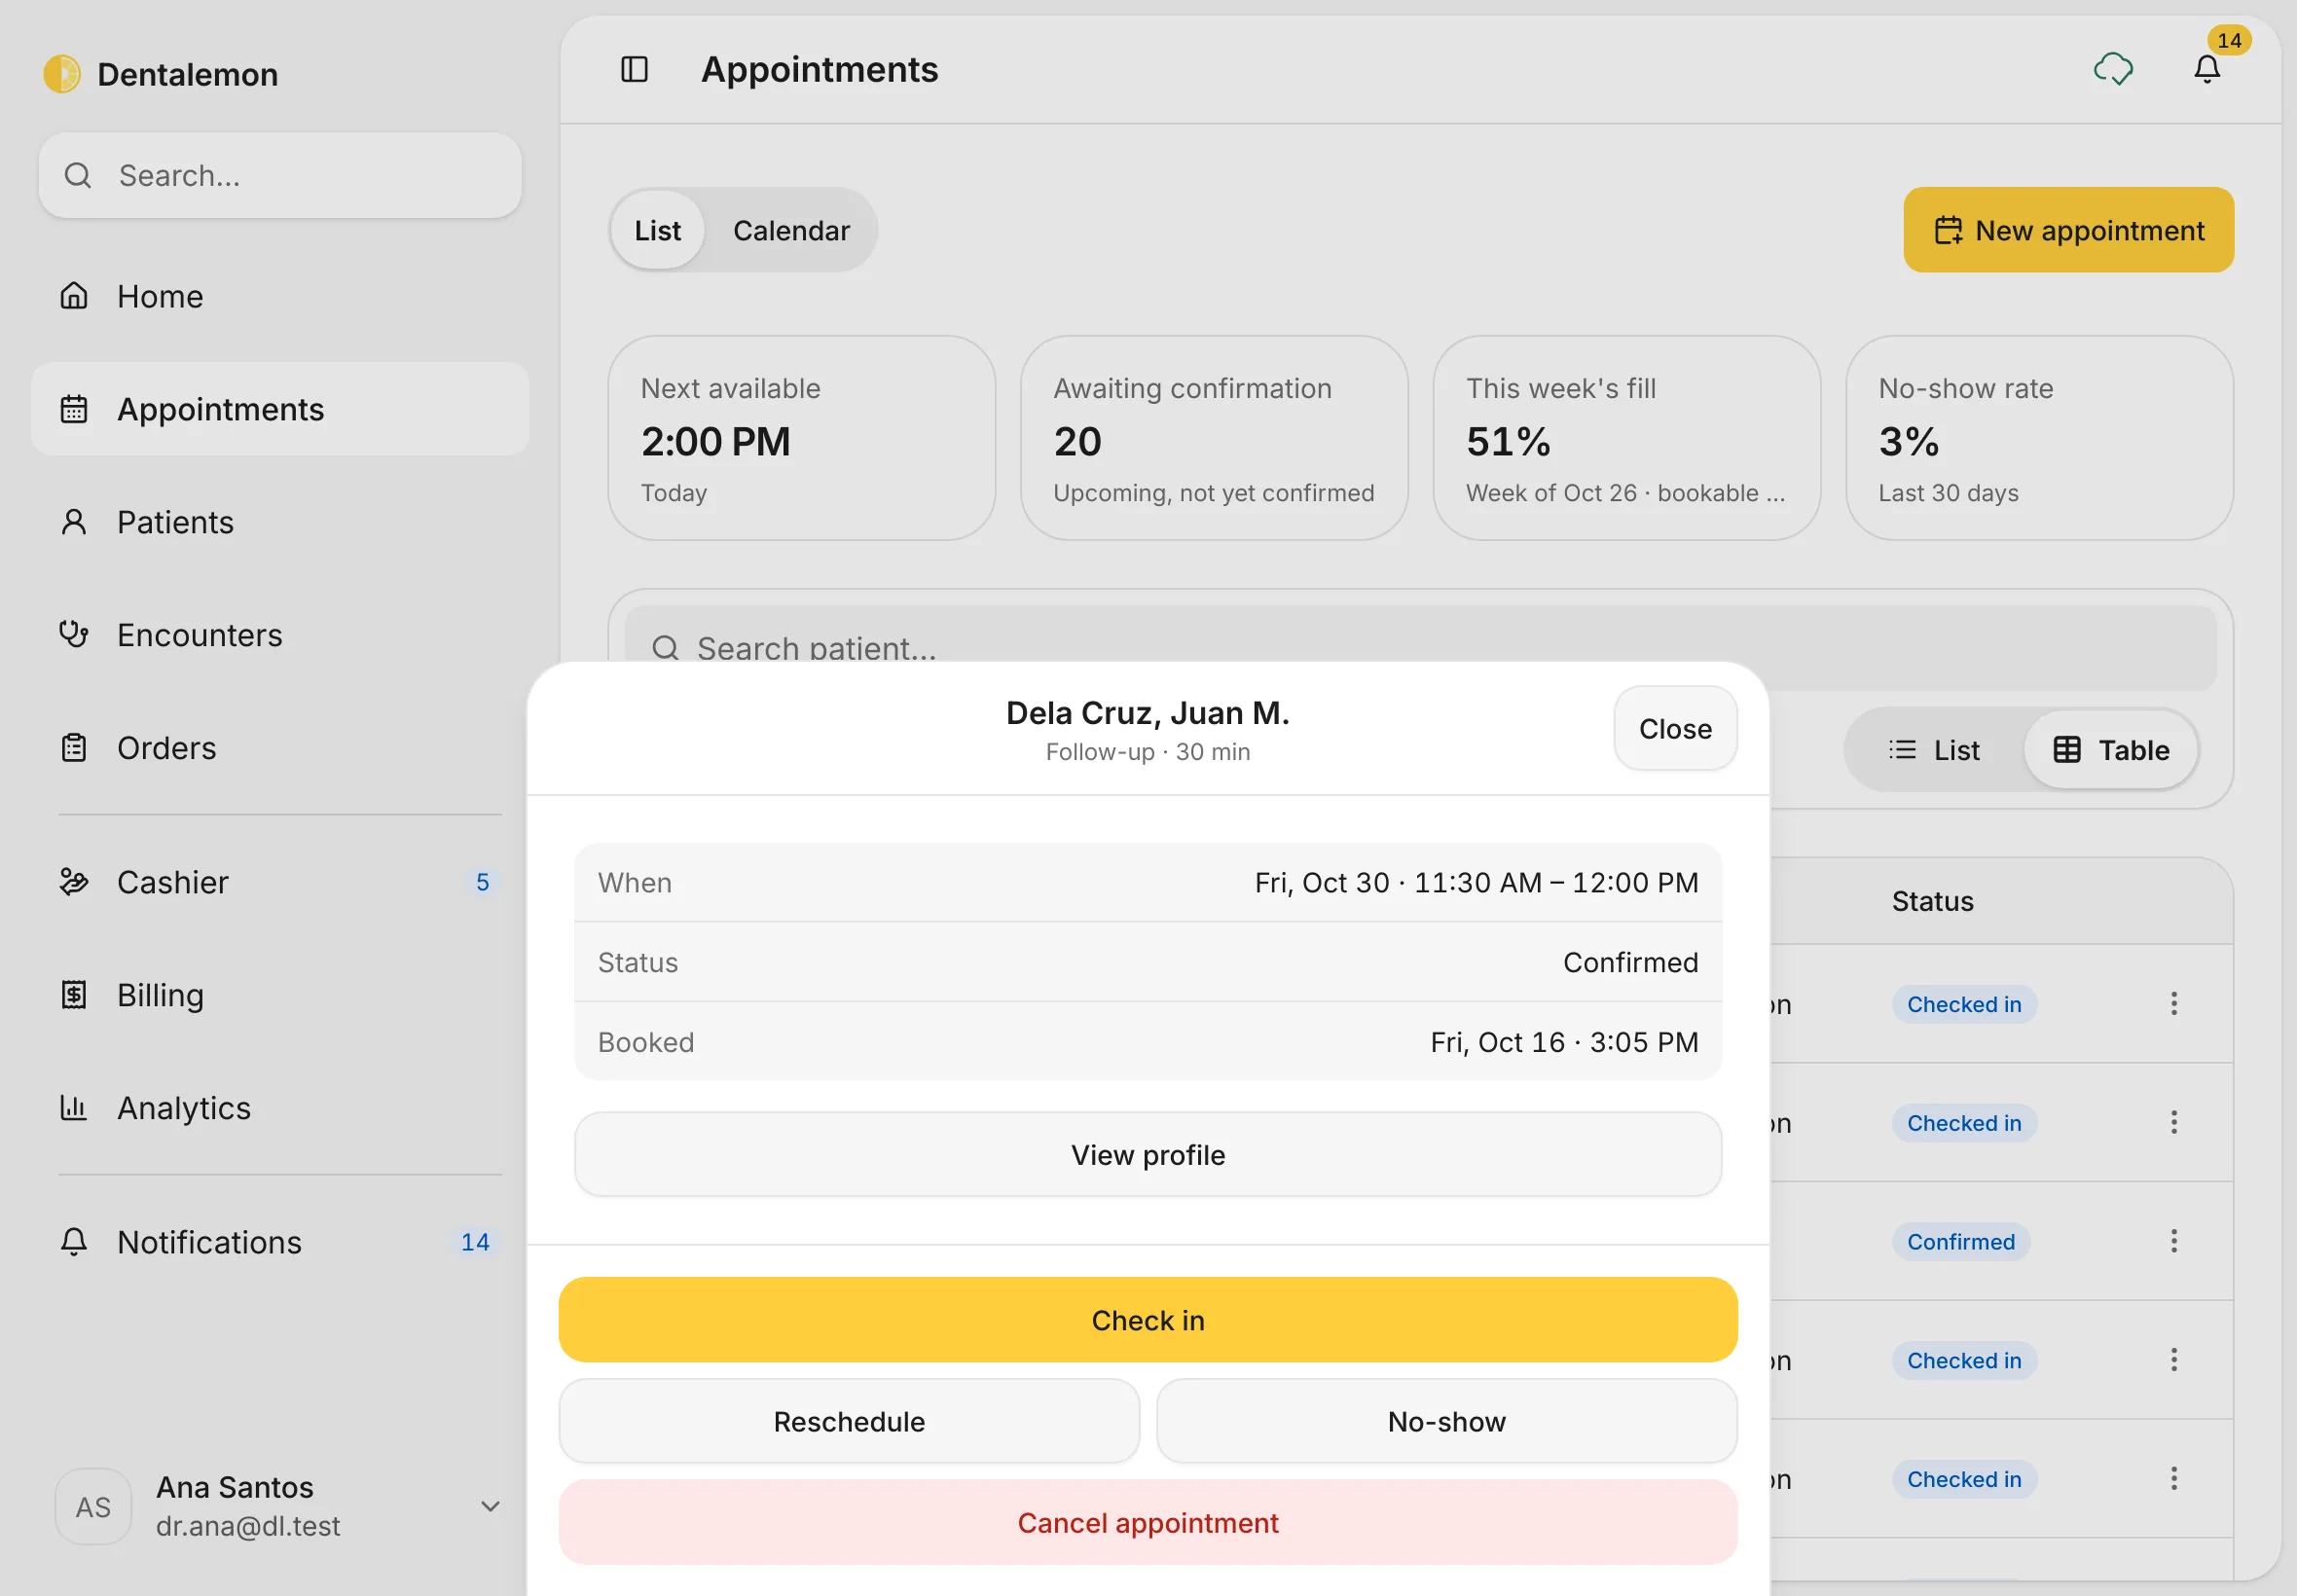
You should see: the patient and the visit at the top, then When, Status, Booked and Note, with View profile. At the bottom are Reschedule and Cancel appointment. On the day of the appointment, Check in appears above them.
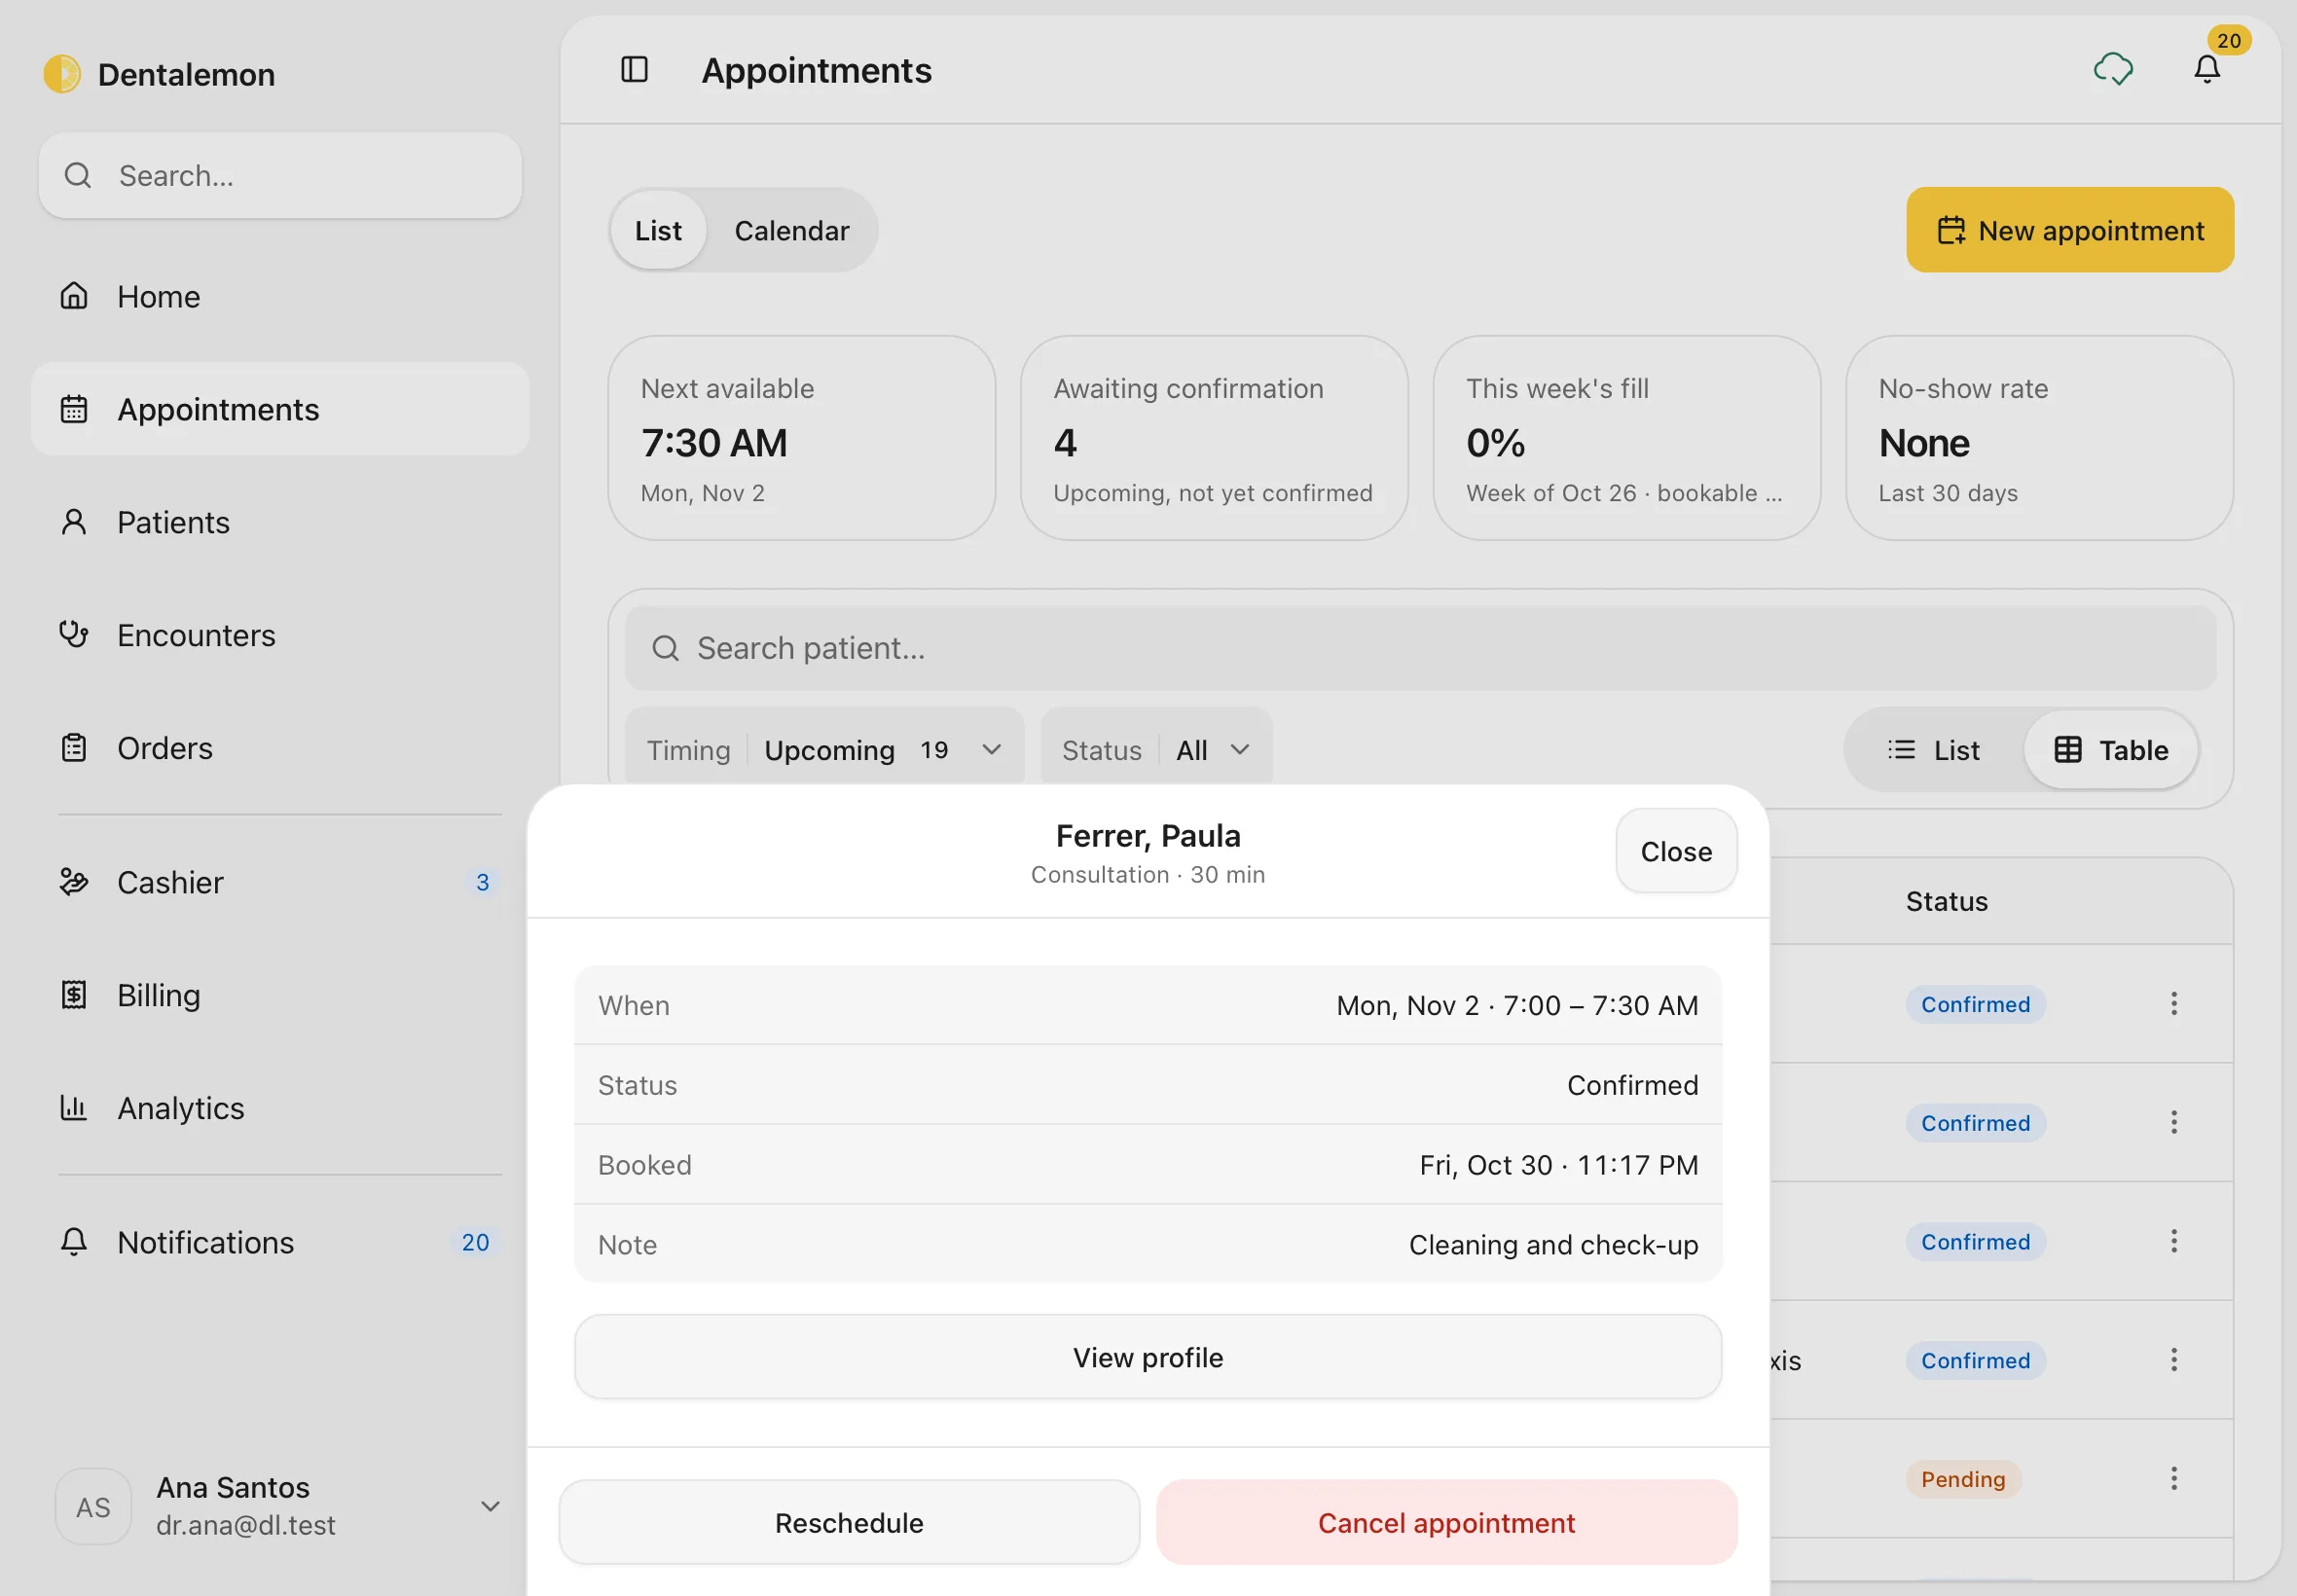
Note
The big yellow button changes with the appointment: Confirm for one that isn't confirmed yet, Check in on the day, then Open encounter once the patient is checked in.
7. Reschedule
Tap Reschedule, pick a new day and time, then tap Save.
You should see: Reschedule appointment, with the patient and visit already filled in.
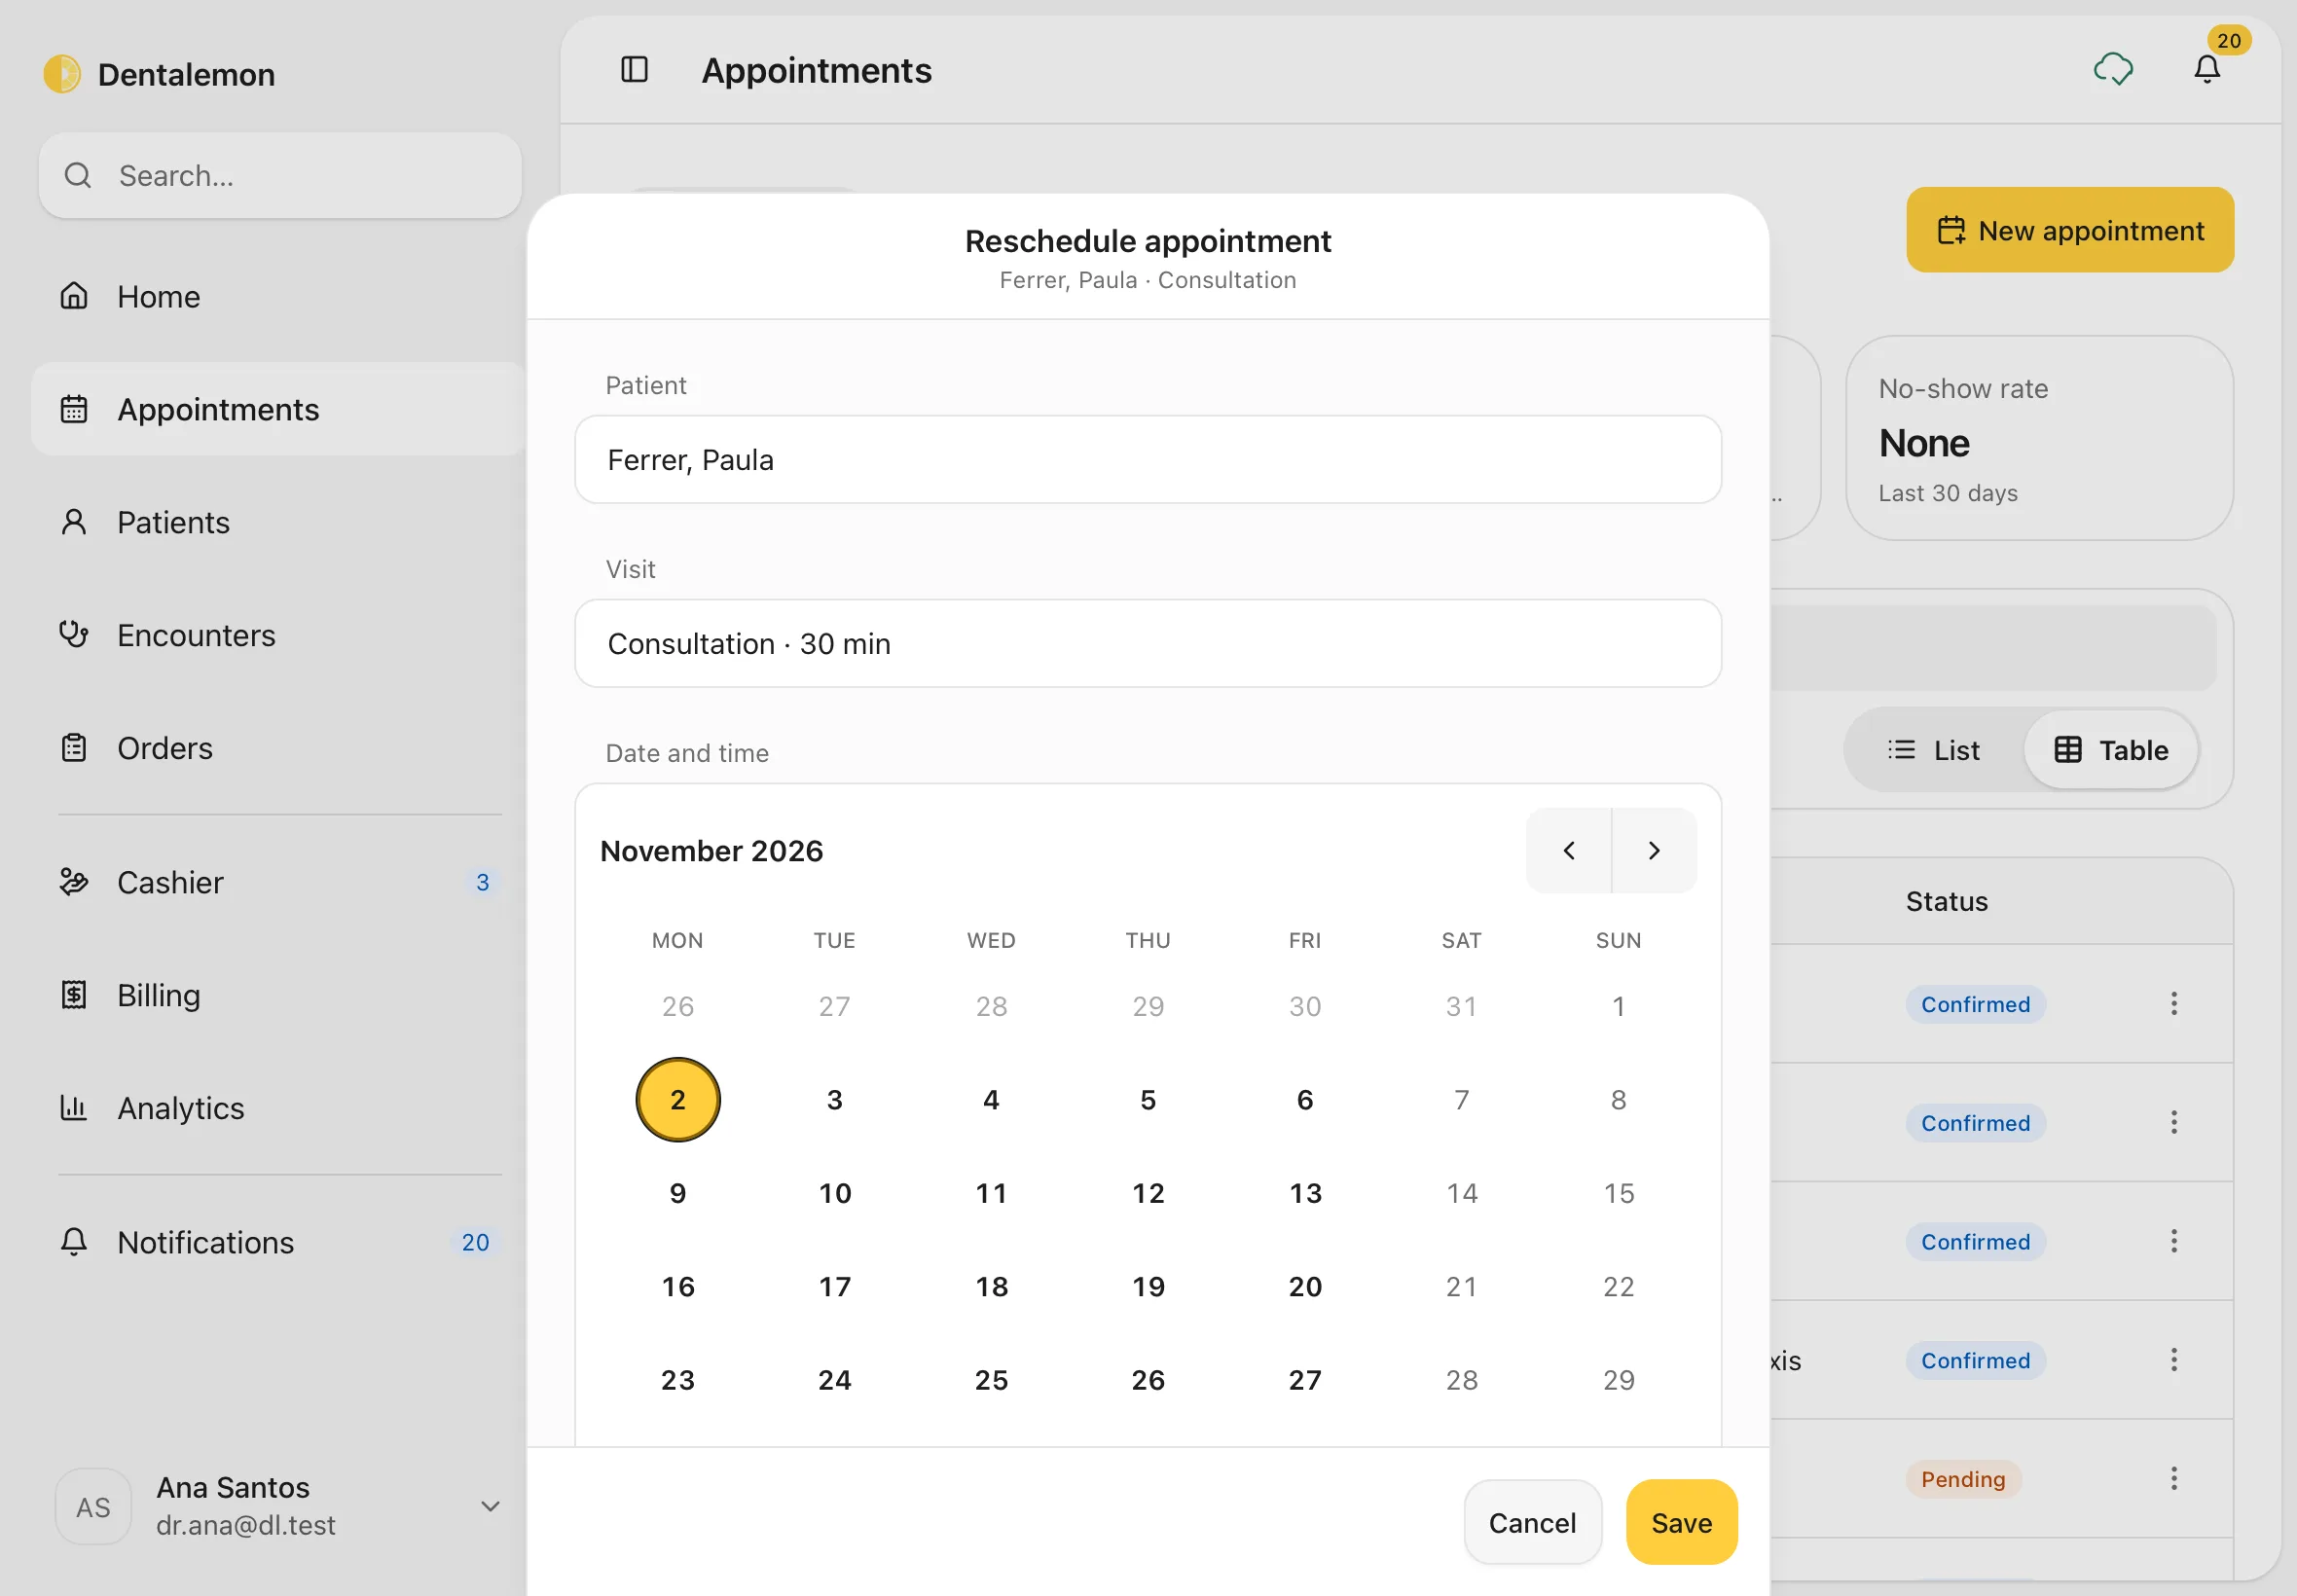
A Moved… message appears with an Undo button. The old time is freed once the Undo countdown ends.
8. Cancel an appointment
Tap Cancel appointment. Add a Reason (optional), then tap Cancel appointment again to confirm. Tap Keep appointment if you changed your mind.
You should see: Cancel appointment? with the appointment's details.
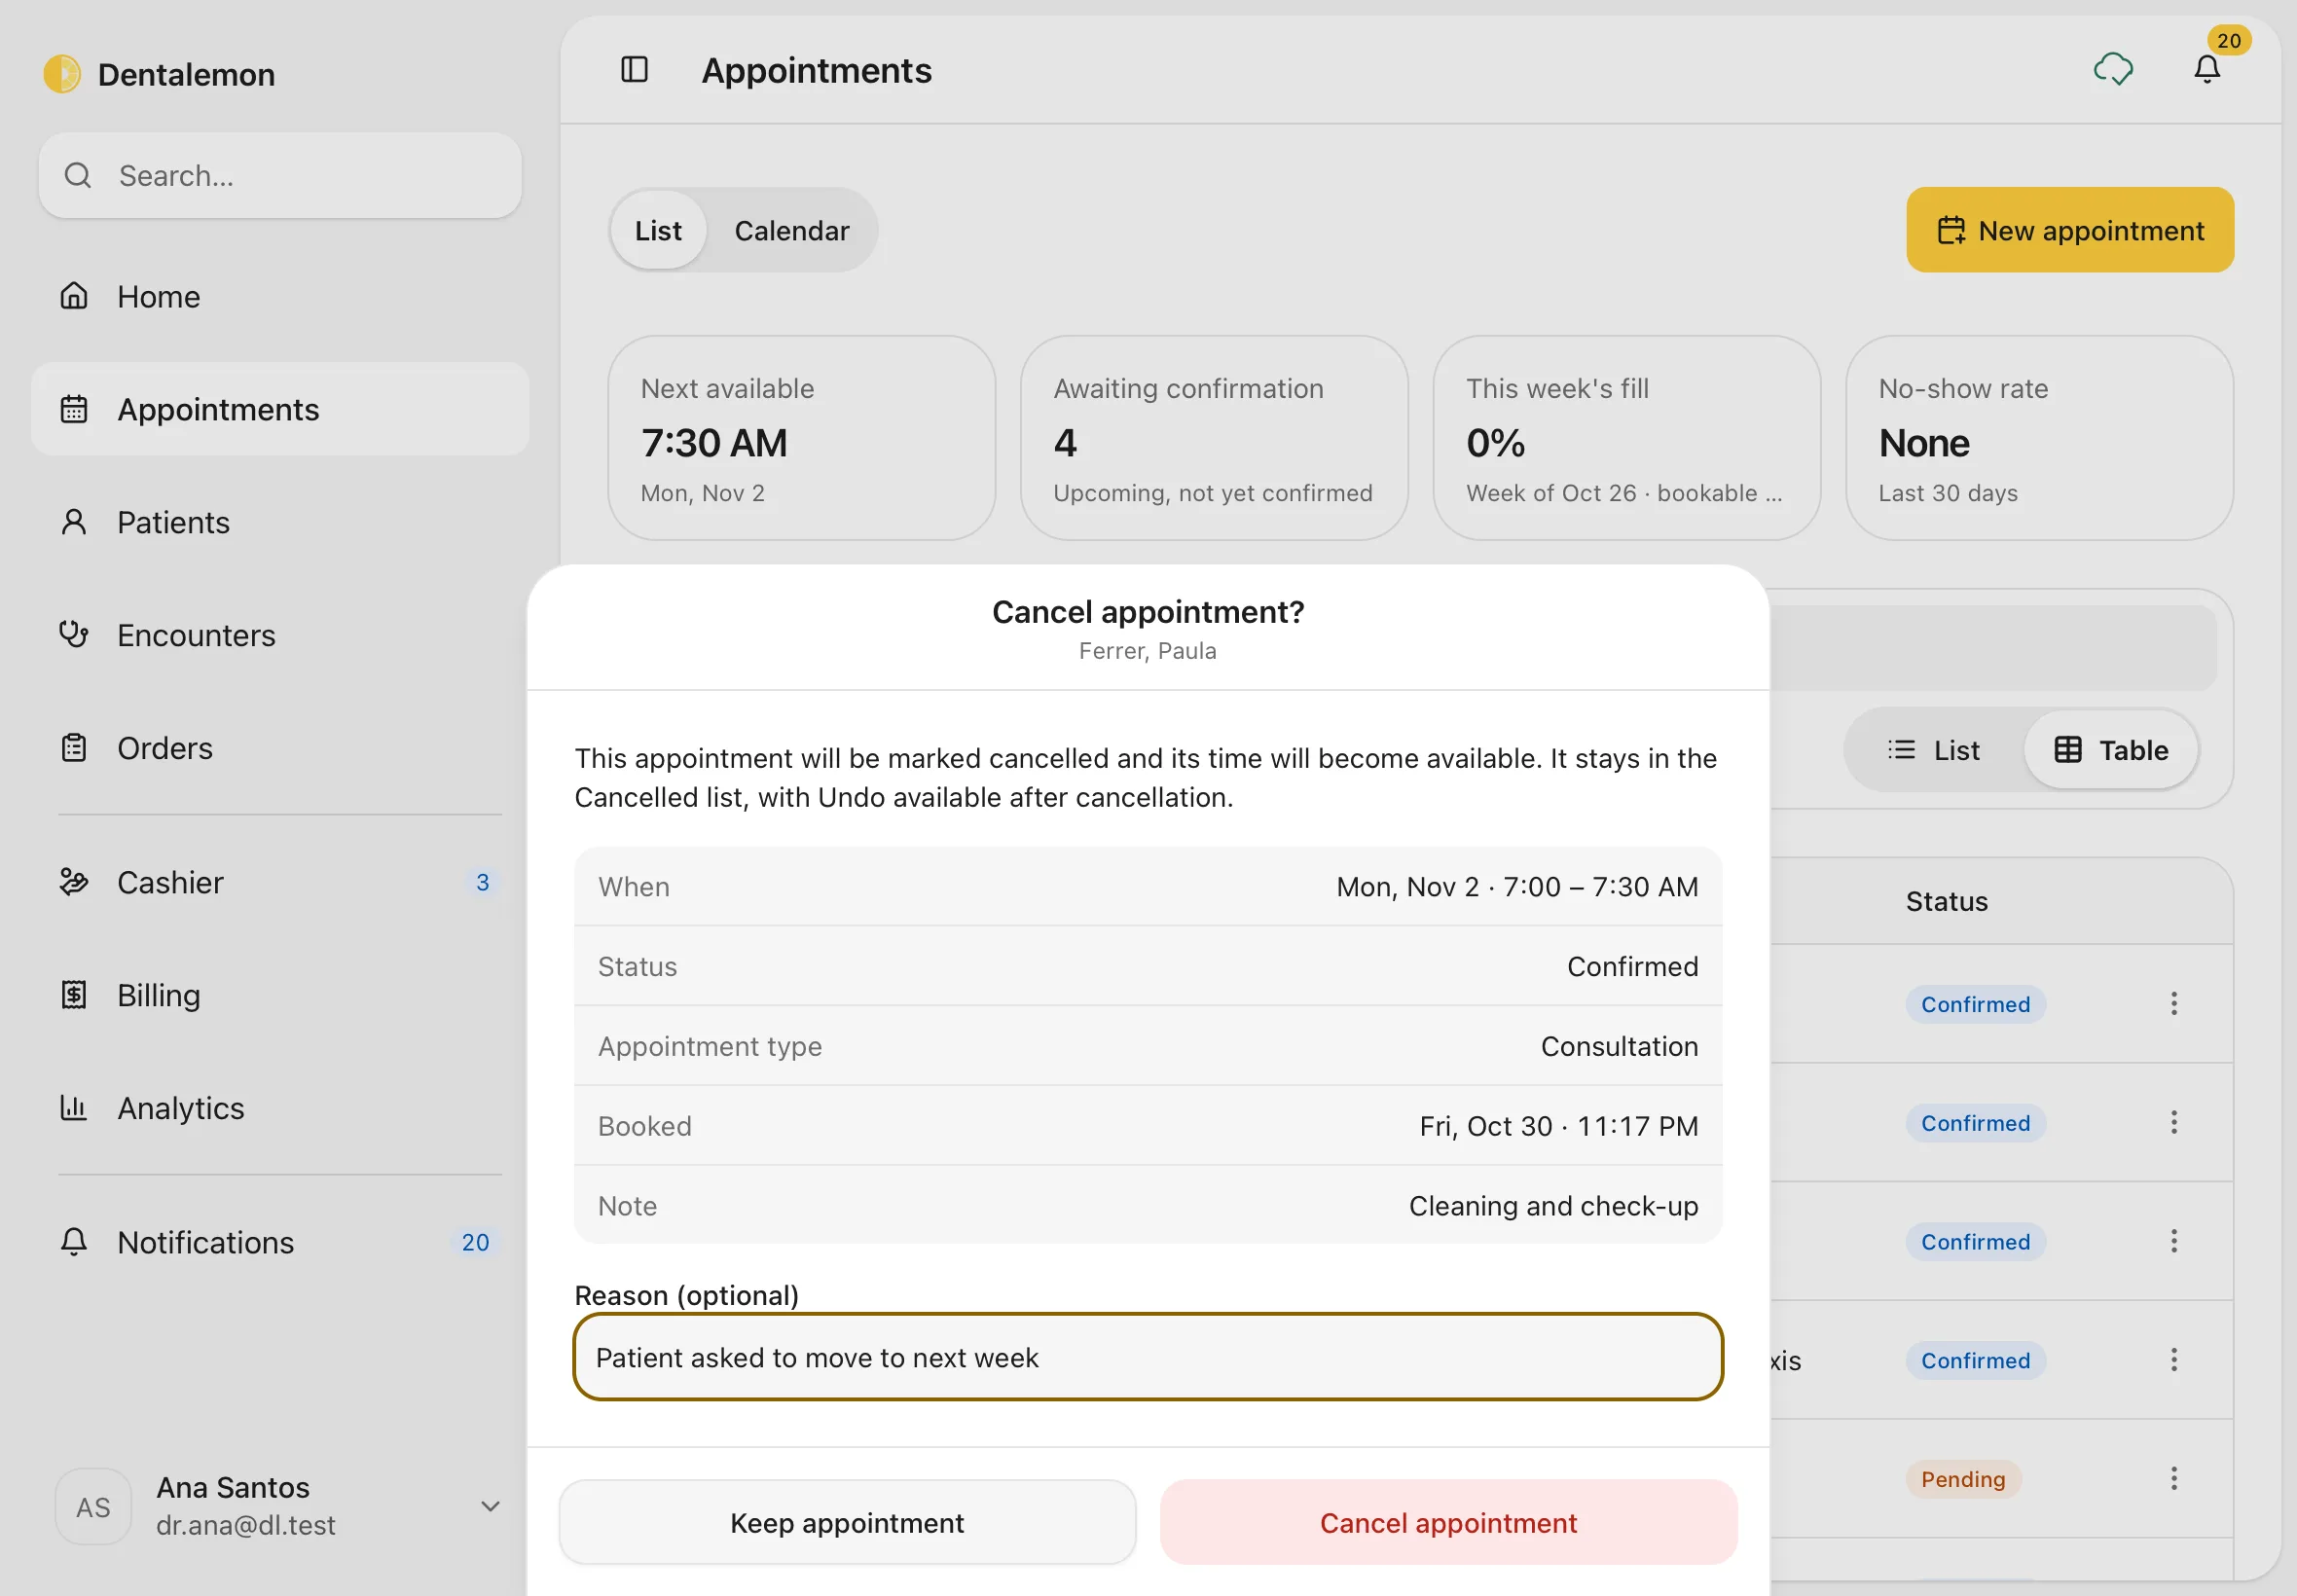
A message with Undo appears for a few seconds. The appointment is only cancelled once that time runs out.
9. Check the patient in
When the patient arrives, open their appointment and tap Check in.
You should see: Ferrer, Paula checked in, with an Open encounter button. The appointment's status changes to Checked in.
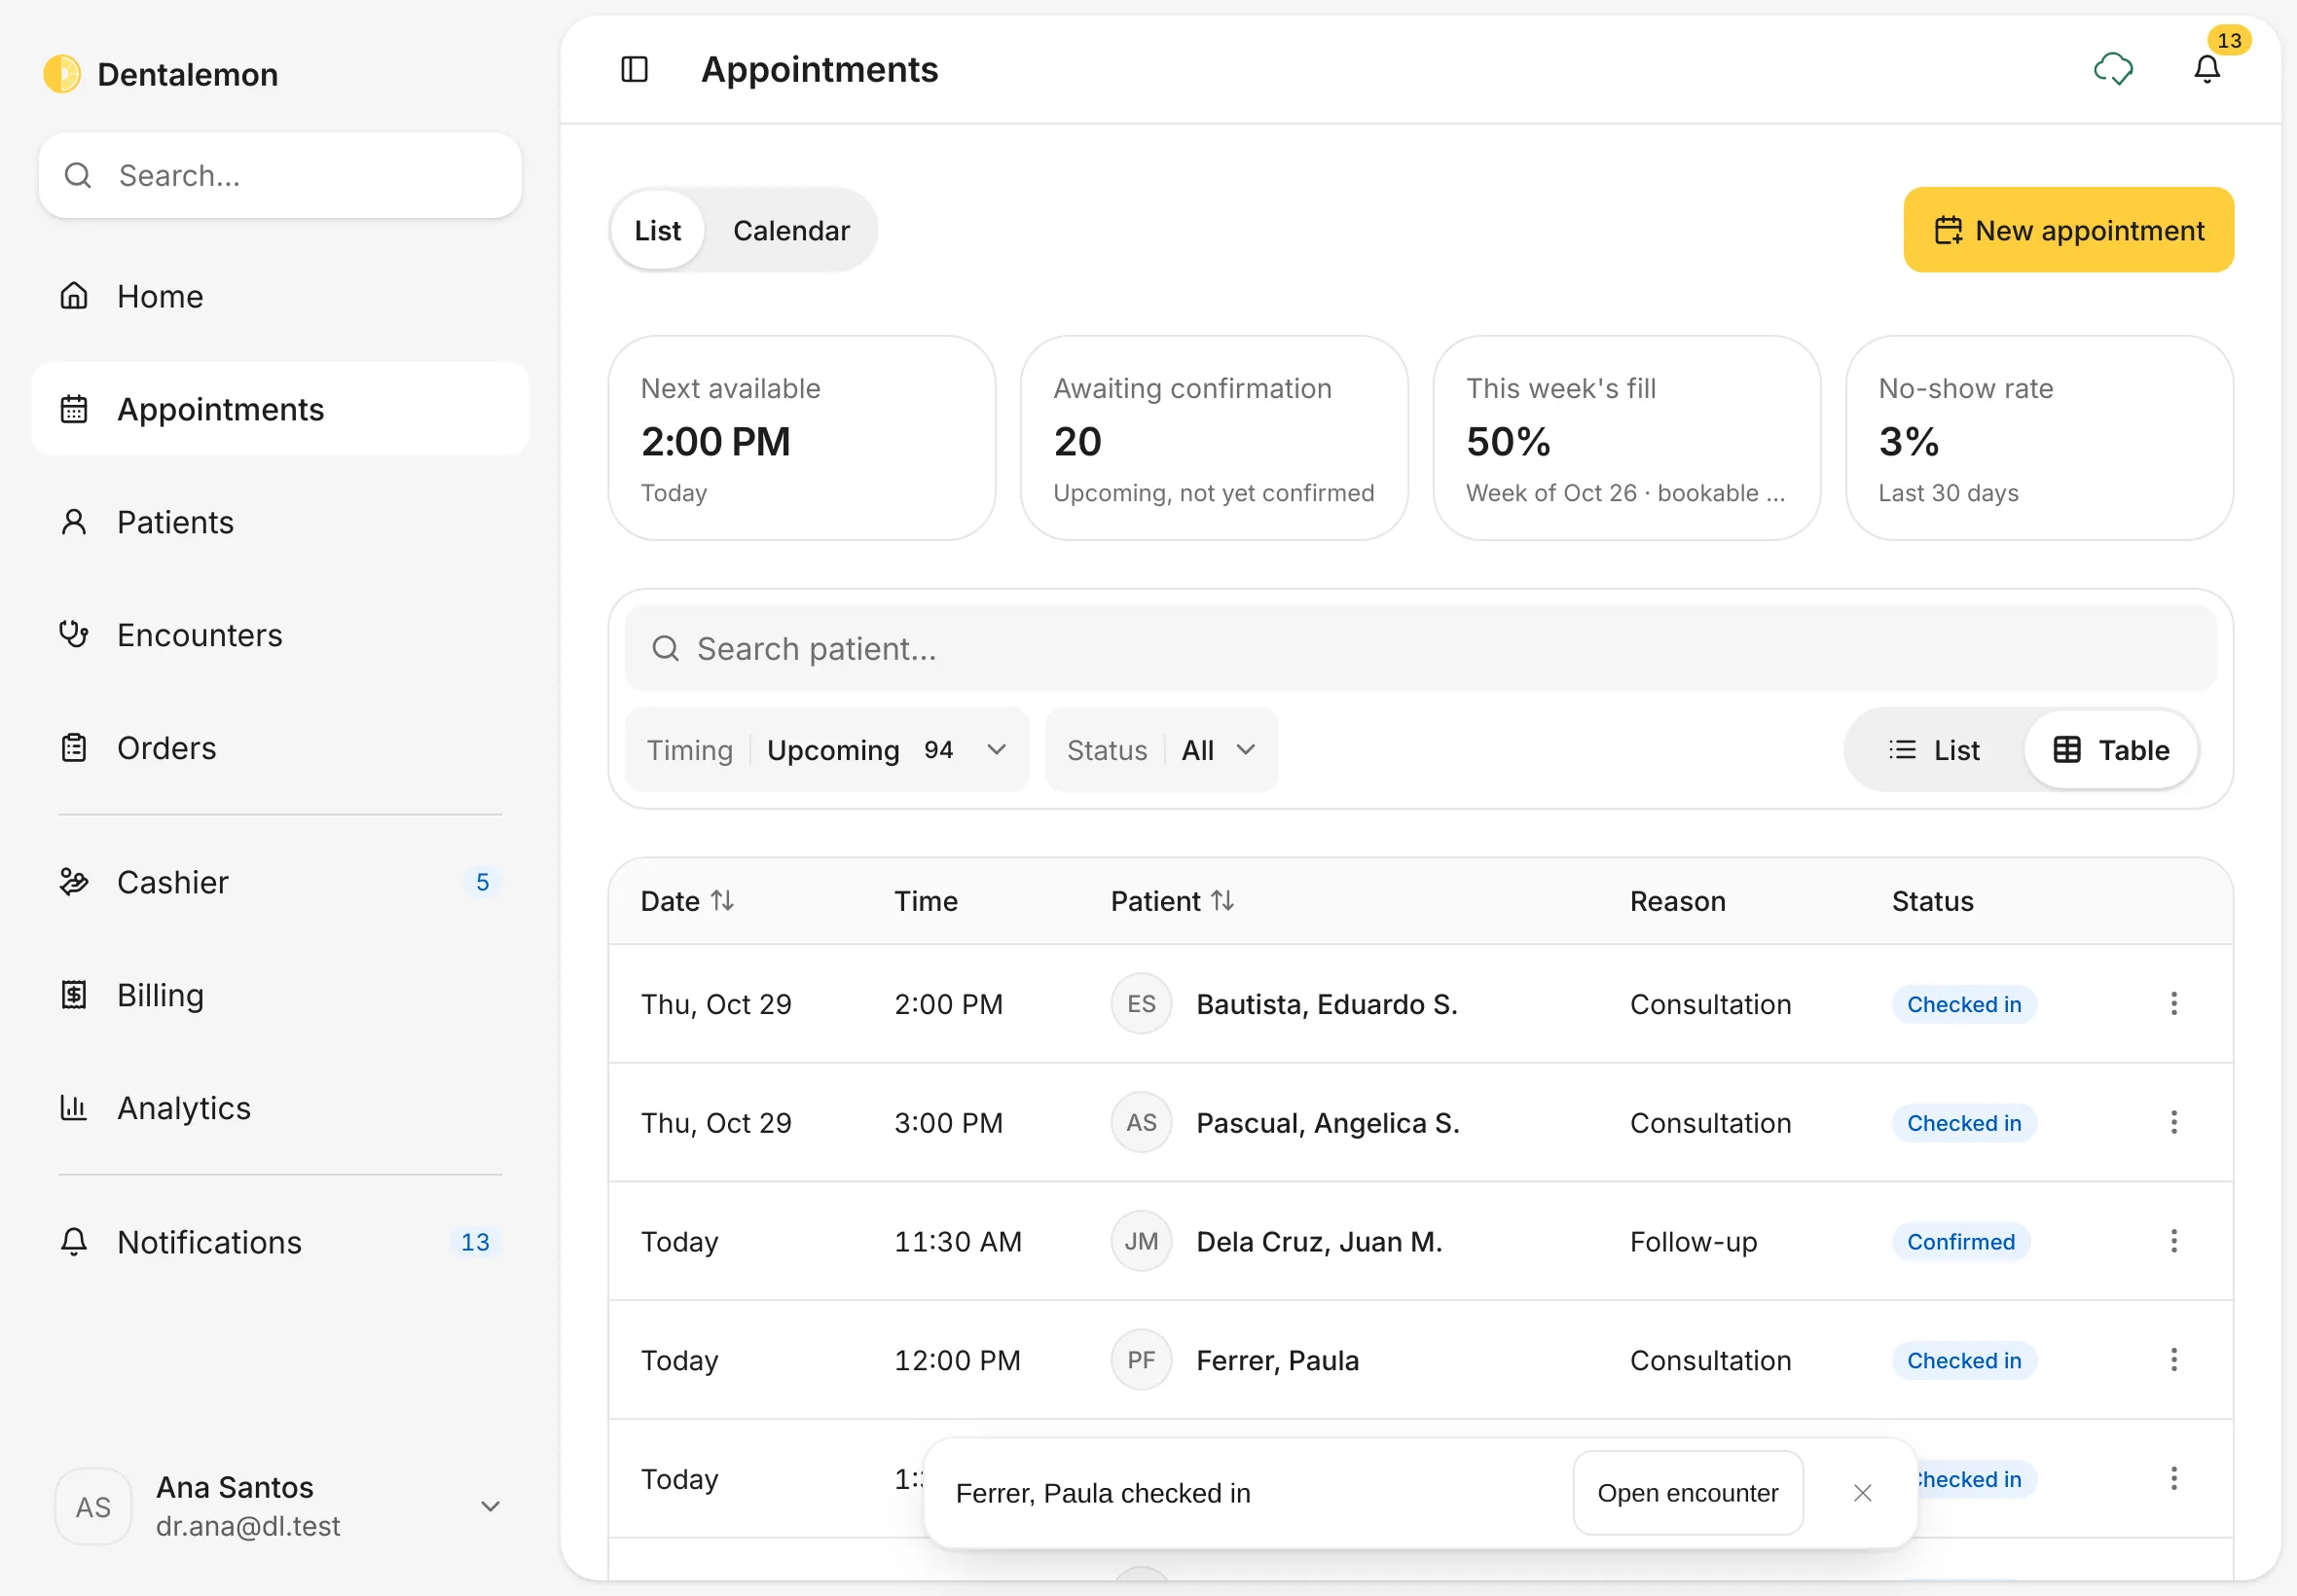
Checking in opens the patient's encounter for today, ready for charting and charges. Tap Open encounter to go straight there.
10. Confirm an appointment
An appointment booked as Not yet confirmed shows the status Pending. When the patient confirms (for example by phone or text), open the appointment and tap Confirm.
You should see: Status · Pending and a yellow Confirm button. After you tap it, the status changes to Confirmed.
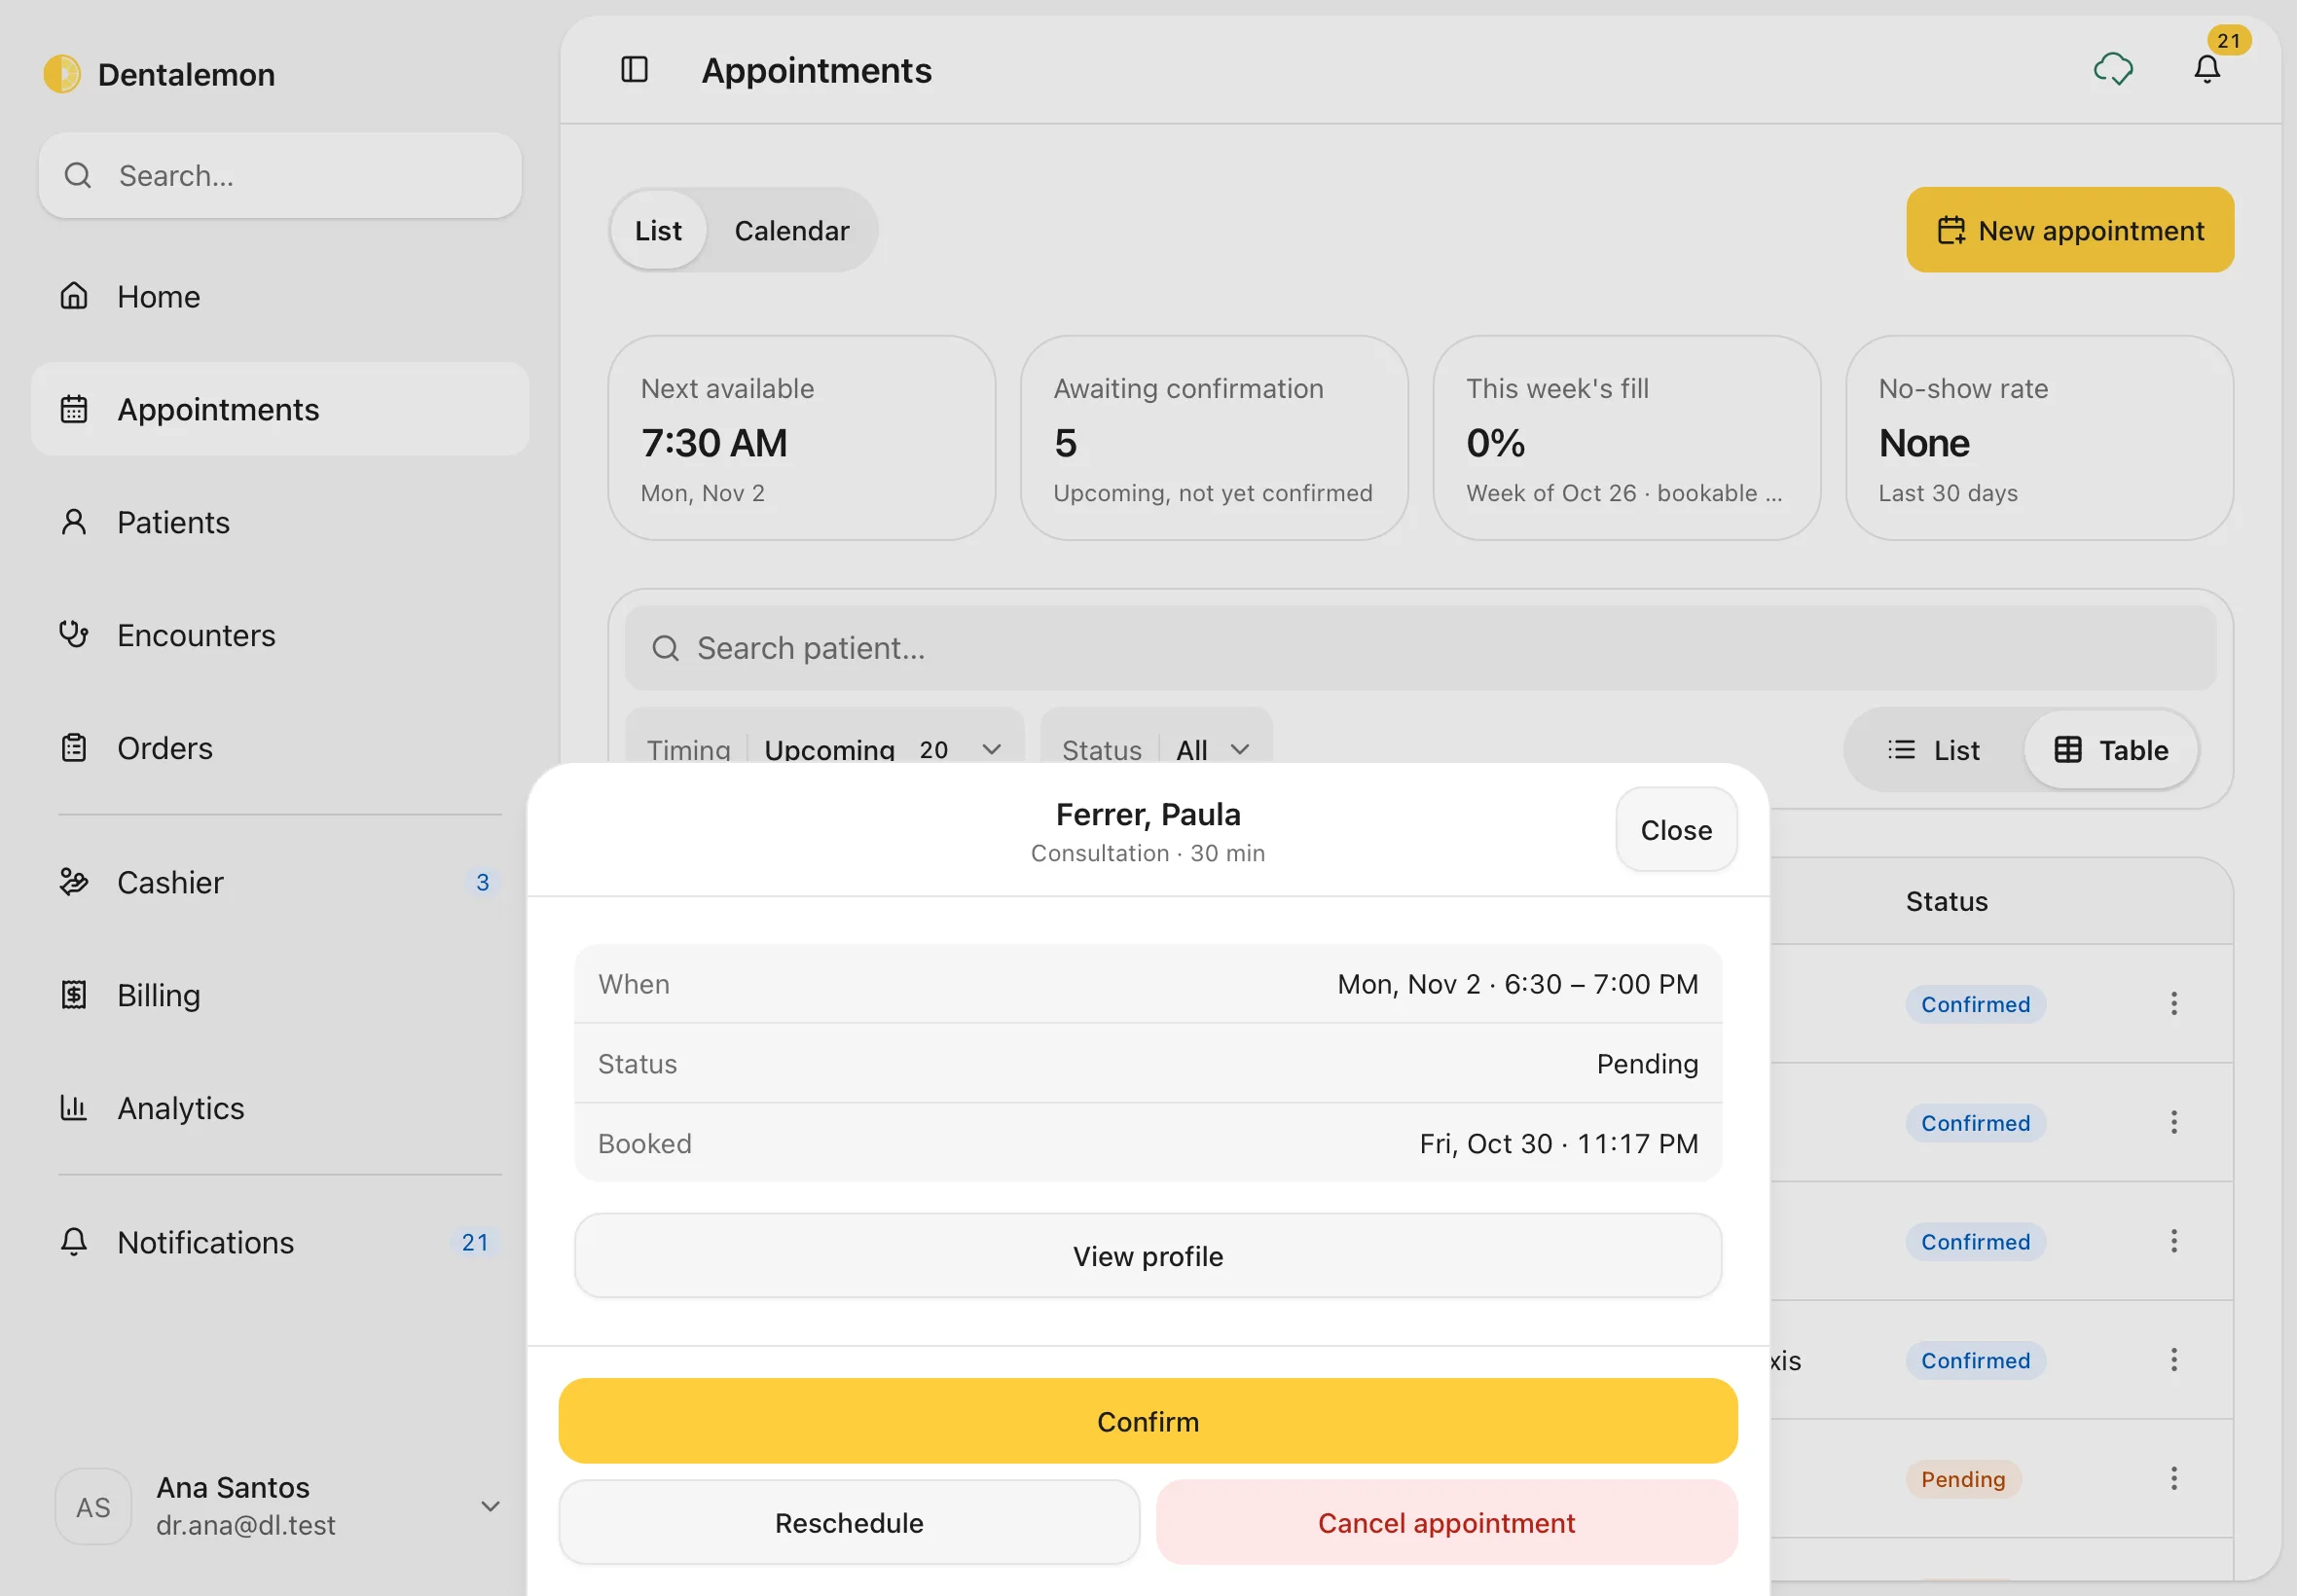
Find the ones to call
The Awaiting confirmation card at the top of the list counts every upcoming pending appointment. Use Status in the list to show only those.
11. Mark a no-show
If a patient with a Confirmed appointment doesn't come, open the appointment and tap No-show.
No-show appears from 5 minutes after the appointment's start time. It isn't offered for pending appointments: cancel those instead.
You should see: No-show among the buttons at the bottom of the appointment.
A message says Marked name as a no-show, with Undo. Tap Undo within a few seconds if you tapped it by mistake. After that, the appointment's status is No-show, and it counts in the No-show rate card.
12. Follow-ups booked when you finish a visit
When you finish an encounter and choose a Follow-up (for example 1 week), Dentalemon books it for you. It shows up here as a Confirmed appointment with the reason Follow-up, on the first open time that day. Open it like any other appointment to move or cancel it. See Finish the visit.
Tips
Not sure the patient will come?
Book as Not yet confirmed. Those appointments count in Awaiting confirmation, so you can call them later and tap Confirm.
If something goes wrong
"That time isn't available": someone else booked that time while you were choosing. Pick another time. No times appear for a day: the clinic is closed that day, or it's fully booked. Try the next day, or check your clinic hours.
Good to know
- Dentalemon doesn't send reminders or confirmation messages to patients. Contact them yourself.
- You can check patients in only on the day of their appointment.
- A checked-in appointment can't be cancelled. If the visit shouldn't go ahead, use End encounter early… on the appointment.
- Appointments can't be dragged to a new time. Use Reschedule.