Settings basics
Before you start
- Settings save as you go. There's no Save button: a change is kept as soon as you make it.
- Some settings are yours alone (your profile, the theme, the tooth notation). Others apply to the whole clinic (clinic details, prices, payments).
Steps
1. Open Settings
At the bottom of the sidebar, tap your name. In the menu, tap Settings.
You should see: the account menu with Account, Settings, Share Dentalemon, What's new and Log out.
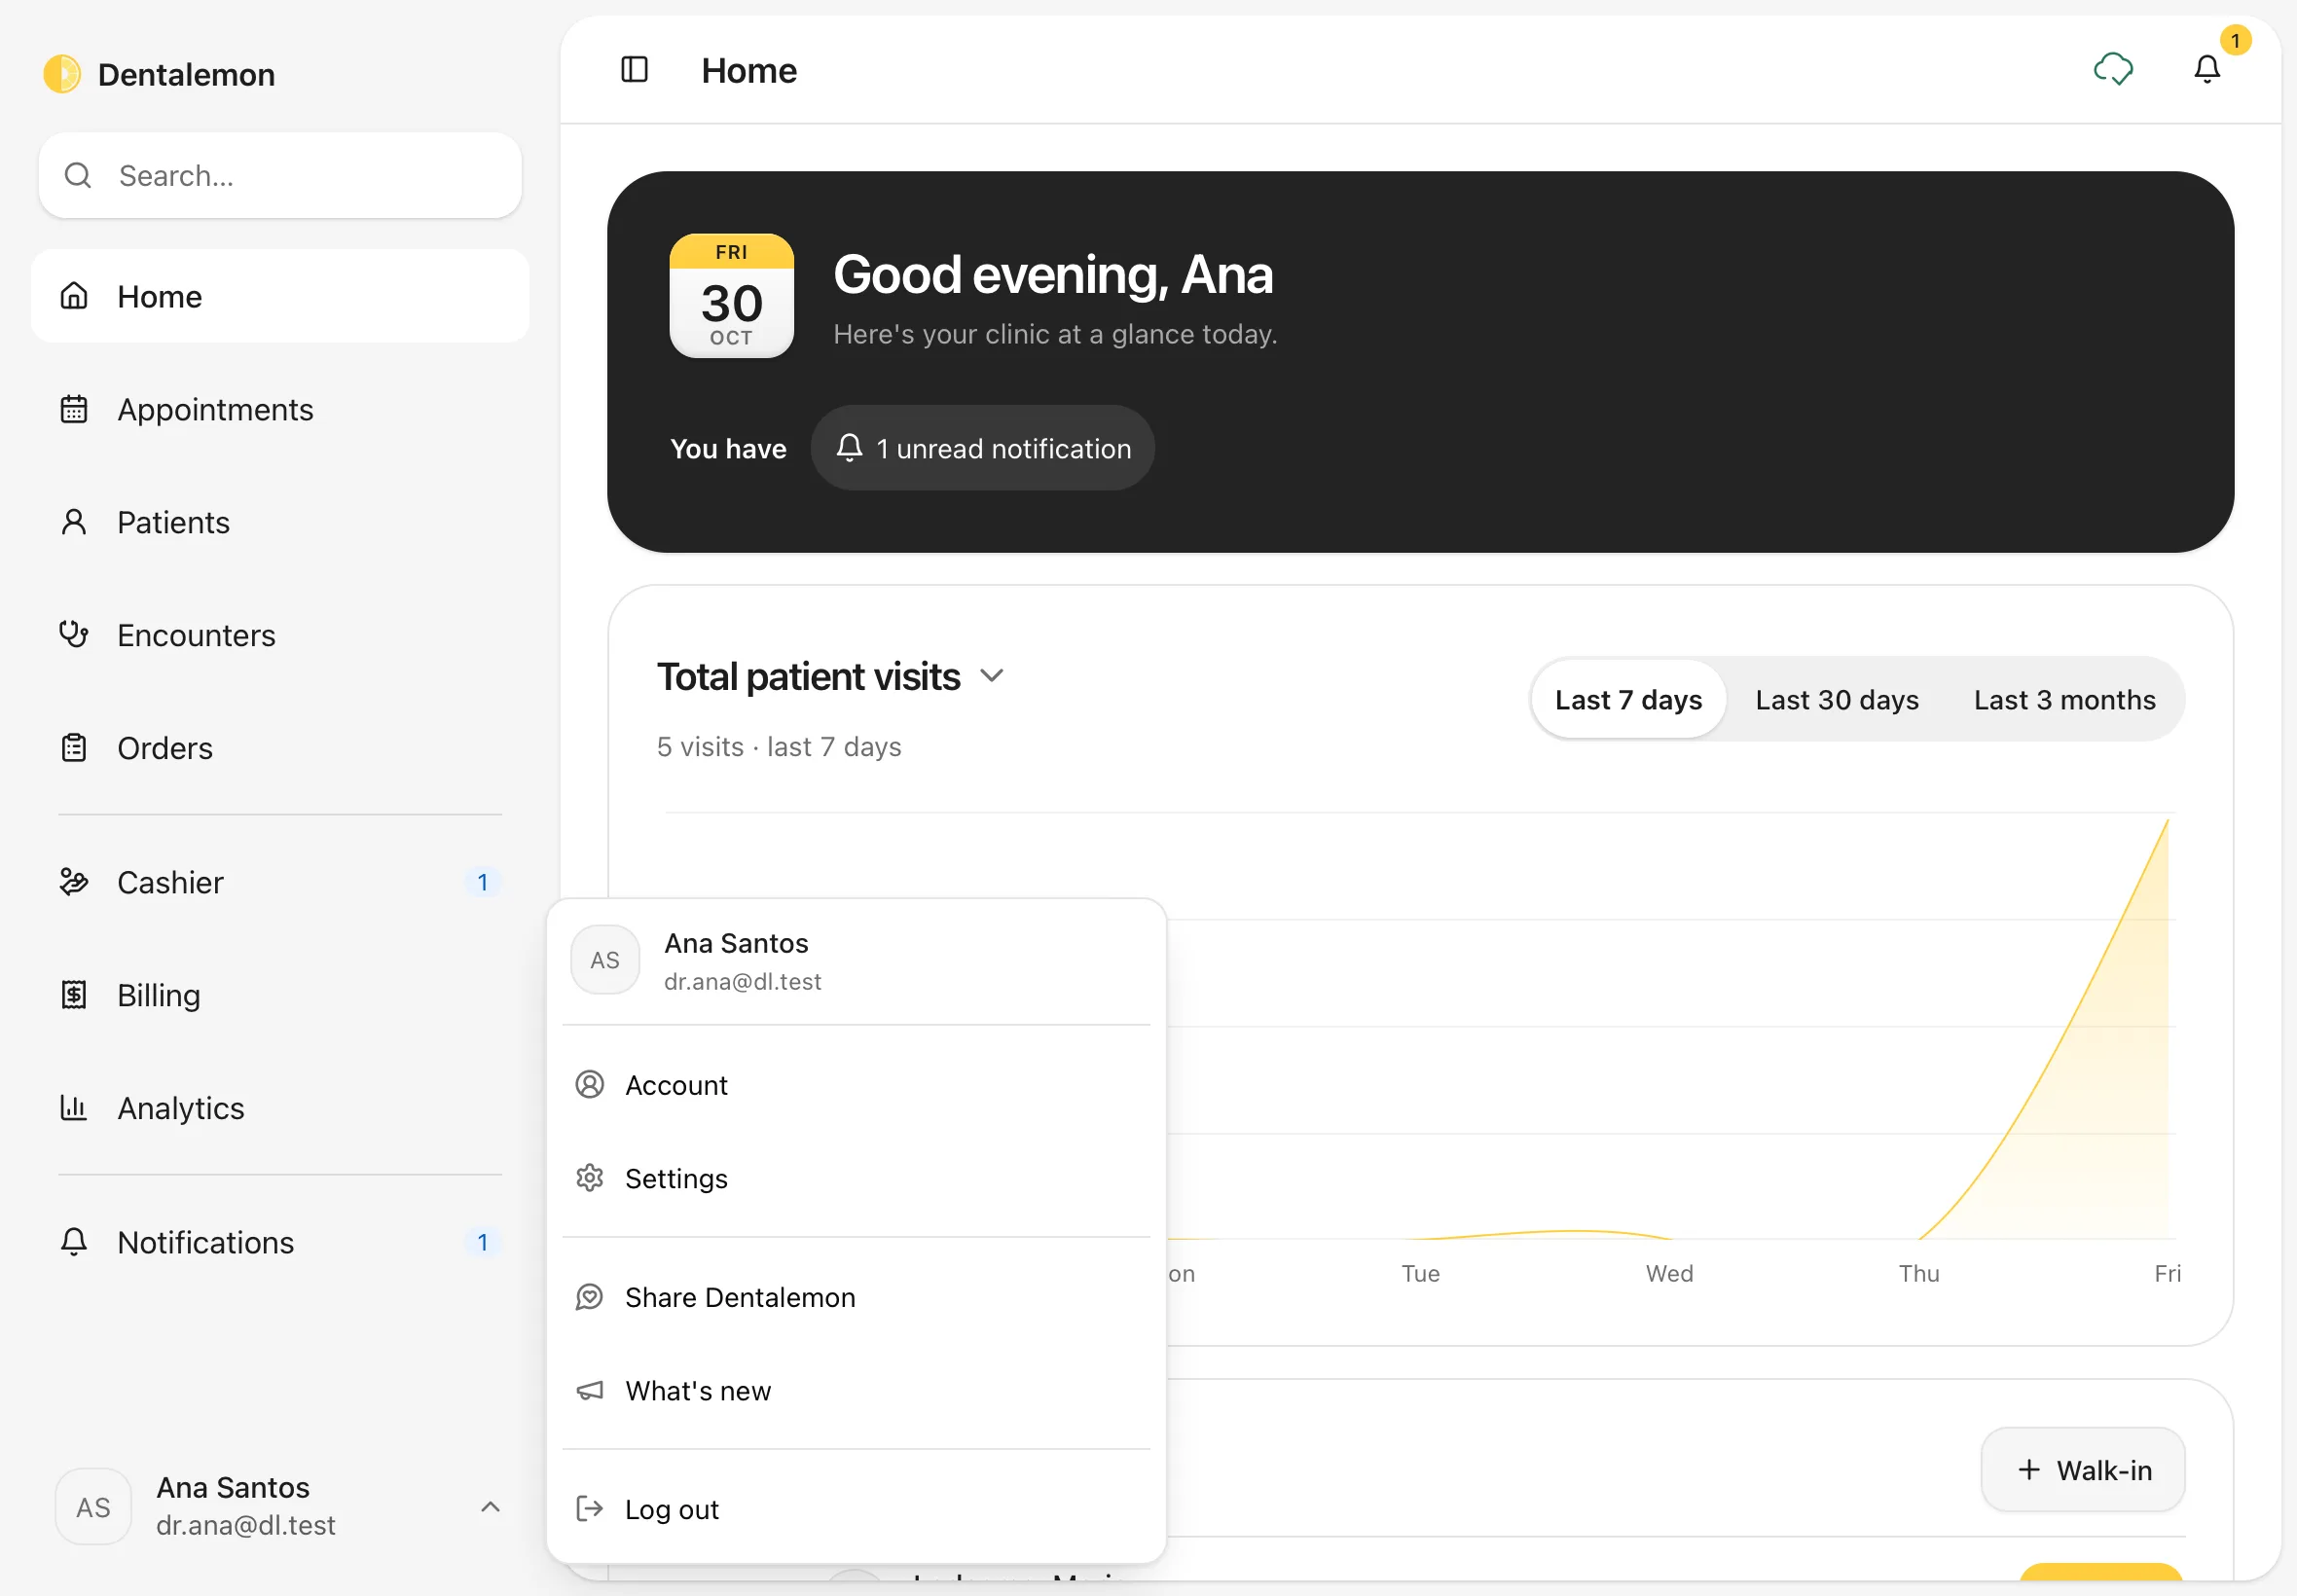
Settings opens on Profile. The list on the left has four groups: Account, App, Practice and Dentalemon. To find a setting fast, type in Search at the top of the list.
2. Your profile
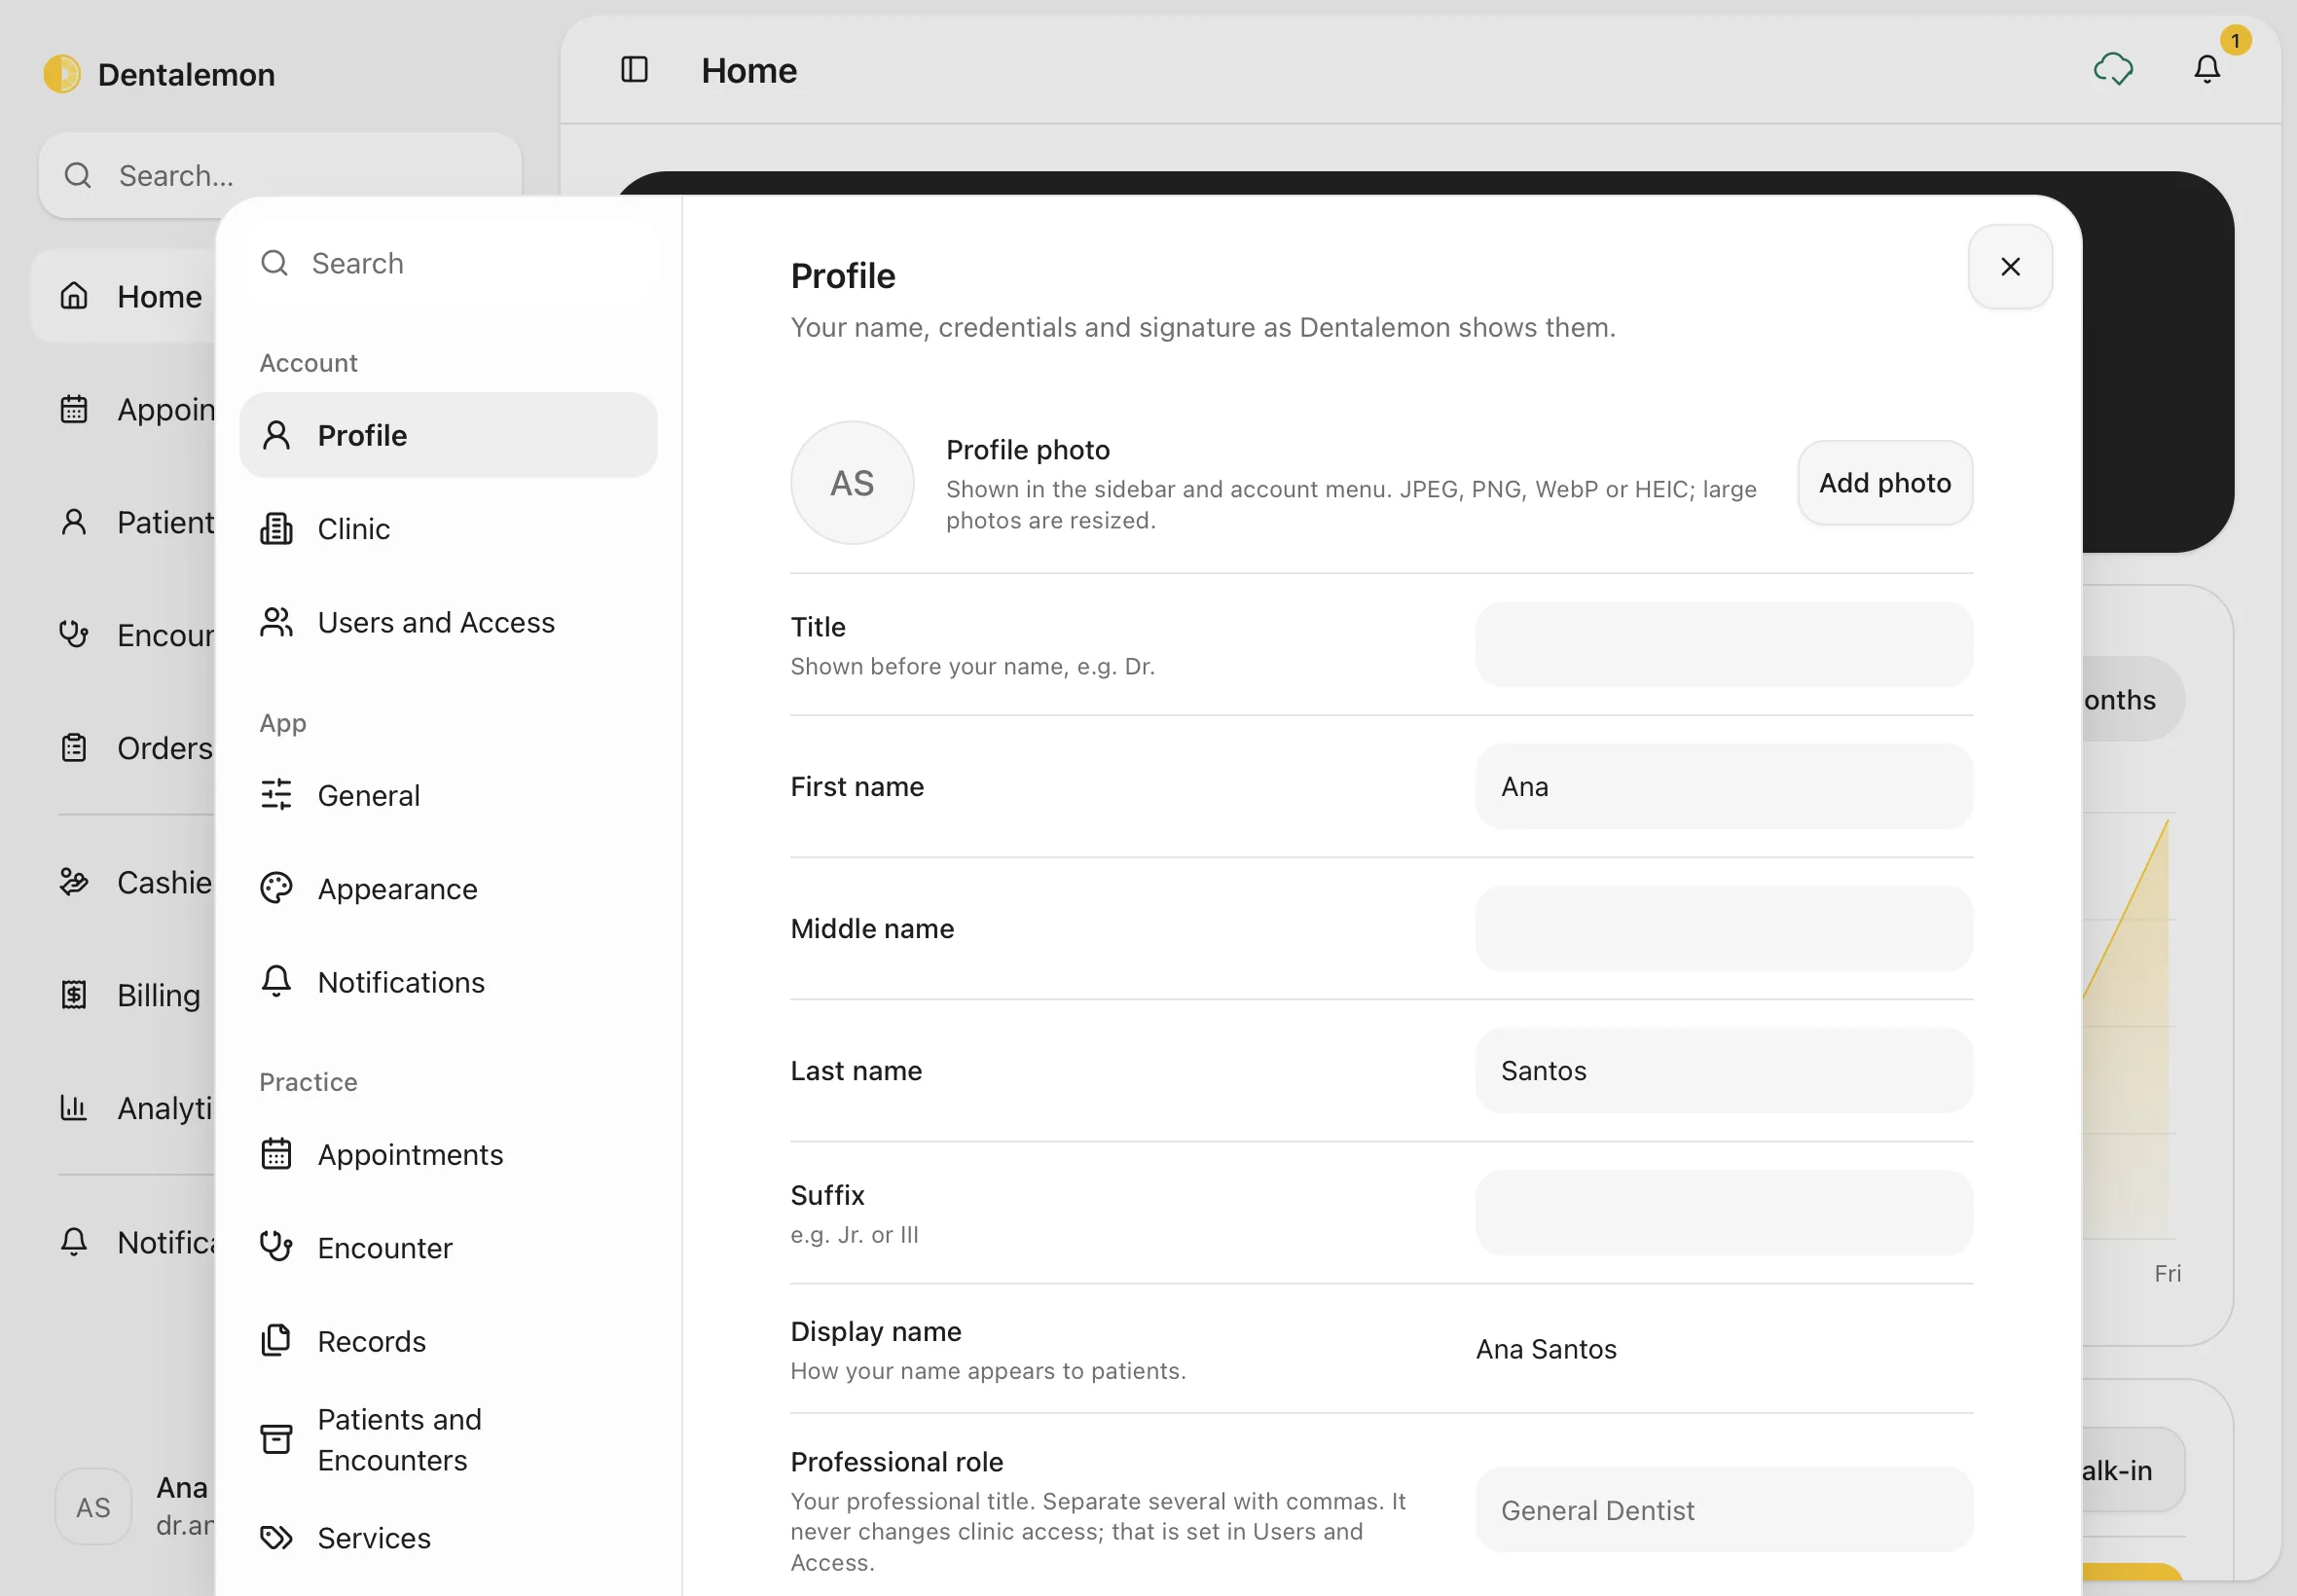
In Profile, fill in your Title (for example Dr.), your name, Professional role and Mobile number. Tap Add photo next to Profile photo to add a photo; it shows in the sidebar and the account menu.
You should see: your name and email. Your Display name is how your name appears to patients.
3. Your licence numbers and signature
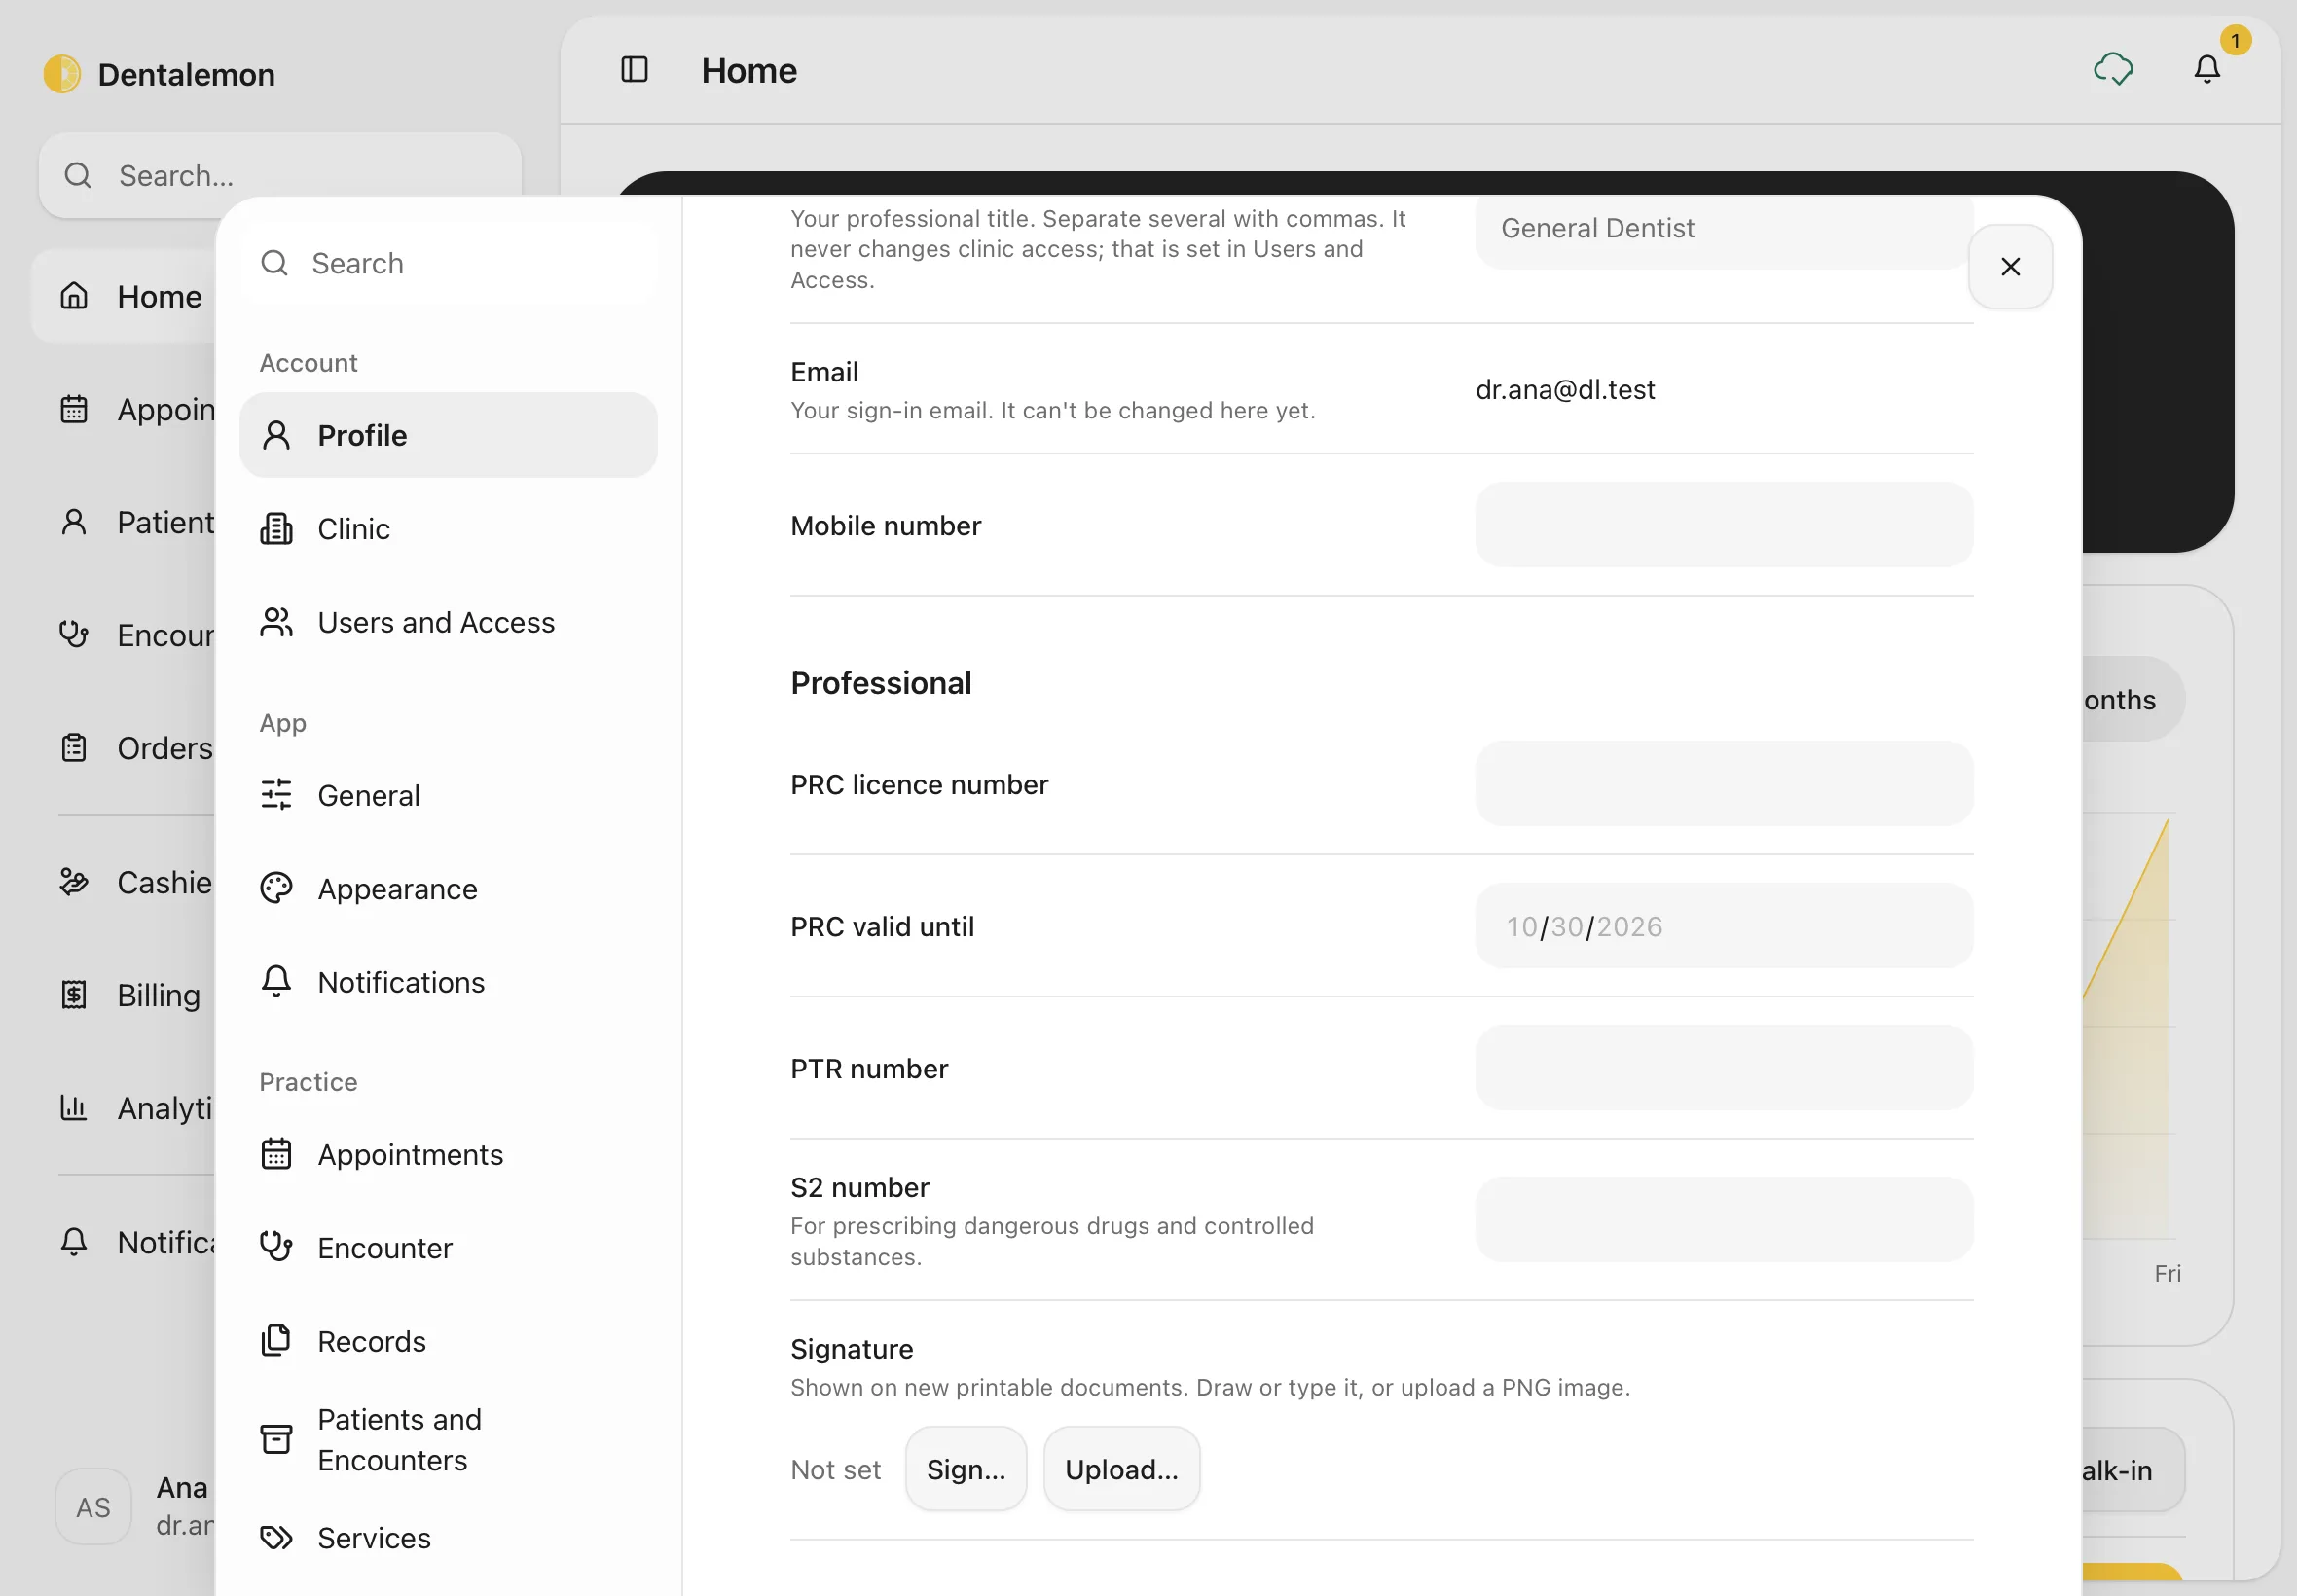
Scroll down Profile to Professional. These print on your prescriptions, so fill them in before you prescribe:
- PRC licence number and PRC valid until
- PTR number
- S2 number: only if you prescribe dangerous drugs or controlled substances
Under Signature (it says Not set until you add one):
- Tap Sign… to sign with your finger or an Apple Pencil. You can also type your full name instead of drawing.
- Tap Use signature. Tap Cancel to leave without saving.
Or tap Upload… to use a picture of your signature: a PNG image, up to 200 KB.
Your signature is saved straight away and appears on new printed documents. Documents you already printed keep the old one. To take it off, tap Remove.
4. Your clinic and opening hours
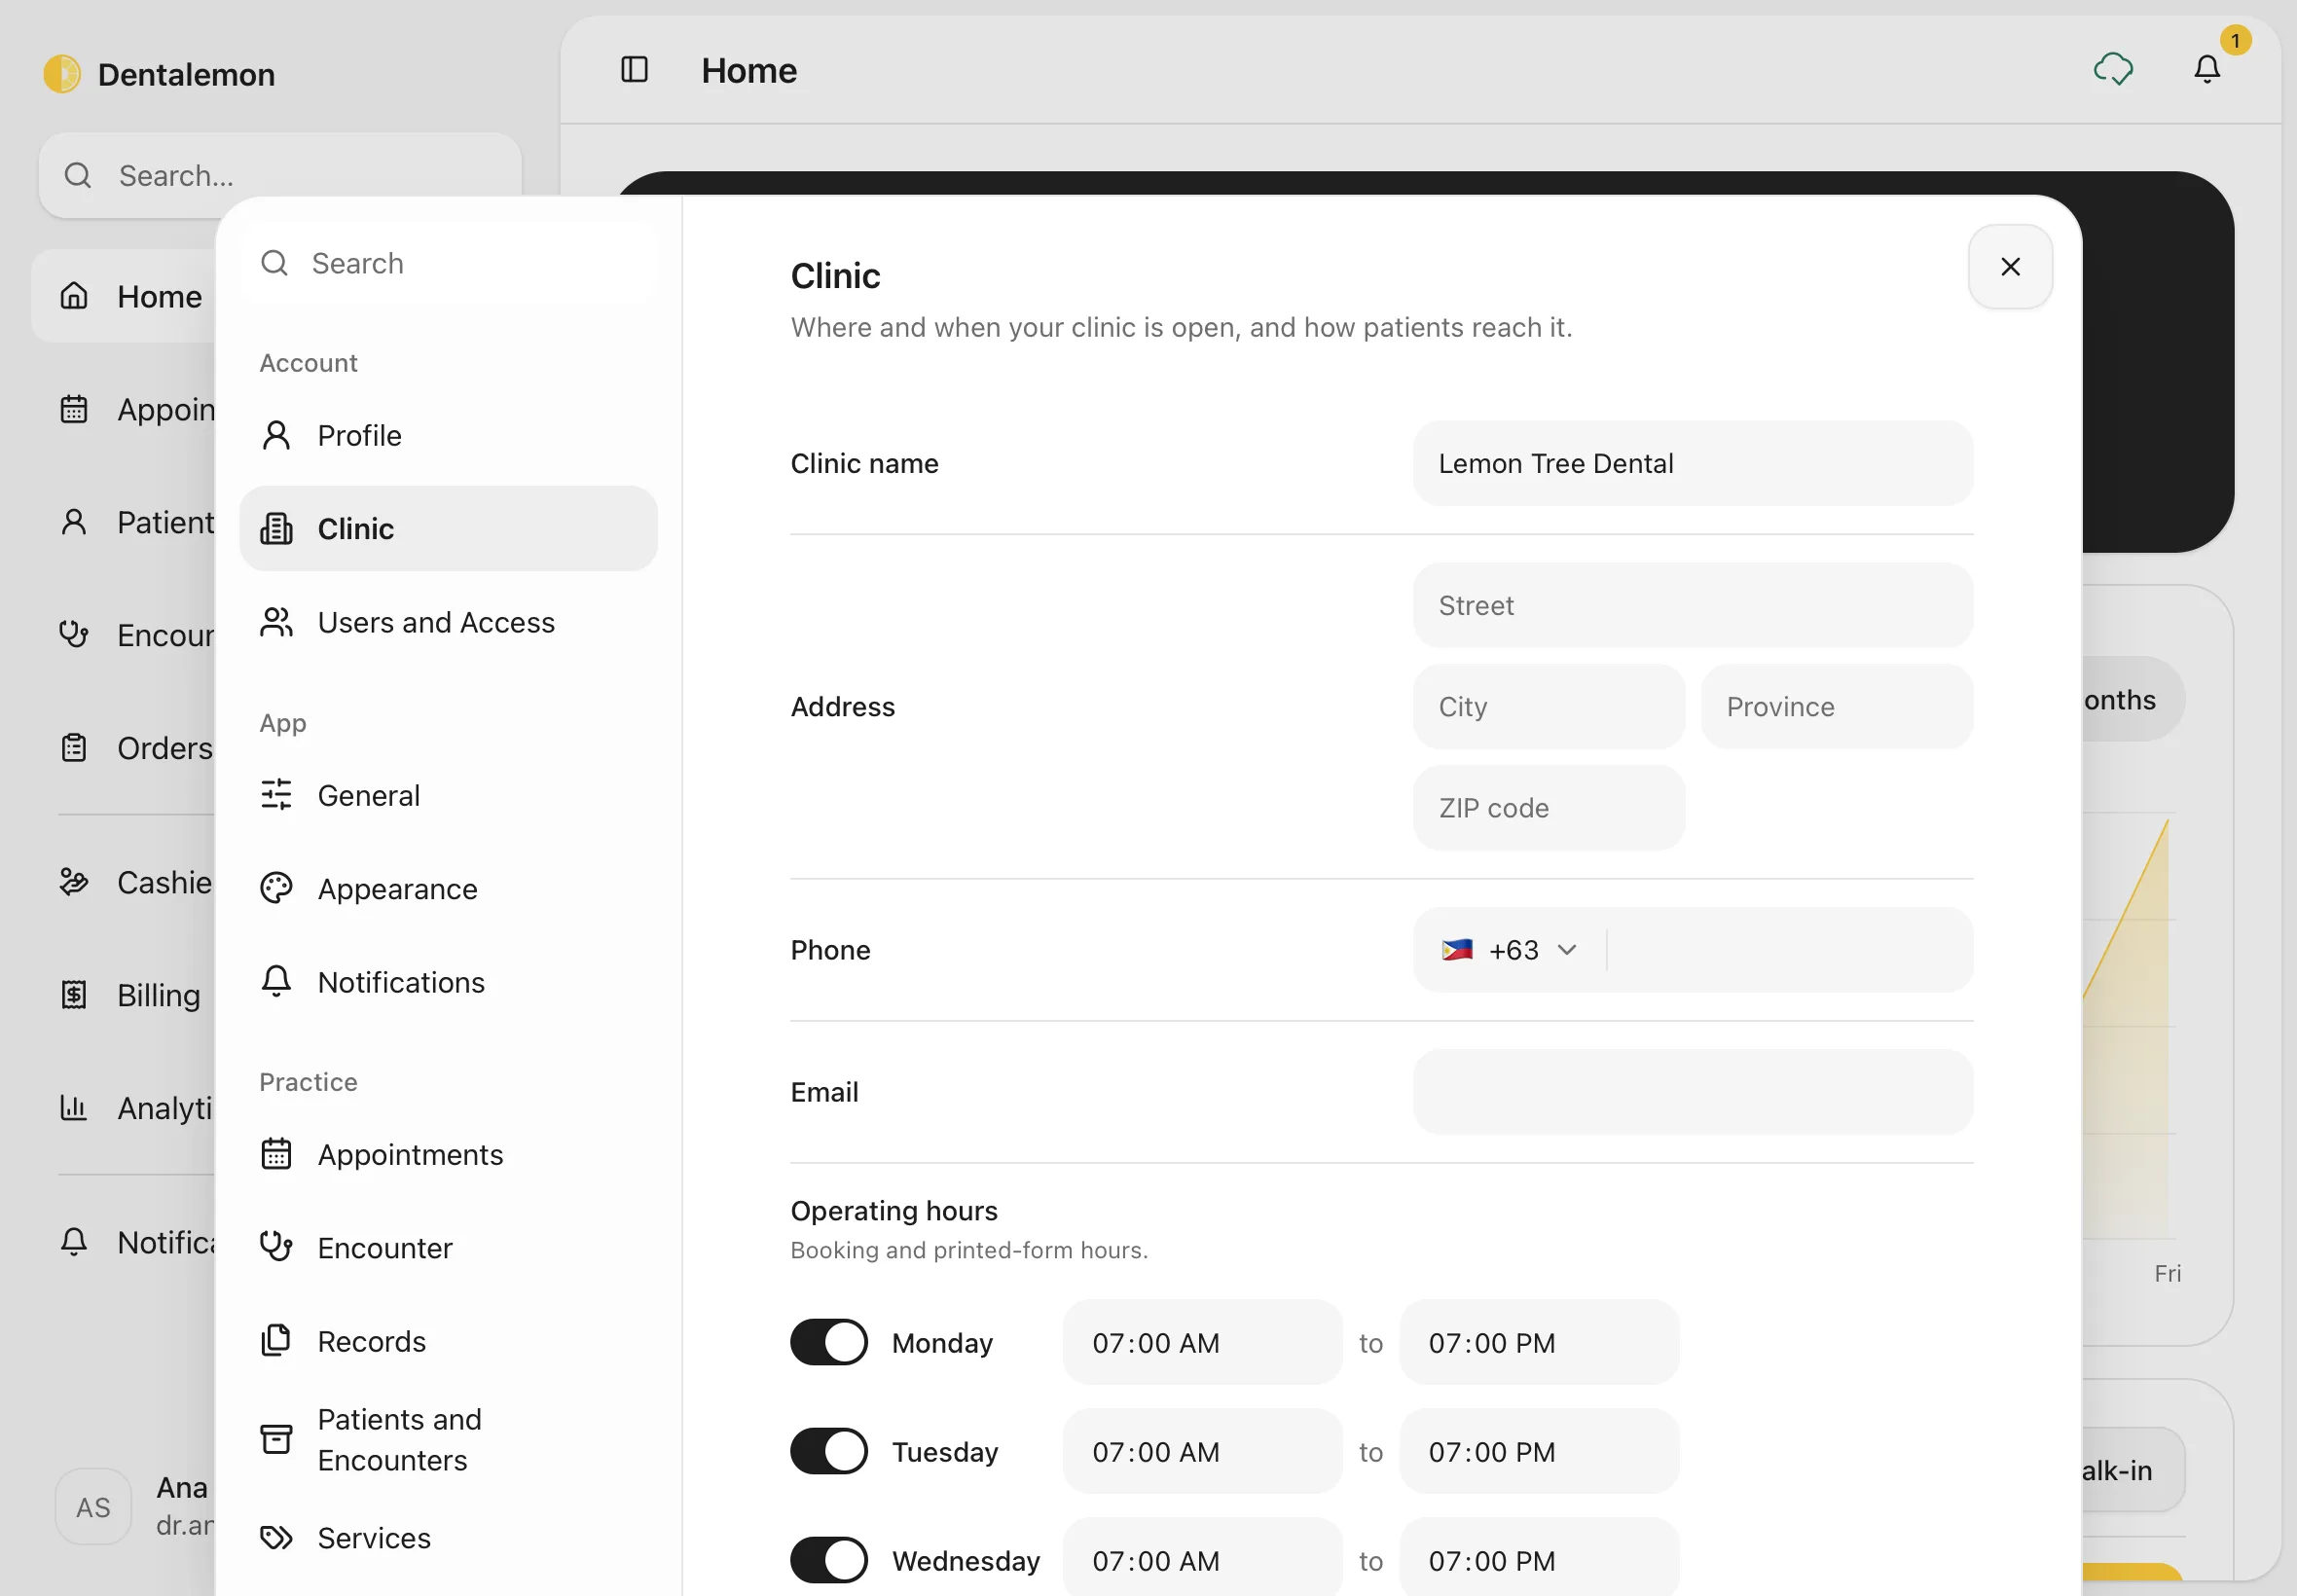
Tap Clinic. Fill in the Clinic name, Address, Phone and Email.
Under Operating hours, switch each day on or off and set its opening and closing times. Appointments can only be booked inside these hours, and printed forms show them.
Further down, under Location, Country sets the currency, time zone, tax fields and payment methods. Time zone and Currency follow from it.
You should see: your clinic name, the address boxes (Street, City, Province, ZIP code), Phone, Email and the week's hours.
5. Tooth notation and start page
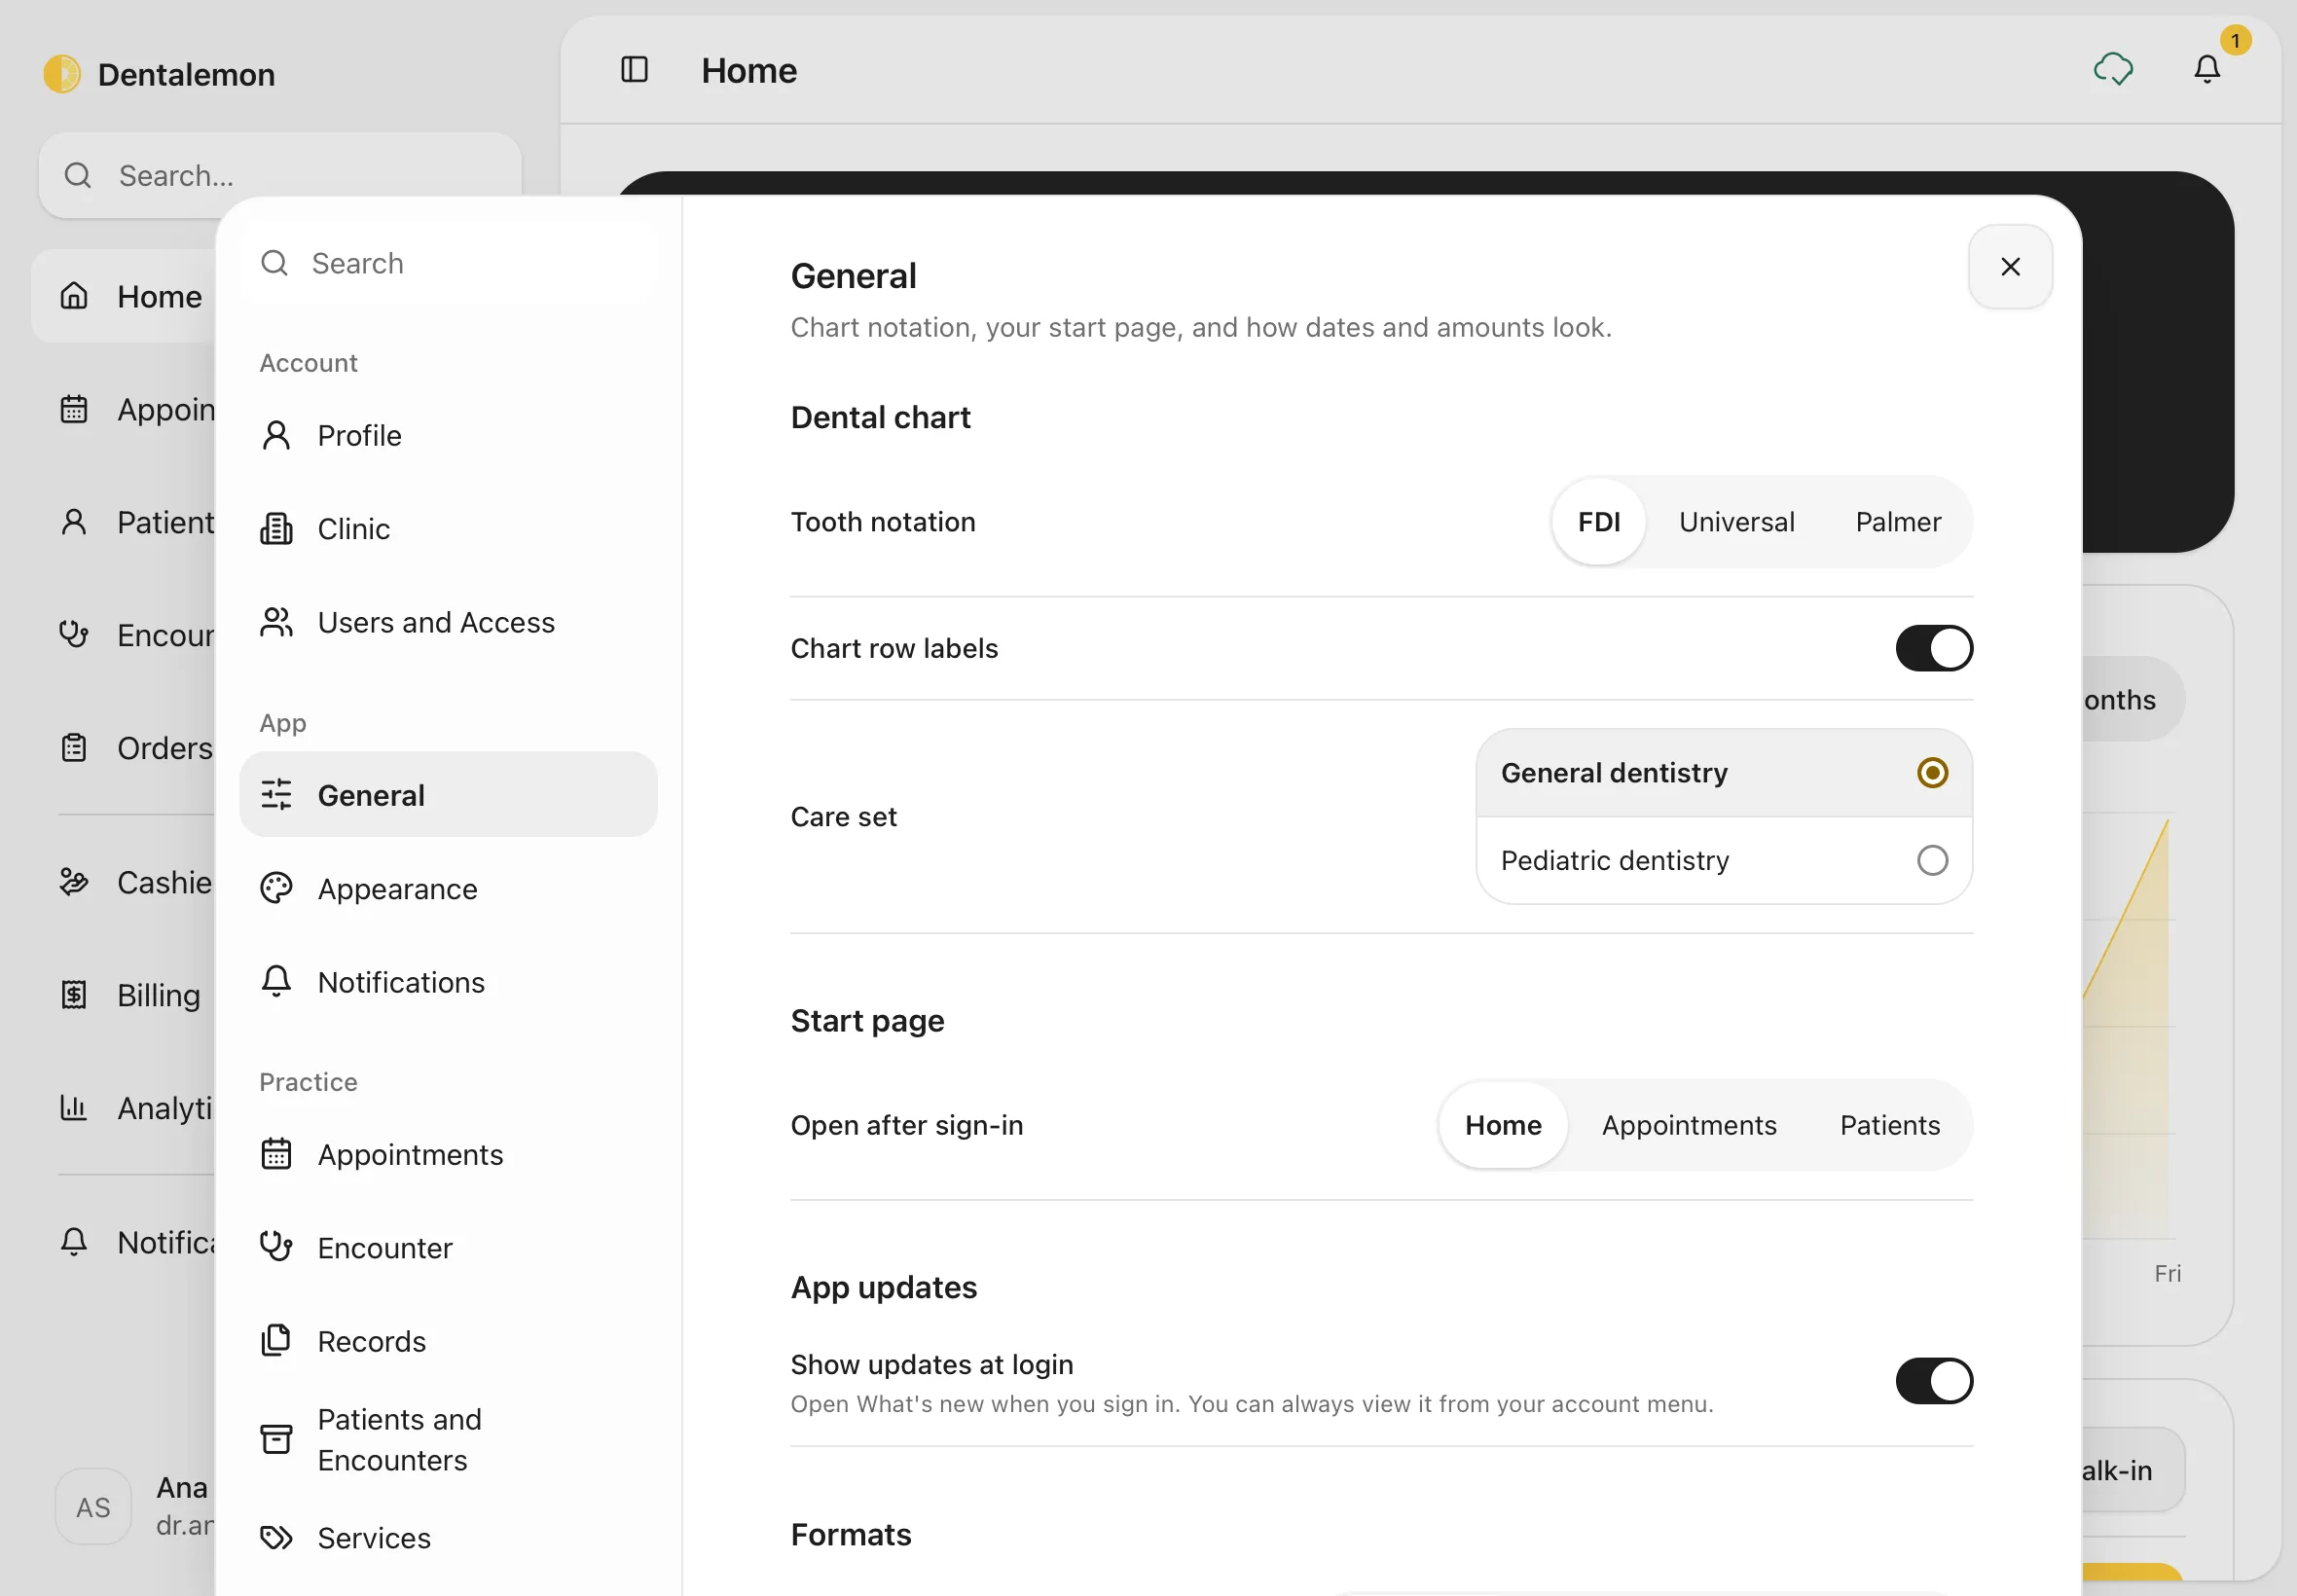
Tap General.
- Tooth notation: FDI, Universal or Palmer. This changes how tooth numbers are shown everywhere in the app.
- Chart row labels: show or hide the Facial, Occlusal and Lingual labels on the chart.
- Care set: General dentistry or Pediatric dentistry.
- Open after sign-in: which page opens first (Home, Appointments or Patients).
- Show updates at login: opens What's new when you sign in. You can always open it from your account menu.
- Formats: how the Date, Time and Amounts are written, and which day the Week starts on.
6. Light or dark
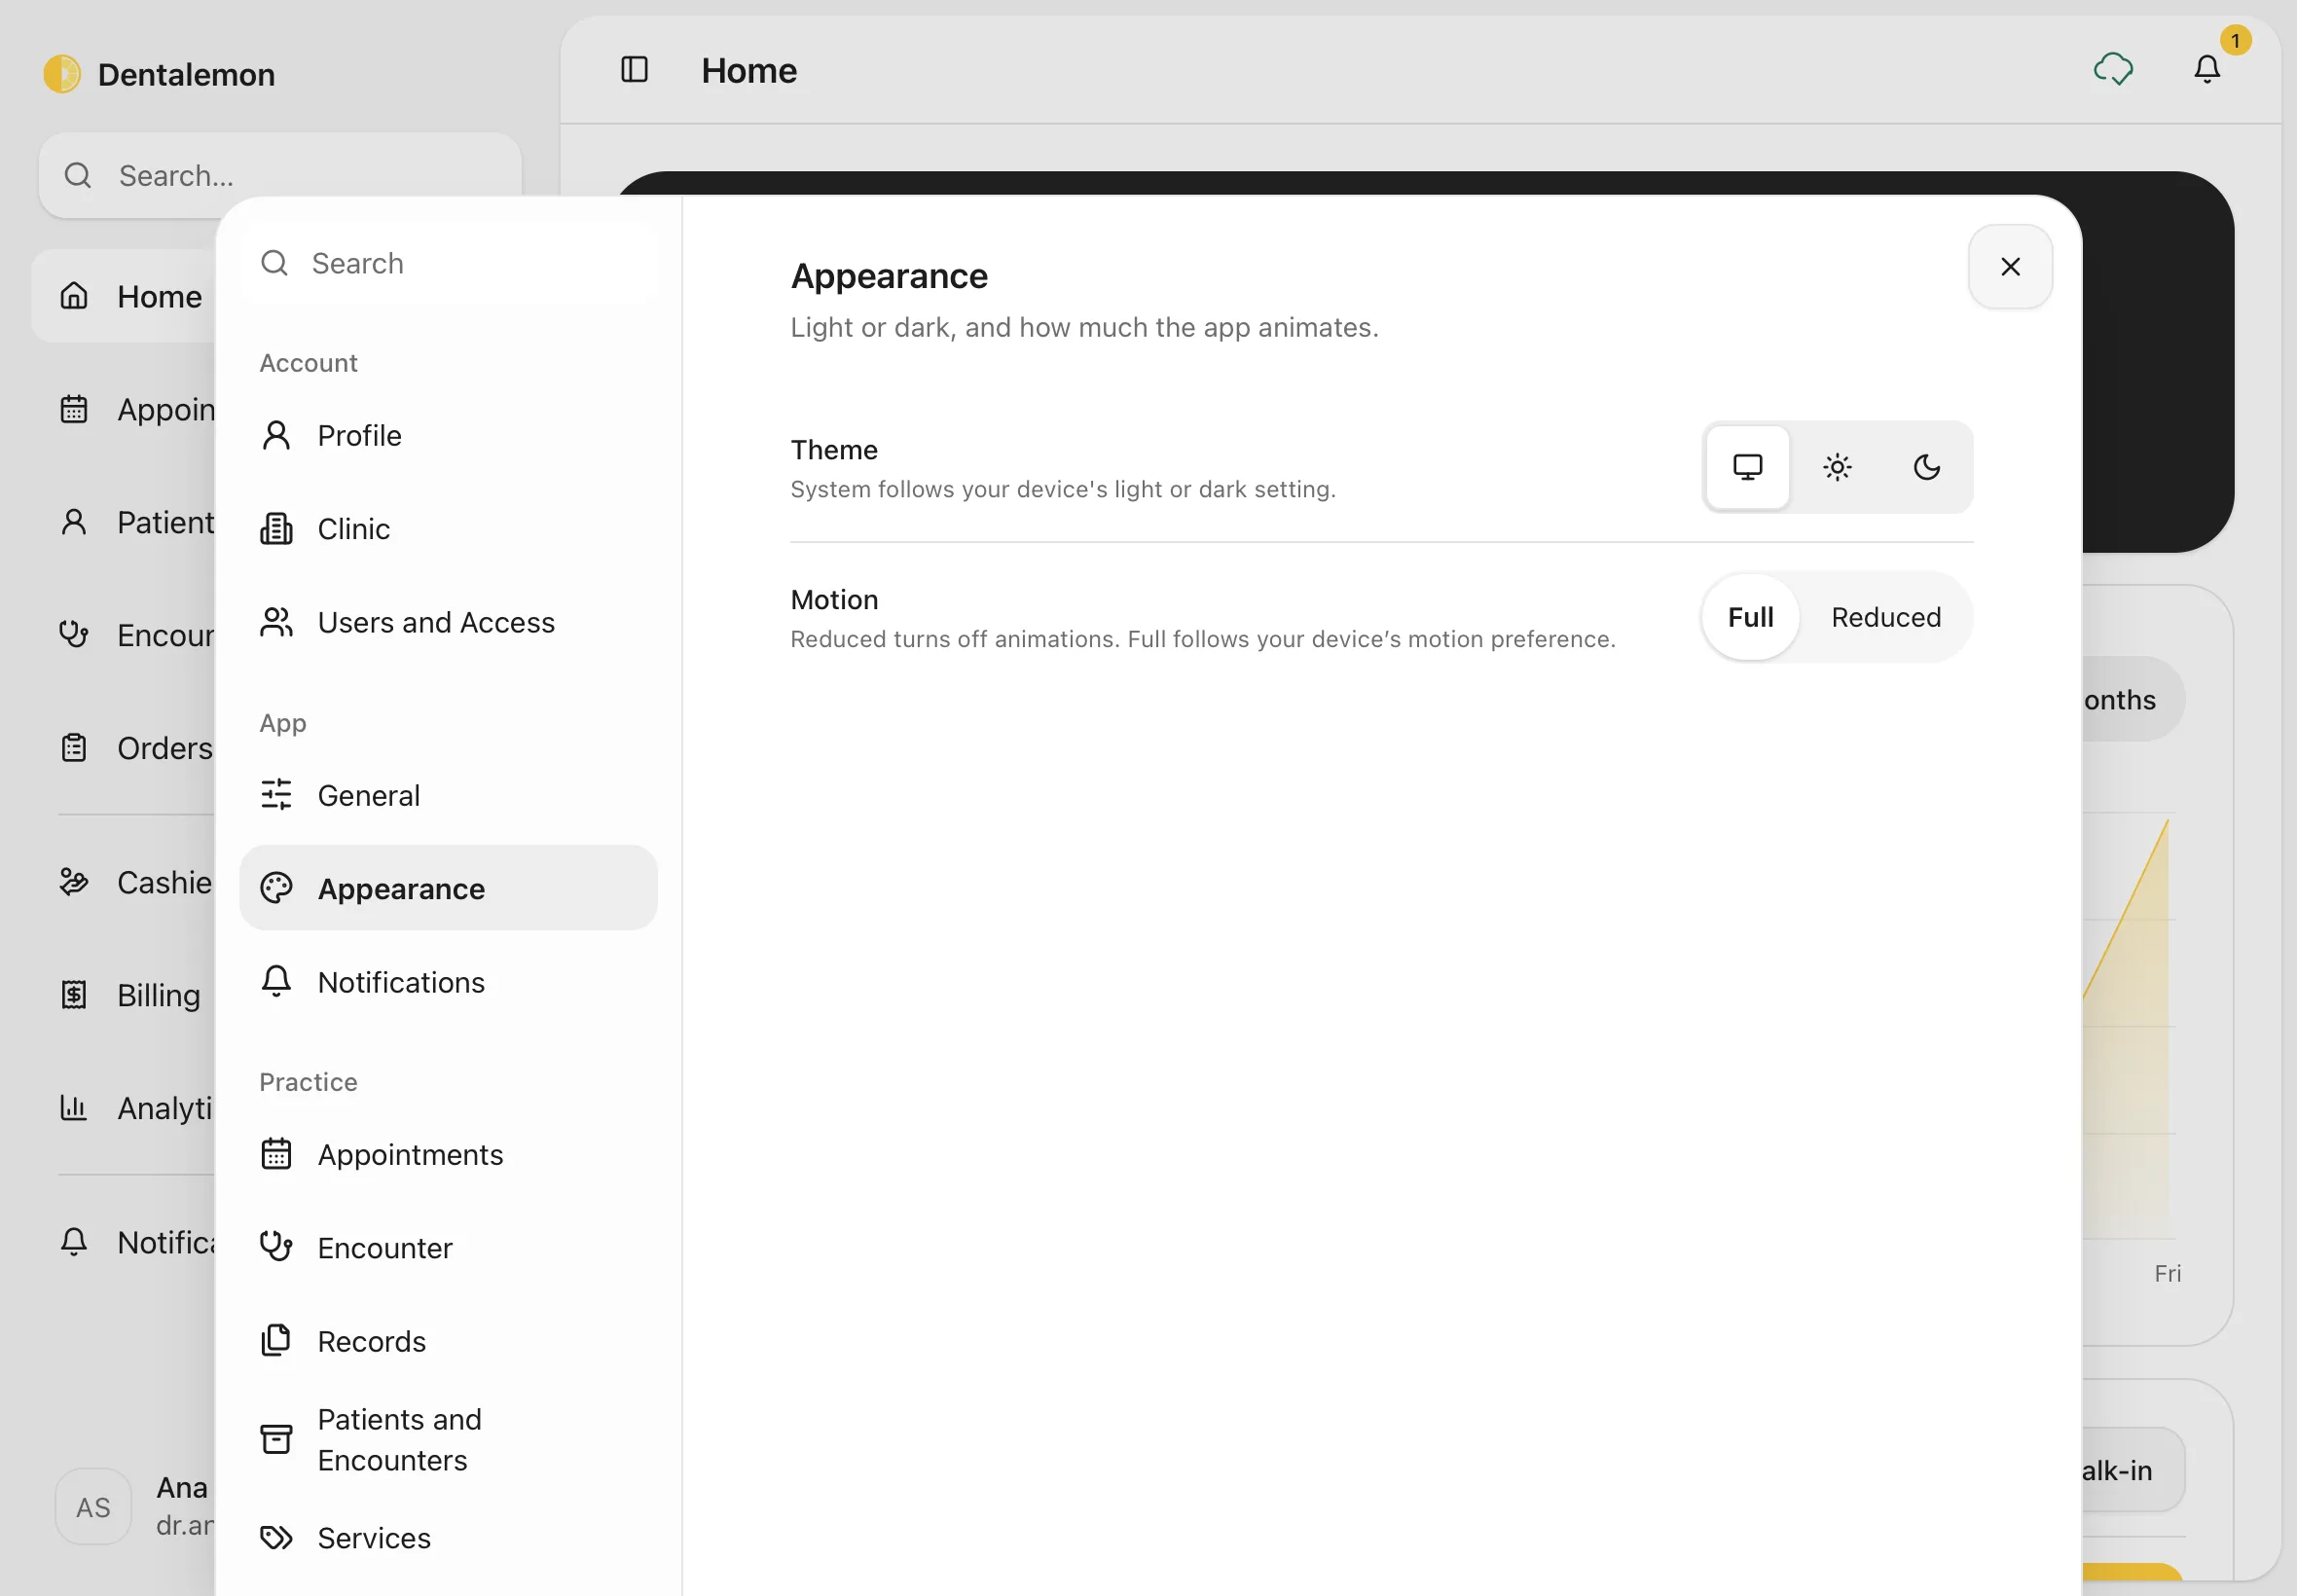
Tap Appearance. Under Theme, pick the screen icon (follow your device), the sun (light) or the moon (dark). Under Motion, choose Reduced to turn off animations.
7. Your price list
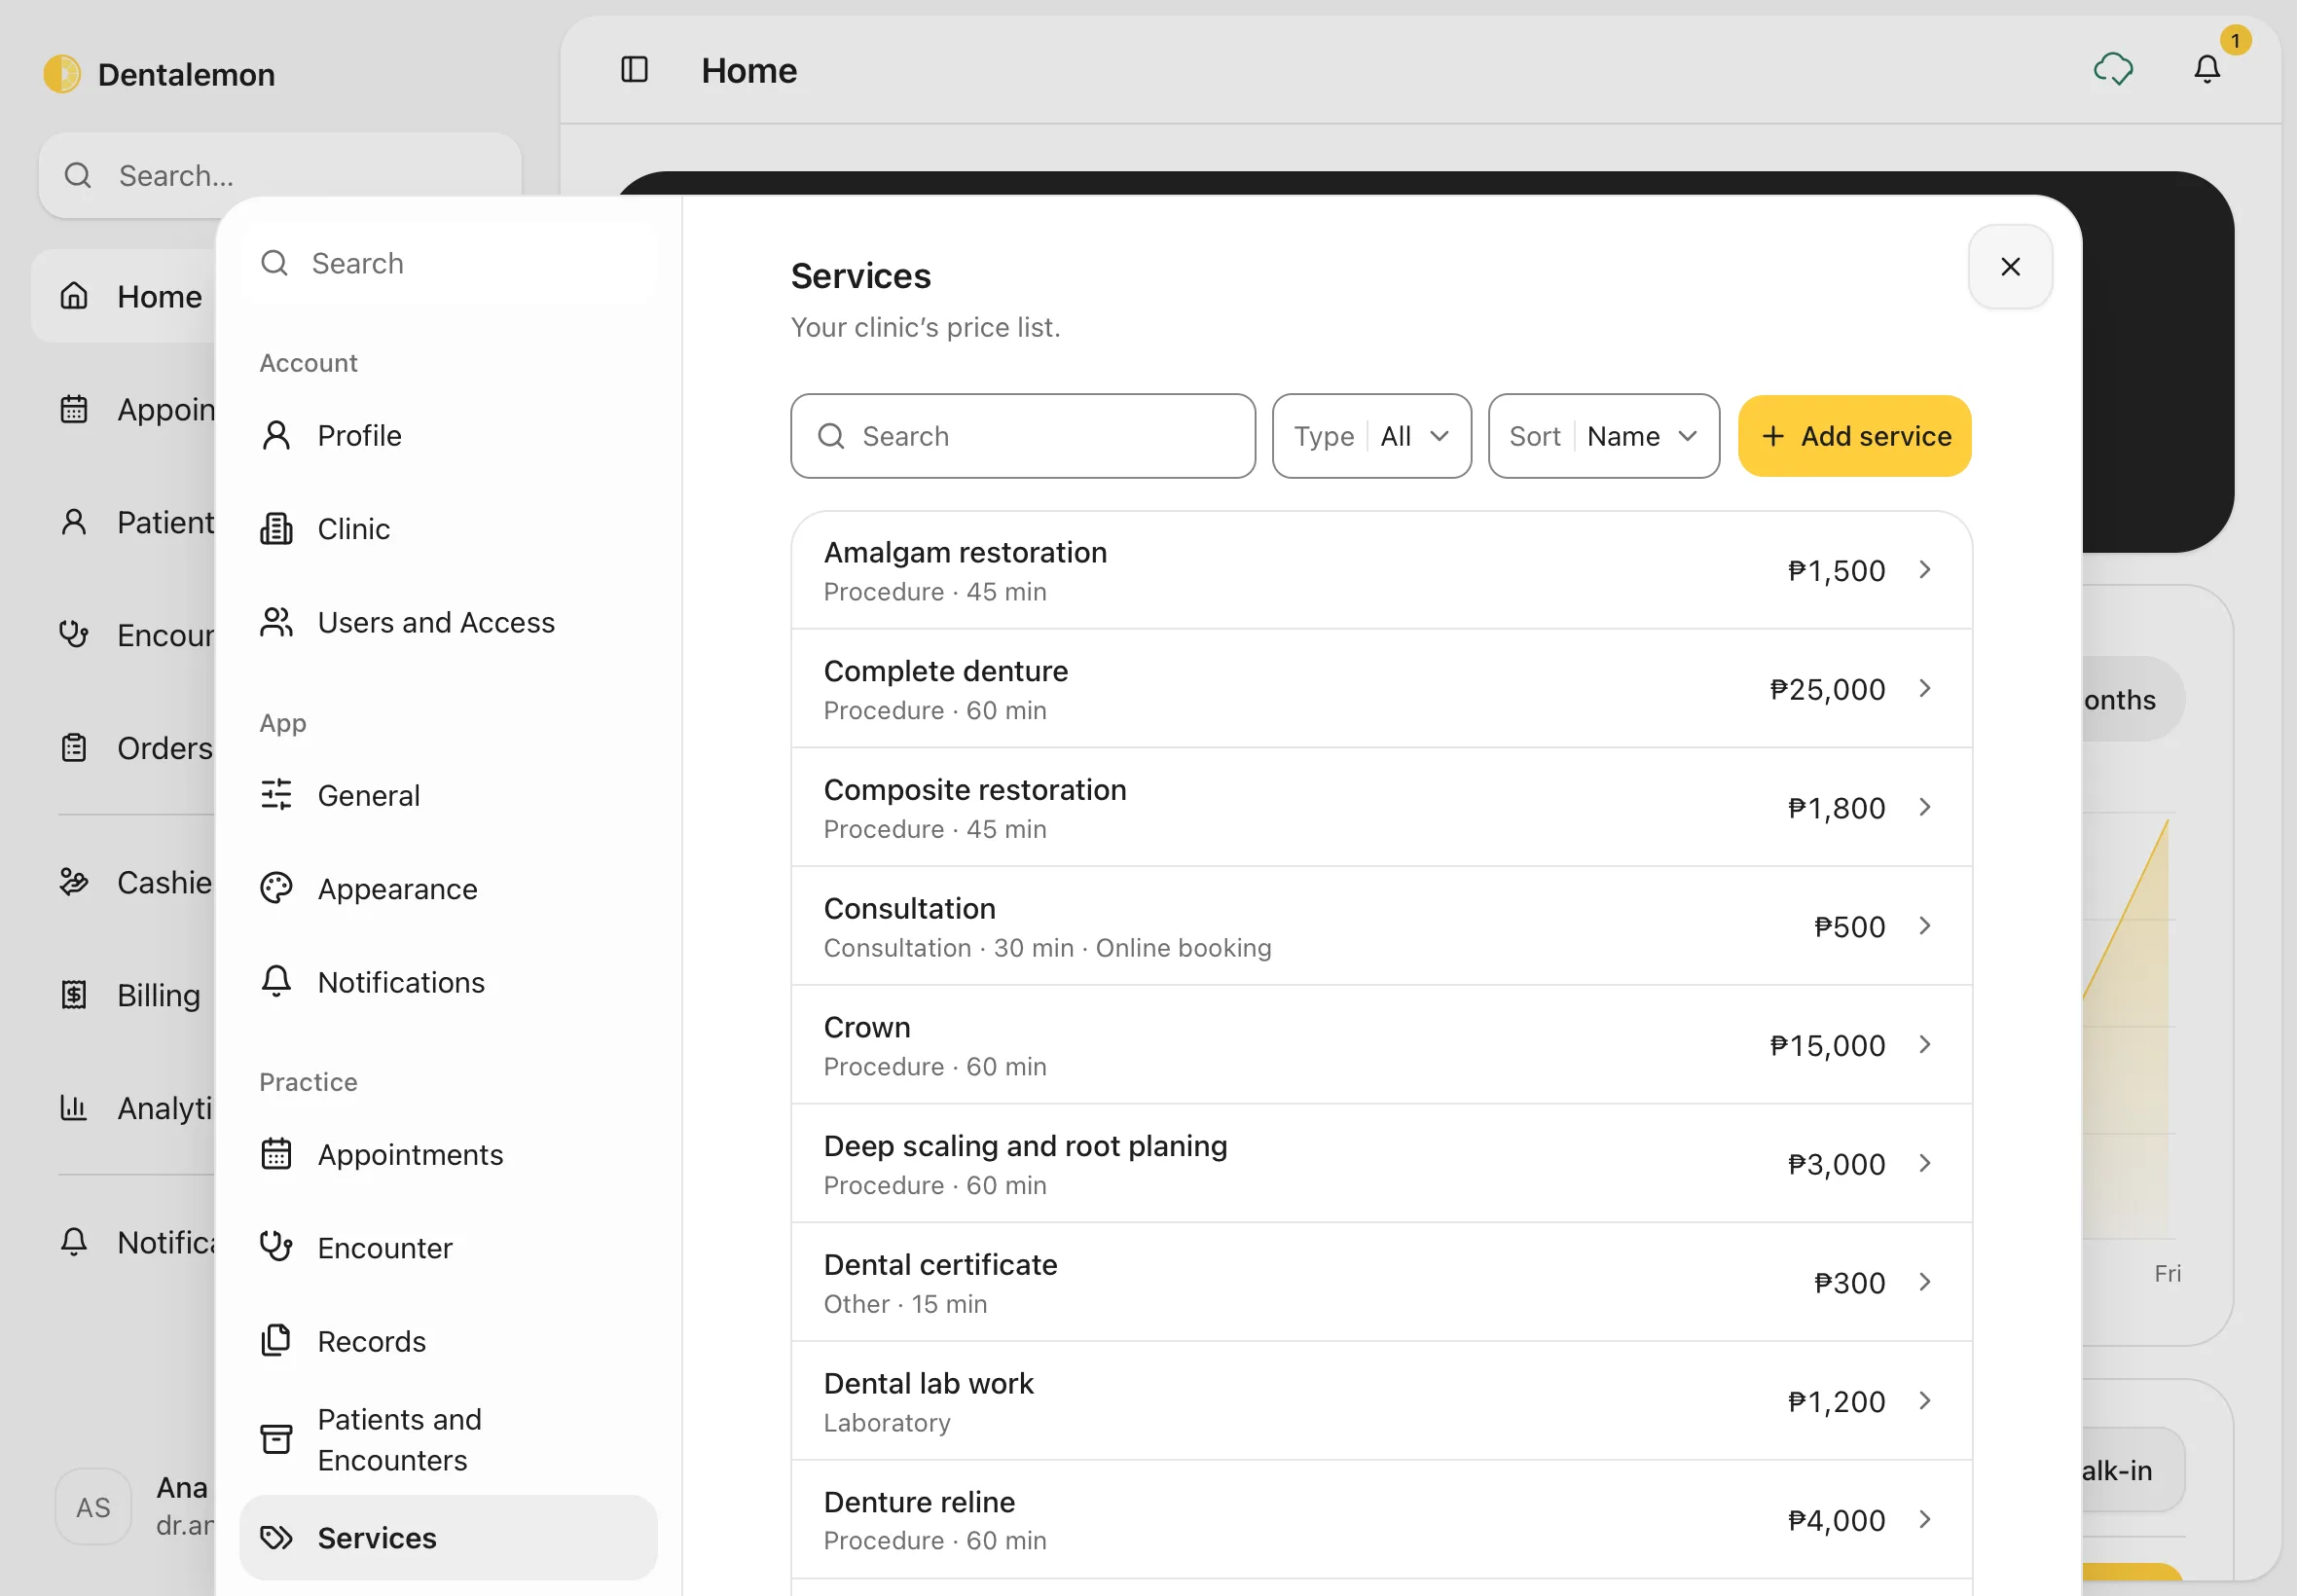
Tap Services. This is the list Dentalemon uses for Charges and the Cashier. Use Search, the Type filter and Sort at the top to find a service.
You should see: every service with its type, length and price.
To change a service, tap it, change what you need, and save. To add one:
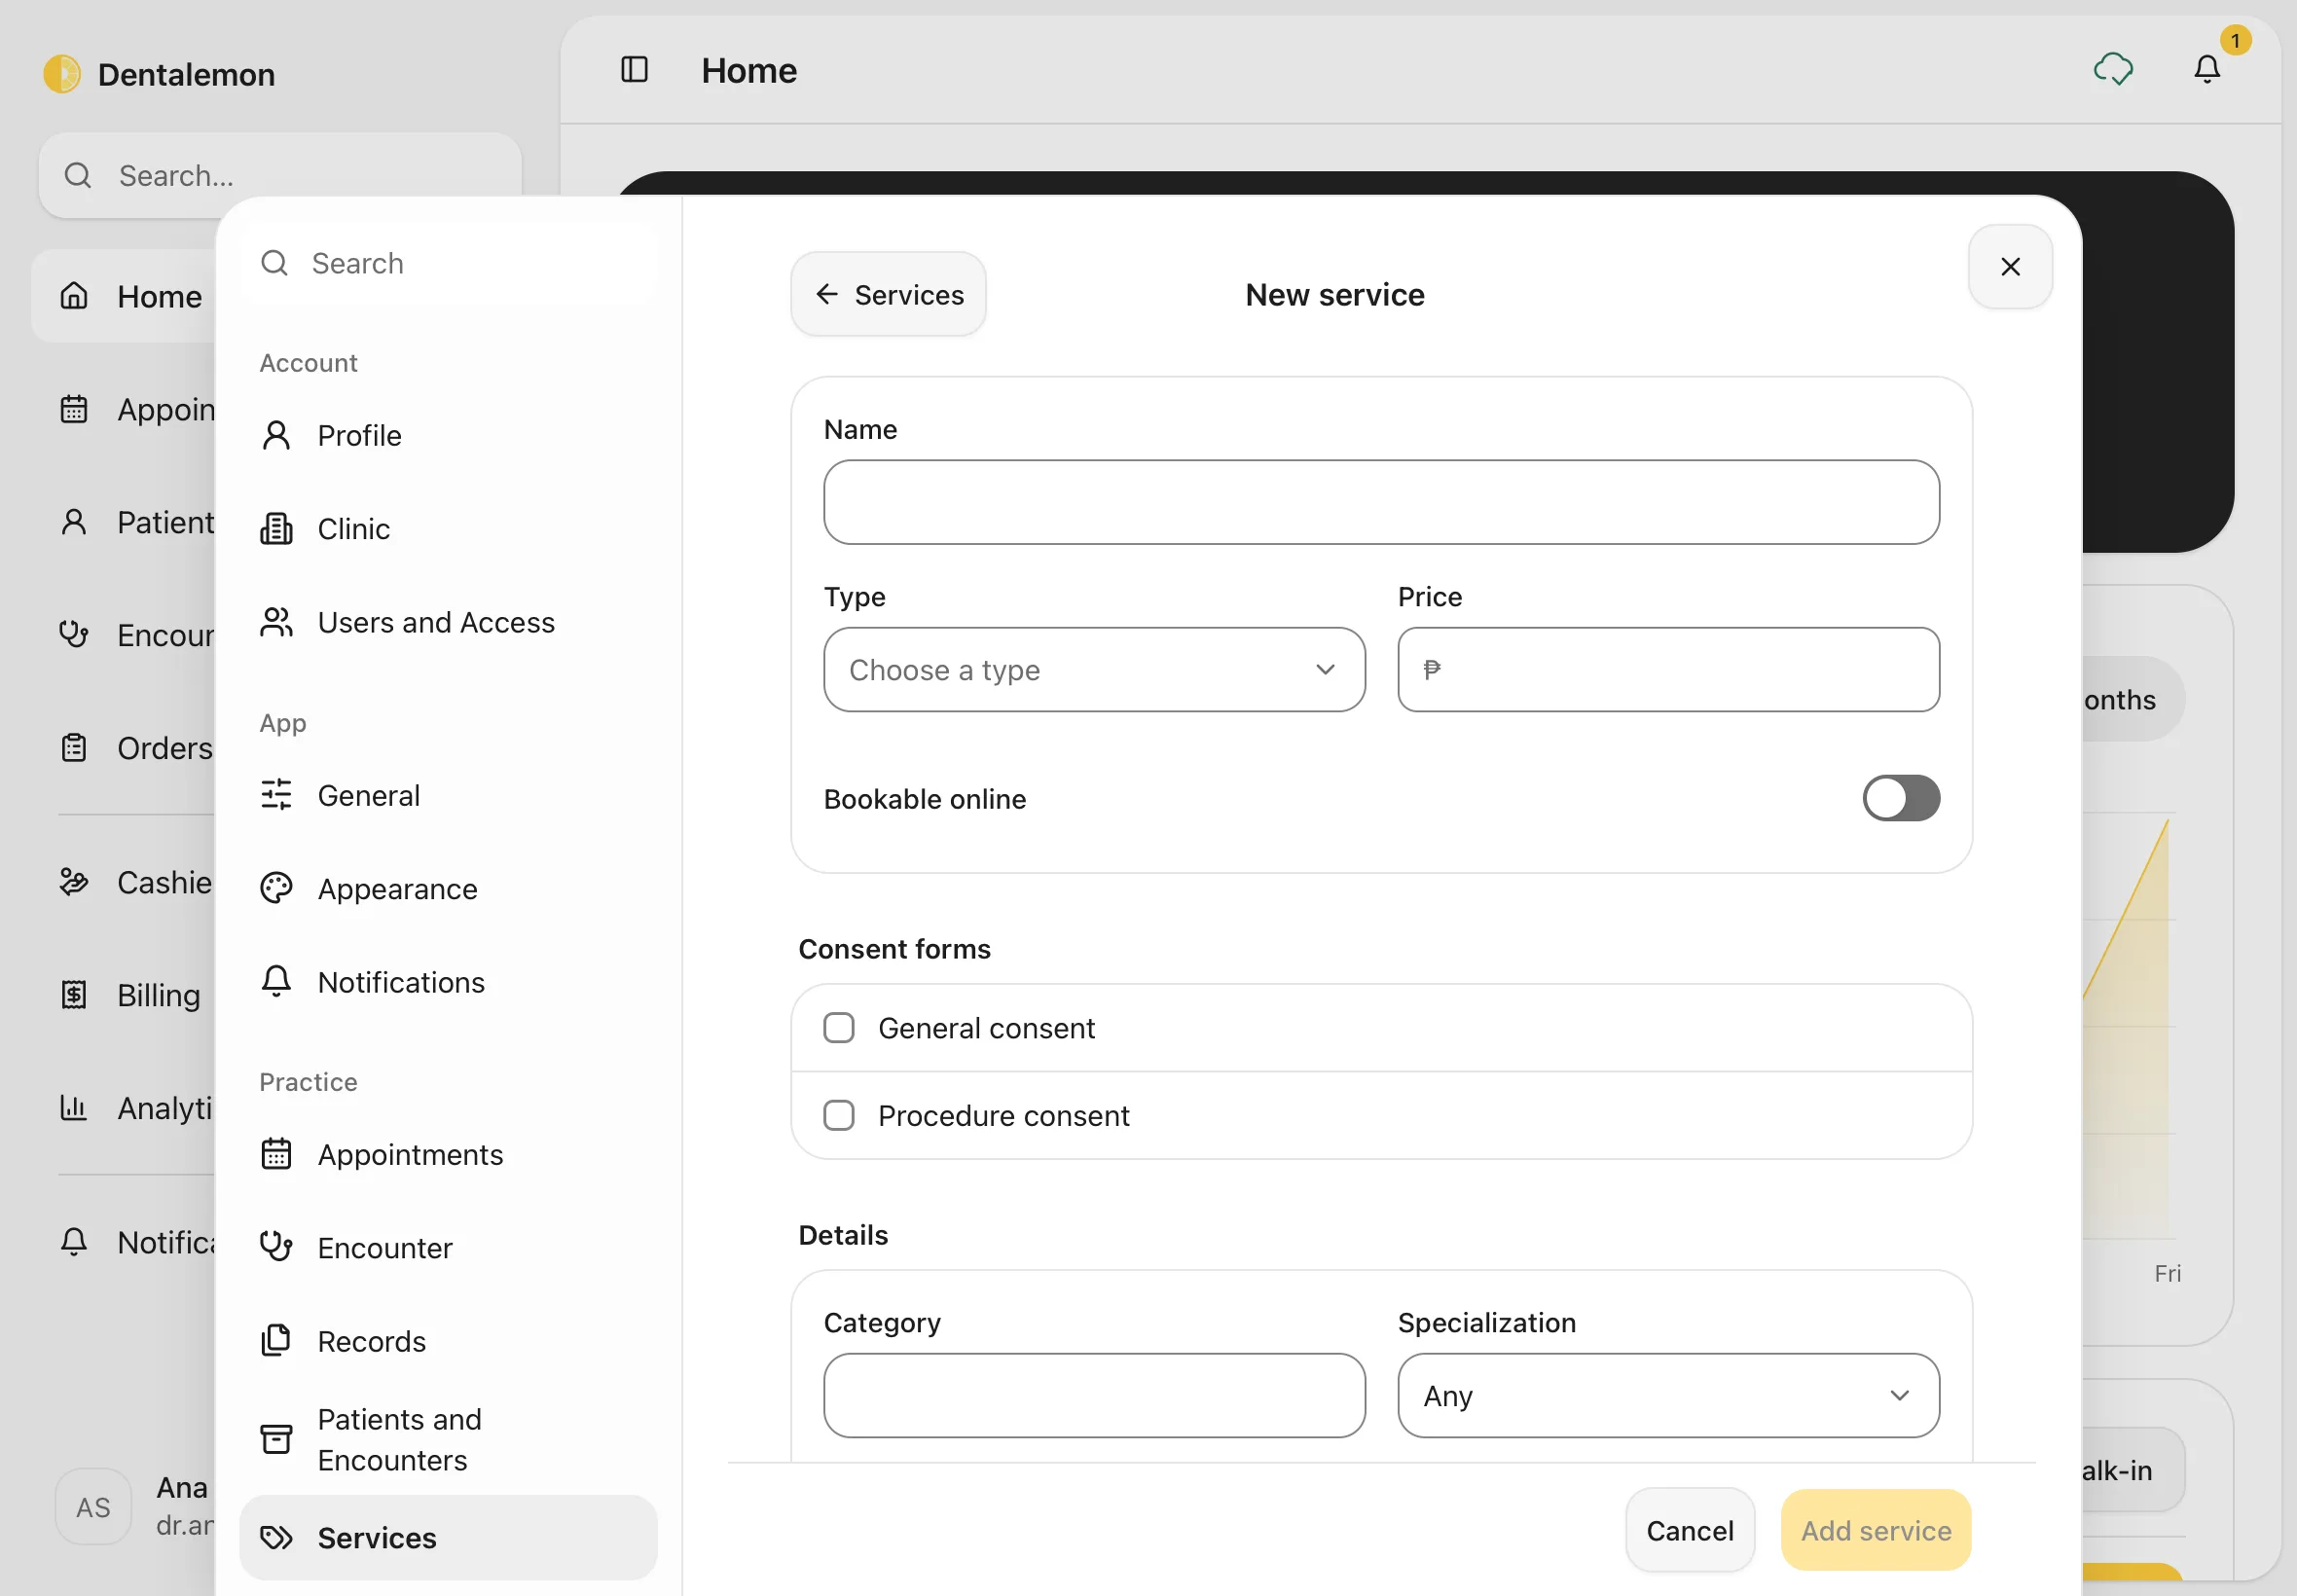
- Tap Add service.
- Type the Name, for example Night guard.
- Choose the Type (for example a procedure or a consultation) and type the Price.
- Optional: switch on Bookable online; tick General consent or Procedure consent under Consent forms if the patient must sign one first; fill in Details such as Category, Specialization and Usual length (how long the visit takes). Further down are the service's Professional fees and Supplies.
- Tap Add service. Tap Cancel to leave without saving.
To stop offering a service, open it and tap Archive service. It no longer shows when you add charges; bills that already have it keep it.
8. Payments and tax
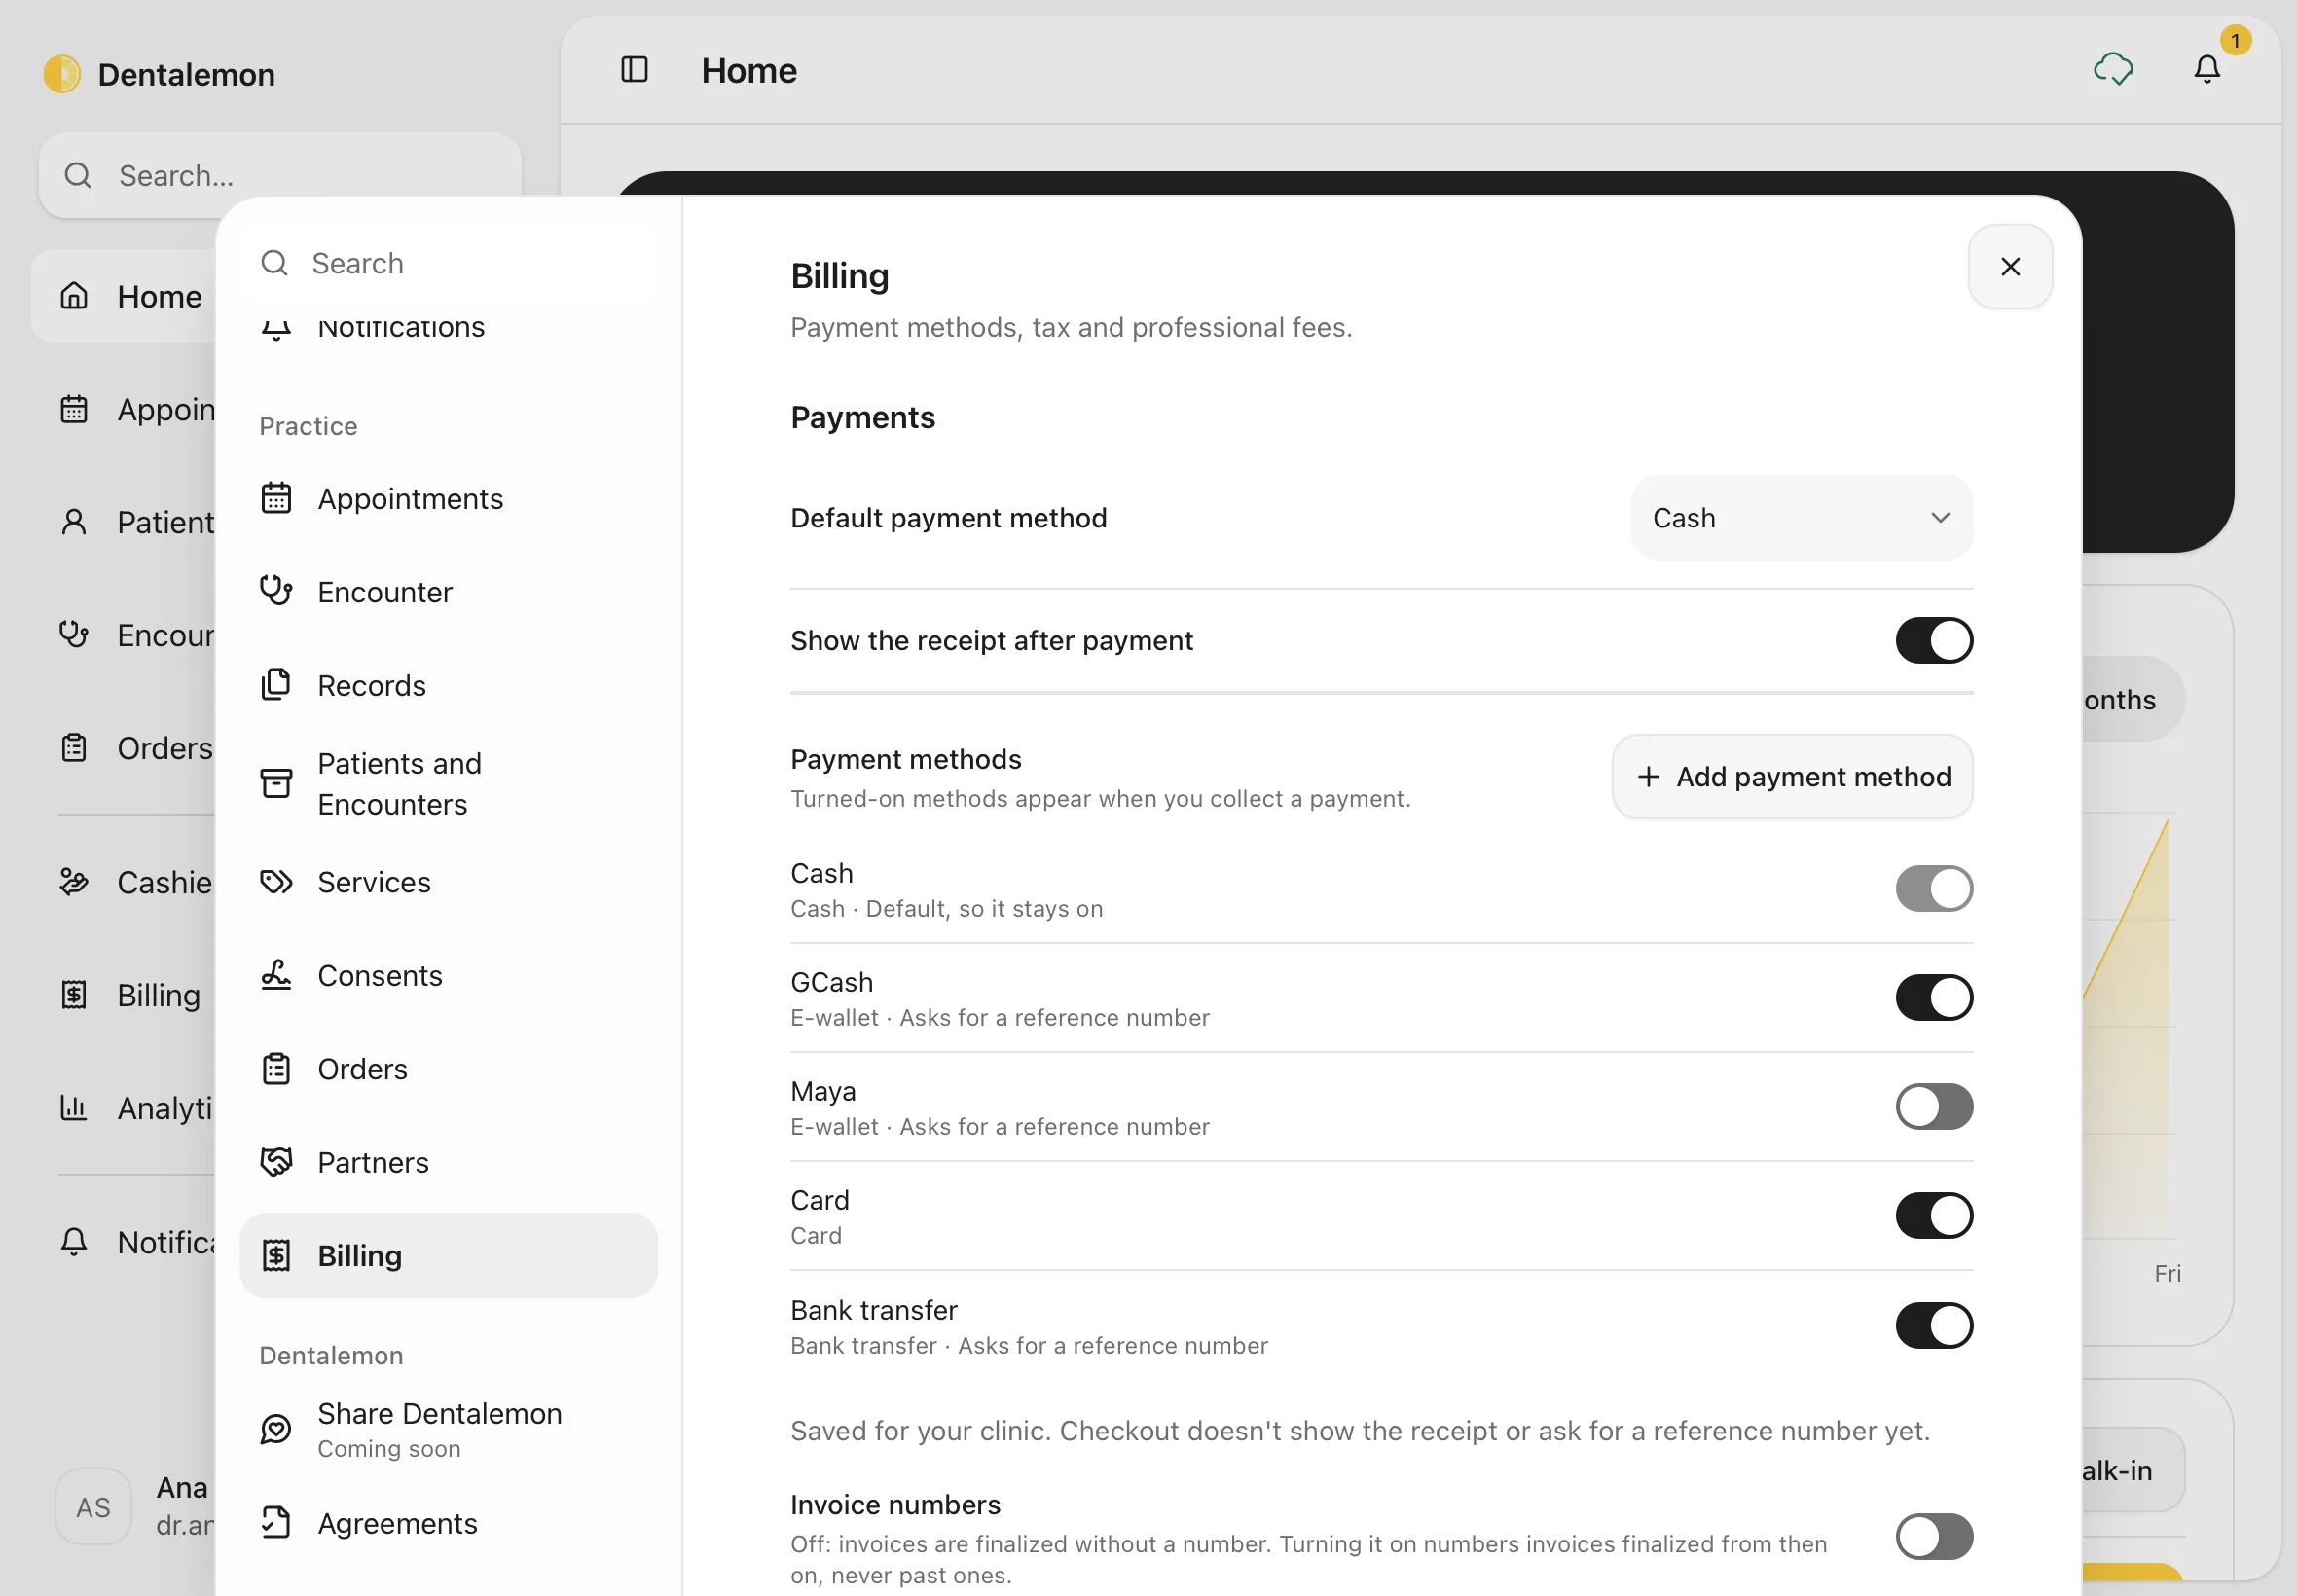
Tap Billing.
- Default payment method: the method already chosen when you collect a payment. It always stays switched on.
- Show the receipt after payment: saved for your clinic, but not used at checkout yet.
- Payment methods: switch on the ones you accept (Cash, GCash, Maya, Card, Bank transfer), or tap Add payment method. Only switched-on methods appear at the Cashier.
- Invoice numbers: off for a new clinic, so invoices are finalized without a number. A clinic admin can switch it on: tap the switch, then Turn on invoice numbers. From then on, every invoice you finalize gets the next number in one series. Invoices finalized before stay without a number, and numbering can't be turned off again.
You should see: Payments, with Default payment method, Show the receipt after payment, the list of Payment methods and Invoice numbers.
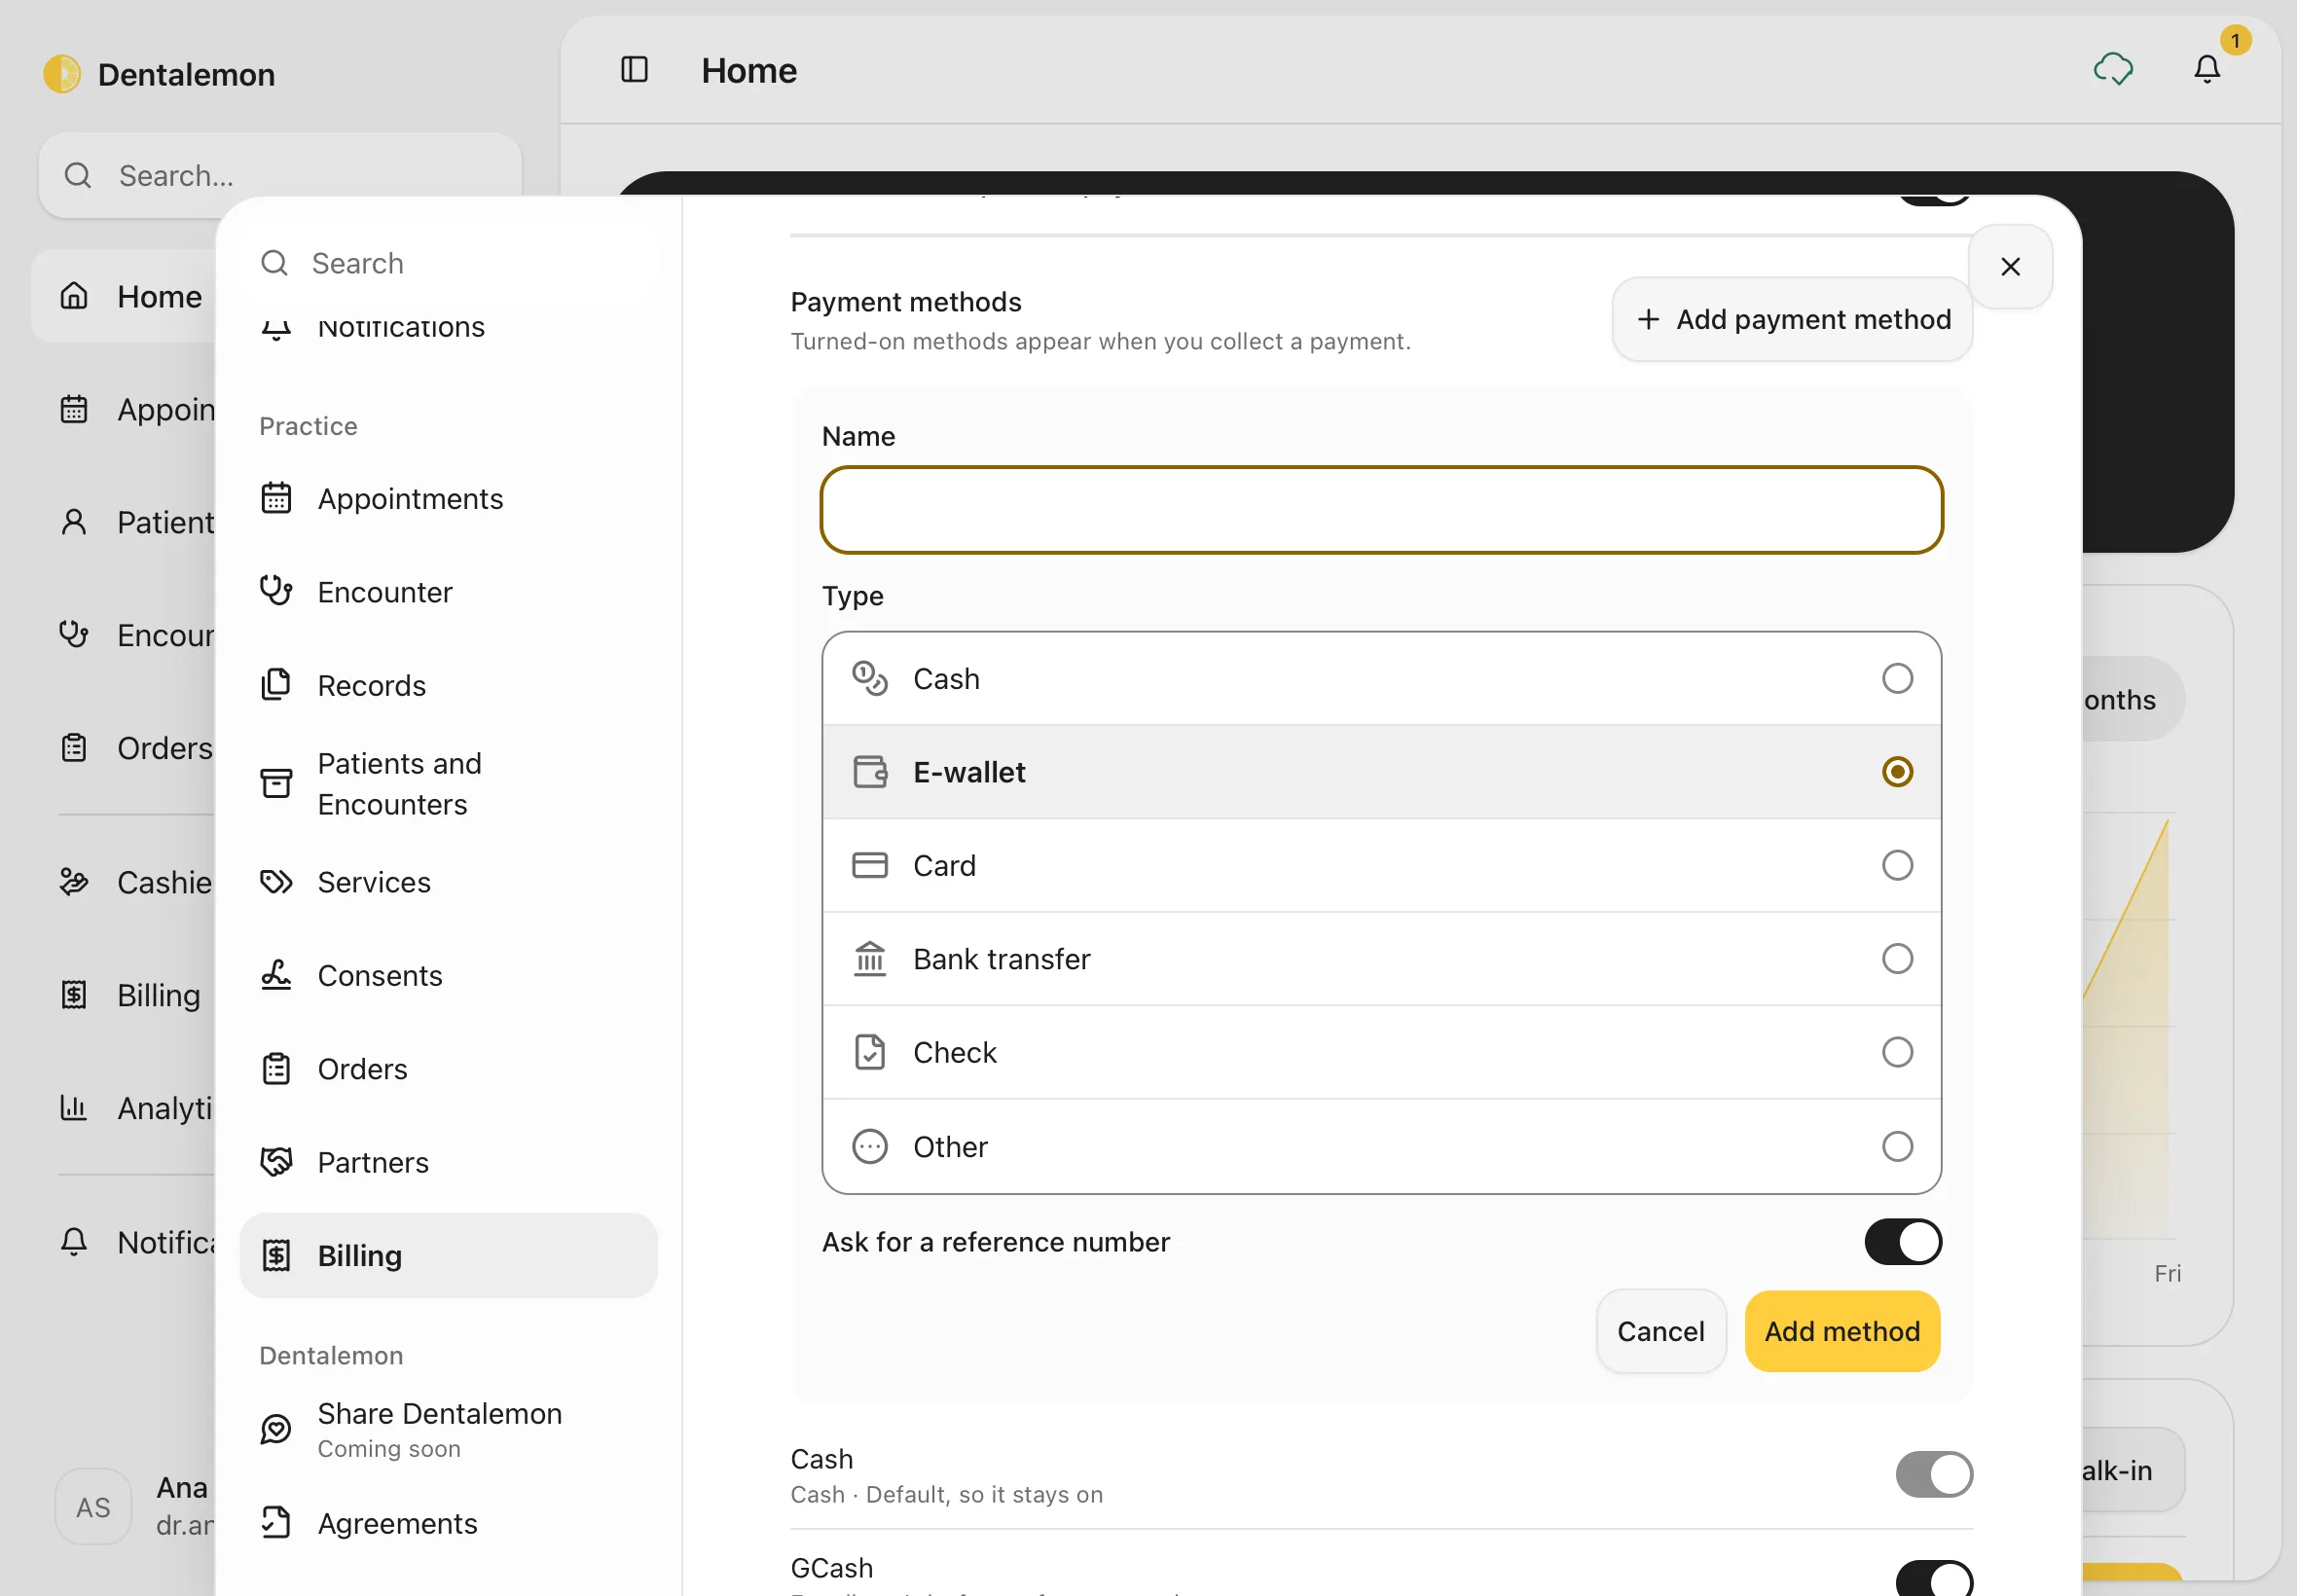
To add a payment method your clinic accepts, for example another e-wallet:
- Tap Add payment method.
- Type its Name, for example ShopeePay.
- Choose its Type: Cash, E-wallet, Card, Bank transfer, Check or Other. The type decides what the Cashier asks for when you collect (for example a reference number for an e-wallet).
- Tap Add method. Tap Cancel to leave without adding.
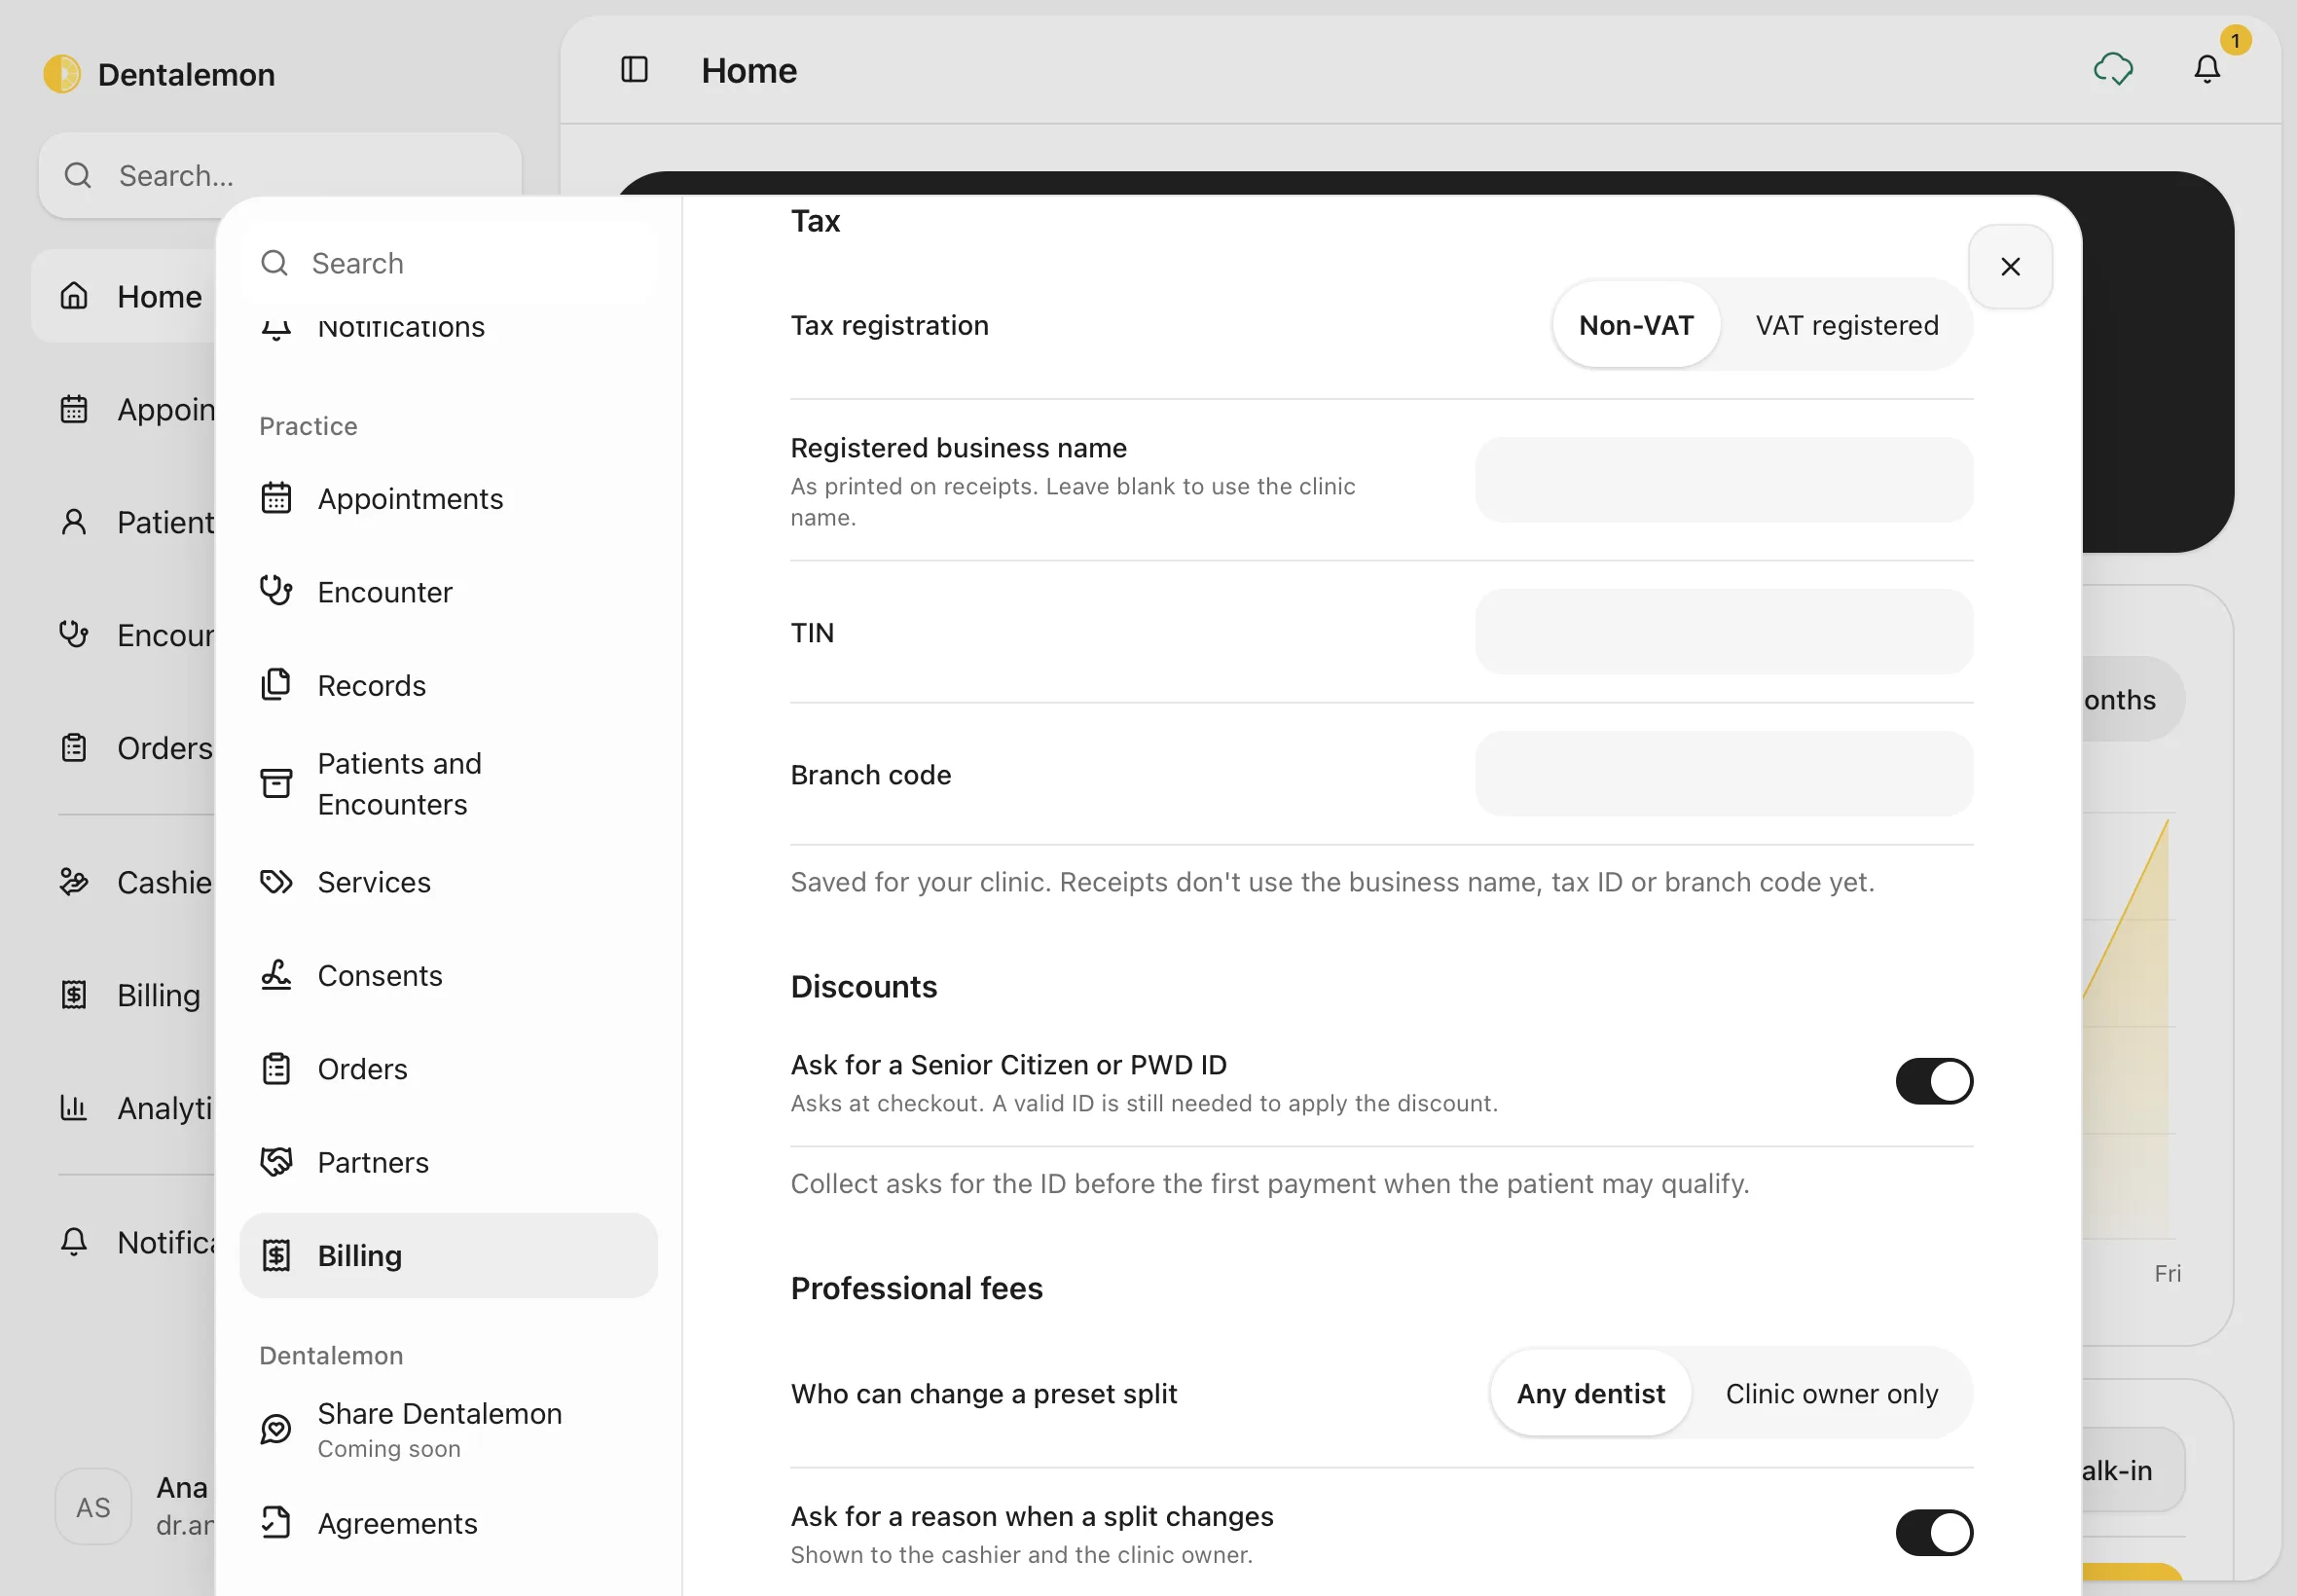
Scroll down to Tax. Set Tax registration to Non-VAT or VAT registered, and fill in the Registered business name, TIN and Branch code. Under Discounts and Professional fees are the Senior Citizen/PWD and fee-split rules.
9. Encounter rules
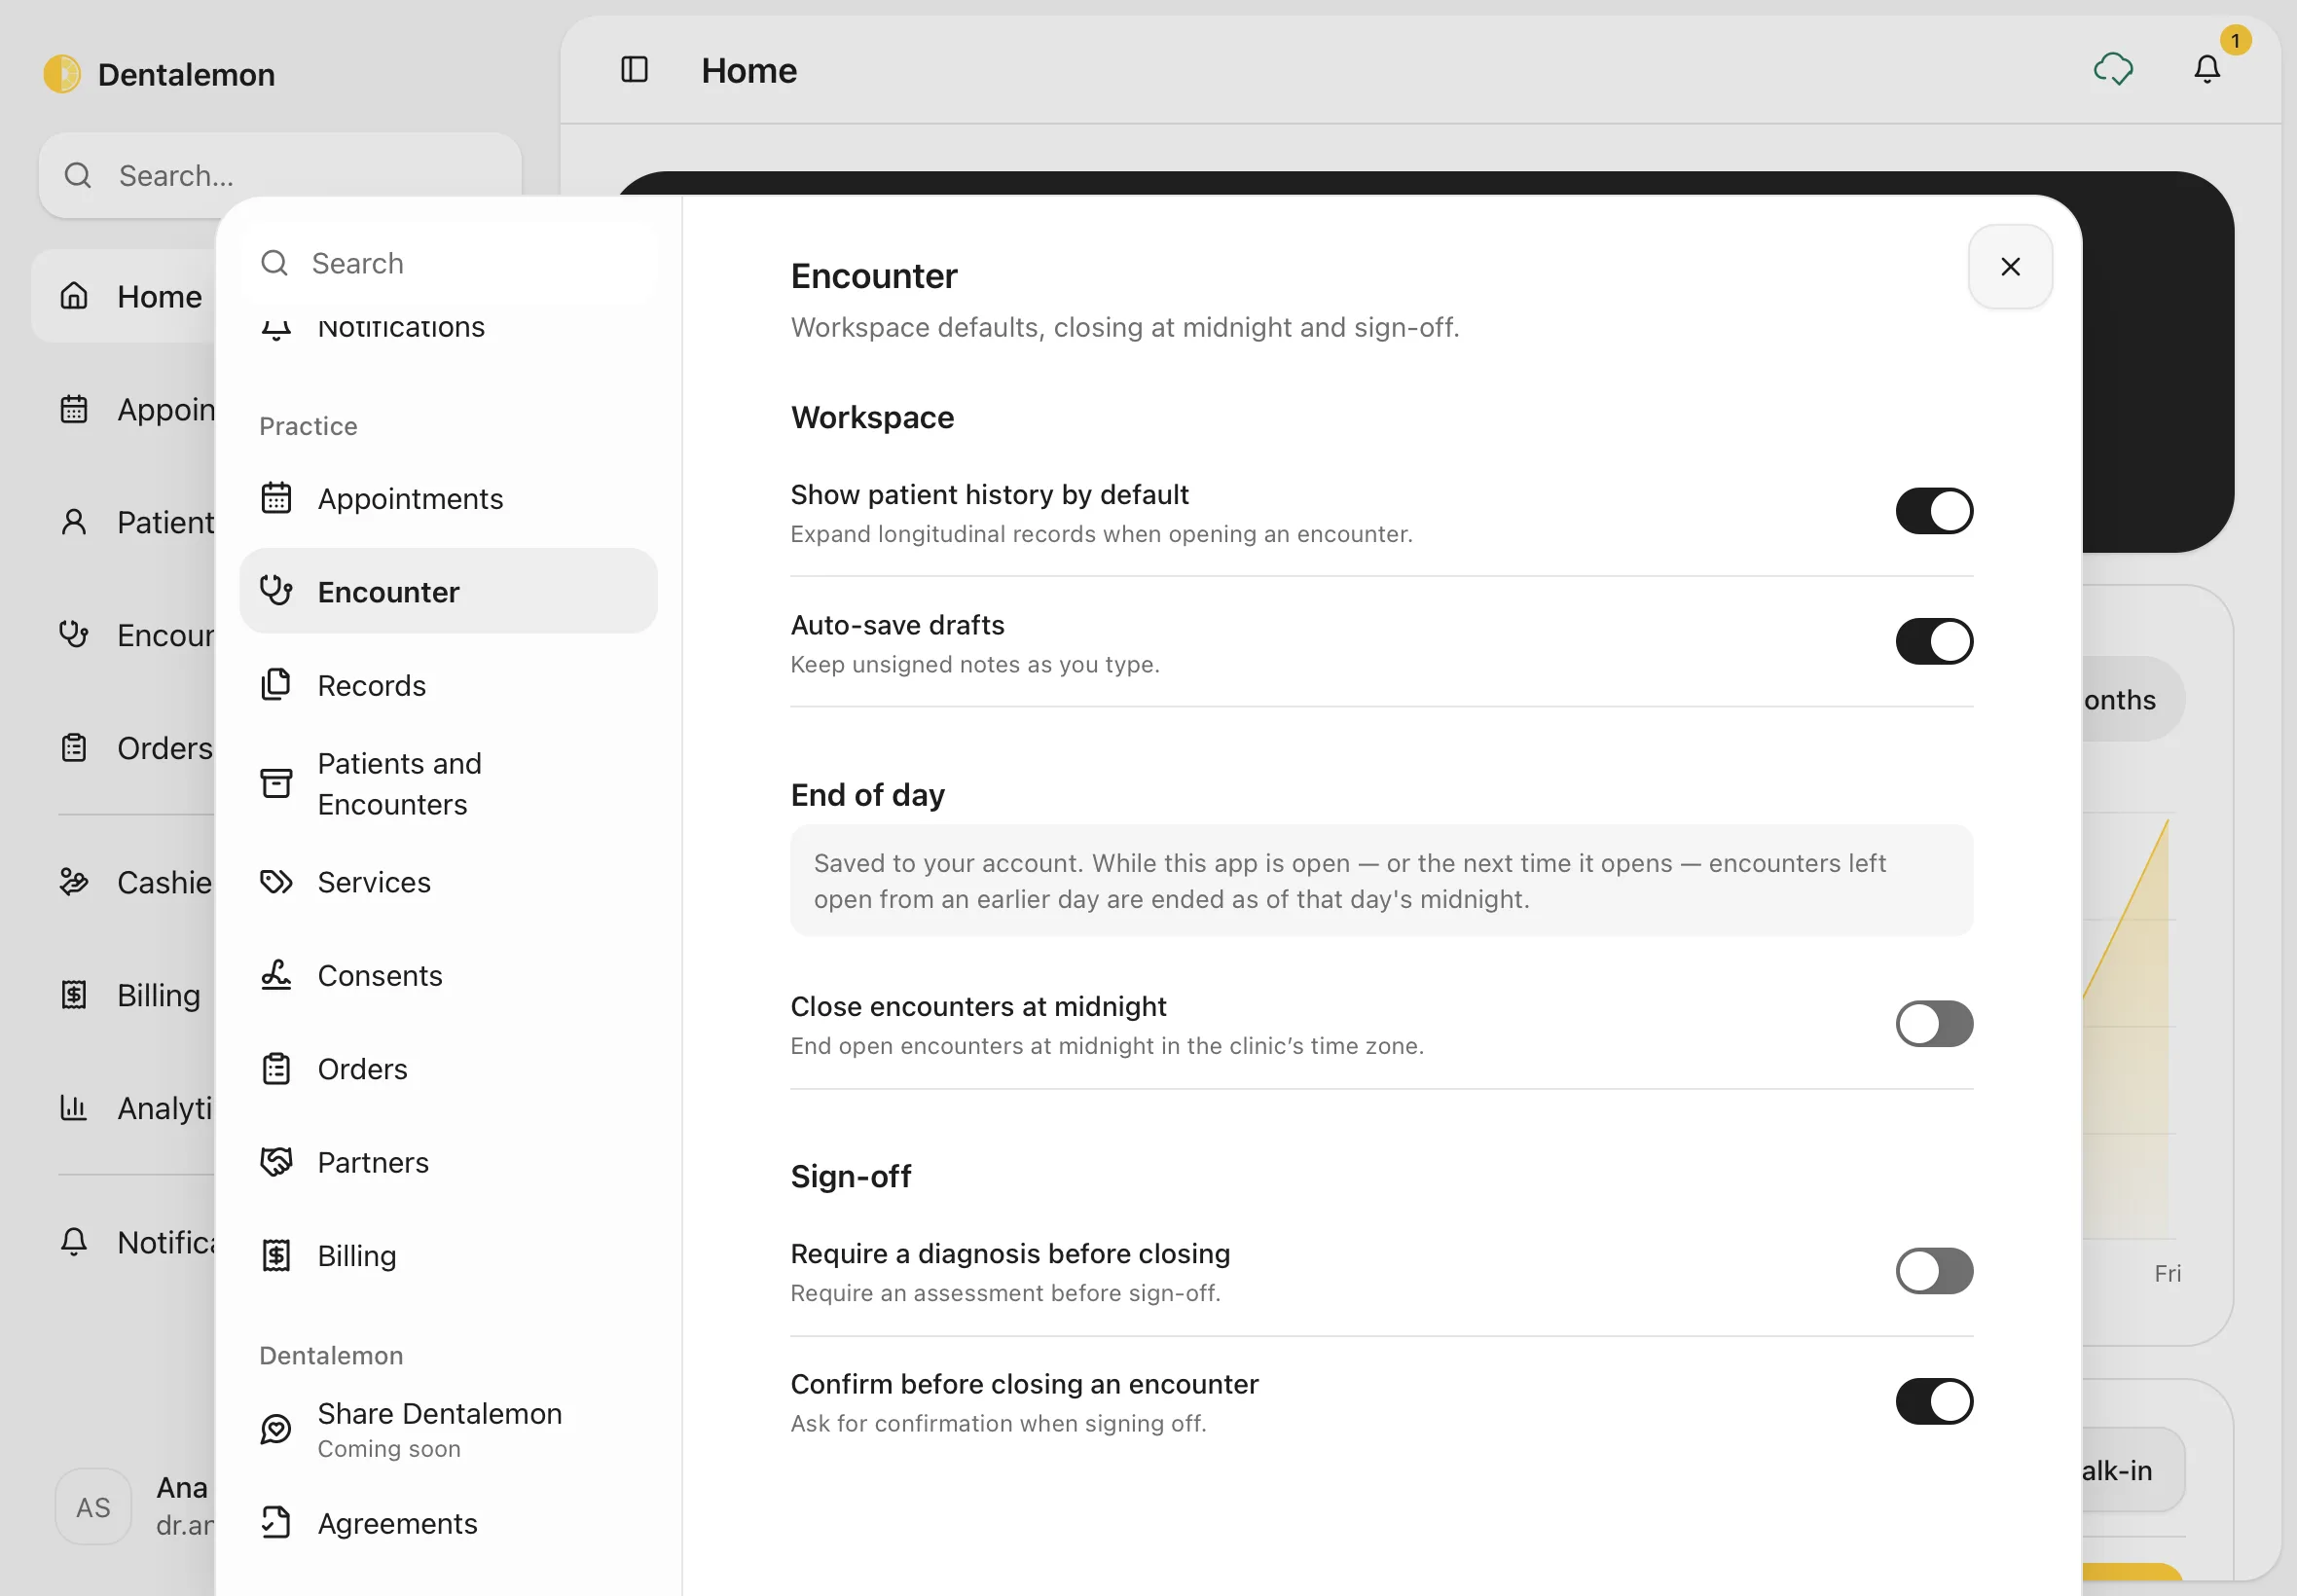
Tap Encounter.
- Workspace: Show patient history by default opens the patient's earlier records with each encounter; Auto-save drafts keeps unsigned notes as you type.
- End of day: Close encounters at midnight ends visits left open from an earlier day, as of that day's midnight.
- Sign-off: Require a diagnosis before closing blocks End encounter until a diagnosis is recorded; Confirm before closing an encounter asks before ending a visit.
- Archived encounters: below Sign-off, the encounters you archived. Search for one and tap Restore to bring it back (see step 13).
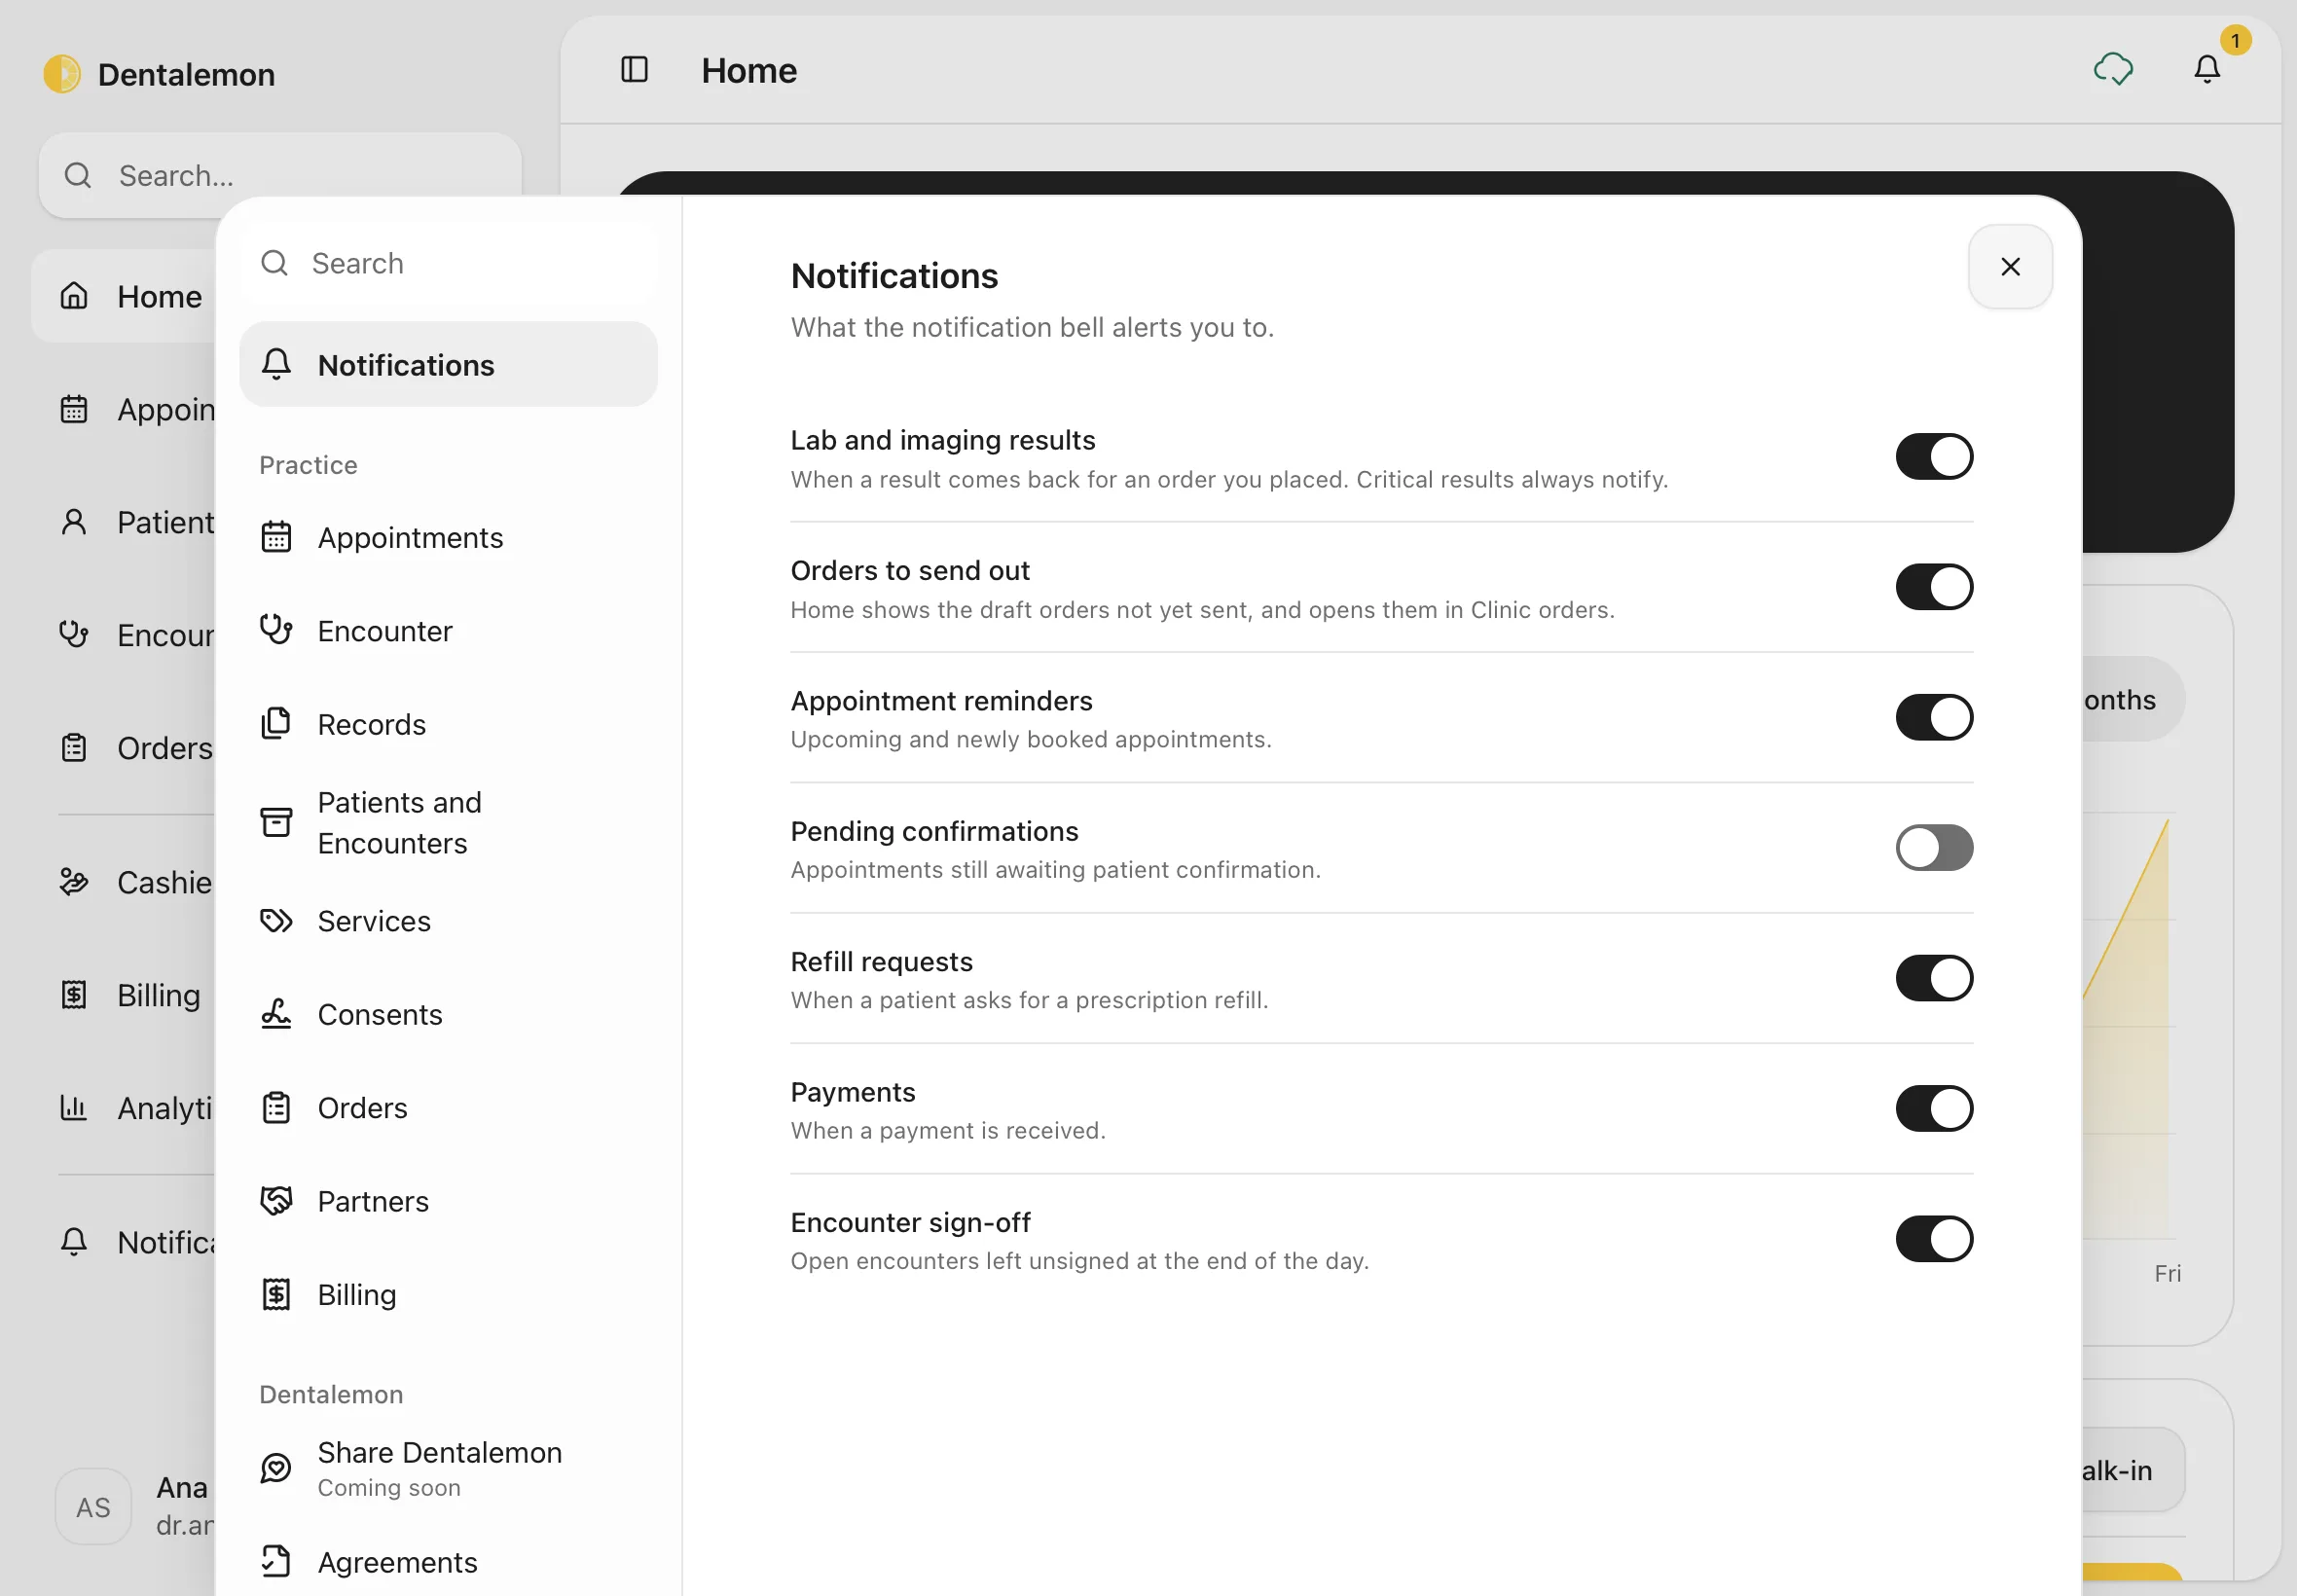
10. Notifications you want to see
Tap Notifications. Switch off any kind of notification you don't want in your bell and on the Notifications page, for example Pending confirmations or Payments. The choice is yours alone and follows you to your other devices.
Critical lab and imaging results always notify you, even with Lab and imaging results switched off.
11. Appointment settings
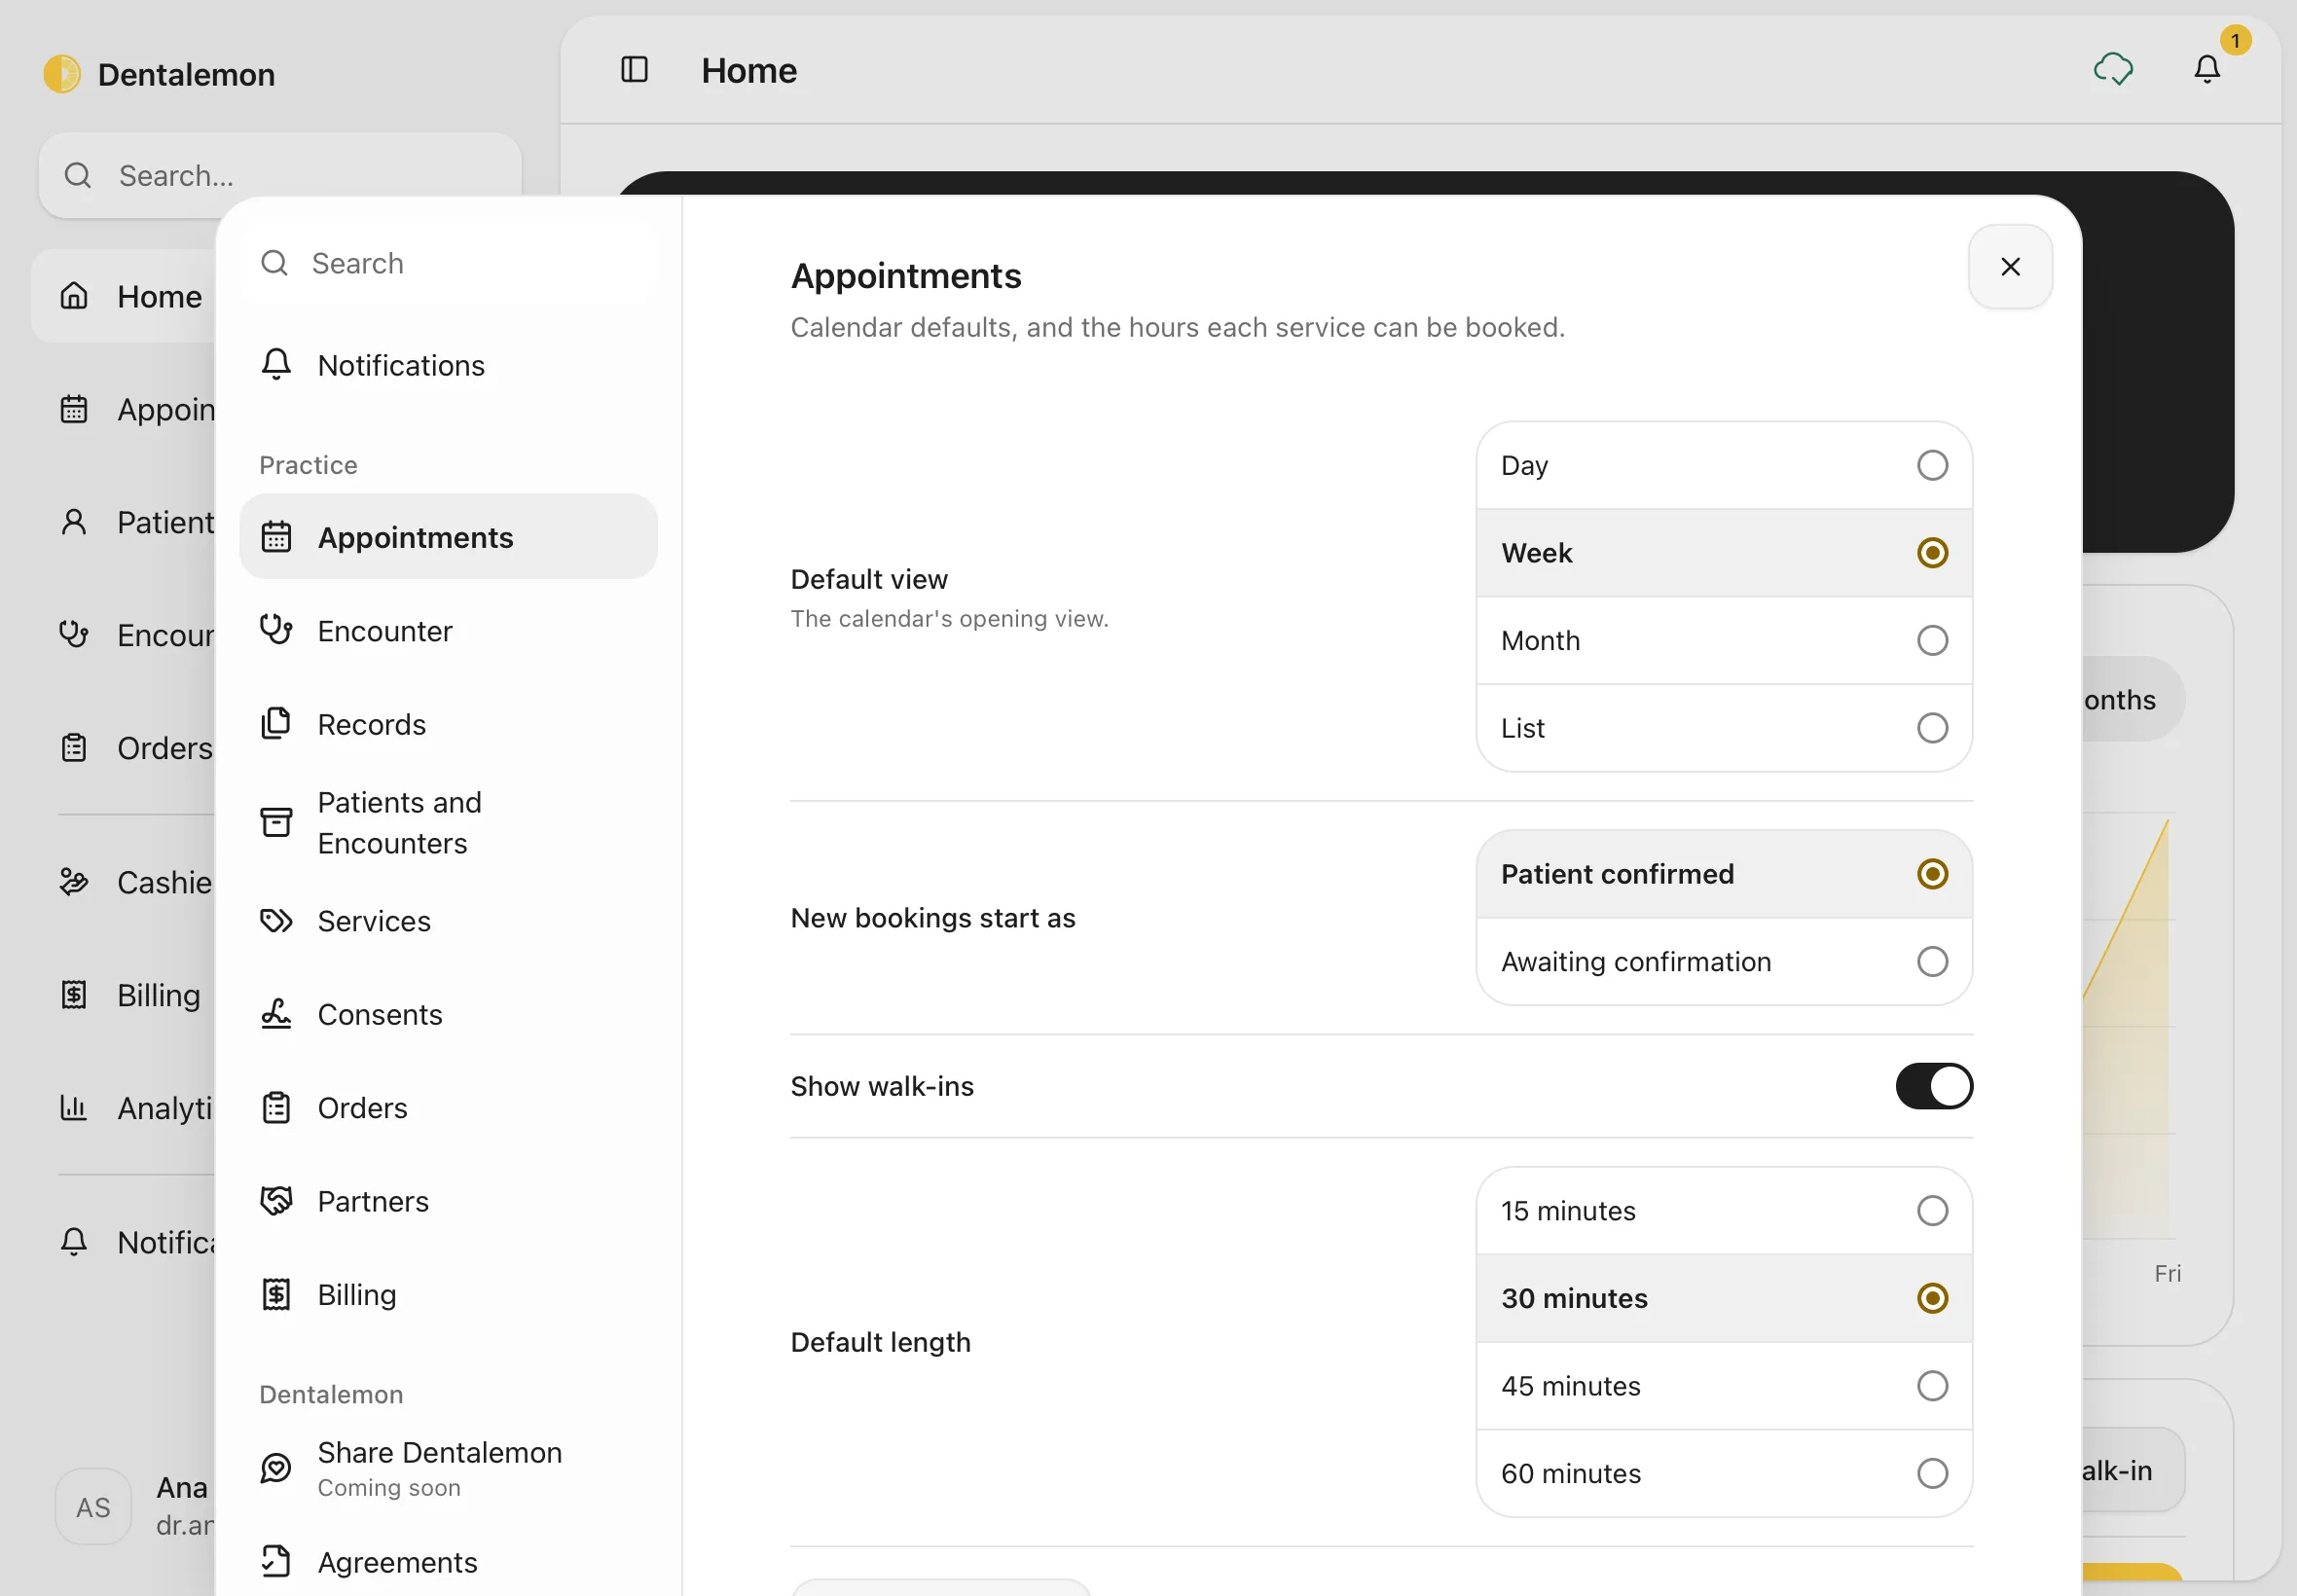
Tap Appointments (under Practice).
- Default view: which view the Appointments calendar opens in (Day, Week, Month or List).
- New bookings start as: Patient confirmed or Awaiting confirmation. This is the status already chosen when you book.
- Show walk-ins: show patients seen without a booking on the calendar.
- Default length: how long a new appointment lasts (15, 30, 45 or 60 minutes). It's also the gap between the times offered when you book.
- Booking hours: further down, you can give a service its own bookable days and hours. Otherwise it uses your clinic hours.
12. Consents and signing on screen
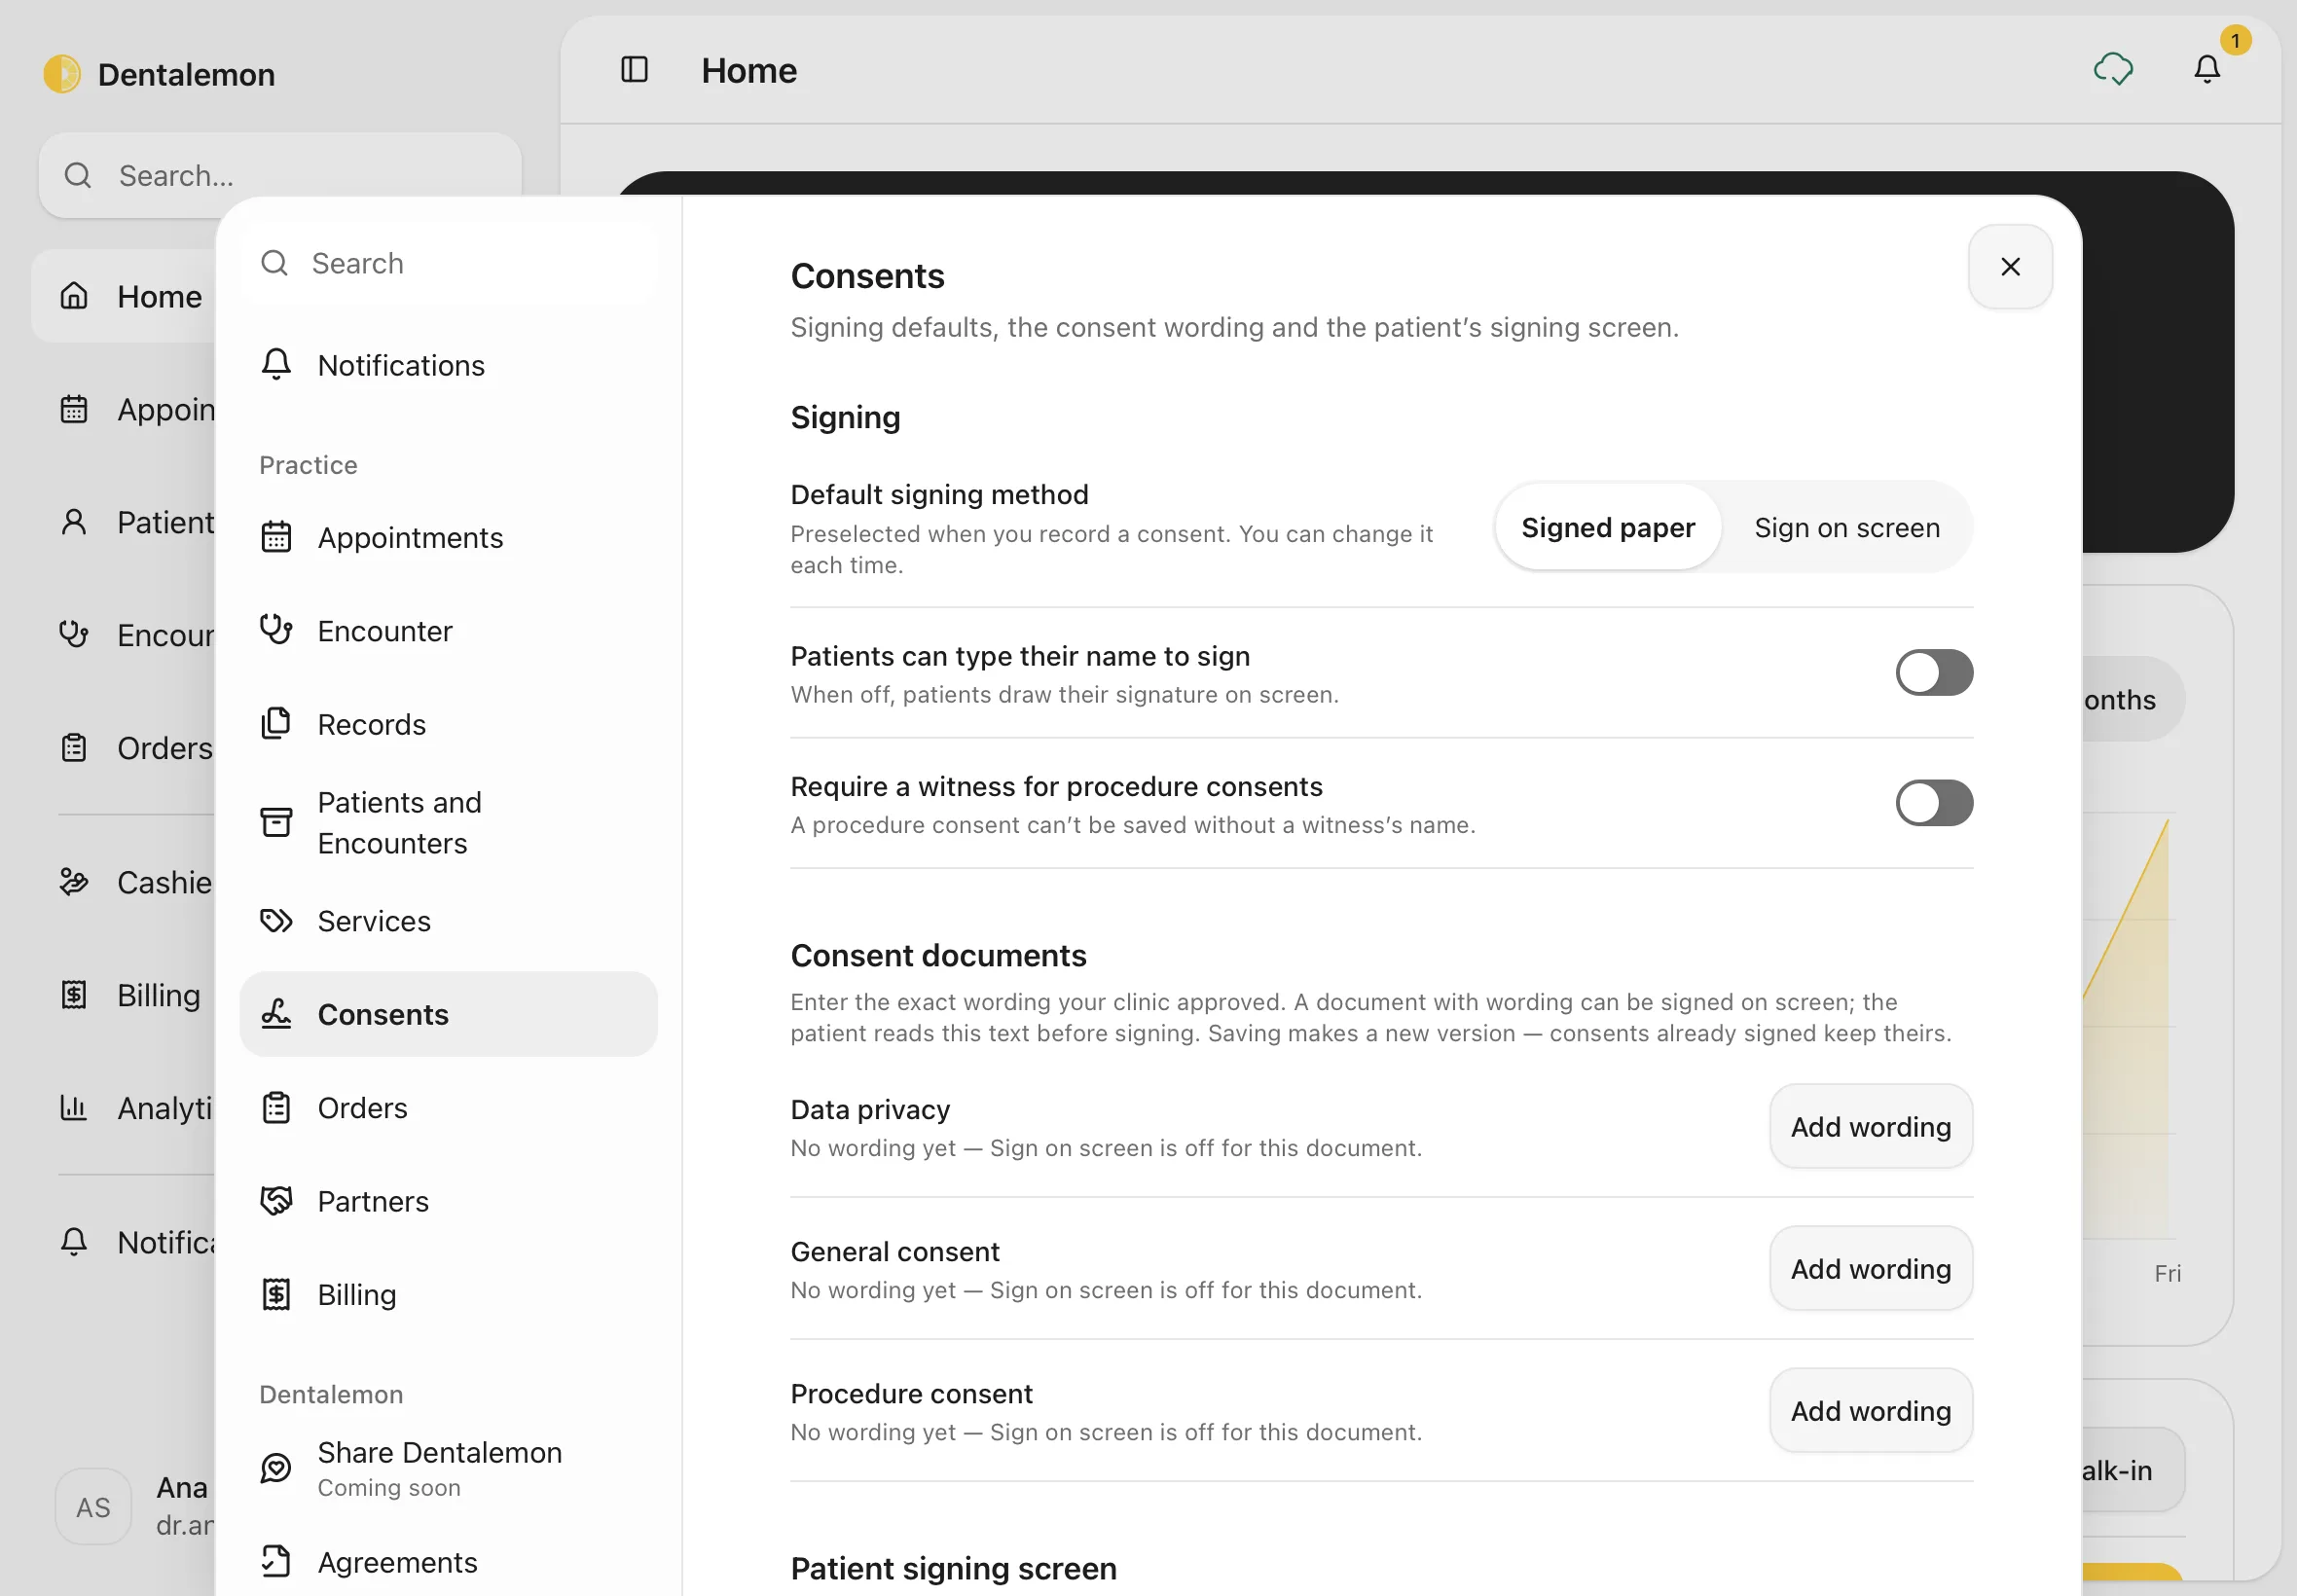
Tap Consents. This is where you set how patients sign consents. See Consents for recording one.
- Default signing method: Signed paper or Sign on screen, already chosen when you record a consent.
- Patients can type their name to sign: when off, patients draw their signature.
- Require a witness for procedure consents: when on, a procedure consent can't be saved without a witness's name.
- Consent documents: the wording patients read on the iPad. A document can only be signed on screen once its wording is entered. Until then it says No wording yet — Sign on screen is off for this document.
- Signing passcode (under Patient signing screen): the 4- to 8-digit code you enter to take the iPad back after the patient signs. It's kept on this iPad only. You're asked to set it the first time you hand the iPad to a patient.
To enter a document's wording:
- Next to Data privacy, General consent or Procedure consent, tap Add wording.
- Type the Title, choose the Language (English or Filipino), and paste or type the exact Approved wording: the text your clinic approved for patients to sign.
- Tap Save new version.
Saving creates a new version. Consents patients already signed keep the version they signed. To change the wording later, tap Edit wording.
13. Bring back a patient or an encounter you archived
Archived patients and encounters aren't deleted. You can restore them from Settings.
- A patient: tap Archived patients (under Practice). Type in Search patients if the list is long, then tap Restore next to the patient.
- An encounter: tap Encounter and scroll below Sign-off to Archived encounters. Type the patient's name in Search patients, then tap Restore next to the visit. A visit marked Patient is archived needs the patient restored too before you can see it.
You should see: the patient or visit leaves the archived list and is back in Patients or on the patient's Encounters tab.
14. The other sections
- Users and Access: who can use your clinic workspace. For now it's a preview kept on this iPad only (see Good to know).
- Records: measurement units and your default record types.
- Orders: whether new orders start as drafts, and where each kind of order goes by default.
- Partners: who you refer patients to, and the HMOs, government programmes and companies you bill.
- Share Dentalemon: your clinic's invite code for colleagues. It's marked Coming soon.
- Agreements: Dentalemon's privacy notice, terms and policies.
Tips
Do these first
Before your first patient: Clinic (name, address, hours), Services (your prices) and Billing (payment methods and tax). Everything else can wait.
Good to know
- Some settings are saved but not used yet, and the panel says so under them. For example, receipts don't print the business name, TIN or branch code yet, and Show the receipt after payment and a payment method's Ask for a reference number switch aren't used at checkout yet. The Cashier asks for a reference number, approval code or check number by the method's type.
- Users and Access is a preview on this device only. Inviting someone there doesn't send an email or give them access.
- Your email can't be changed in Profile yet.