Consents
Before you start
- Have the patient sign your clinic's paper form first.
- Consents live in the Patient Profile. See The patient page and profile.
Steps
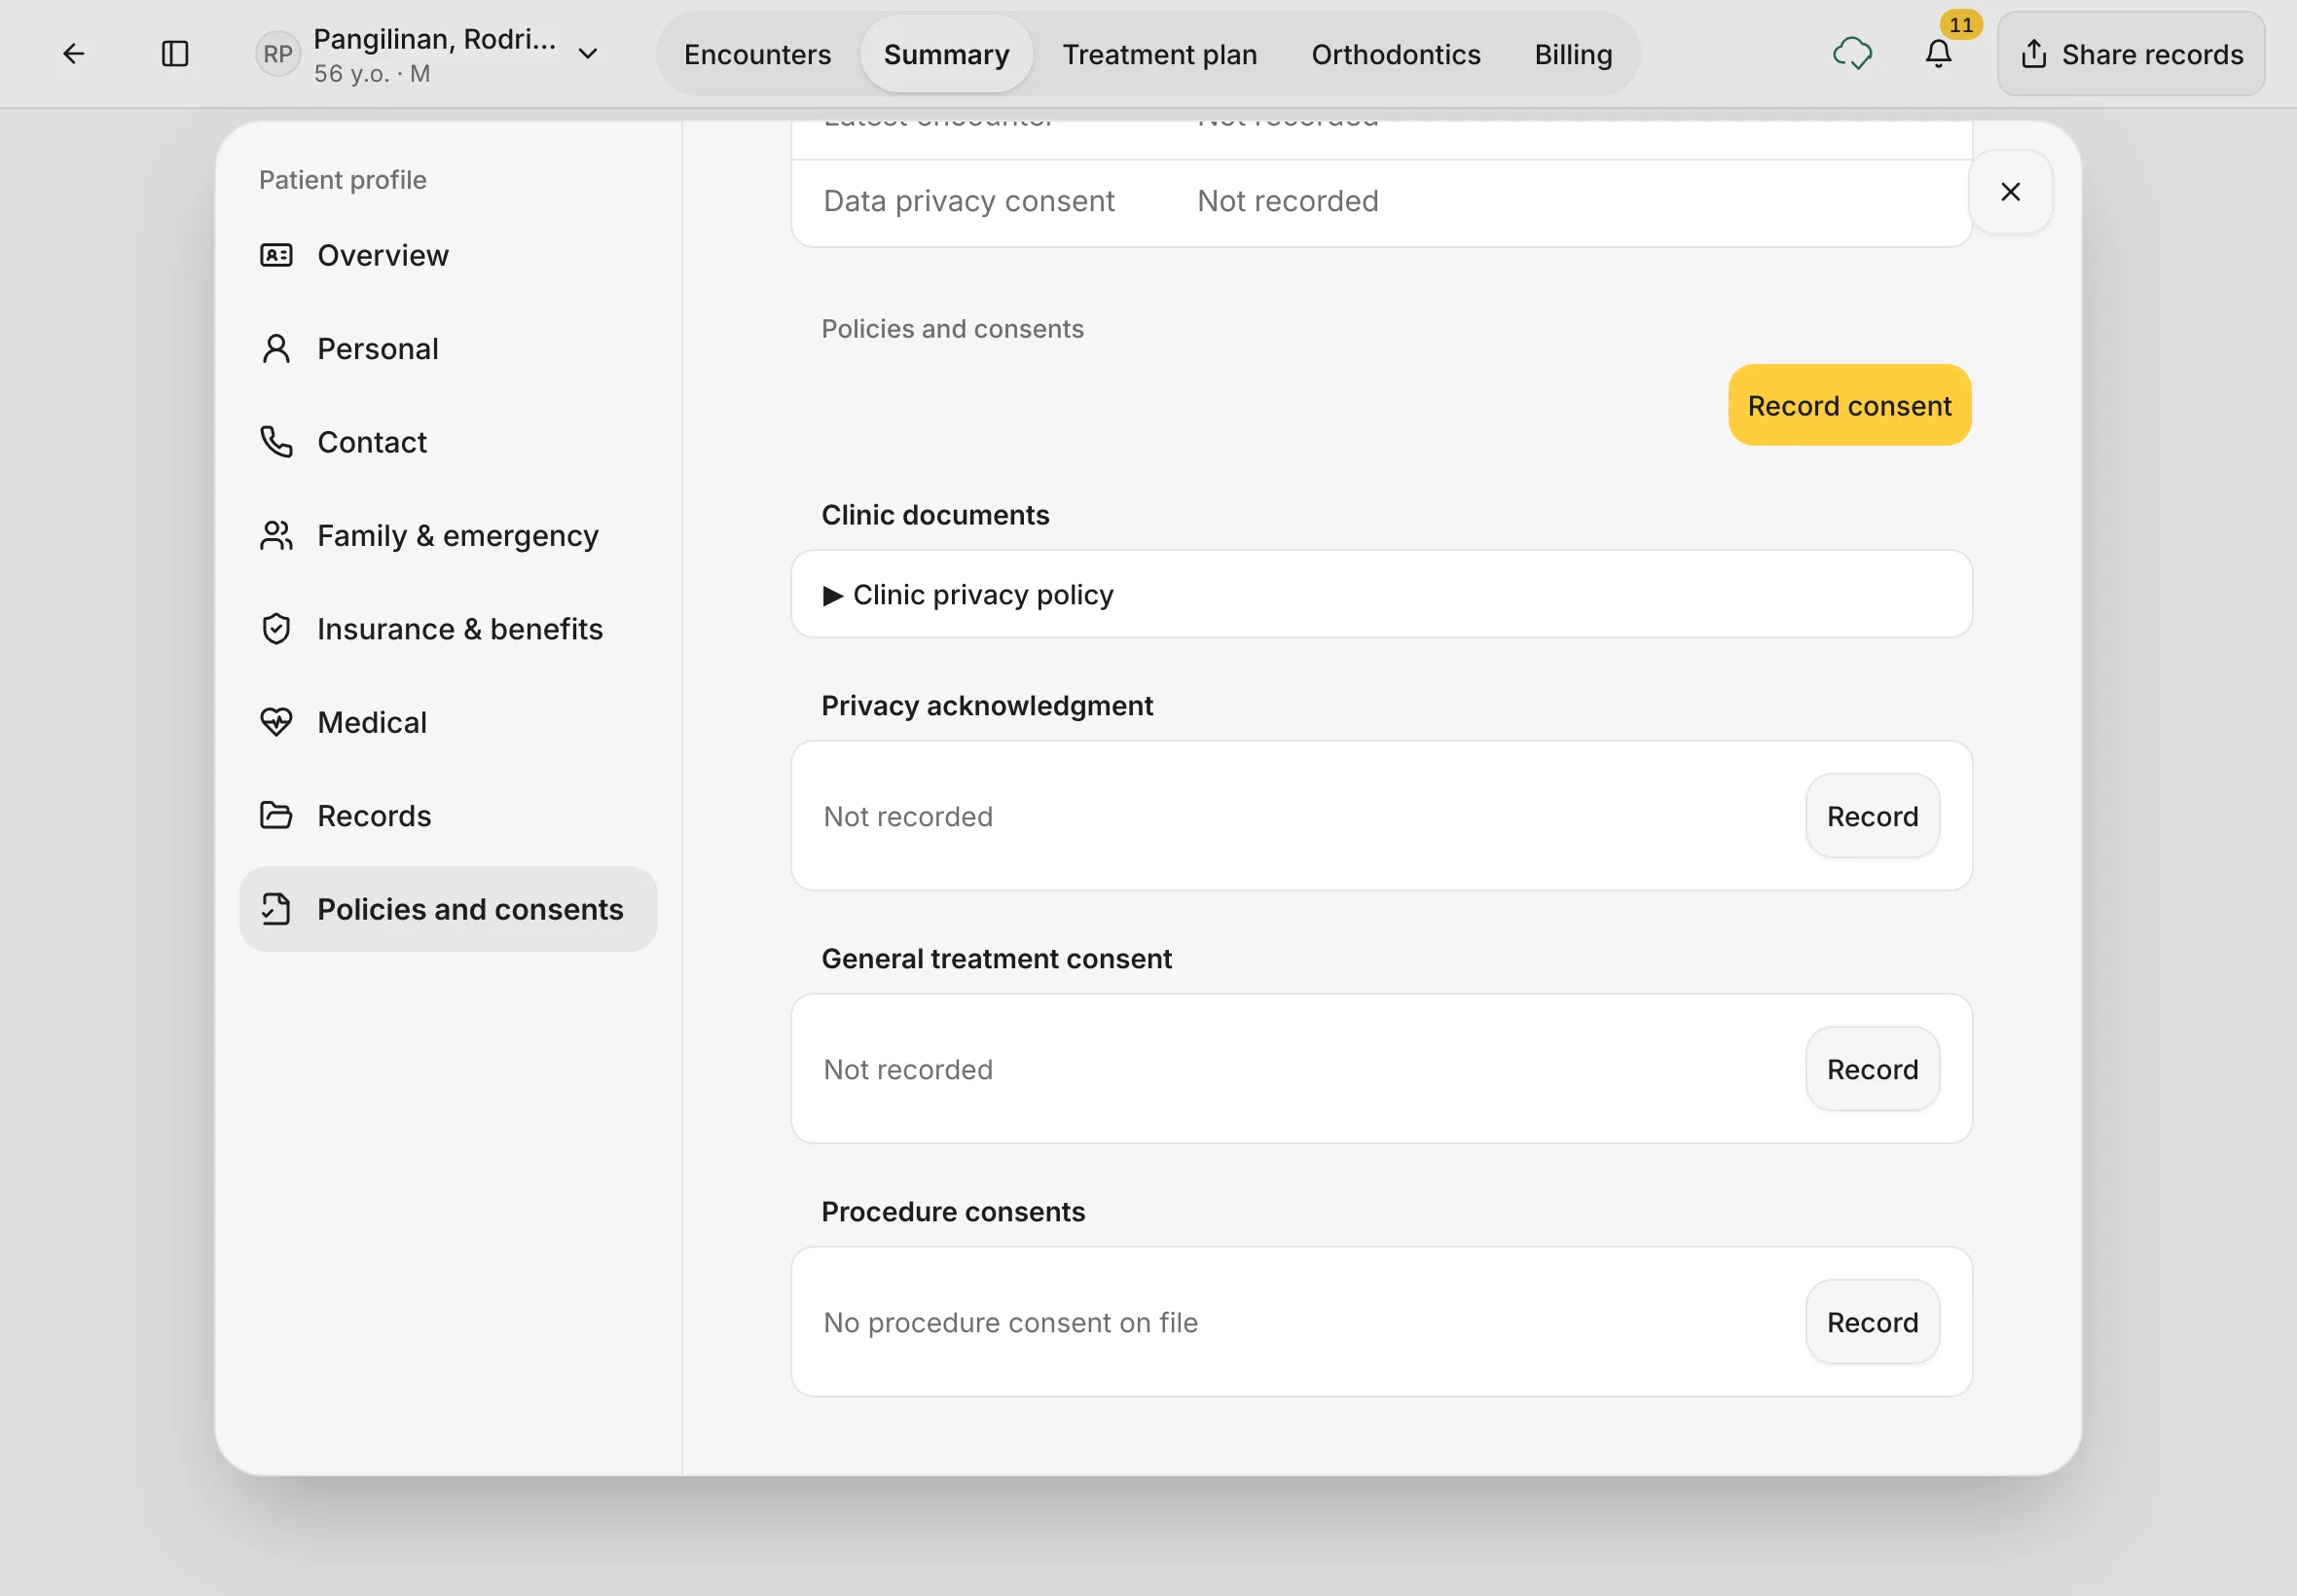
1. Open Policies and consents
On the patient's page, tap the patient's name at the top, then View profile. In the profile, tap Policies and consents on the left.
Each kind of consent has its own card: Privacy acknowledgment, General treatment consent and Procedure consents. One that hasn't been signed says Not recorded. Your clinic's own documents, such as the Clinic privacy policy, are listed under Clinic documents.
You should see: the consent cards, each with a Record button, and Record consent at the top.
2. Choose the consent
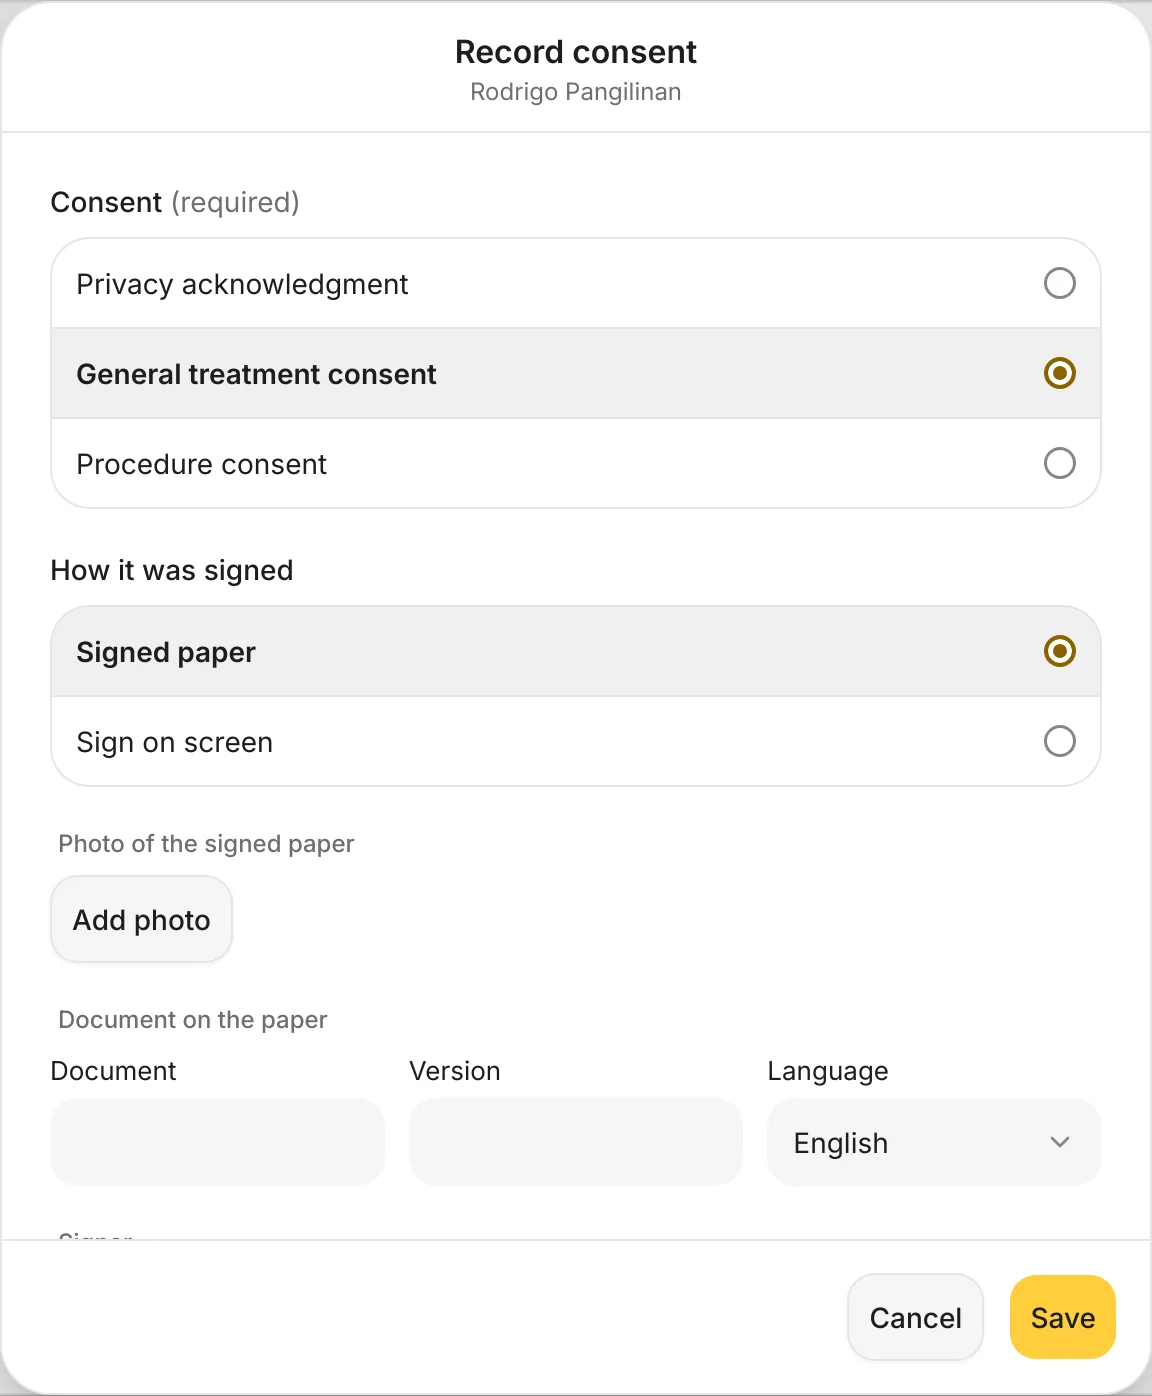
Tap Record consent, or Record on the card you need.
- Under Consent (required), choose Privacy acknowledgment, General treatment consent or Procedure consent.
- Under How it was signed, choose Signed paper.
You should see: Record consent with the patient's name under the title.
3. Add a photo of the signed paper
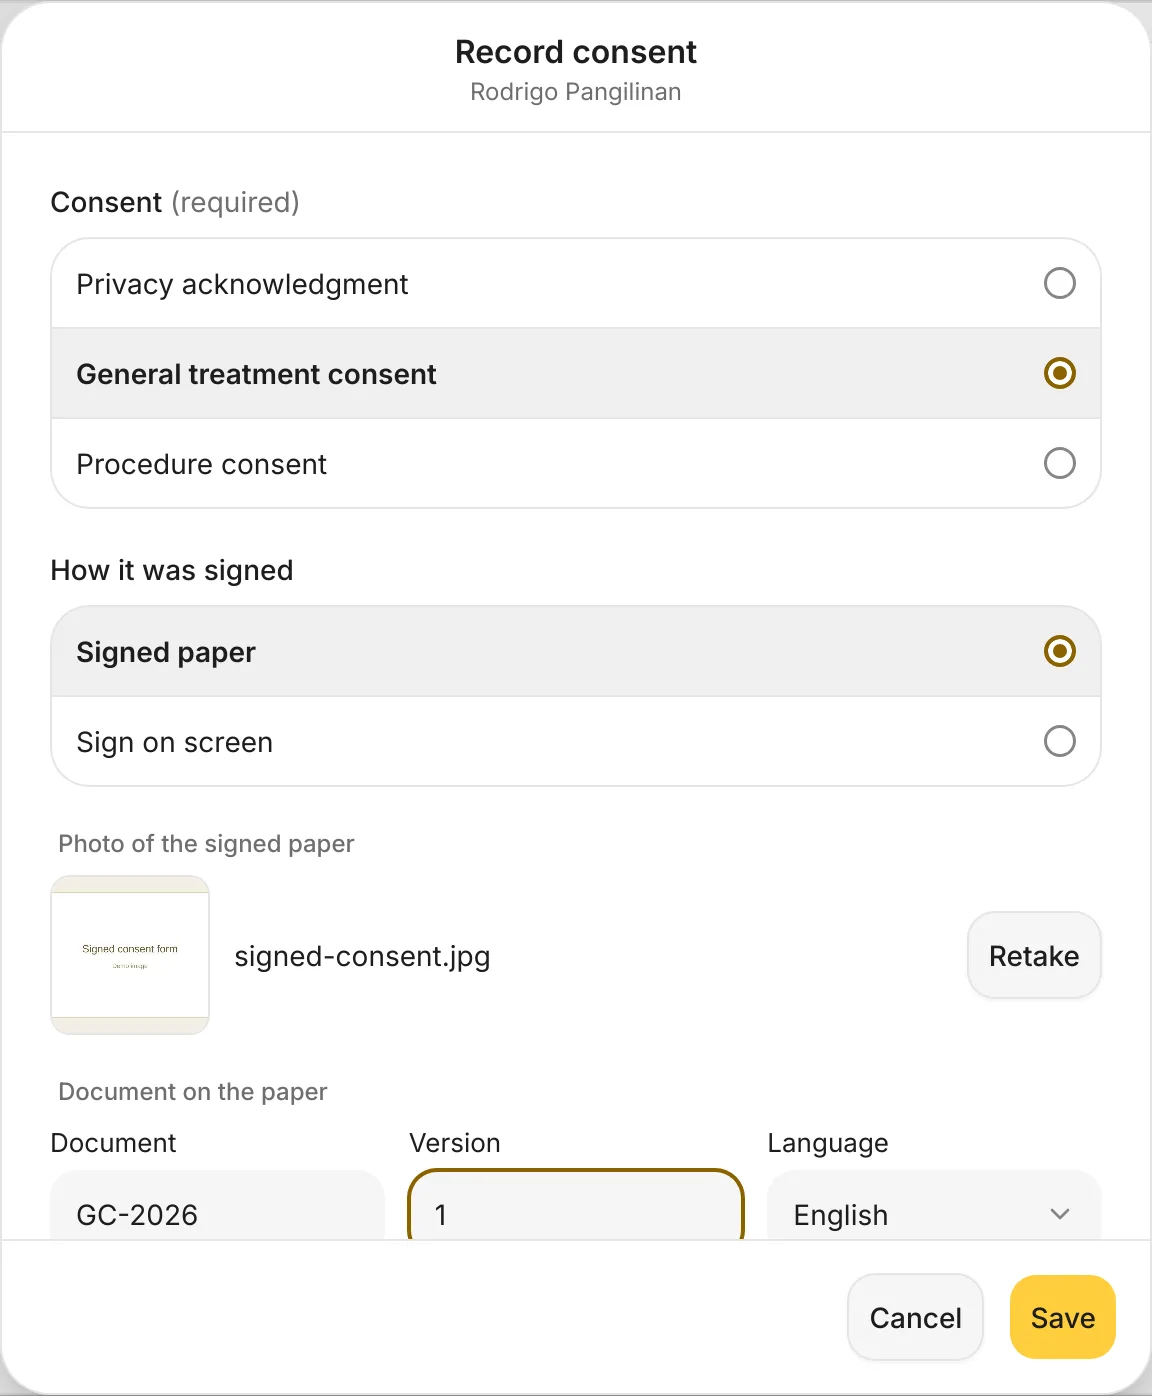
- Under Photo of the signed paper, tap Add photo and take a clear photo of the whole signed page. Tap Retake if it's blurry.
- Under Document on the paper, type the Document code and Version printed on the form, for example GC-2026 and 1, and check the Language.
- Check who signed under Signer, then tap Save.
You should see: the photo next to its file name, and the document code and version filled in.
4. Check the saved consent
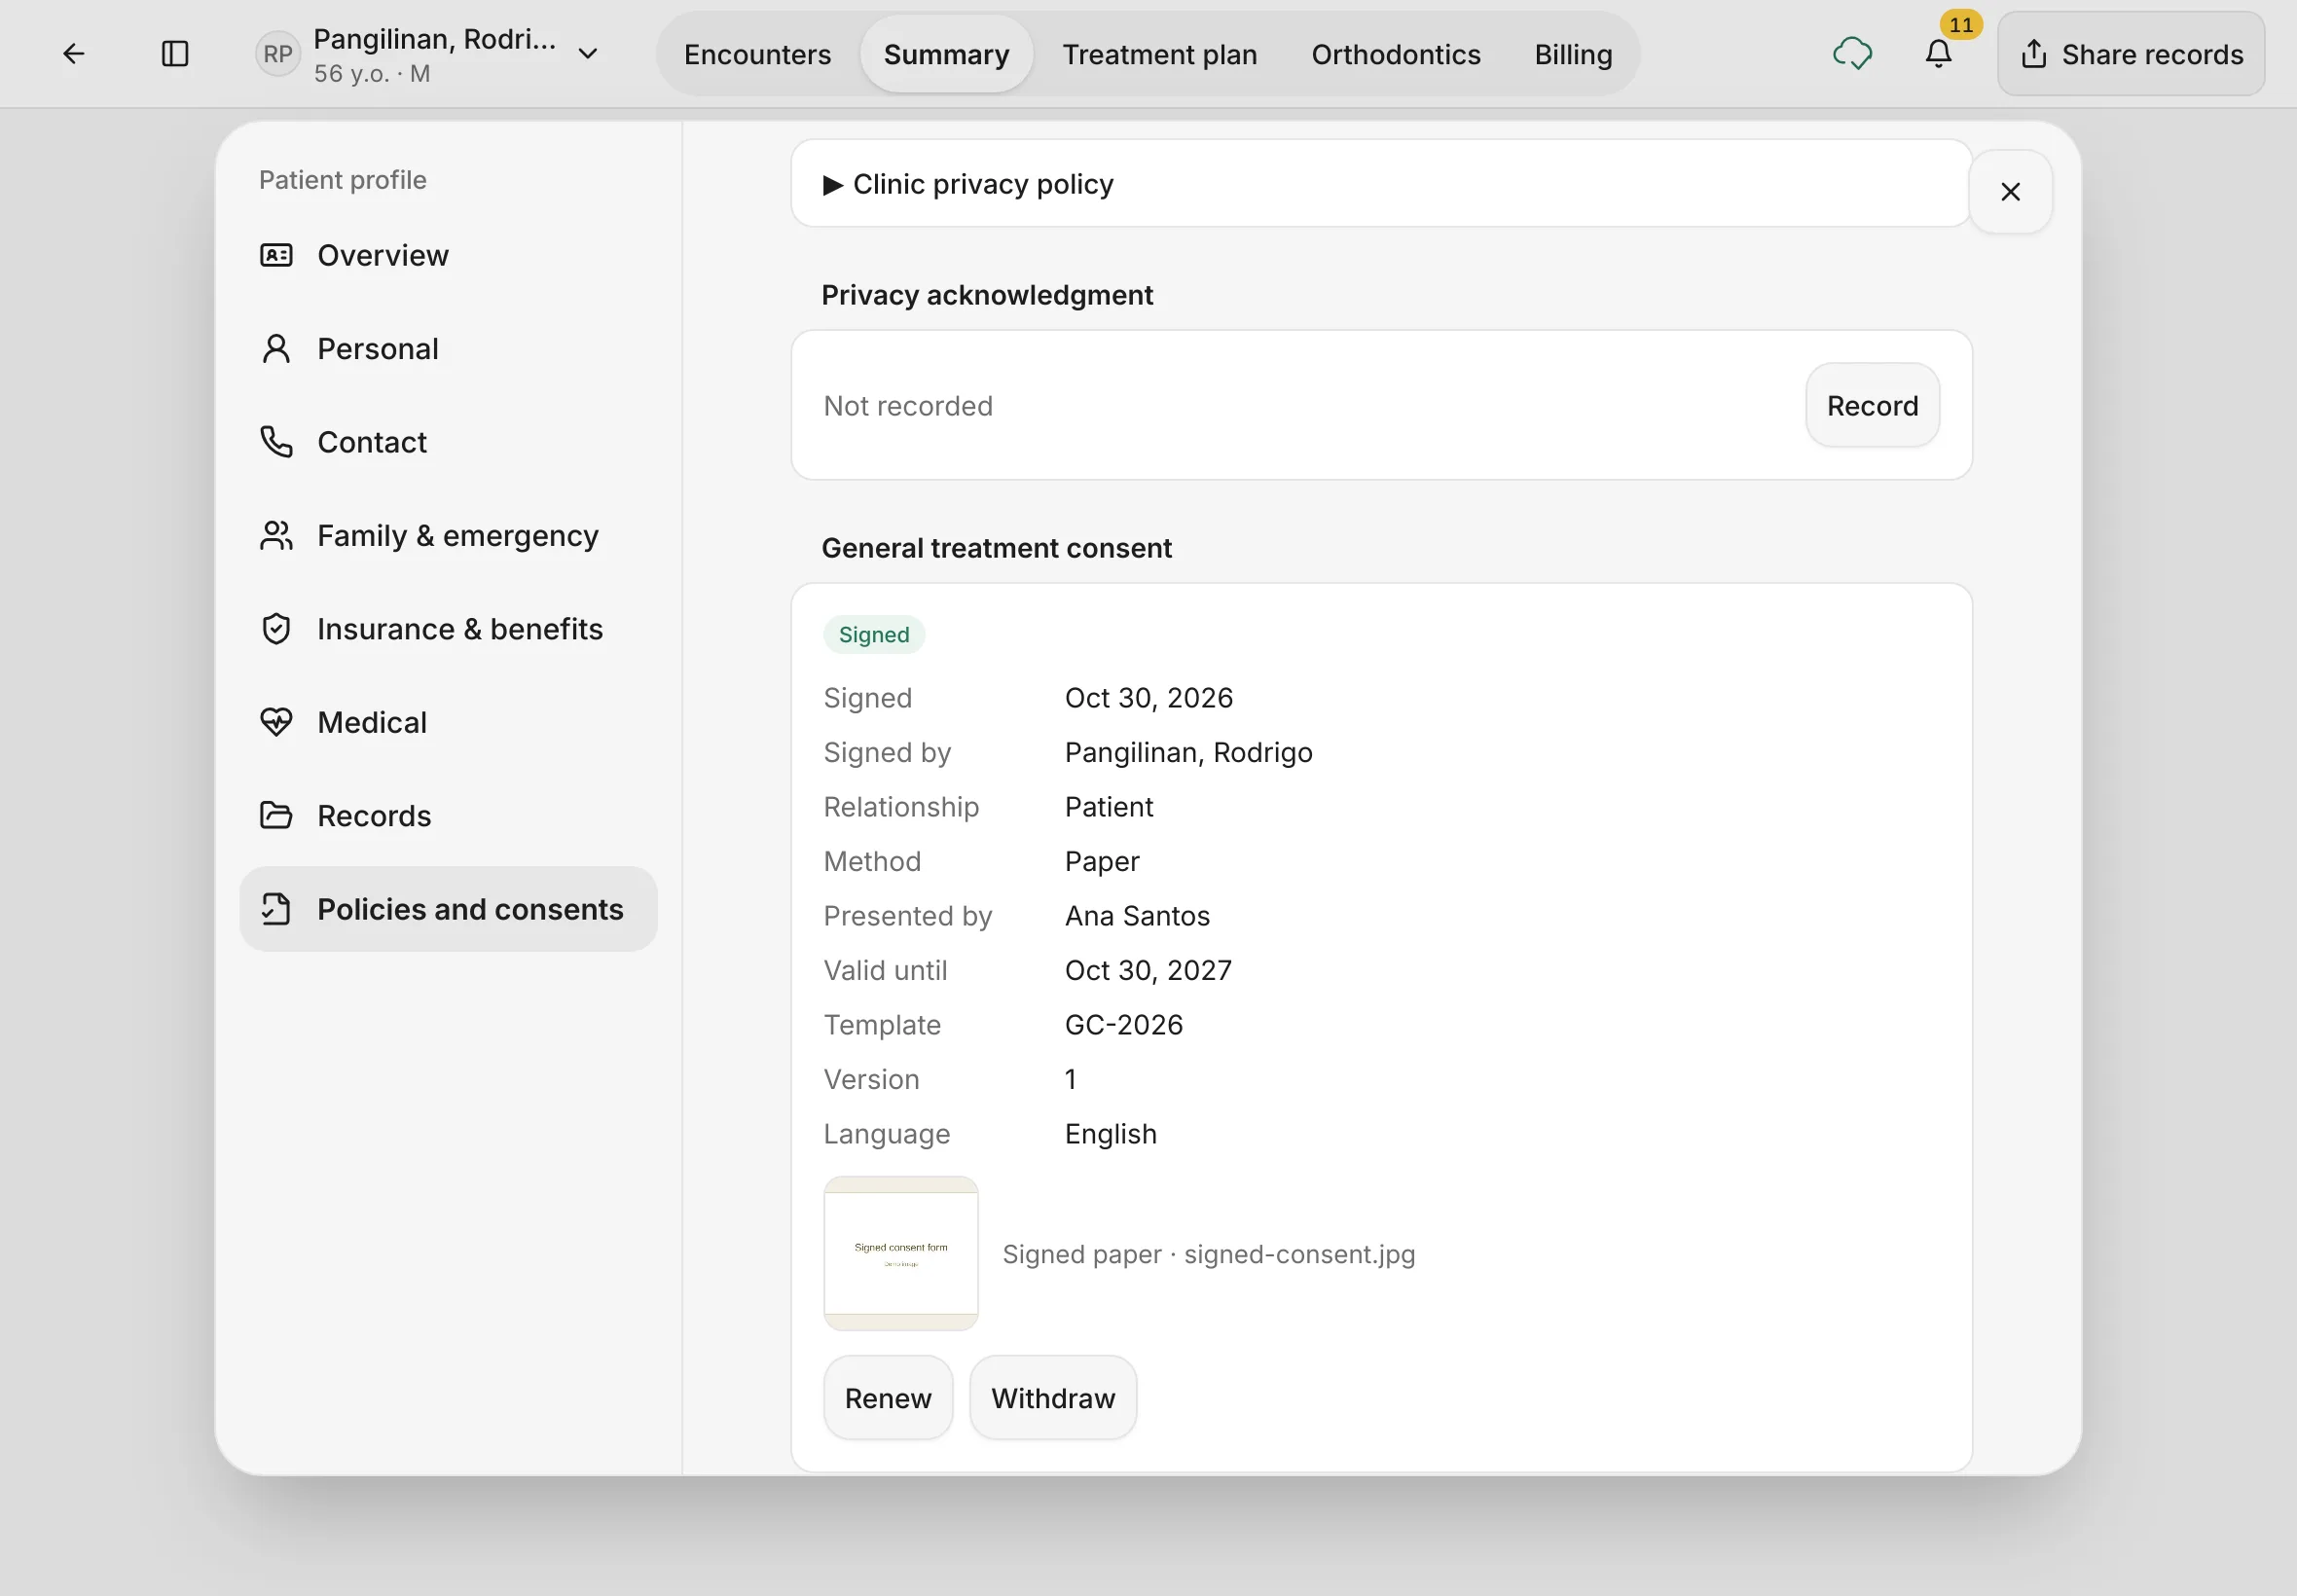
The card now shows Signed, with the date, who signed, how (Paper), who presented it, Valid until, the template, version and language, and the photo.
- Renew: record a new signature when the consent expires or the form changes. The earlier one is kept.
- Withdraw: the patient takes back their consent. You'll be asked for the reason, and the record is kept.
Both show an Undo message for a few seconds.
You should see: General treatment consent marked Signed, with Renew and Withdraw.
Signing on the iPad screen
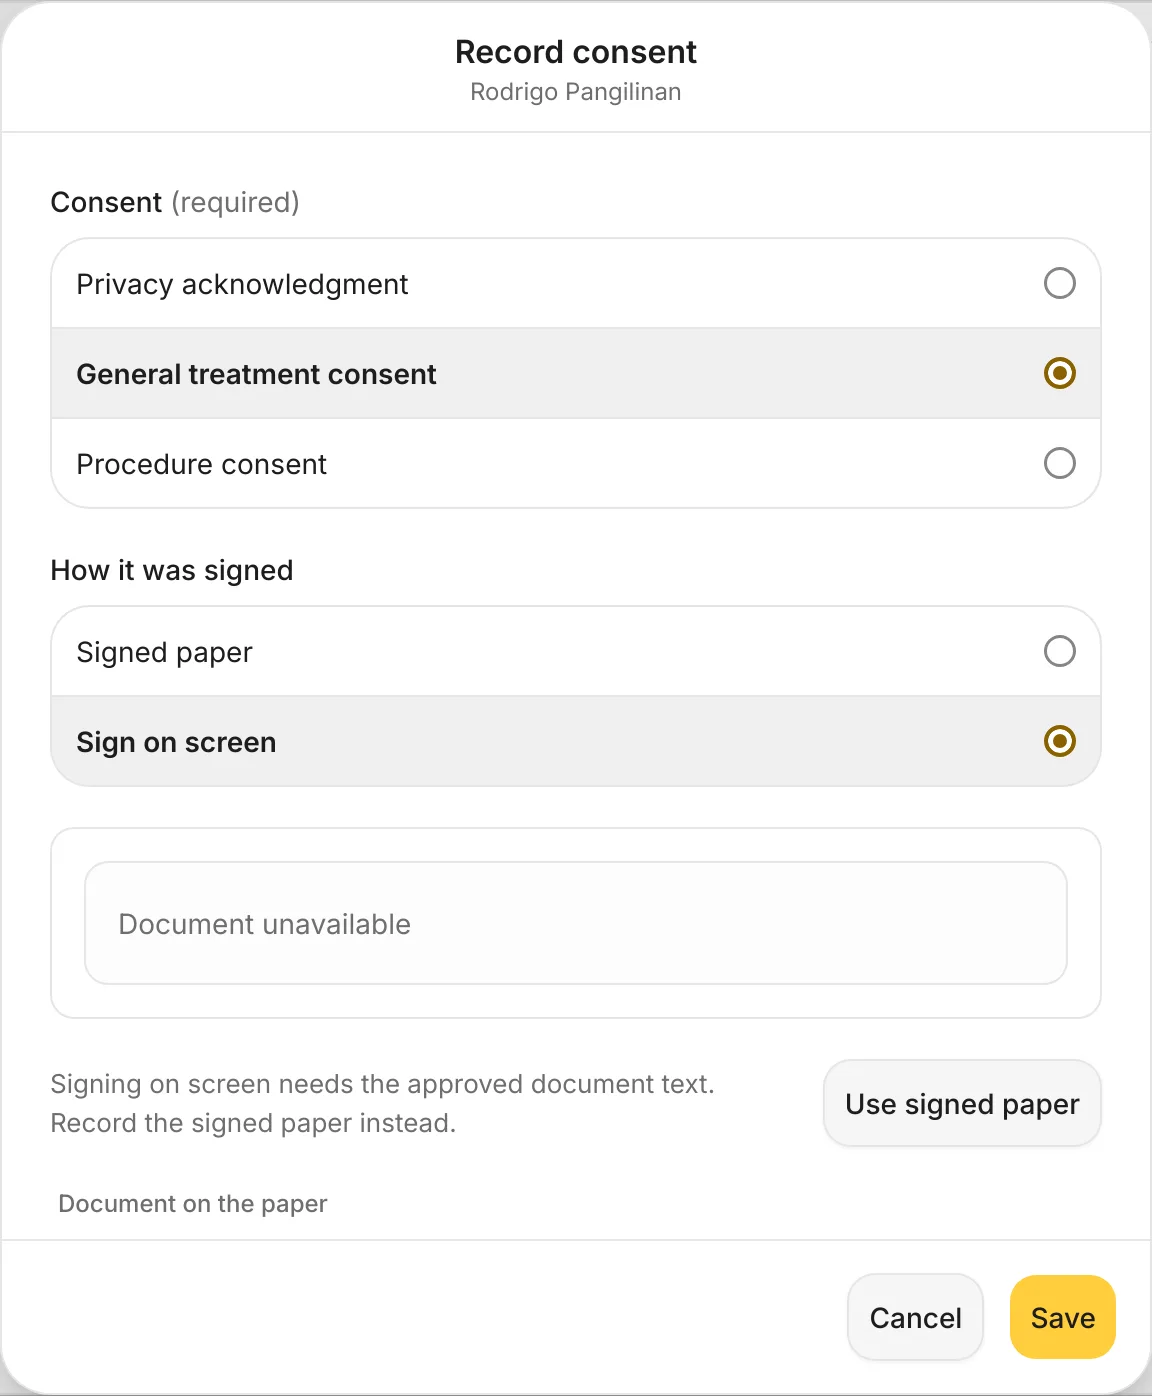
The patient can also sign on the iPad: choose Sign on screen under How it was signed.
This only works once your clinic has added the approved wording of the document. Until then, the form says Signing on screen needs the approved document text. Record the signed paper instead. Tap Use signed paper to go back.
When the wording is set up, tap Hand to patient. You choose a passcode, the patient reads and signs, and you enter the passcode to take the iPad back.
Tips
A faster way
On the patient's Summary, the Consent line shows the general treatment consent, for example Not signed. Tap it to go straight to Policies and consents.
Photograph the whole page
Lay the form flat in good light so the signature and the document code are easy to read later.
If something goes wrong
- Add a photo of the signed paper. A paper consent needs its photo before you can save.
- Enter the document and version printed on the paper. Fill in Document and Version from the form.
Good to know
- The consent wording for Sign on screen is set in Settings › Consents. Ask your clinic admin before changing it.
- A withdrawn or renewed consent is never deleted. The history stays on the card.