Find or add a patient
Before you start
- Sign in to Dentalemon.
- Always search first. Adding someone who is already on file creates a second, separate record.
Steps
1. Open Patients
Tap Patients in the sidebar.
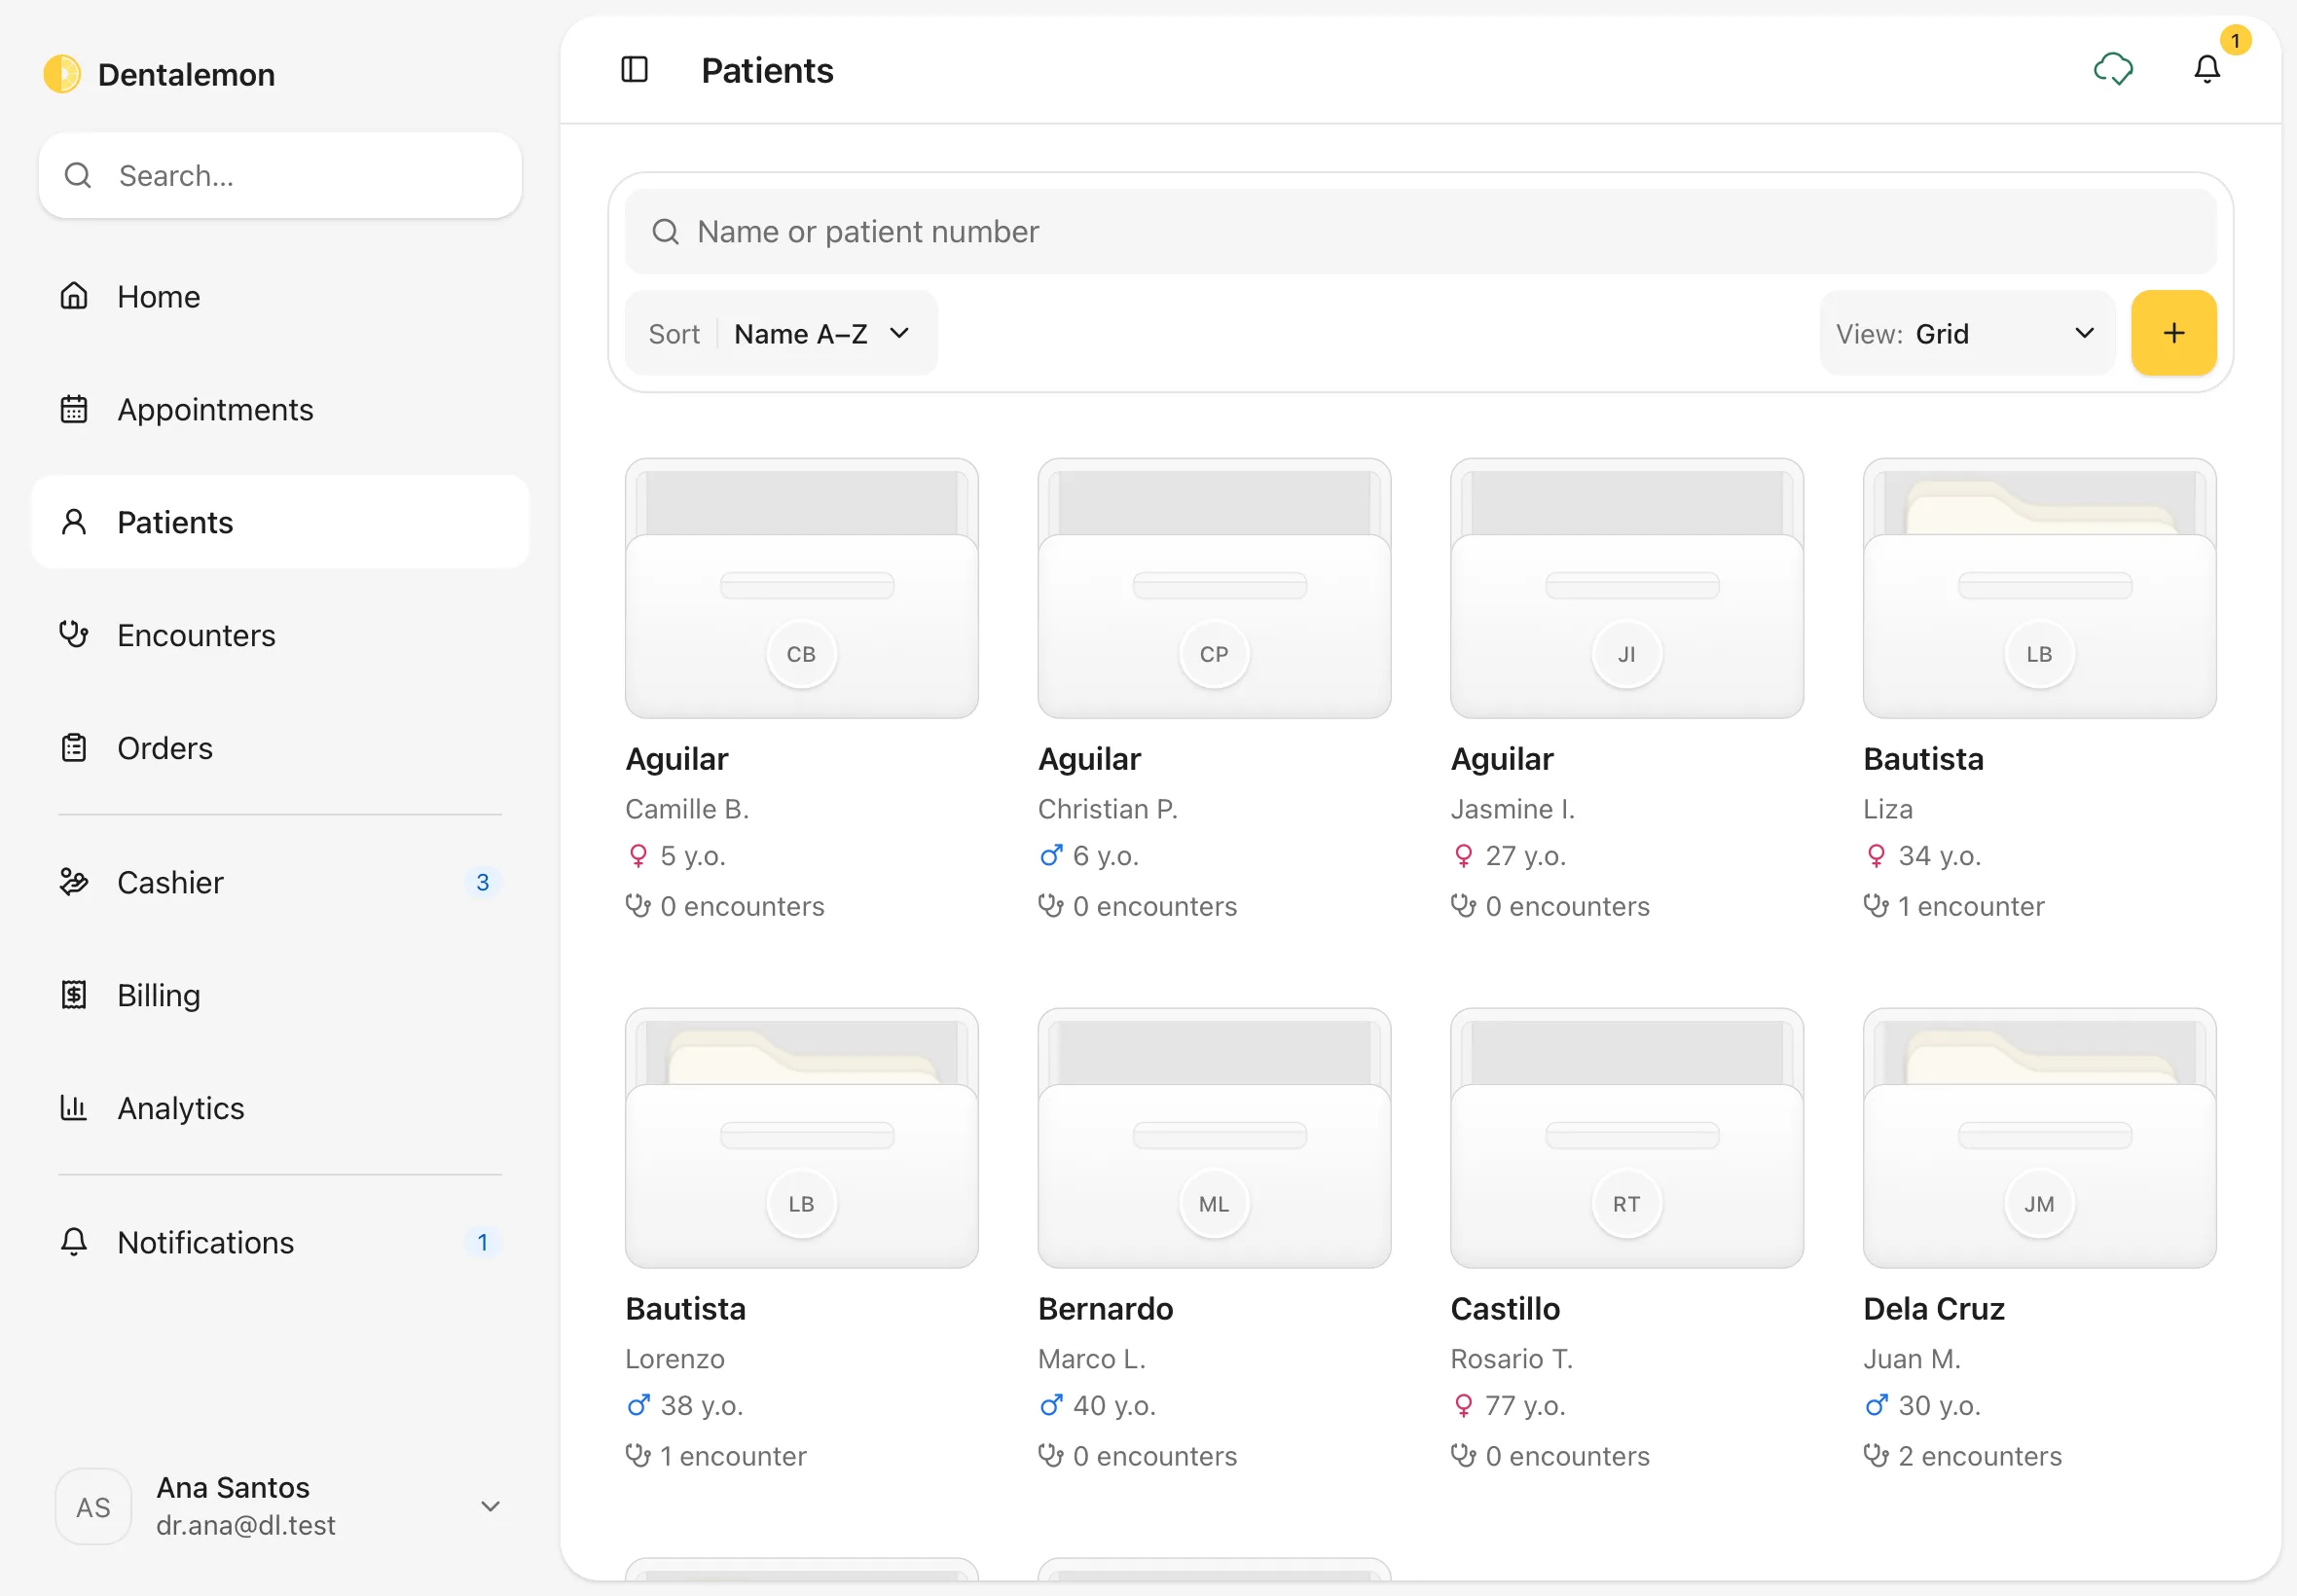
You should see: your patients as folders, sorted by last name (Sort: Name A–Z). Each folder shows the patient's name, sex, age and number of encounters.
Prefer a list?
Use View to switch between Grid, List and Table. The table shows the most at once: Patient, Sex, Age, Encounters, Date registered, Last visit and Status.
2. Search for the patient
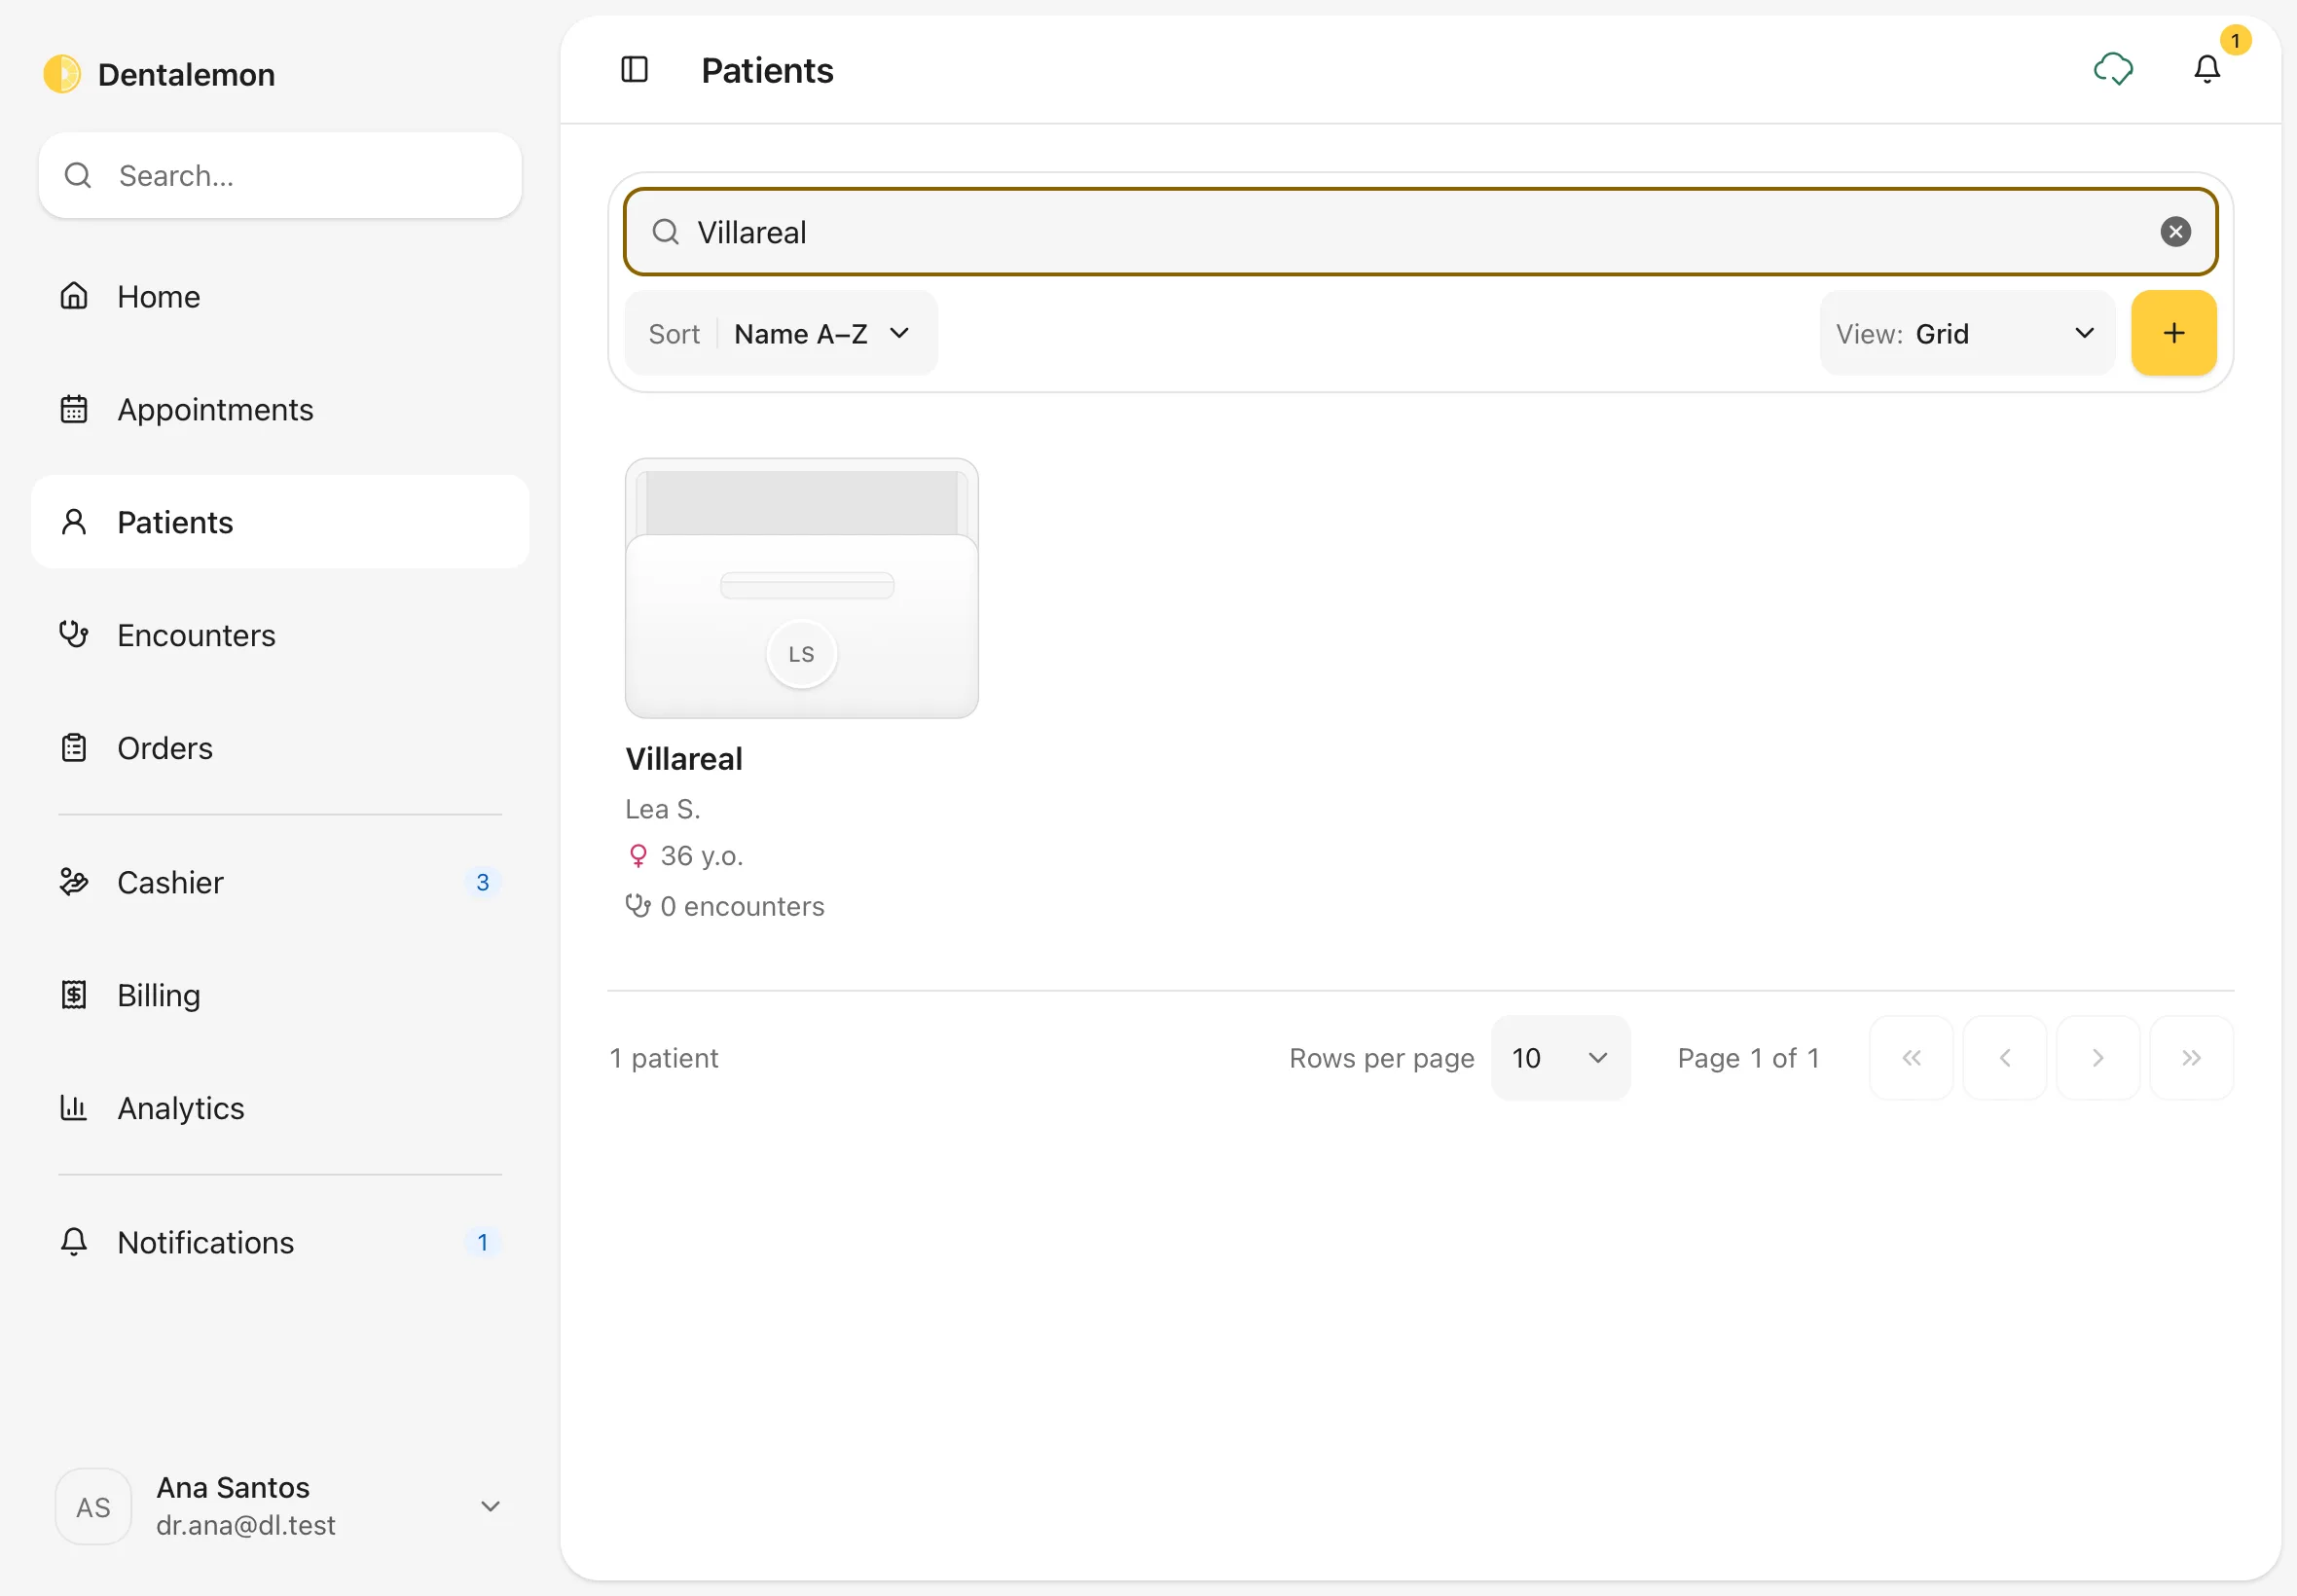
Type part of the name, or the patient number, in Name or patient number. The list updates as you type.
You should see: only the patients that match. Tap a folder to open that patient. Tap × in the search box to clear it.
Note
Search matches first, middle and last names. Searching a common name such as Dela Cruz also finds patients whose middle name is Dela Cruz.
If the patient isn't there, add them in the next step.
3. Open the Add Patient form
Tap the yellow + button next to View.
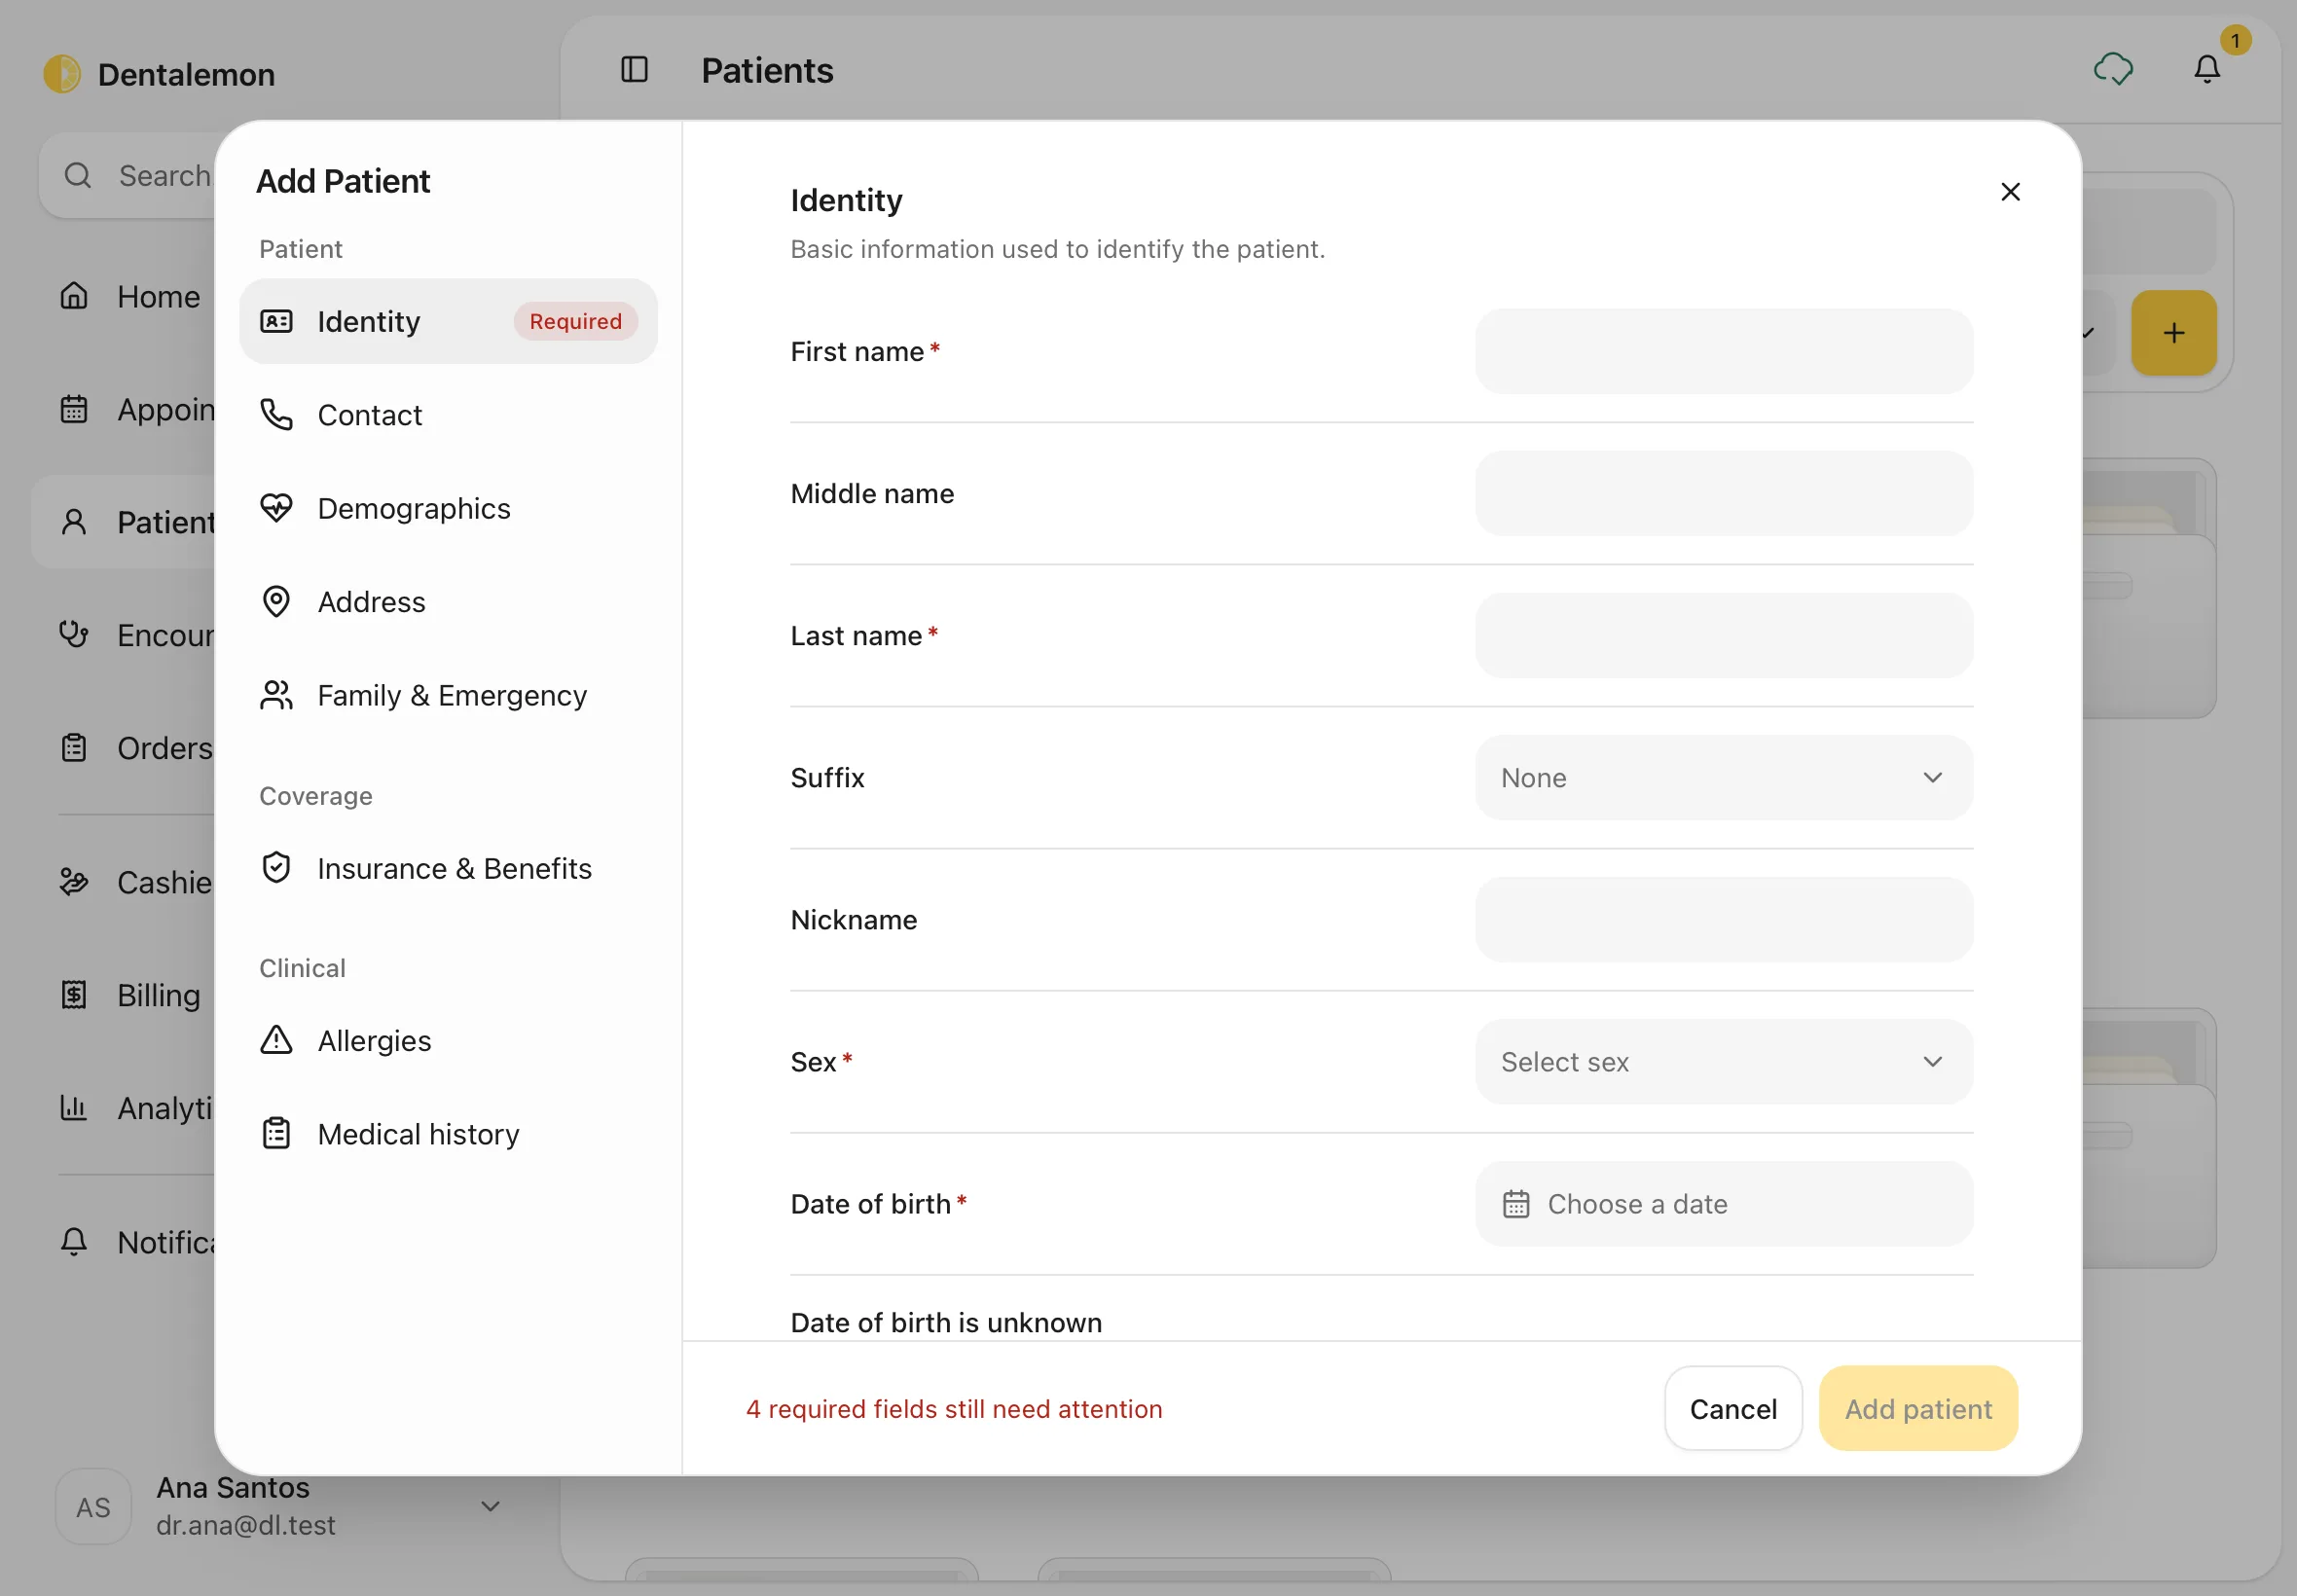
You should see: Add Patient, open on Identity. The footer says how many required fields are left, for example 4 required fields still need attention. Add patient stays greyed out until they're filled.
4. Fill in the required fields
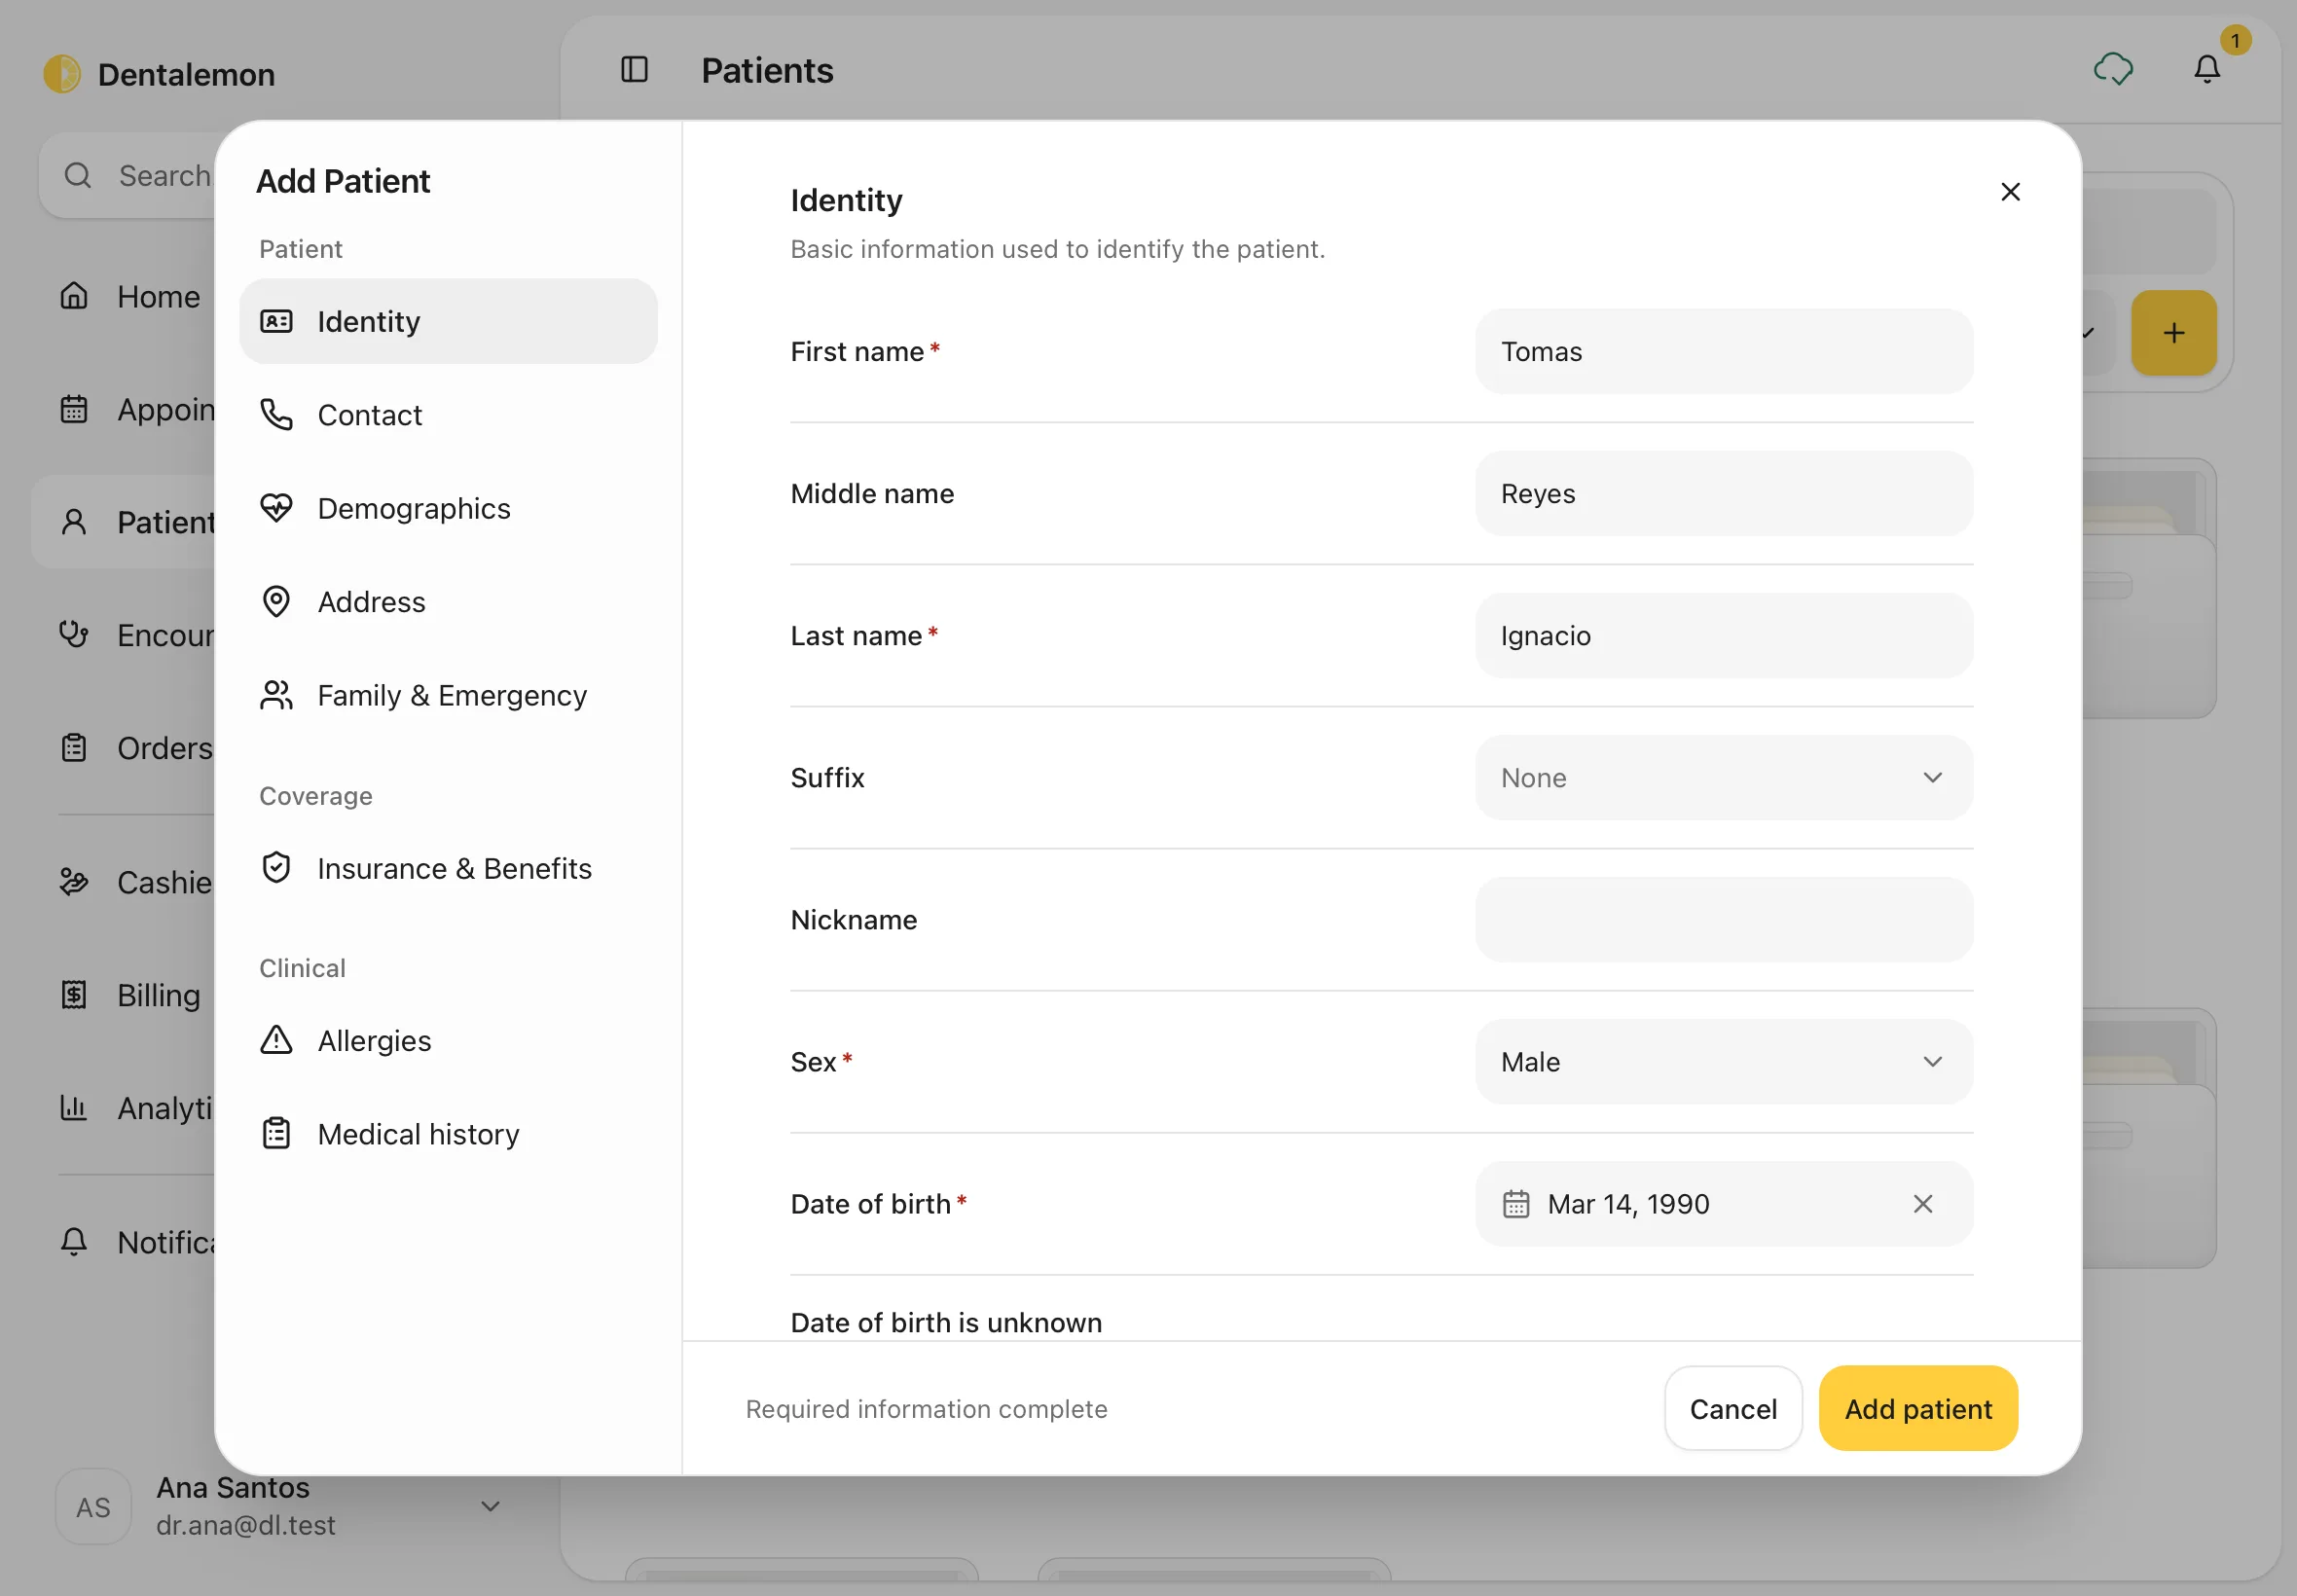
On Identity, fill in the four fields marked with a red star:
- First name
- Last name
- Sex: tap the box and choose.
- Date of birth: tap Choose a date, pick the year, month and day, then apply.
If the patient doesn't know their birthday, tick Date of birth is unknown instead.
You should see: Required information complete in the footer.
5. Add contact details and anything else you have
Use the list on the left to move between sections. Nothing here is required, but it saves time later:
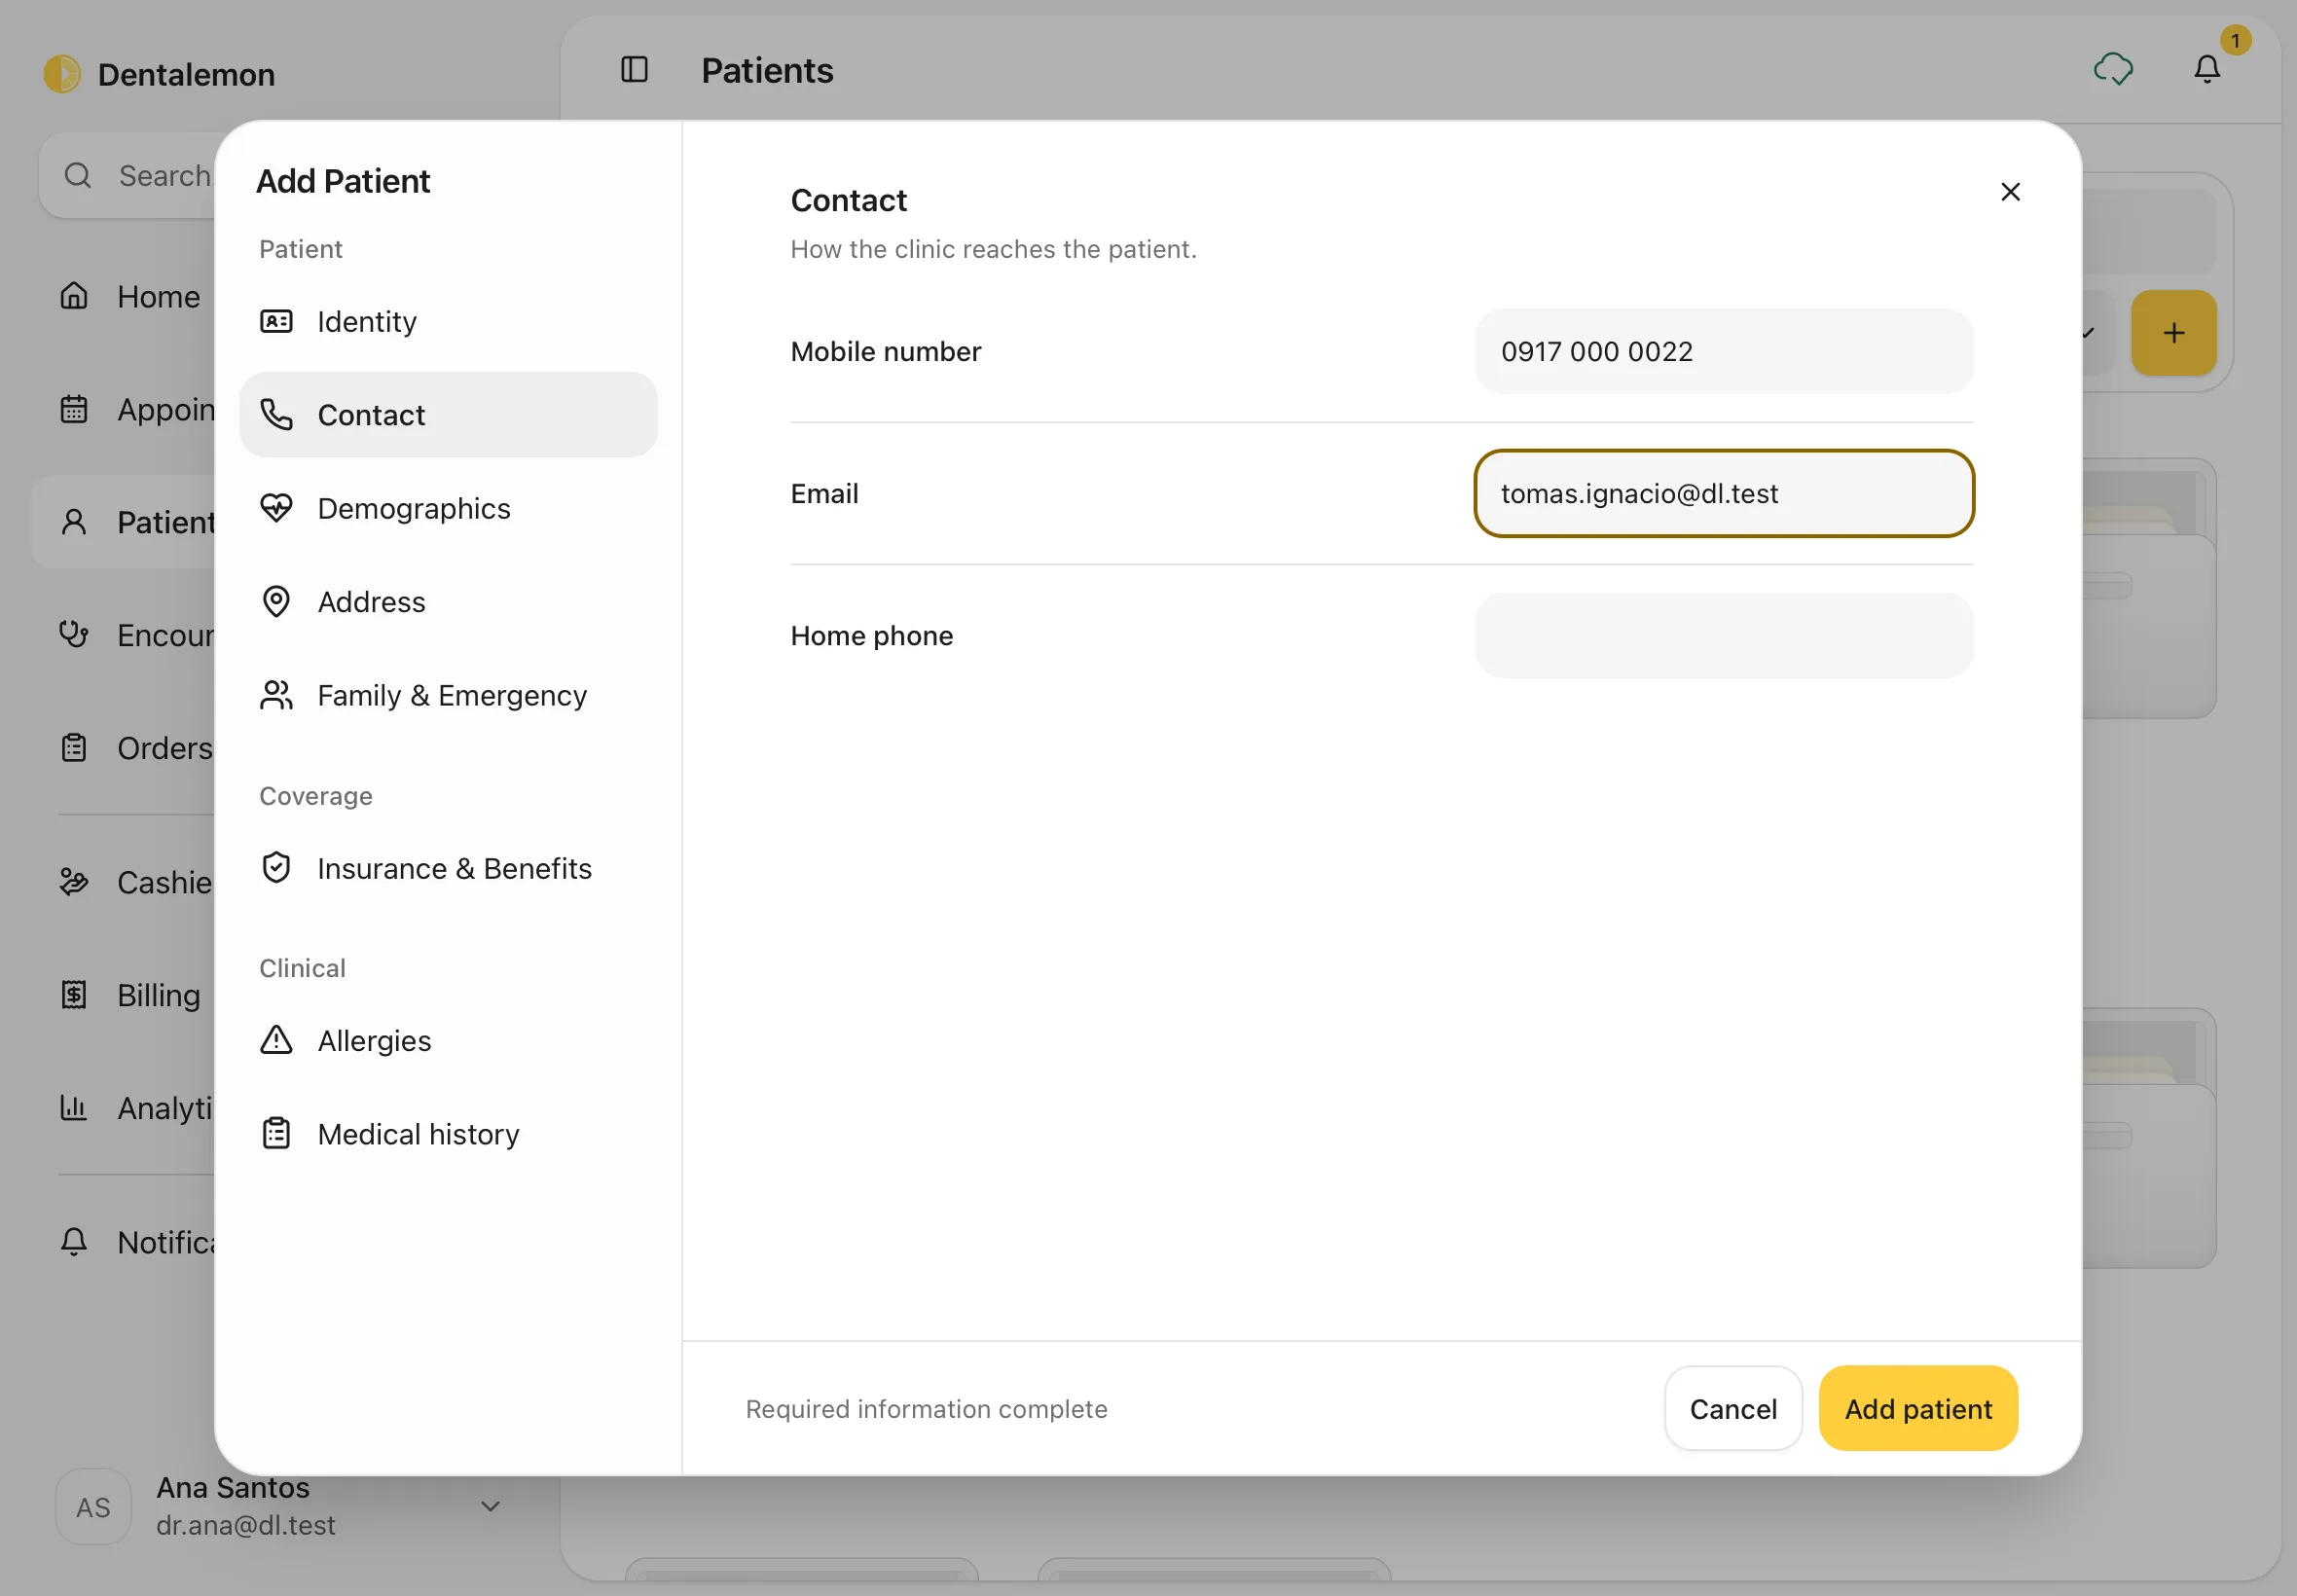
- Contact: Mobile number, Email, Home phone.
- Demographics, Address, Family & Emergency.
- Insurance & Benefits: HMO or PhilHealth cards, and Senior Citizen or PWD IDs (step 7).
- Allergies (step 6) and Medical history: record these before the first treatment.
You should see: the section you tapped, with your details filled in.
6. Record allergies
Always ask about allergies before the first treatment. Allergies you record here appear in red on the patient's page and at every visit.
- Tap Allergies in the list on the left.
- Tap Add allergy.
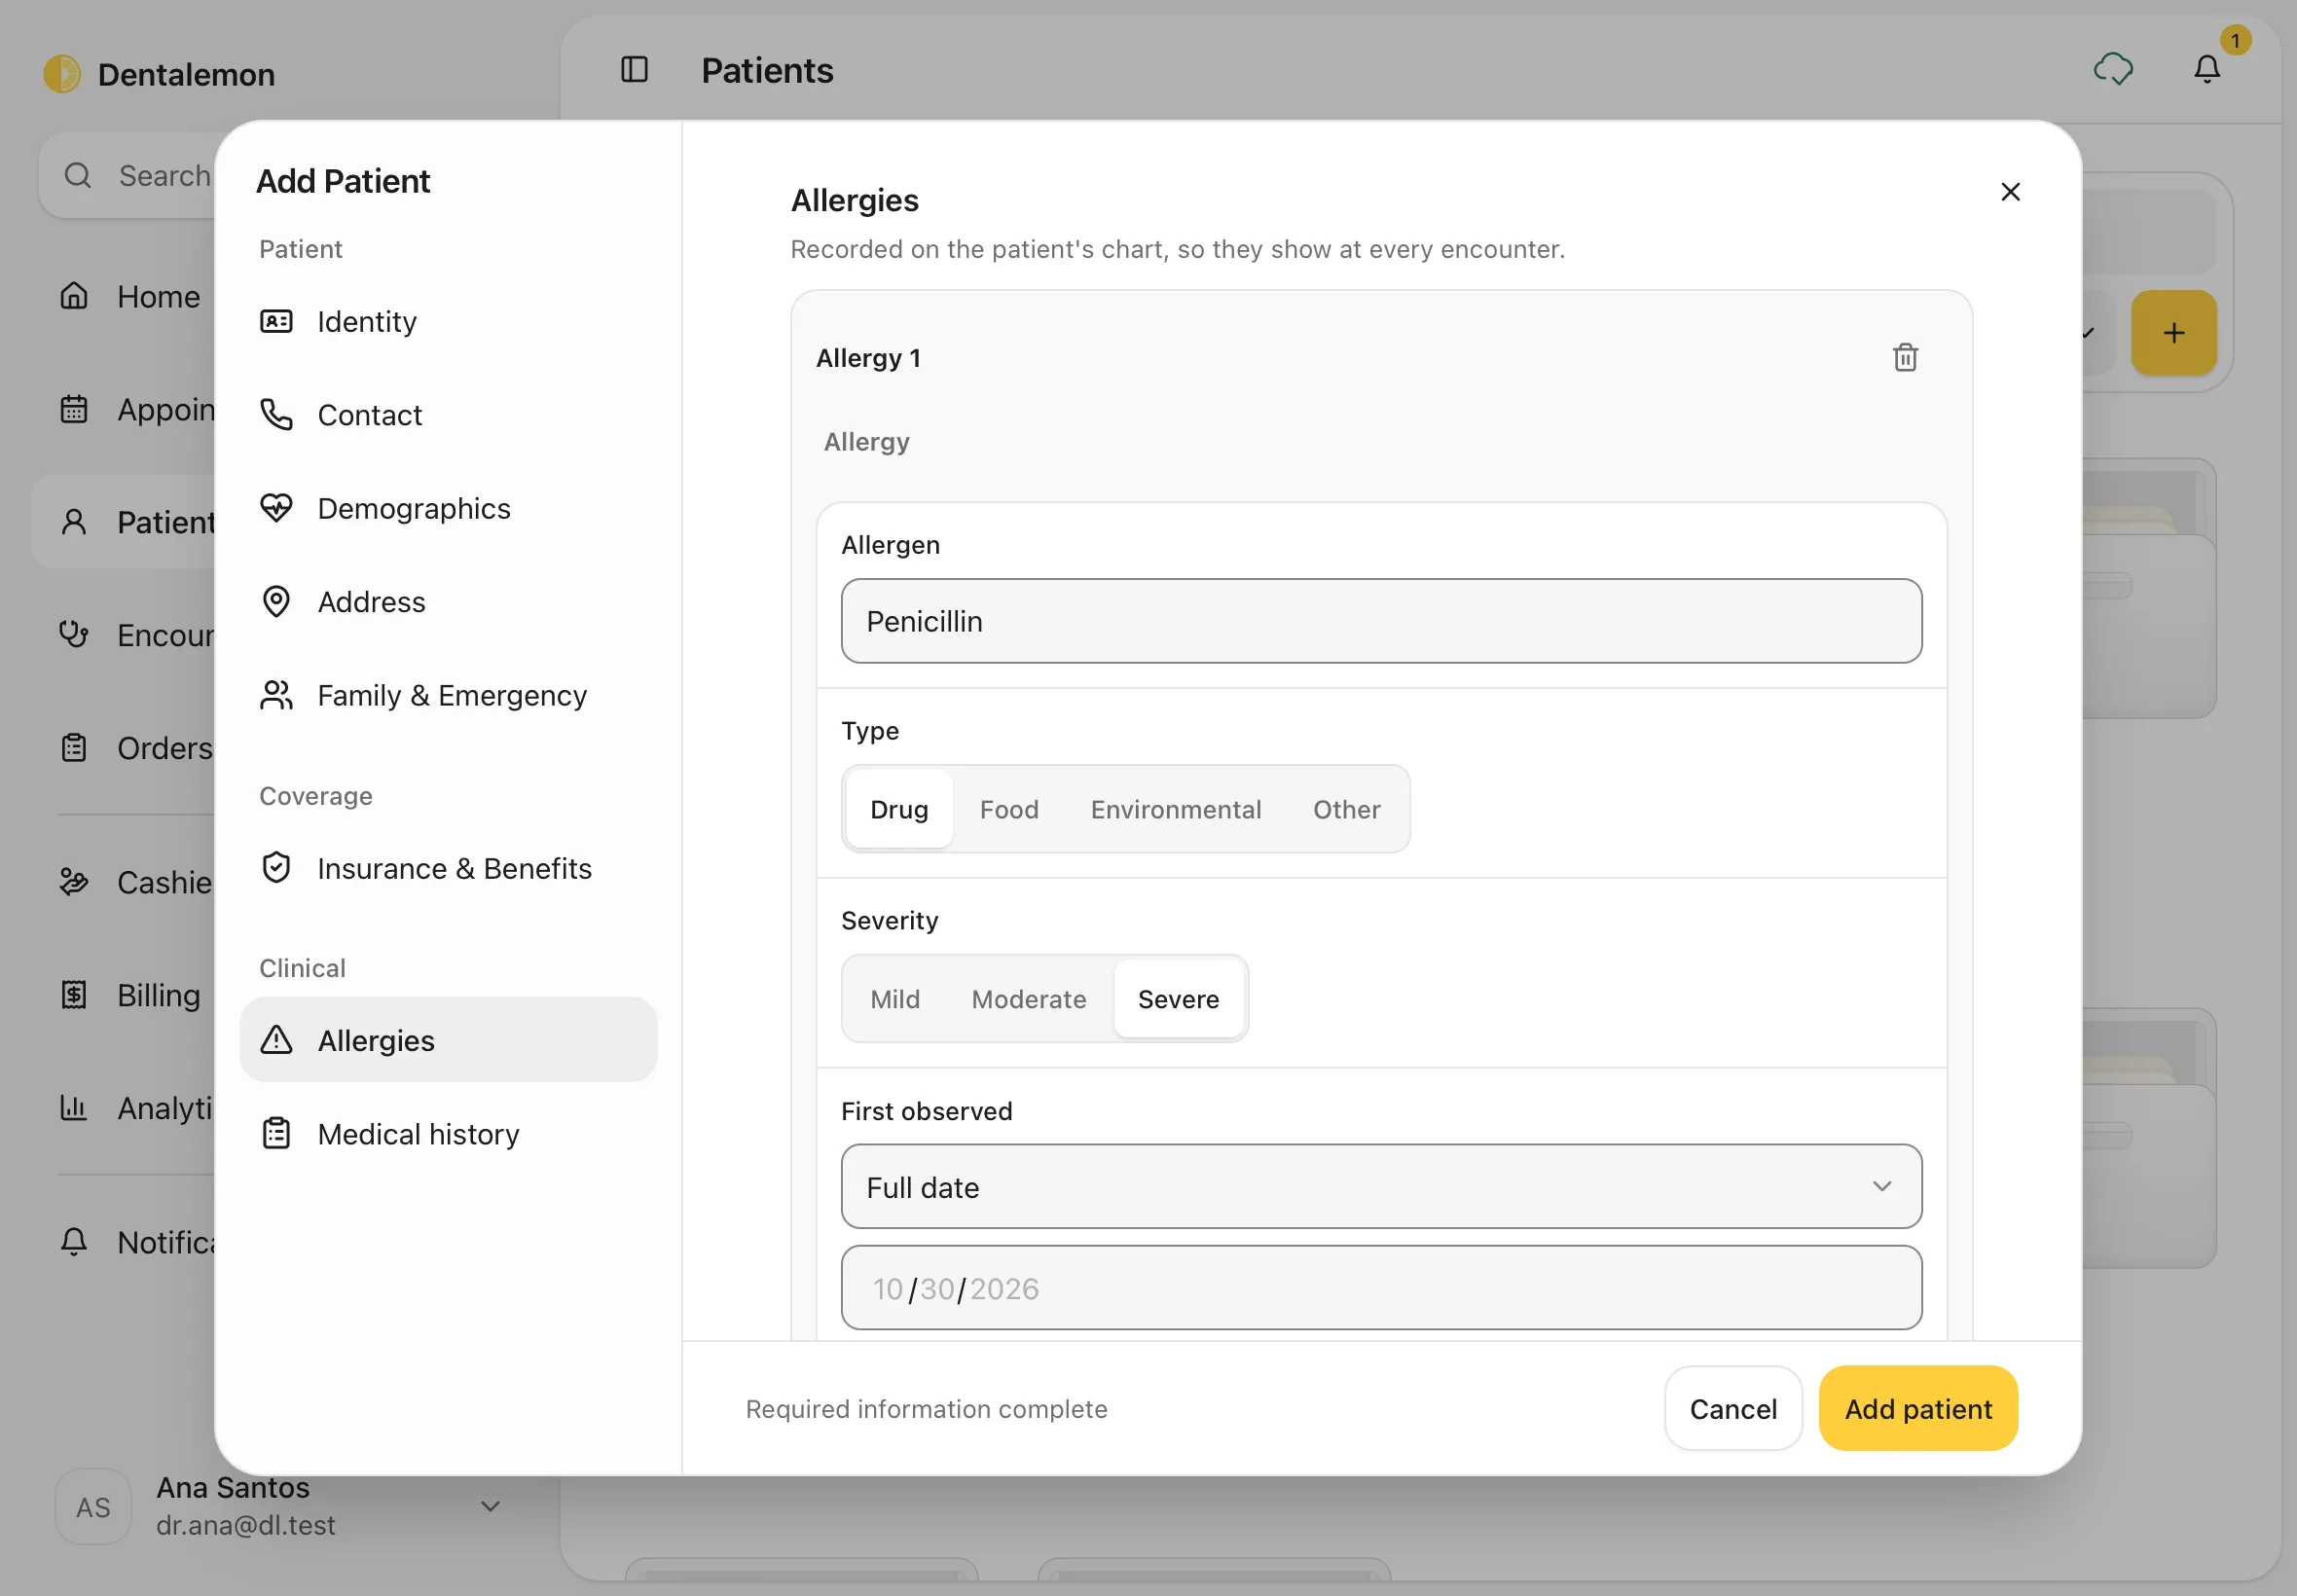
- In Allergen, type what the patient is allergic to, for example Penicillin. Pick a suggestion if one matches, or keep what you typed.
- Under Type, tap Drug, Food, Environmental or Other.
- Under Severity, tap Mild, Moderate or Severe.
- Under First observed, add when it started, if the patient knows. You can leave it empty.
- For another allergy, tap Add allergy again. To remove one, tap the bin next to its name.
If you haven't asked about allergies yet, leave this section empty. The patient's page then says Allergies not recorded, so you know to ask.
You should see: Allergy 1 with the allergen, type and severity filled in.
Note
You can add allergies here only while you're adding the patient. Later, add or change them during a visit: in the encounter, open Records and tap + Allergies. See Notes, prescriptions, orders and attachments.
7. Add insurance cards and discount IDs
Fill this in if the patient has an HMO or PhilHealth card, or a PWD or Senior Citizen ID. The Cashier uses it later for coverage and discounts.
- Tap Insurance & Benefits in the list on the left.
- Tap Add insurance card.
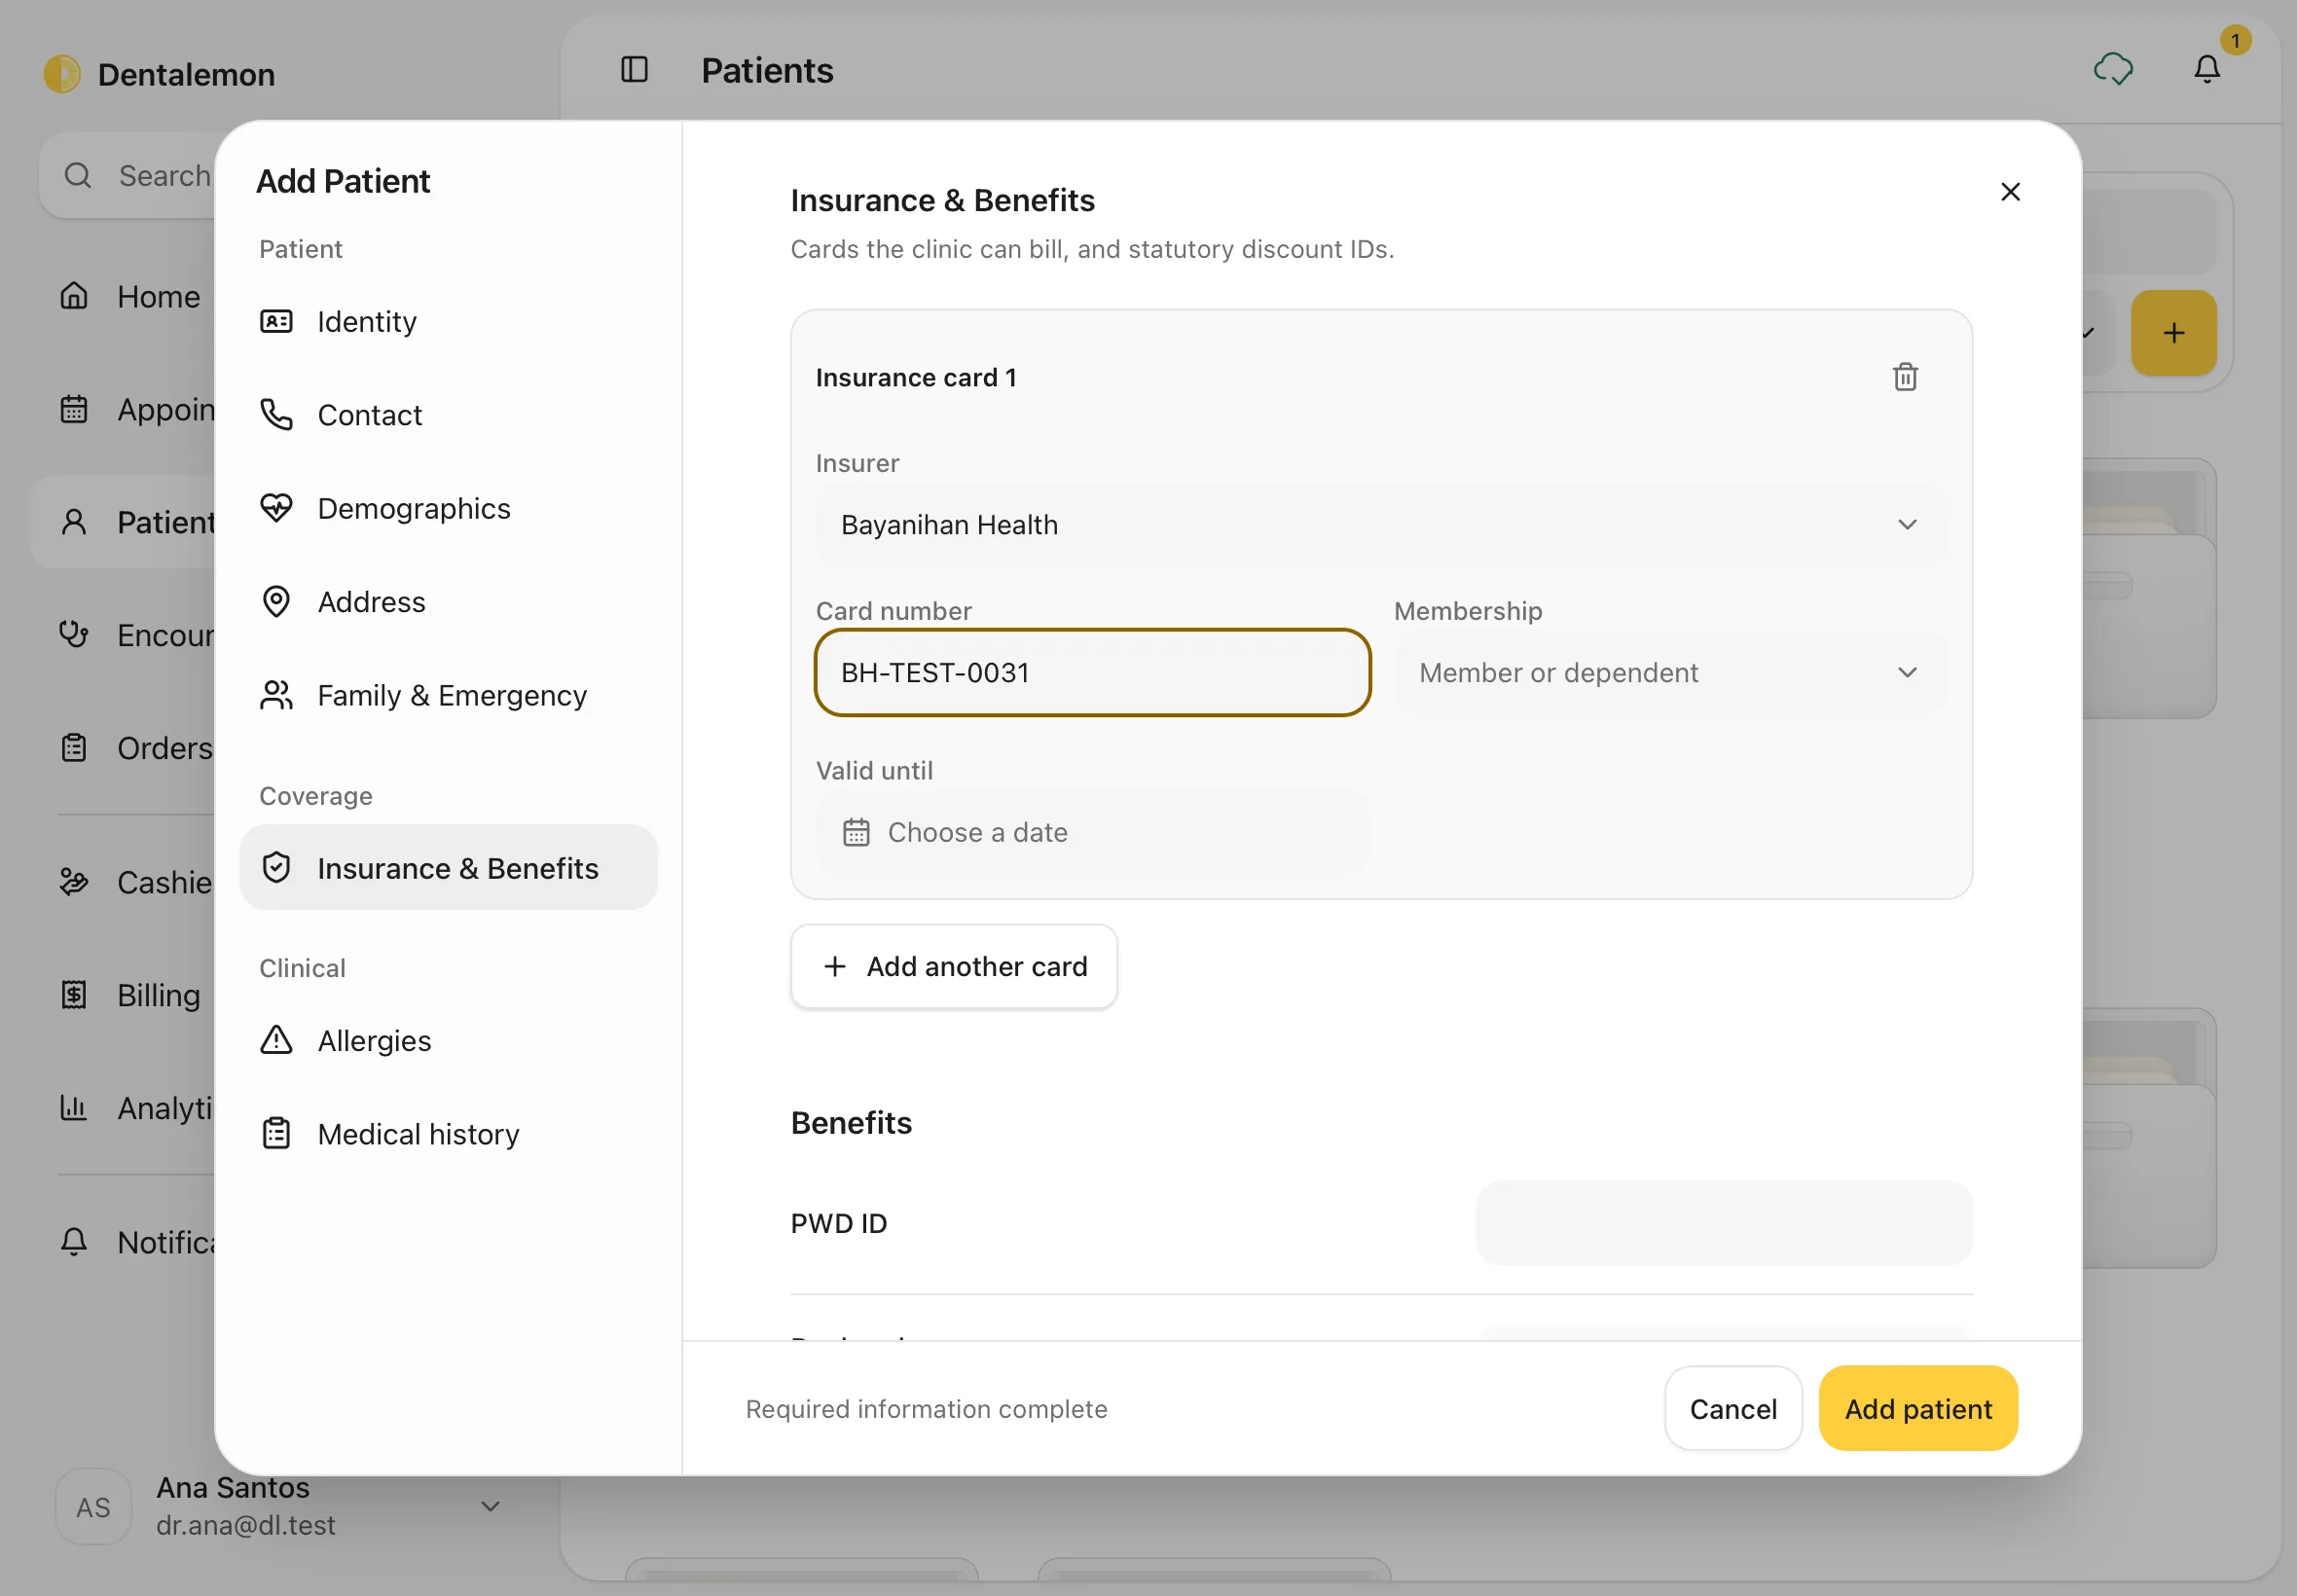
- Tap Select insurer and choose the HMO or PhilHealth. The list shows the payers your clinic works with, which you add in Settings › Partners.
- Type the Card number. Choose the Membership (member or dependent) and Valid until date if you have them.
- For a second card, tap Add another card.
- Under Benefits, type the PWD ID if the patient has one, and the Declared on date (the day they showed it to you). For patients aged 60 or over, a Senior Citizen ID (OSCA) box appears here too.
You should see: Insurance card 1 with the insurer and card number.
8. Save
Tap Add patient.
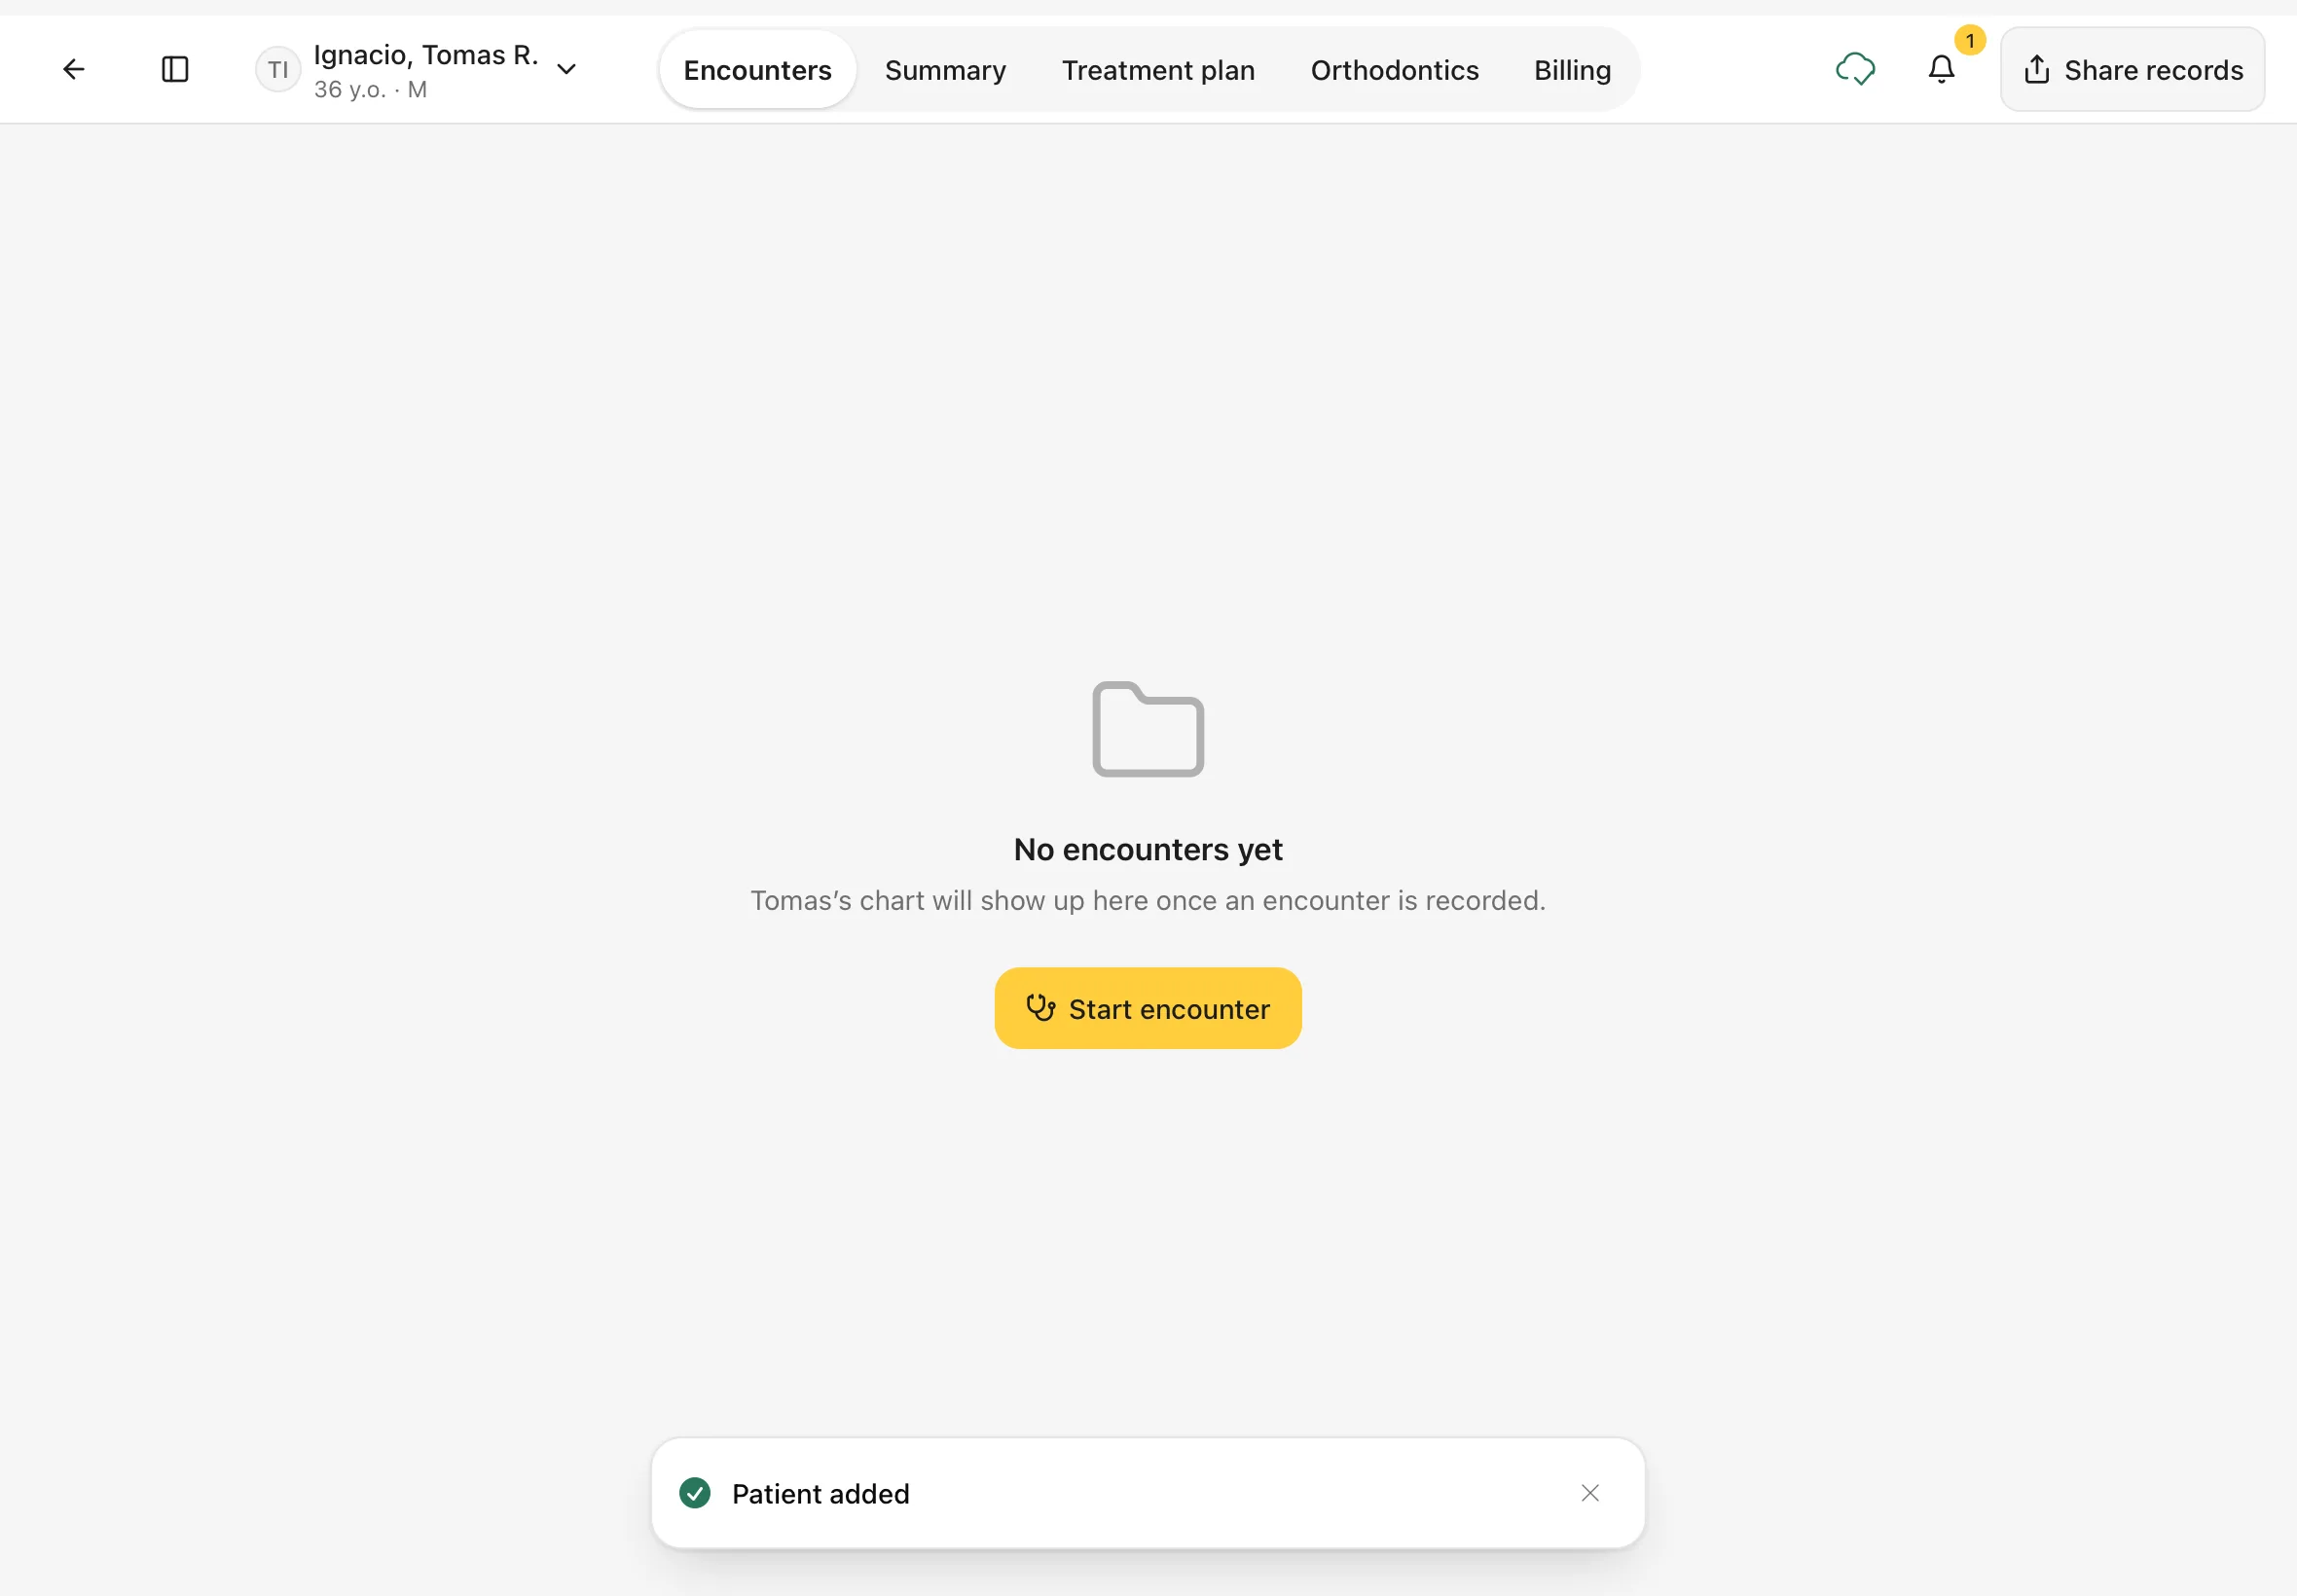
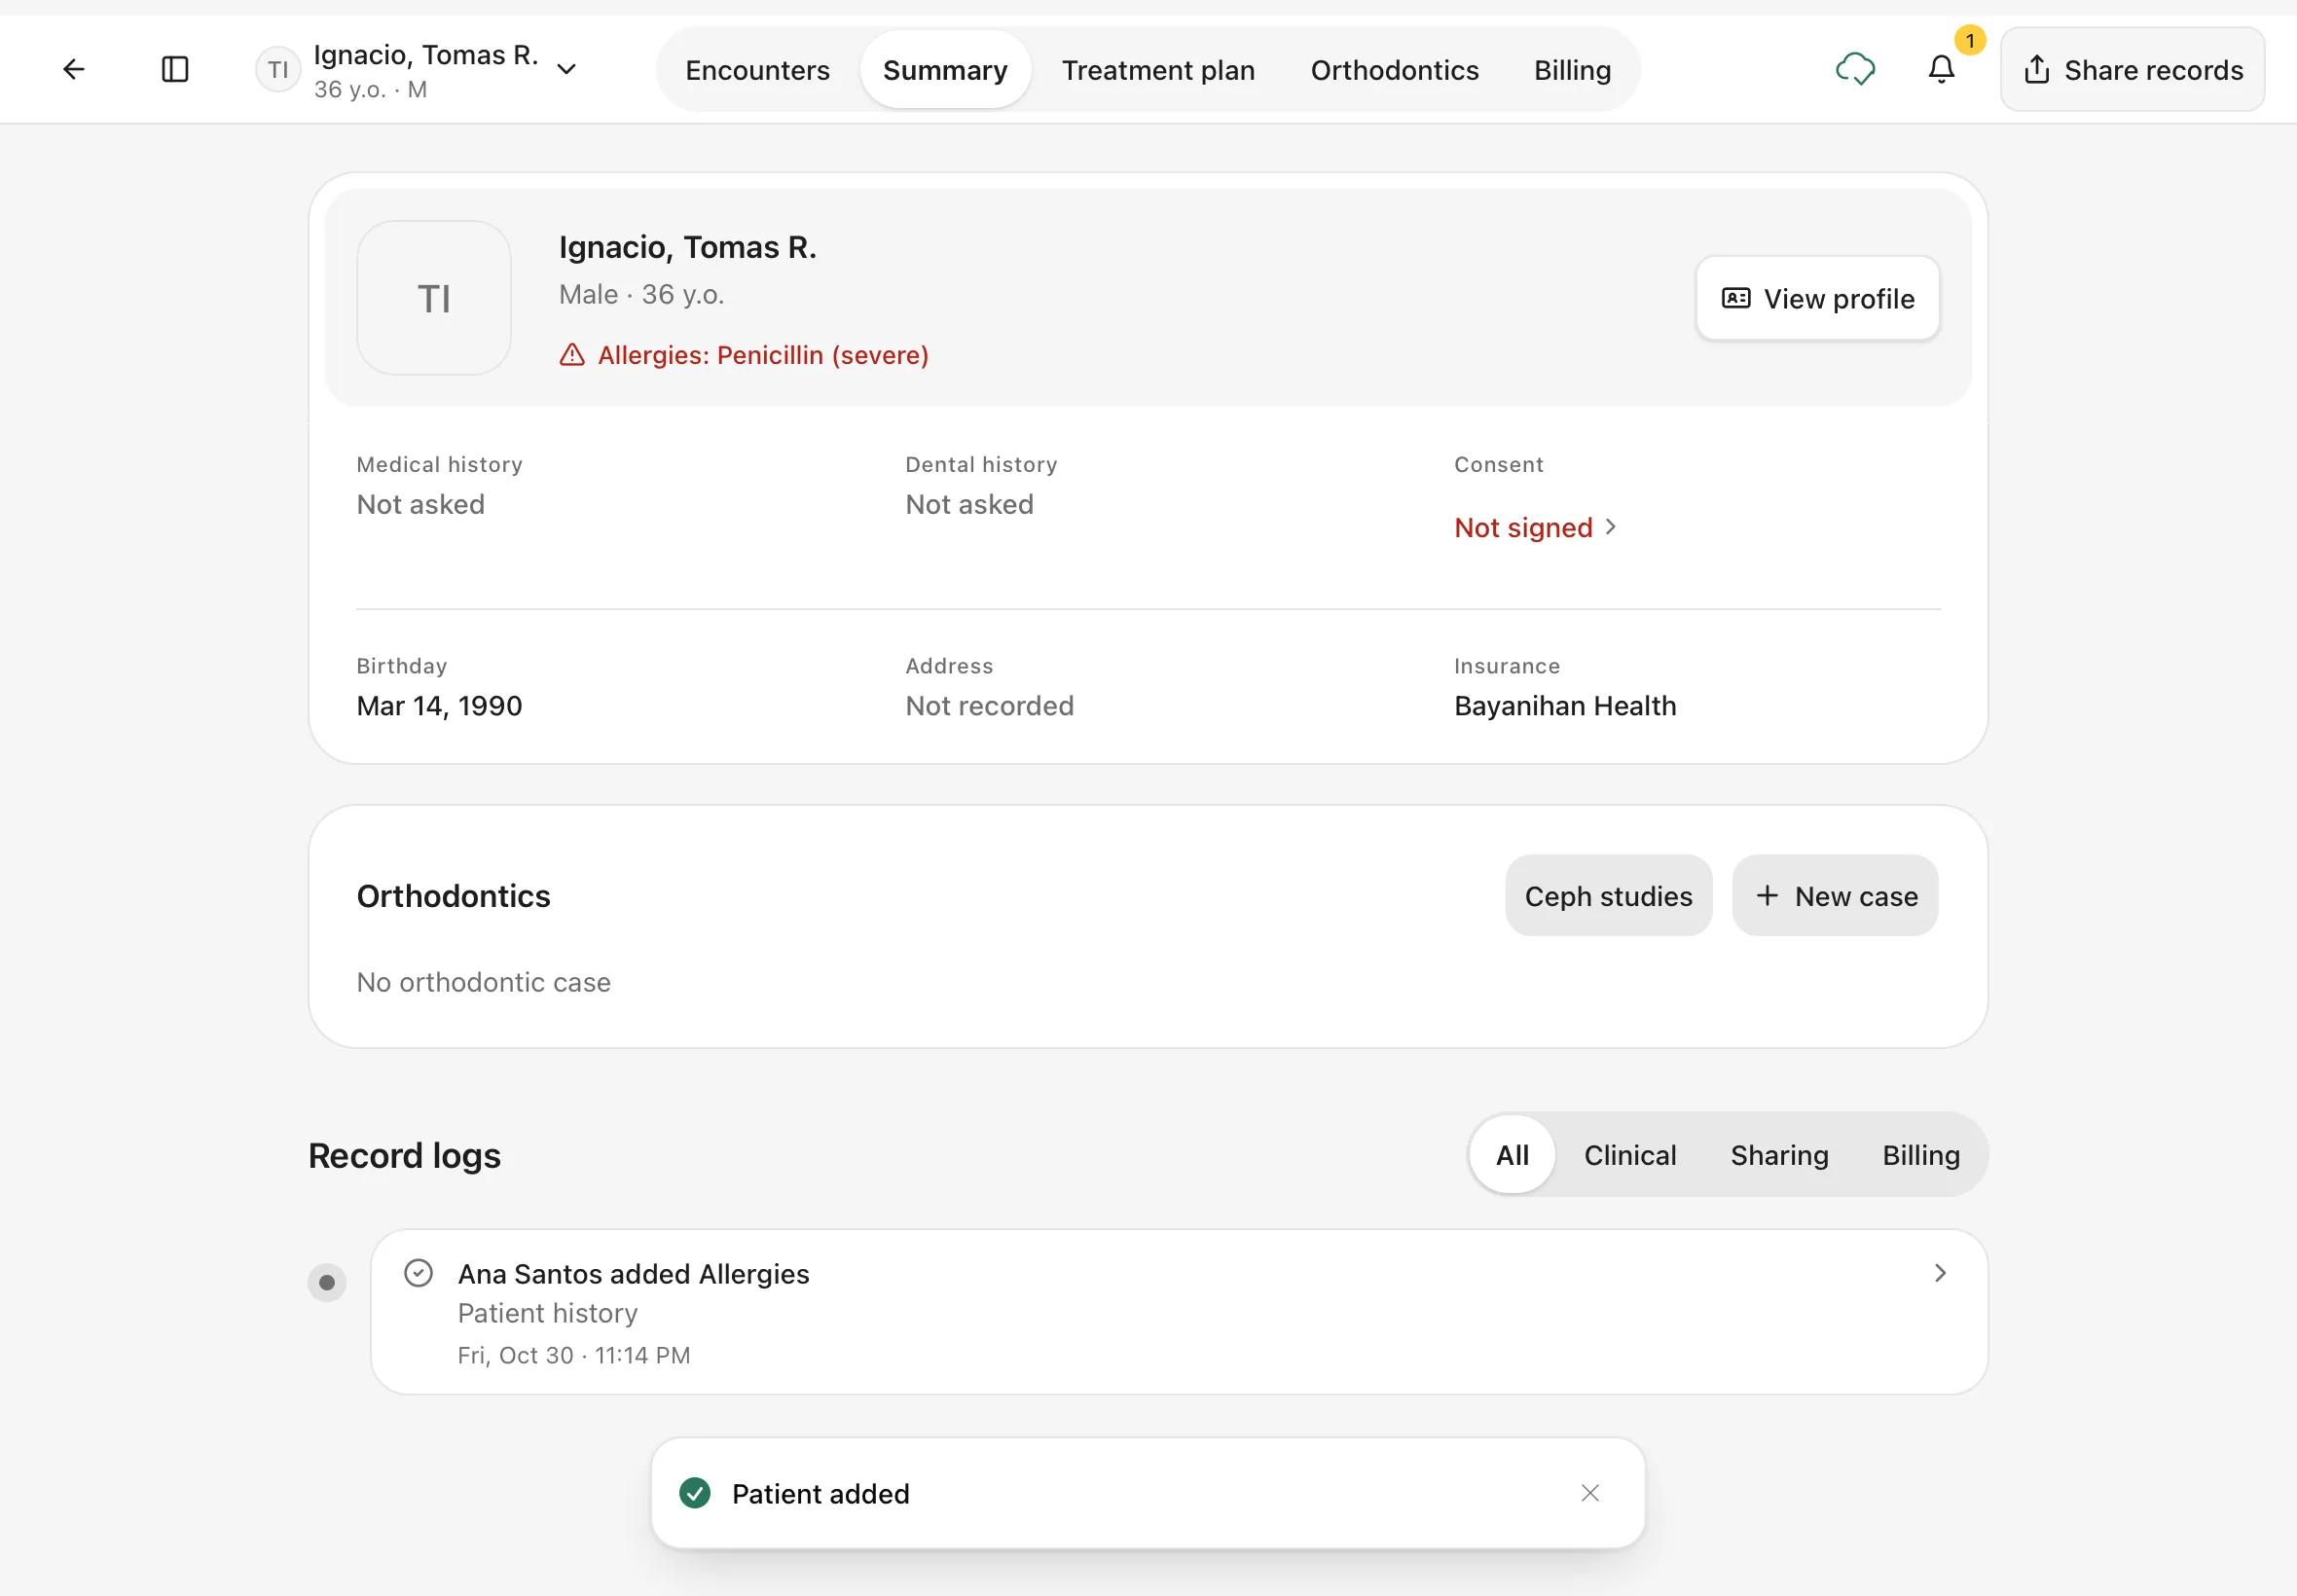
You should see: a Patient added message, and the new patient's page opens on Encounters. It says No encounters yet, with a Start encounter button for when the patient is ready to be seen.
9. Check the patient's details
Tap Summary at the top.
You should see: the allergies you added in red under the name, and the insurer under Insurance. Anything you didn't ask yet says Not asked.
Tips
Search from anywhere
The Search… box at the top of the sidebar also finds patients. Type a name and press Enter.
If something goes wrong
Add patient is greyed out. A required field is still empty. The footer says how many, and Required appears next to the section that needs attention. You closed the form by mistake. If you had typed something, Dentalemon asks Discard this patient?. Tap Keep editing to go back to your work.
Good to know
The patient's details can be changed at any time. See The patient page and profile.